Cloud Account onboarding
AccuKnox Saas Platform supports AWS,Microsoft Azure, Google Cloud Platform accounts onboarding. In this section we can find the steps to onboard various cloud accounts to the AccuKnoxSaaS platform.
Onboarding AWS Cloud Account
AWS IAM User Creation
Please follow the following steps to provide a user with appropriate read access:
Step 1: Navigate to IAM -> Users and click on Add Users

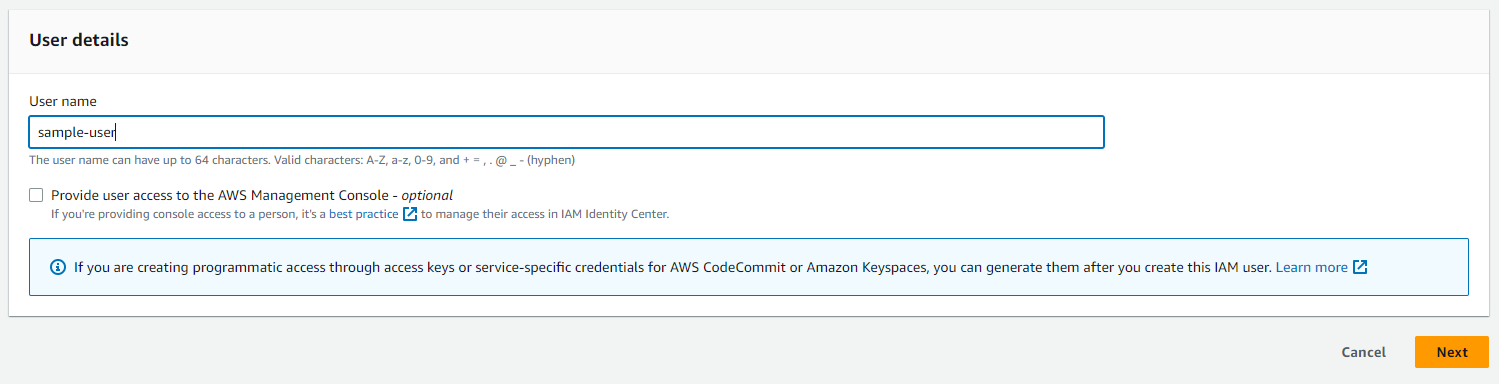
Step 2: Give a username to identify the user
Step 3: In the "Set Permissions" screen:
a. Select "Attach policies directly"
b. Search "ReadOnly", Filter by Type: "AWS managed - job function" and select the policy

c. Search "SecurityAudit", Filter by Type: "AWS managed - job function" and select the policy

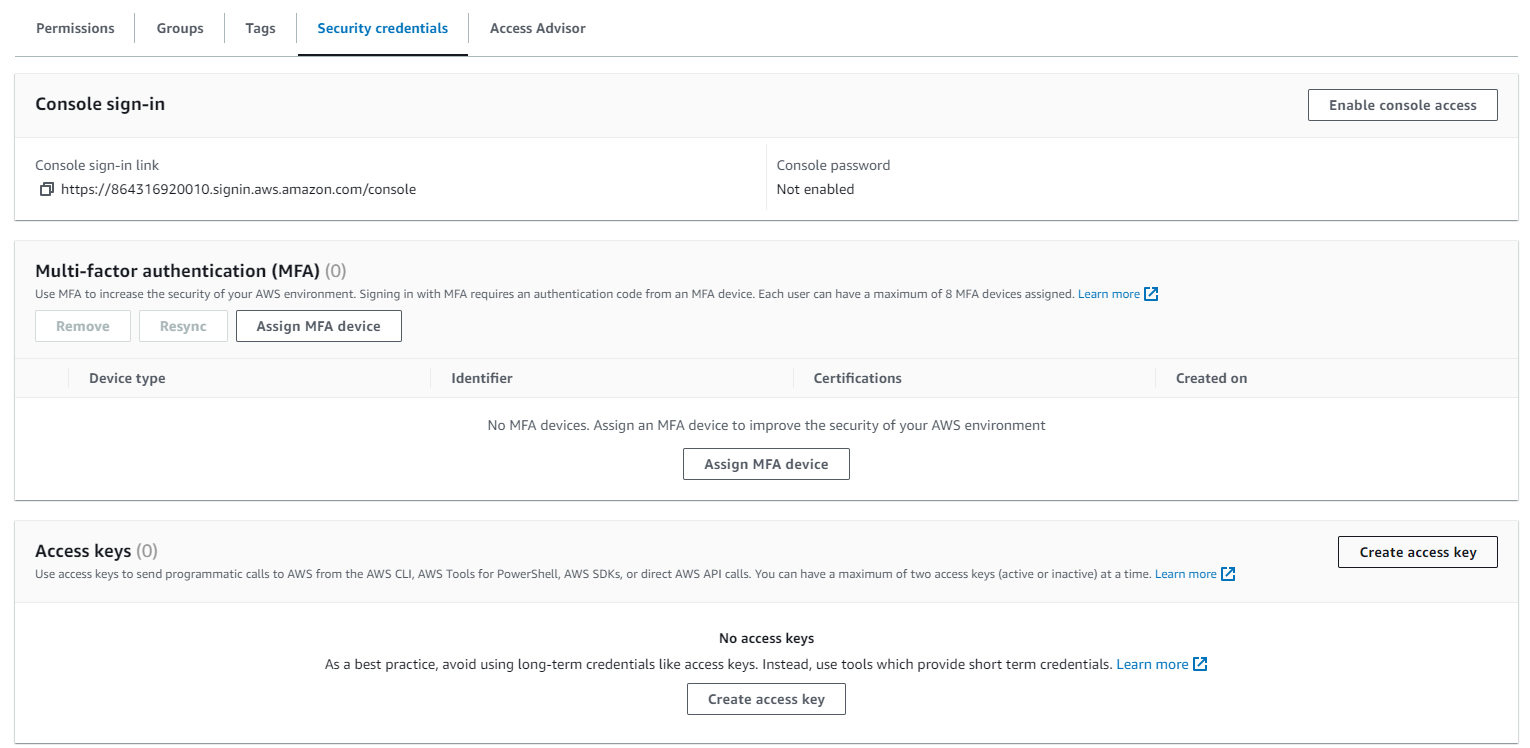
Step 4: Finish creating the user. Click on the newly created user and create the Access key and Secret Key from the Security Credentials tab to be used in the Accuknox panel
AWS Onboarding:
In this example we are onboarding AWS account using the Access Keys method.
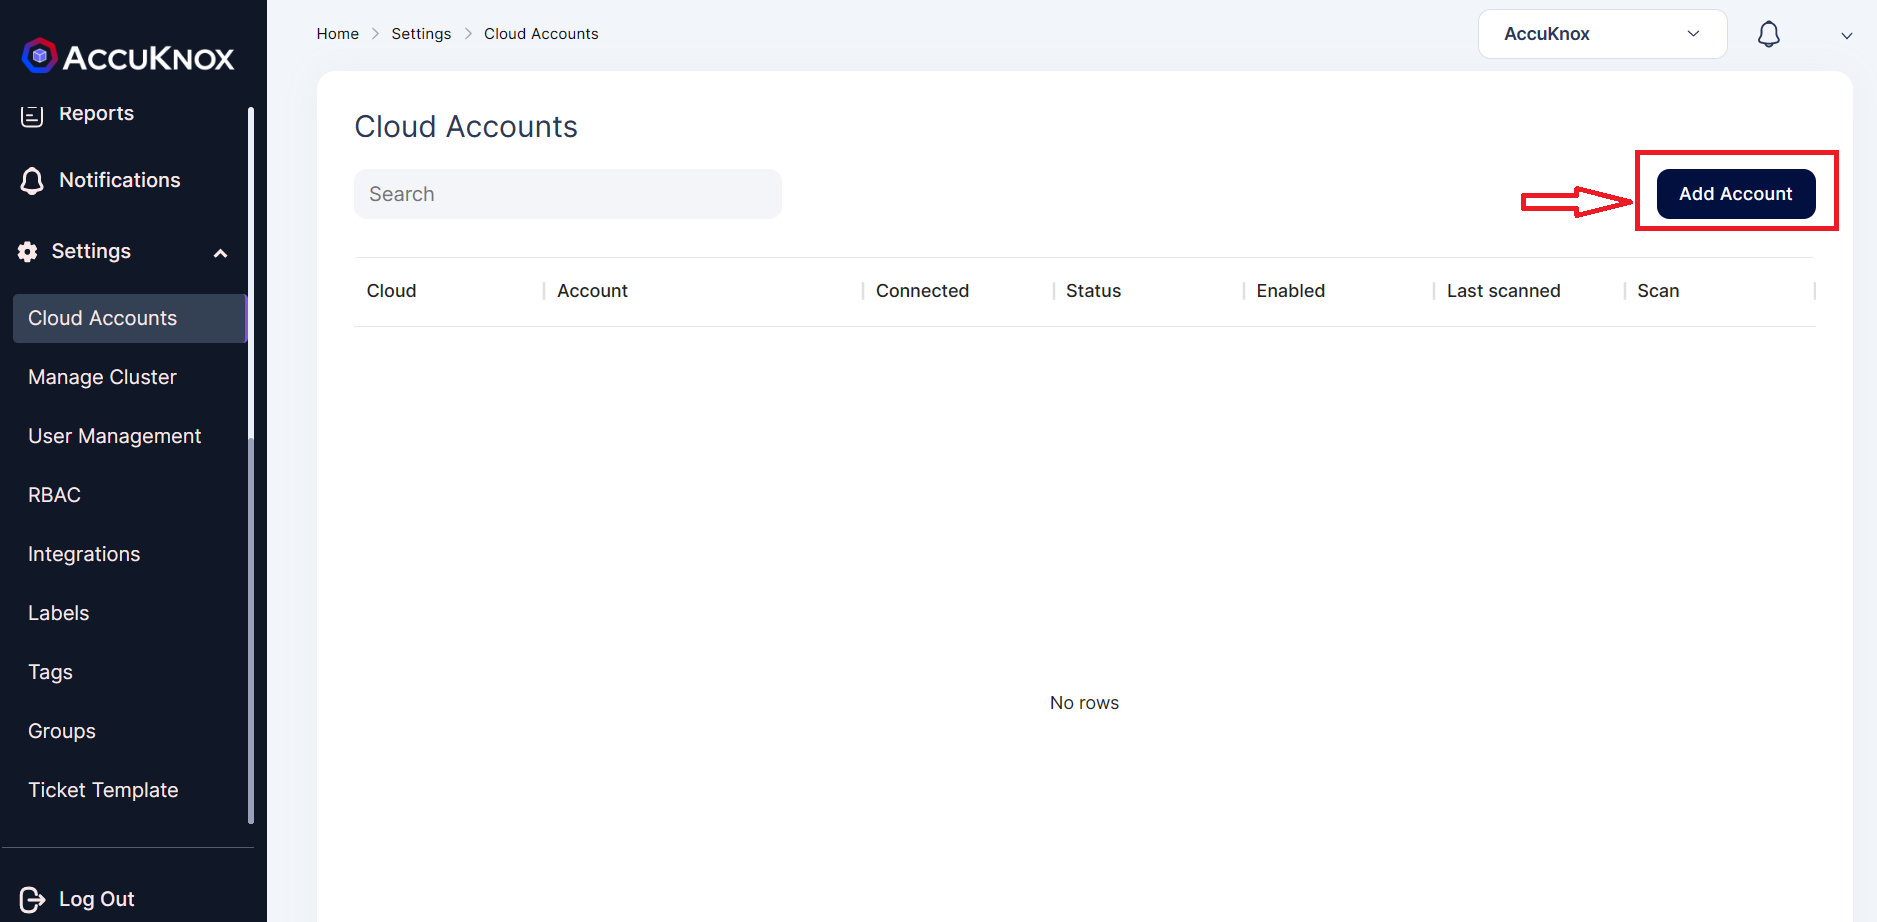
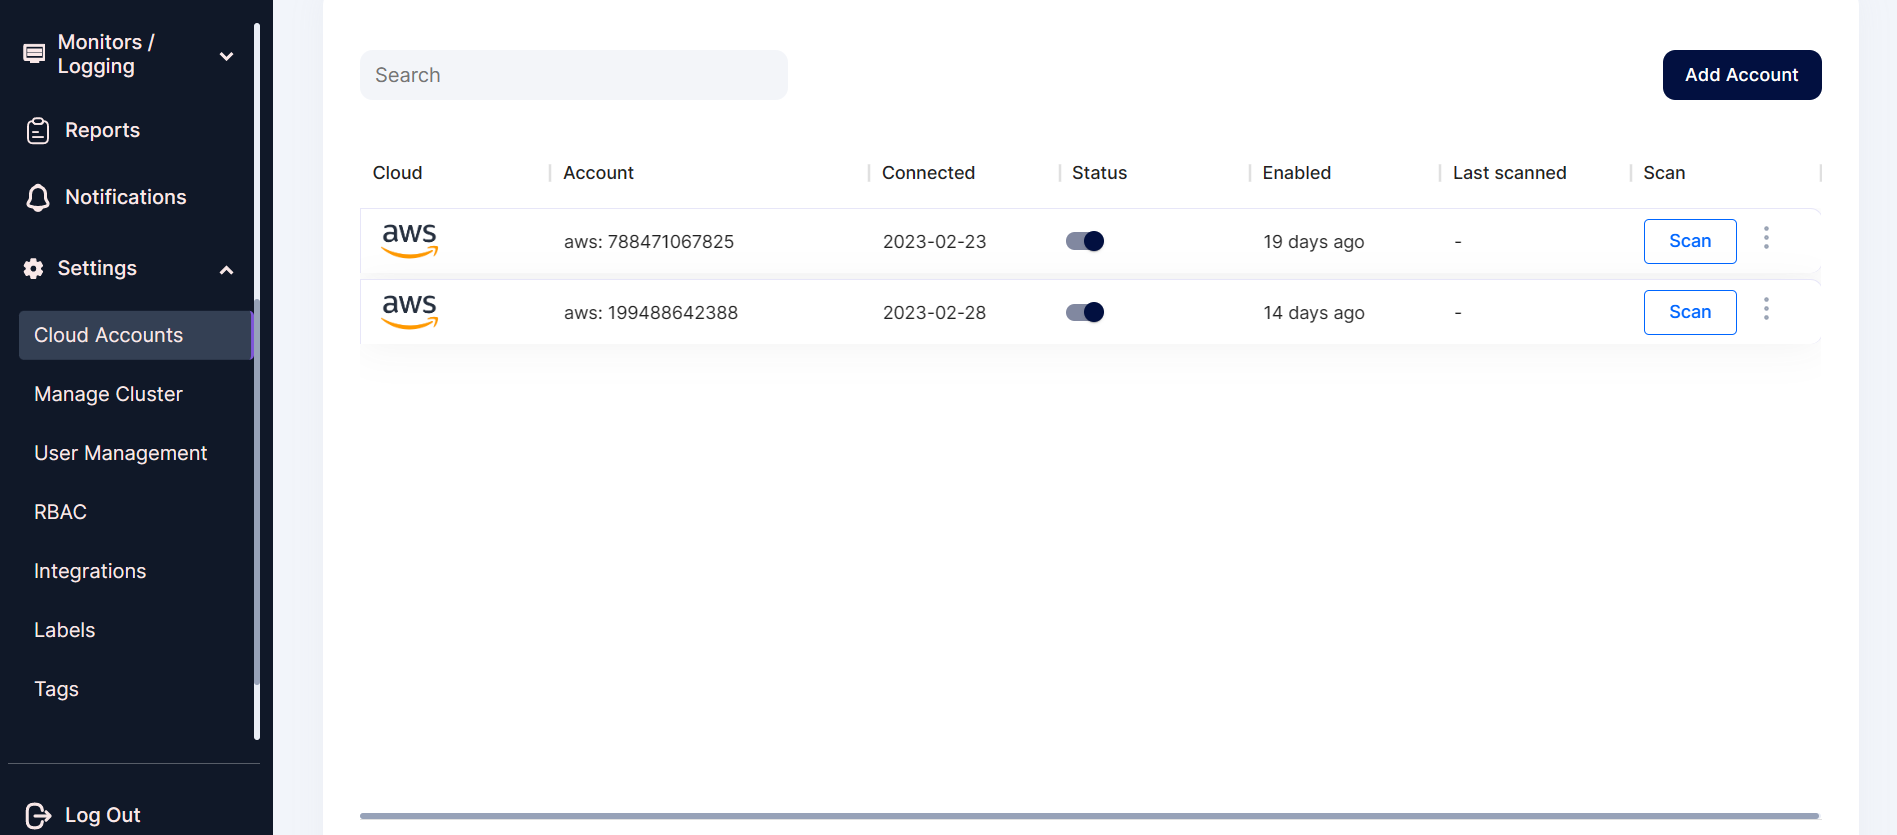
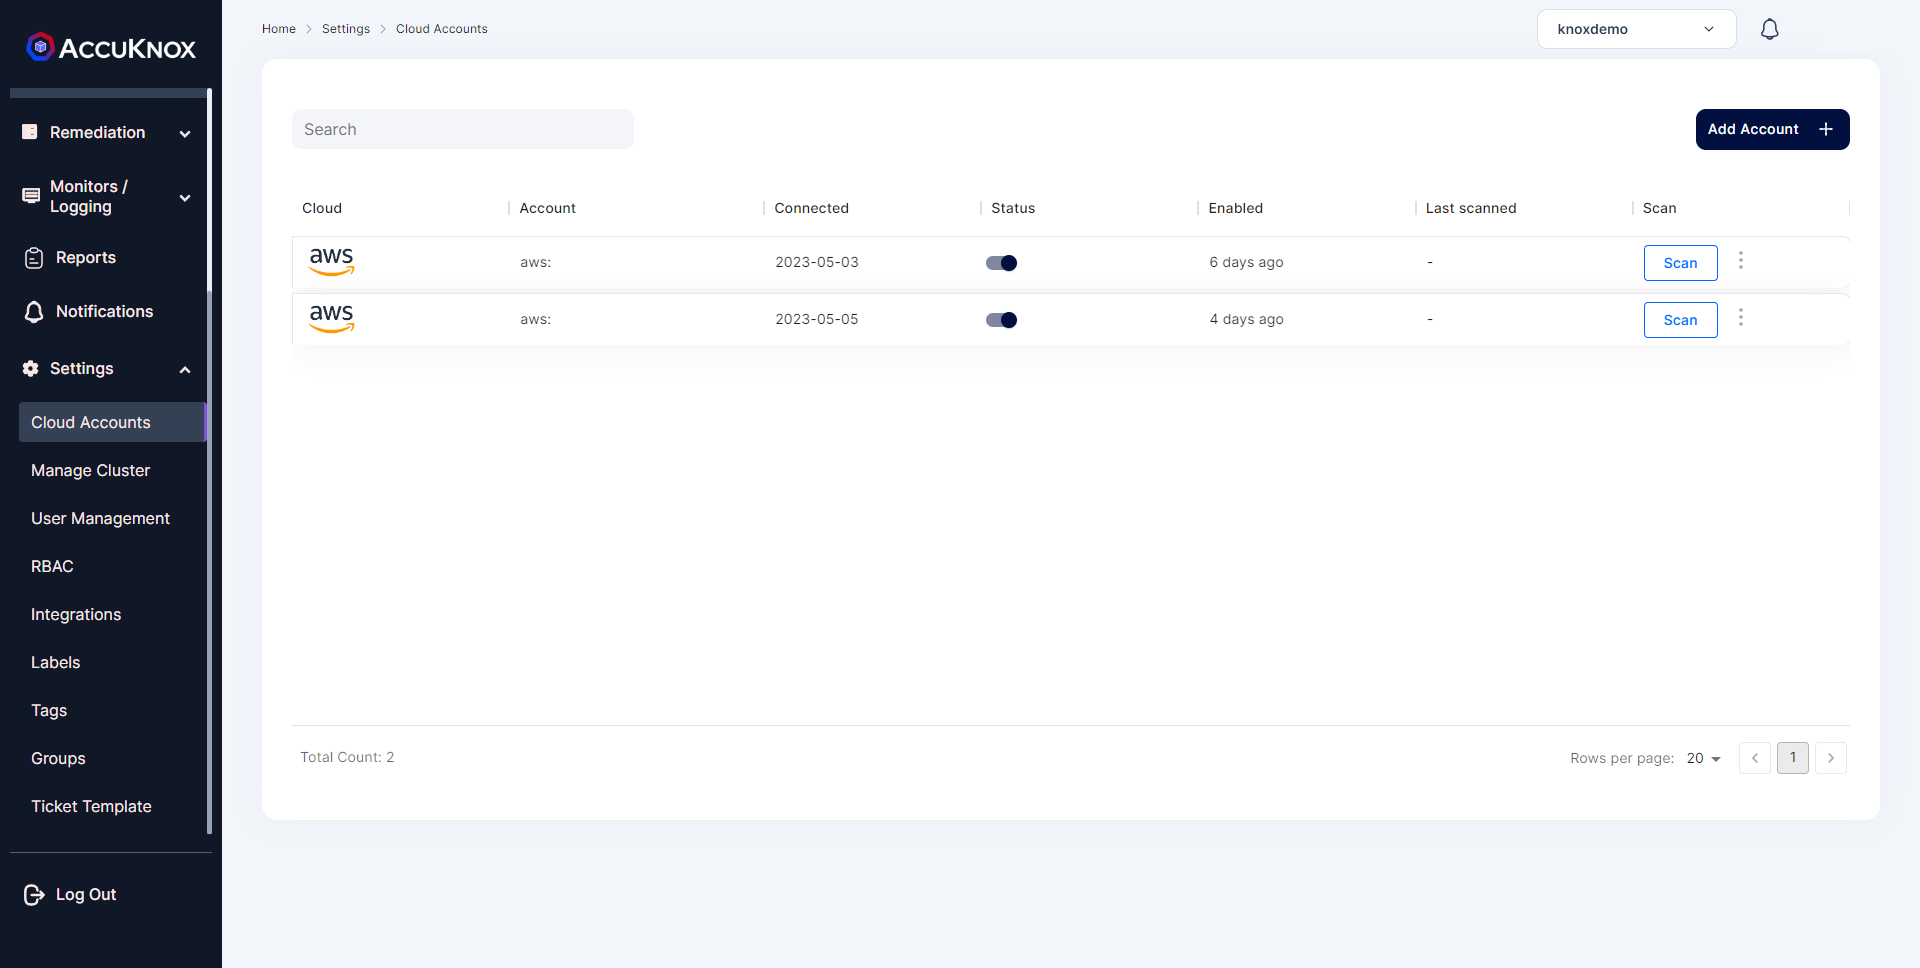
Step 1: To onboard Cloud Account Navigate to Settings->cloud Accounts
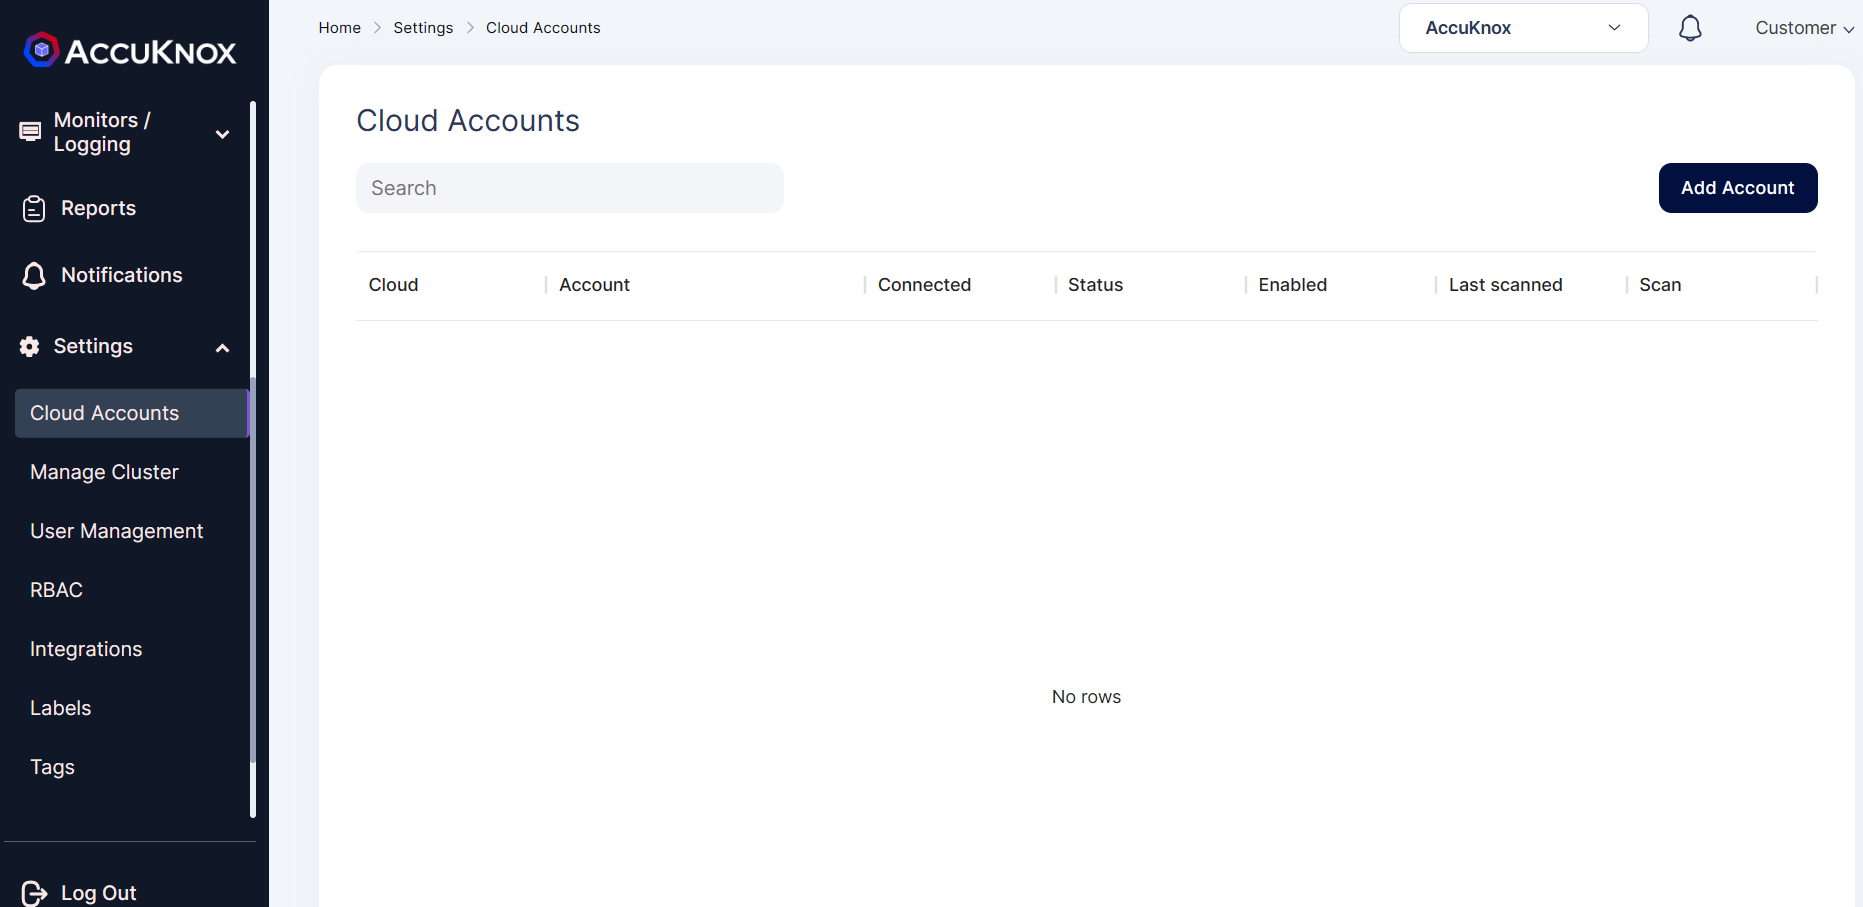
Step 2: In the Cloud Account Page select Add Account option
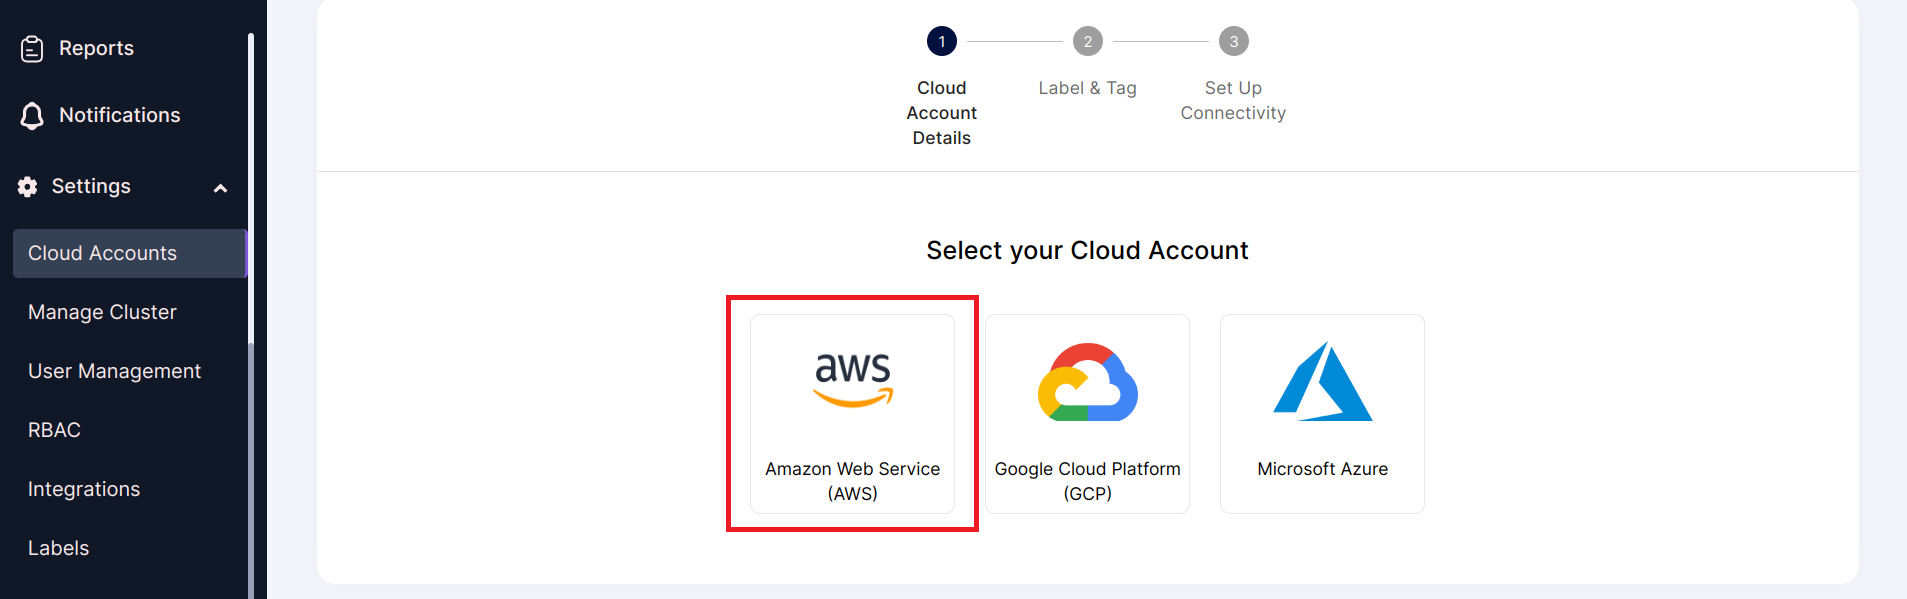
Step 3: Select the AWS option
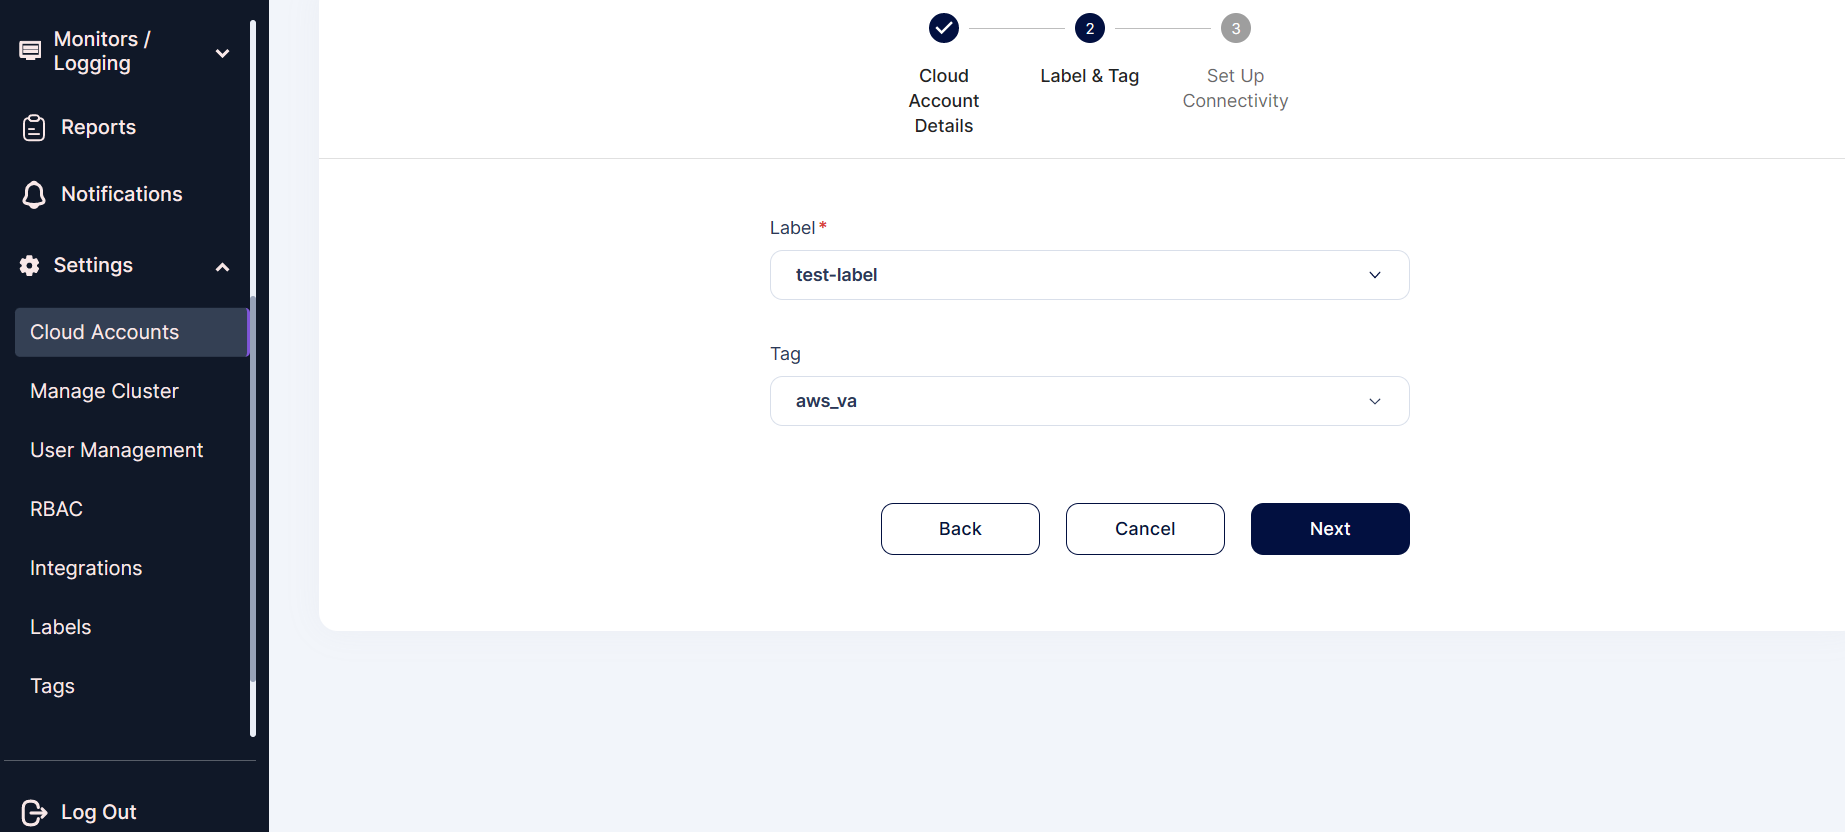
Step 4: In the next Screen select the labels and Tags field from the dropdown Menu.
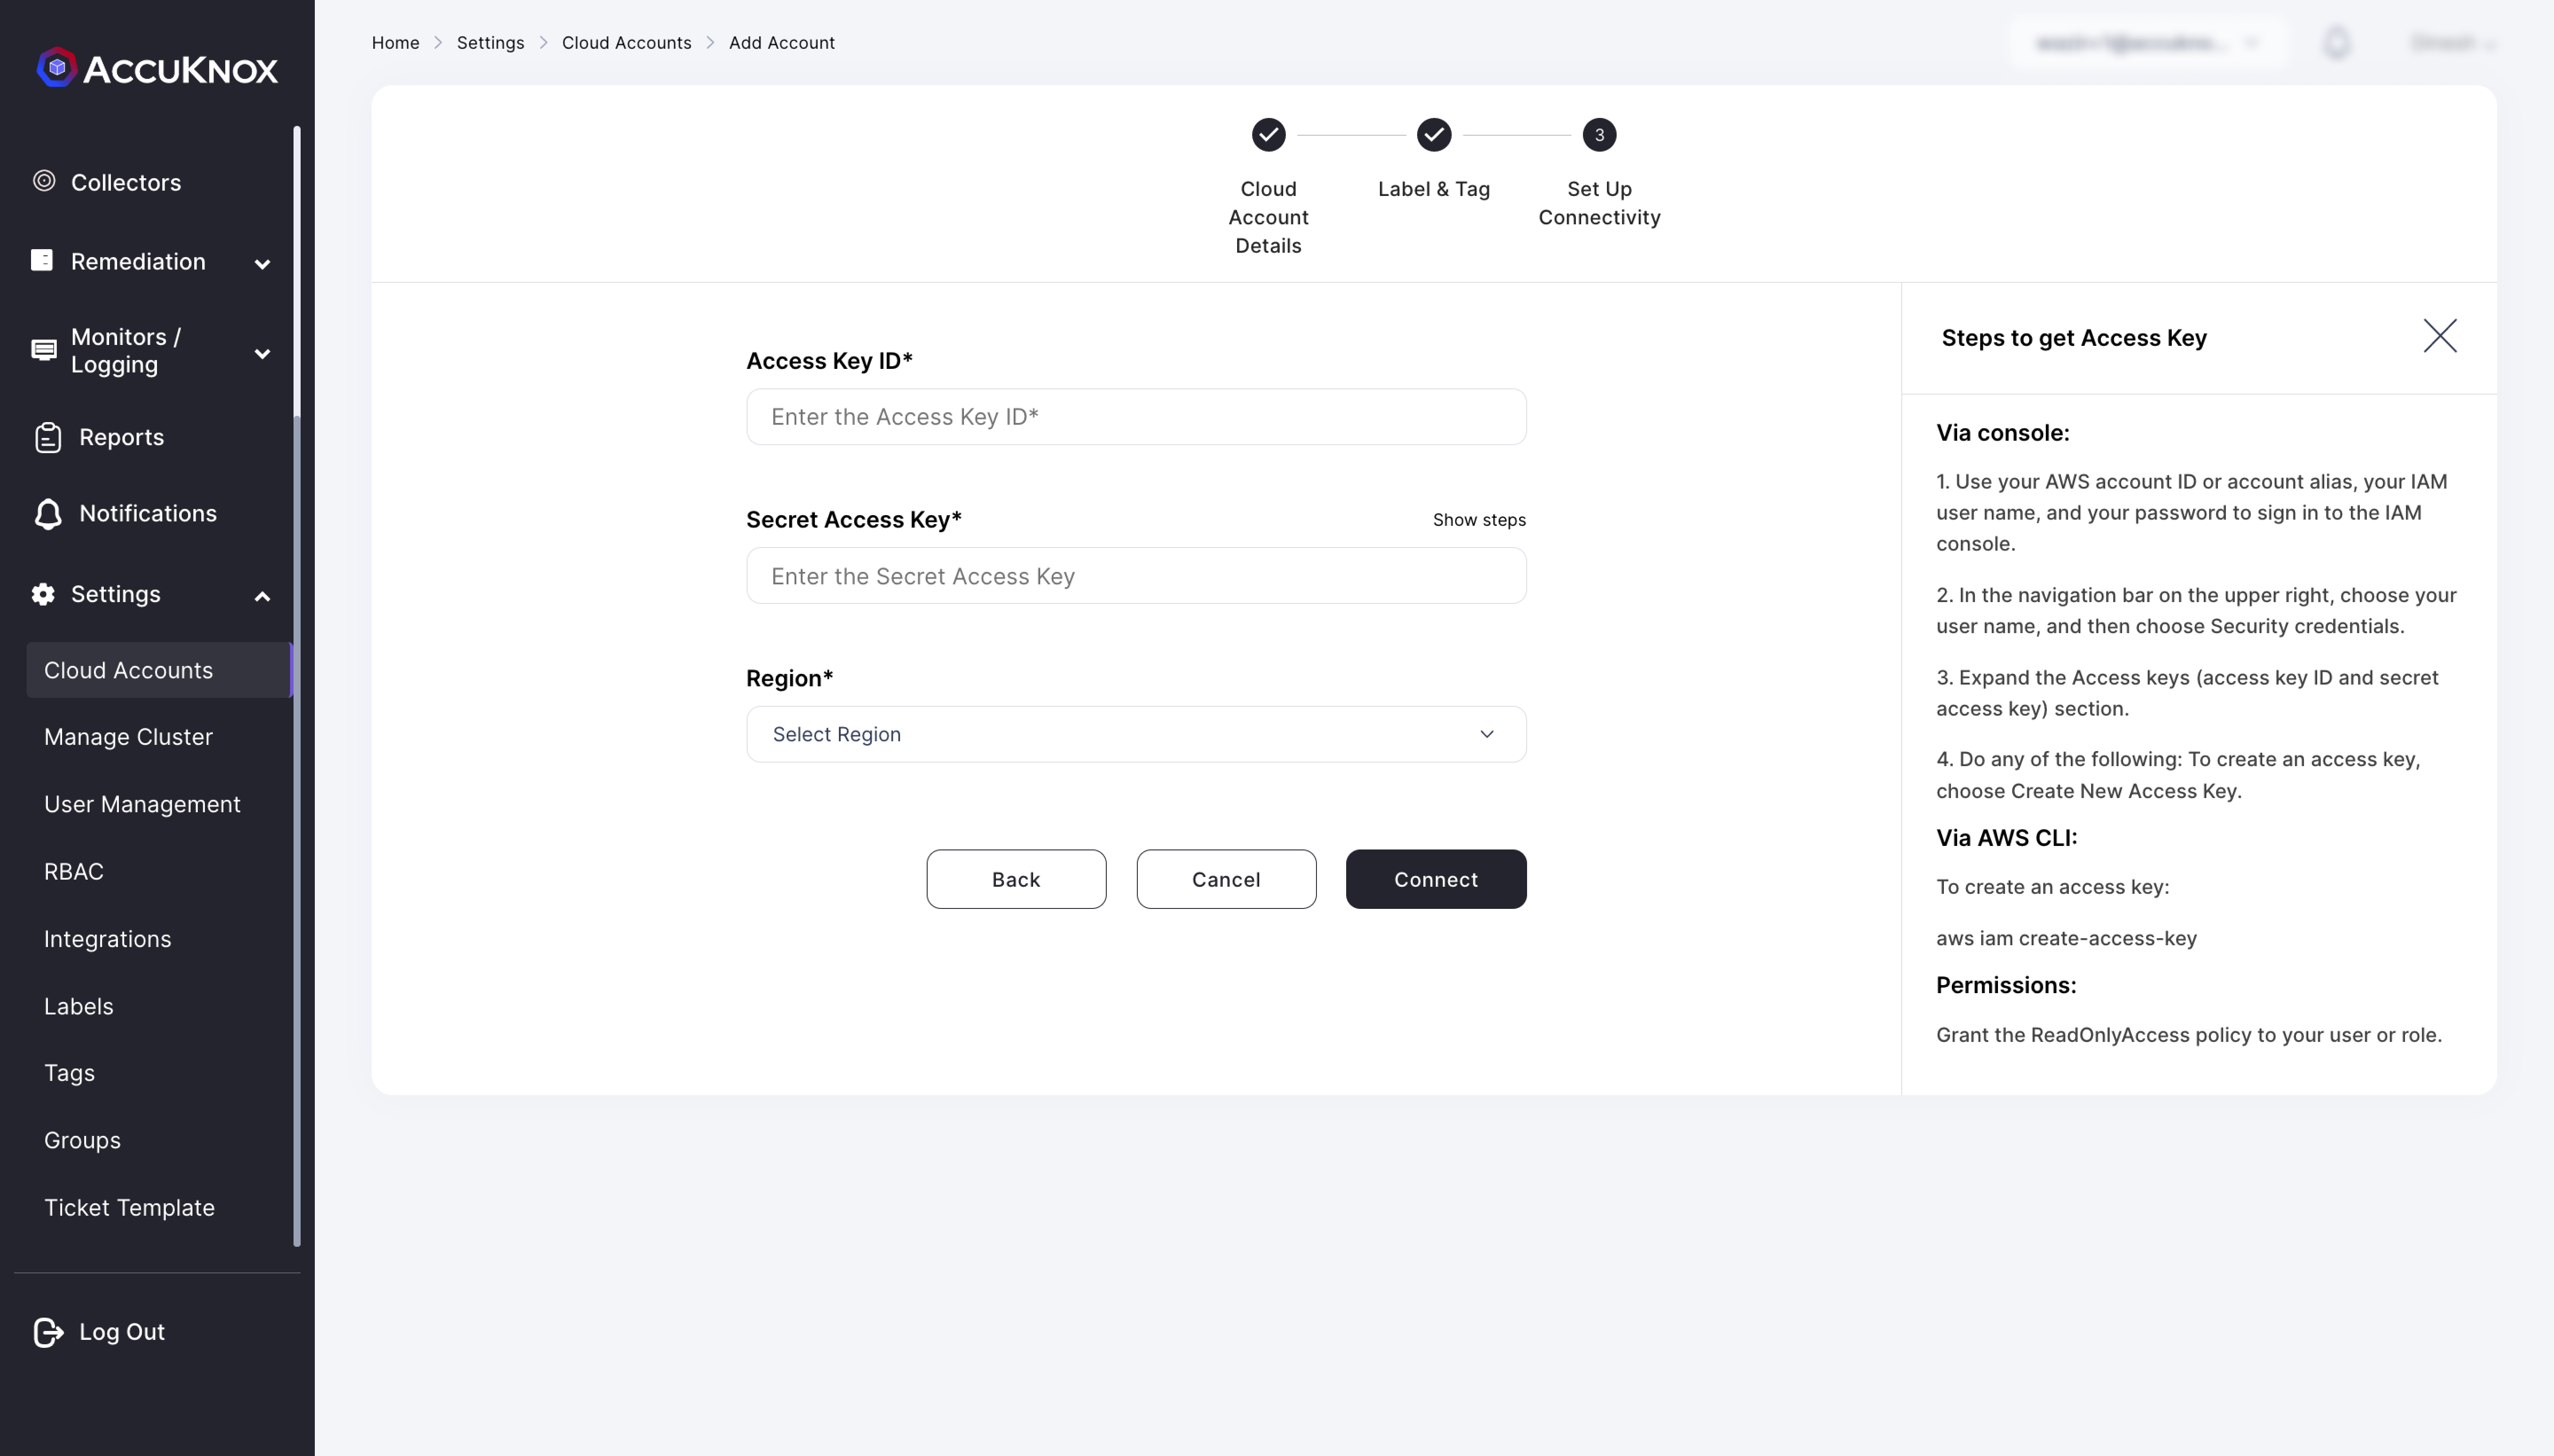
Step 5: After giving labels and Tag in the Next Screen Provide the AWS account’s Access Key and Secret Access Key ID and Select the Region of the AWS account.
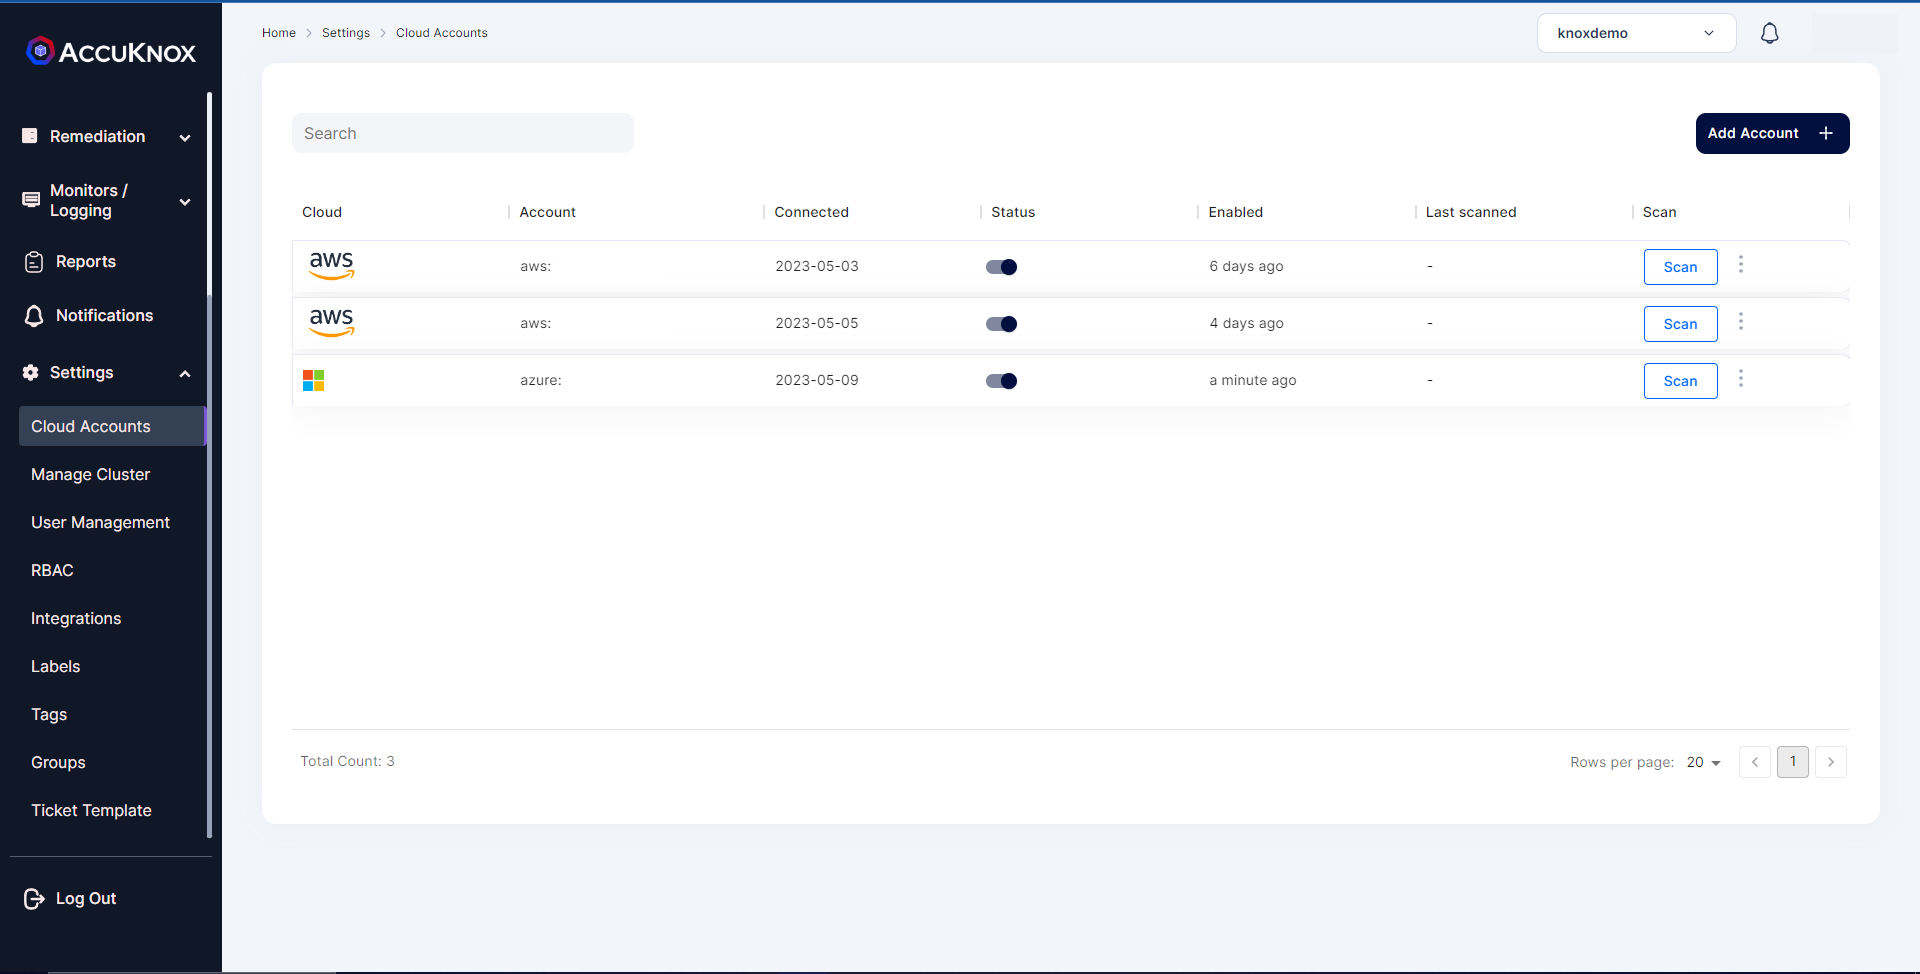
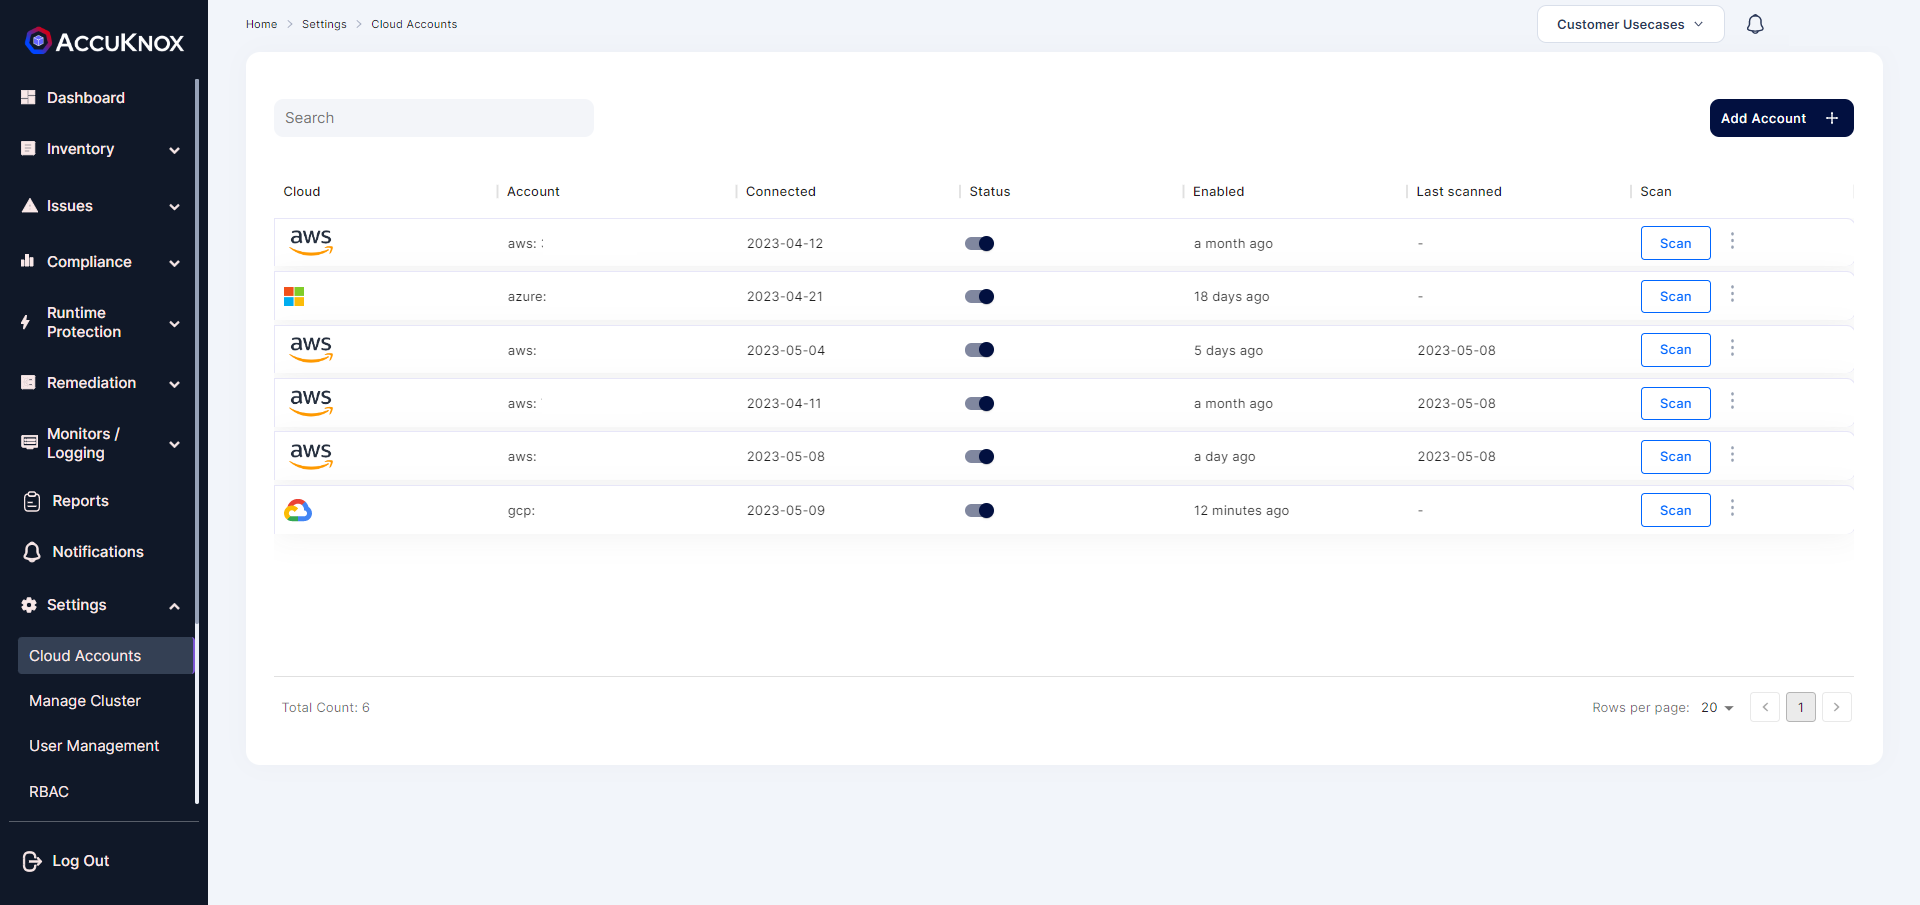
Step 6: AWS account is added to the AccuKnox using Access Key Method. We can see the onboarded cloud account by navigating to Settings->cloud Accounts option.
Onboarding GCP Cloud Account
1. Rapid Onboarding (via GCP)
For GCP there is a requirement for IAM Service Account Access. Step 1: Log into your Google Cloud console and navigate to IAM Admin > Service Accounts
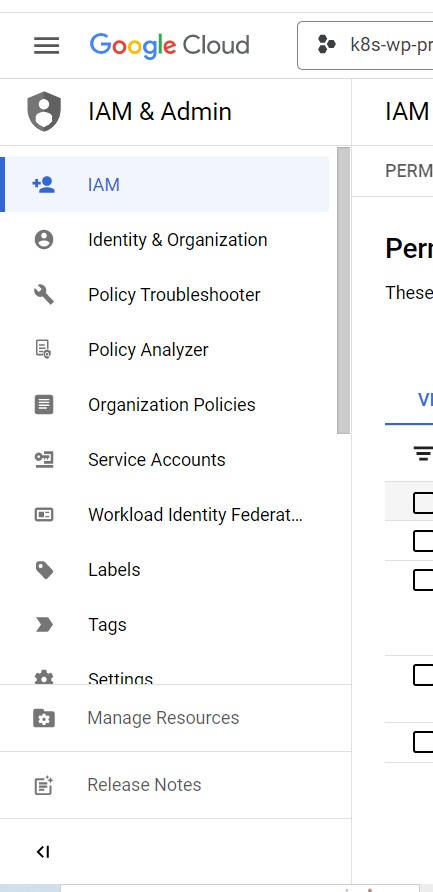
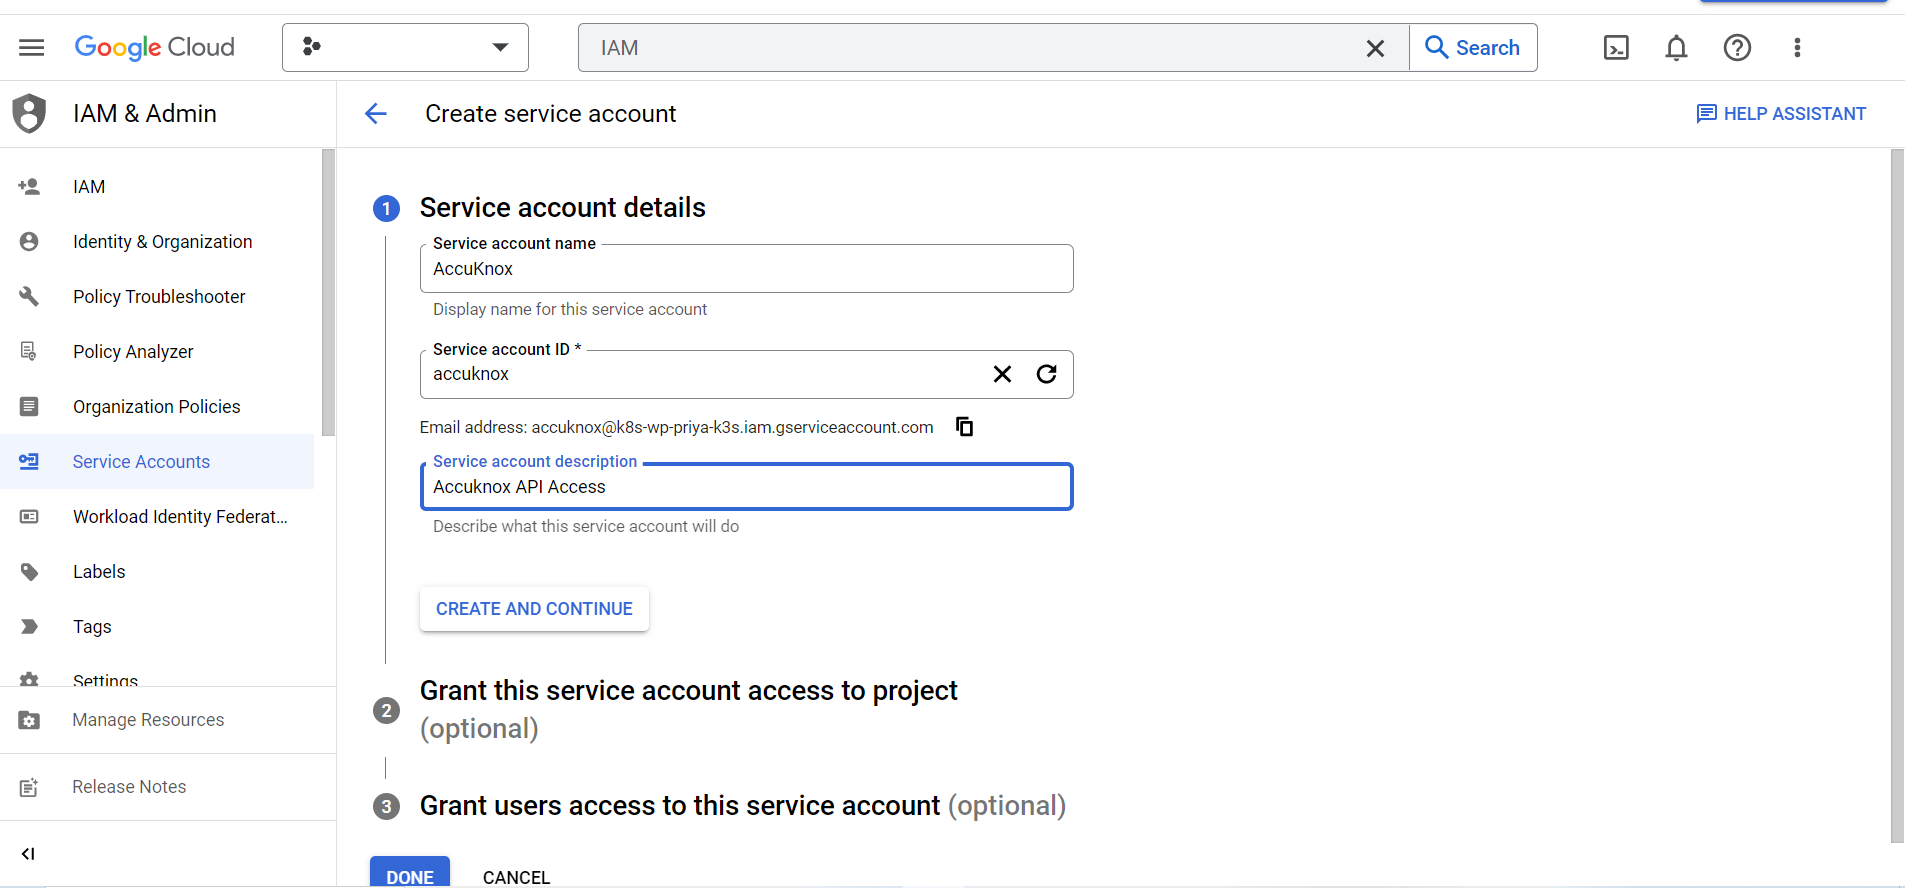
Step 2: Click on "Create Service Account".

Step 3: Enter "AccuKnox" in the "Service account name", then enter "Accuknox API Access" in the description.
Step 4: Click on Continue.
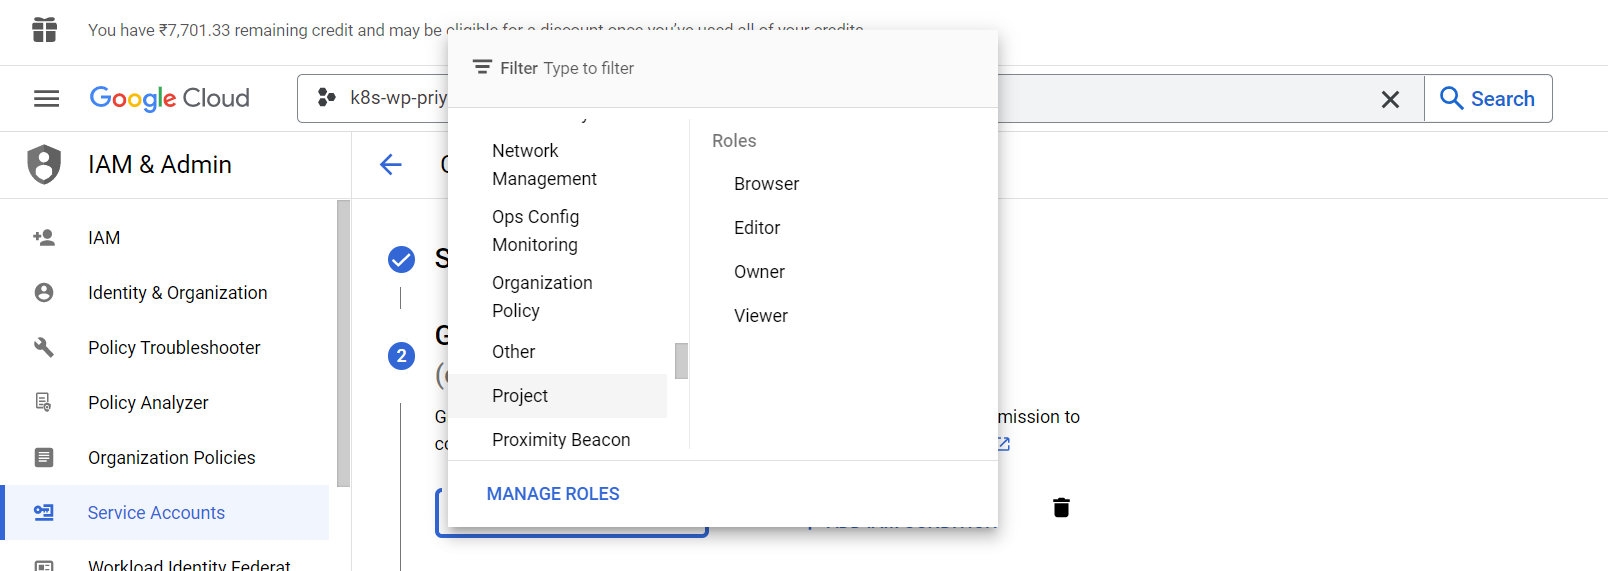
Step 5: Select the role: Project > Viewer and click Continue.
Step 6: Click on “Done”
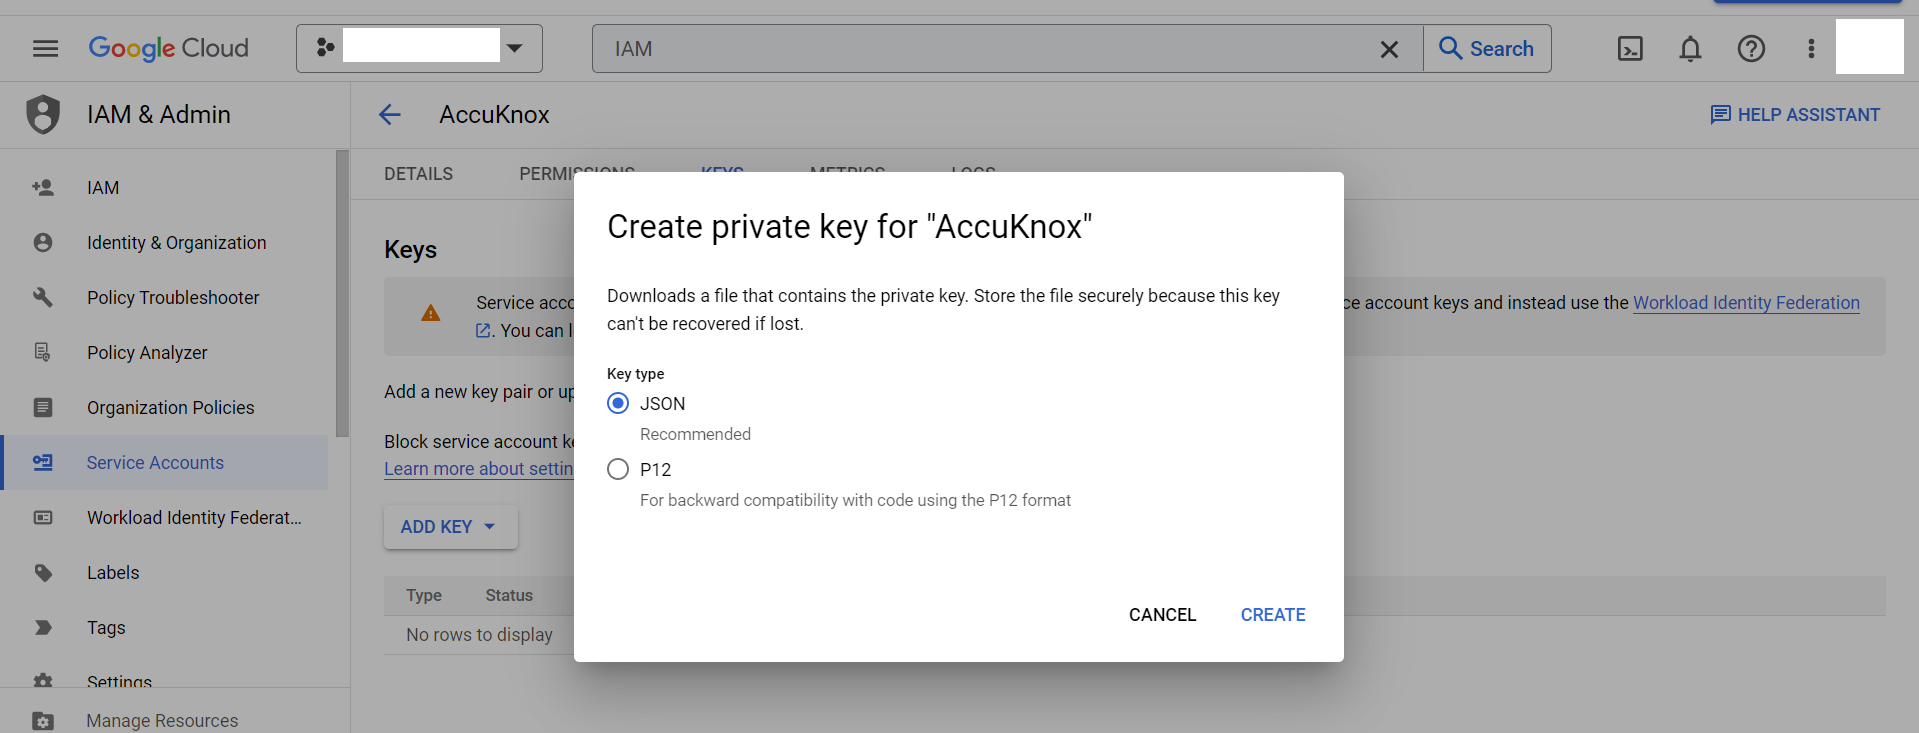
Step 7: To create a “Key” click the created service account

Step 8: Click Add Key and Create new key
Step 9: Check the JSON file and create.
Note: The created JSON private key file will be downloaded to your local machine by default.
2. From AccuKnox SaaS UI
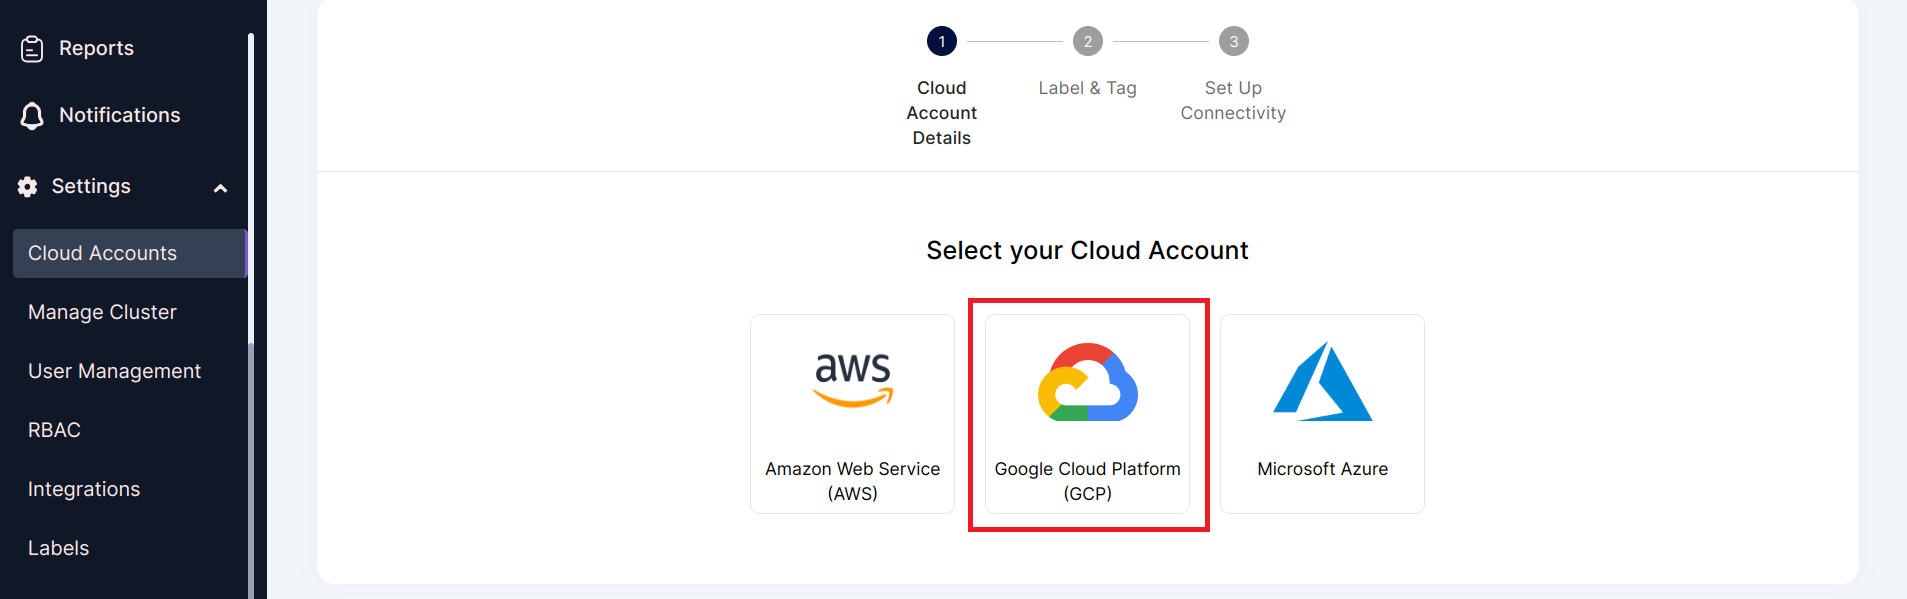
Step 1: Click settings -> Cloud Accounts
Step 2: Click Add account
Step 3: Select GCP as the Cloud Account type
Step 4: Select the Labels and Tags and click Next
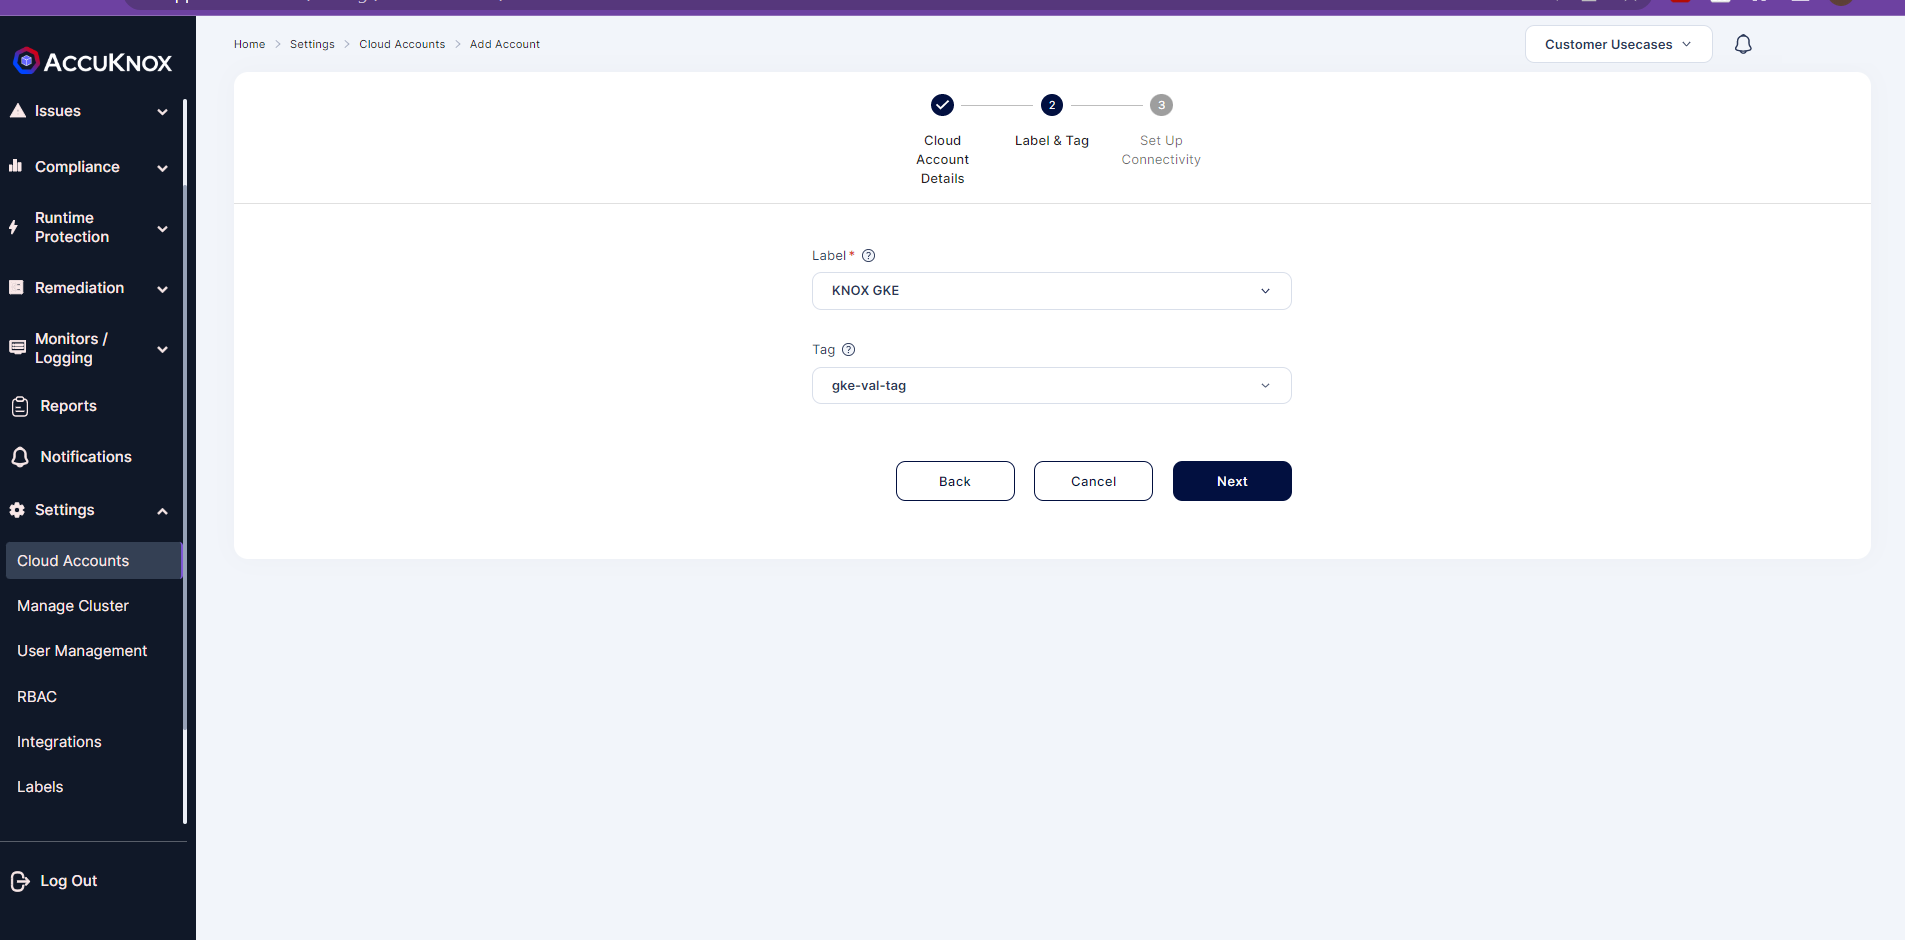
Note: If there are no labels and tags create new labels and tags via the settings
Step 5: Fill the Project ID, Client Email and Private Key(Copy paste the entire content of the JSON private key that was downloaded) then click Connect.
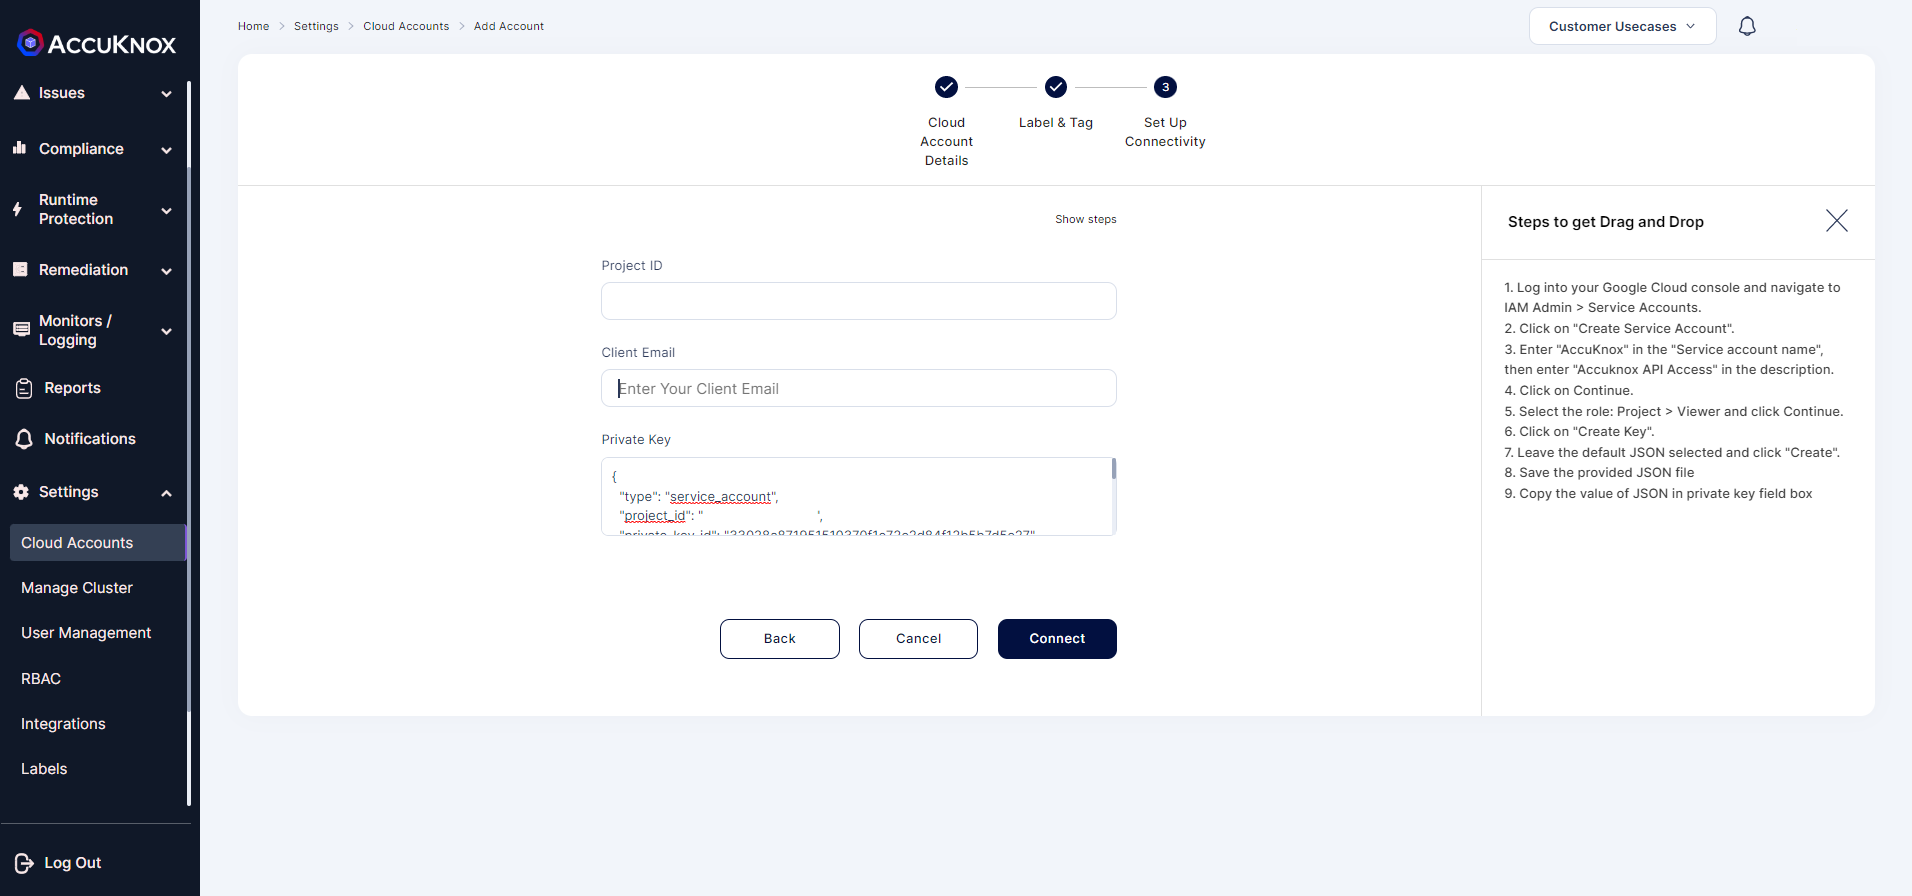
Note: For Client Email Id copy the mail id from the Service Account > Details section
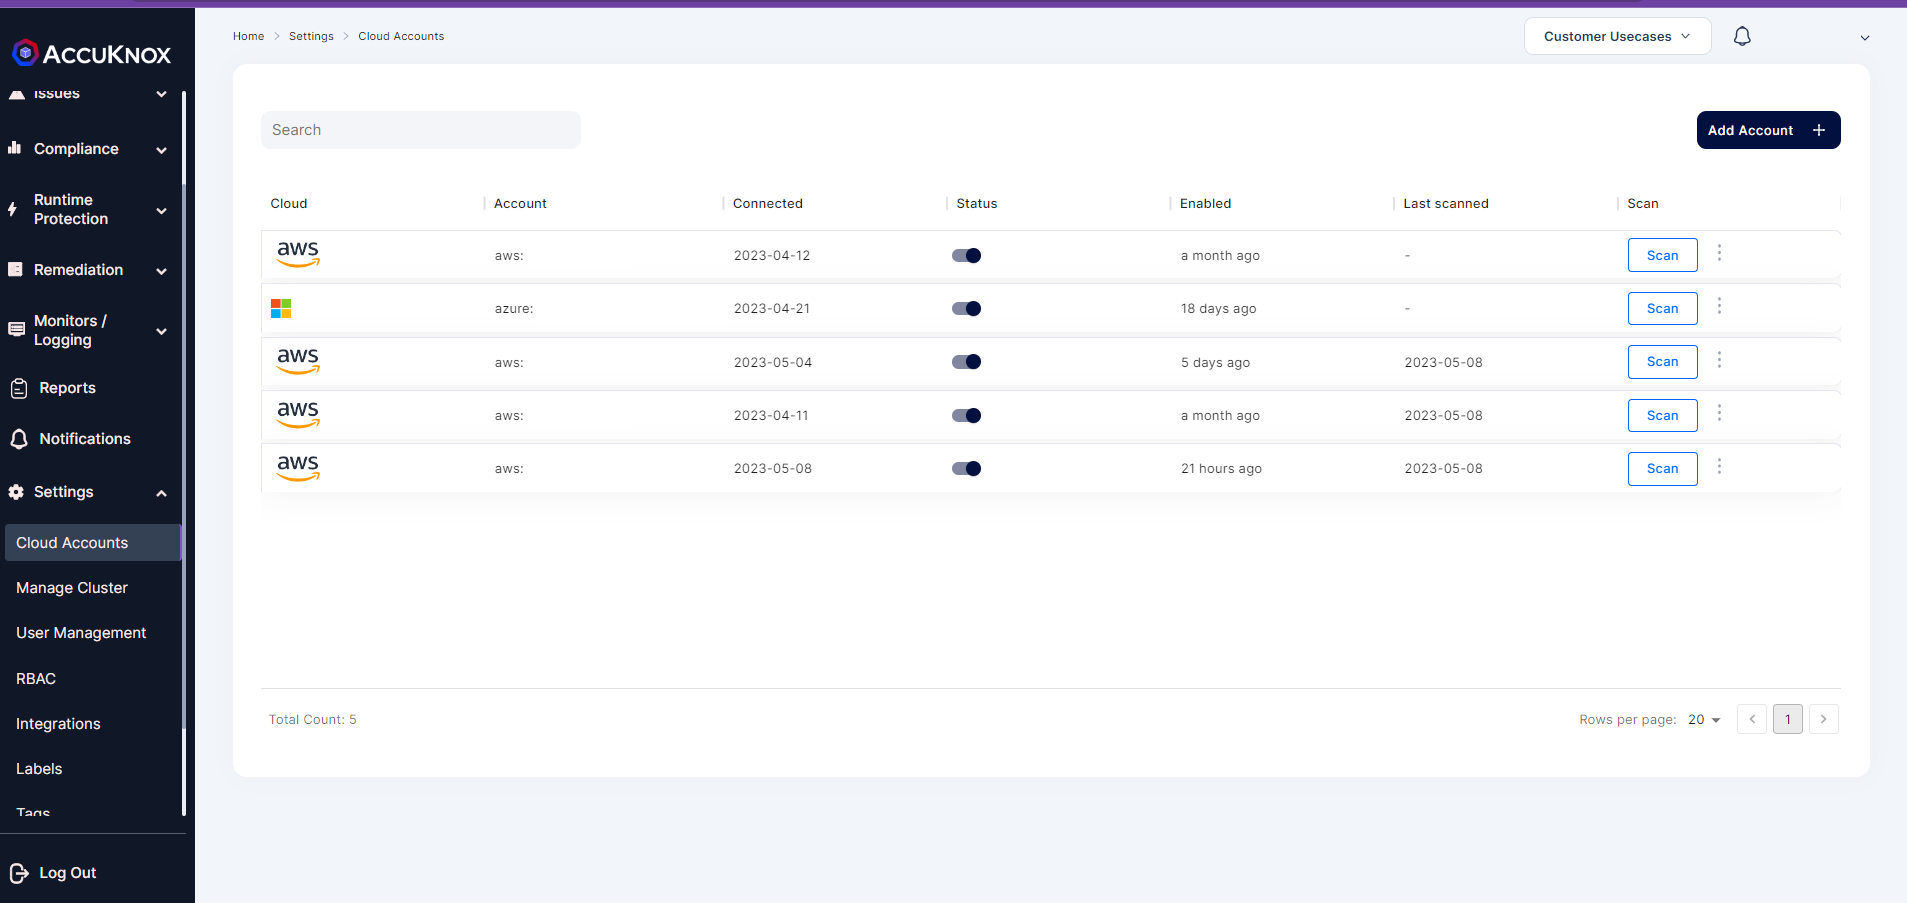
Step 6: Check Settings → Cloud Accounts. You will see your cloud account is added successfully.
Onboarding Azure Cloud Account
1. Rapid Onboarding (via Azure)
For Azure Onboarding it is required to register an App and giving Security read access to that App from the Azure portal.
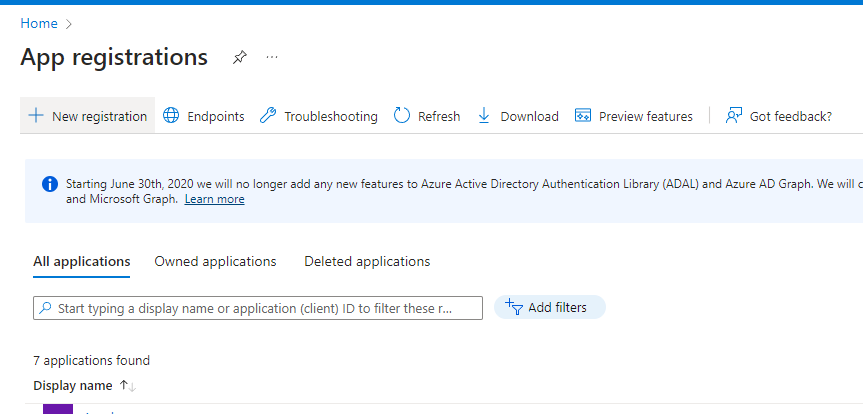
Step 1: Go to your Azure Portal and search for App registrations and open it

Step 2: Here click on New registration
Step 3: Give your application a name, remember this name as it will be used again later, For the rest keep the default settings
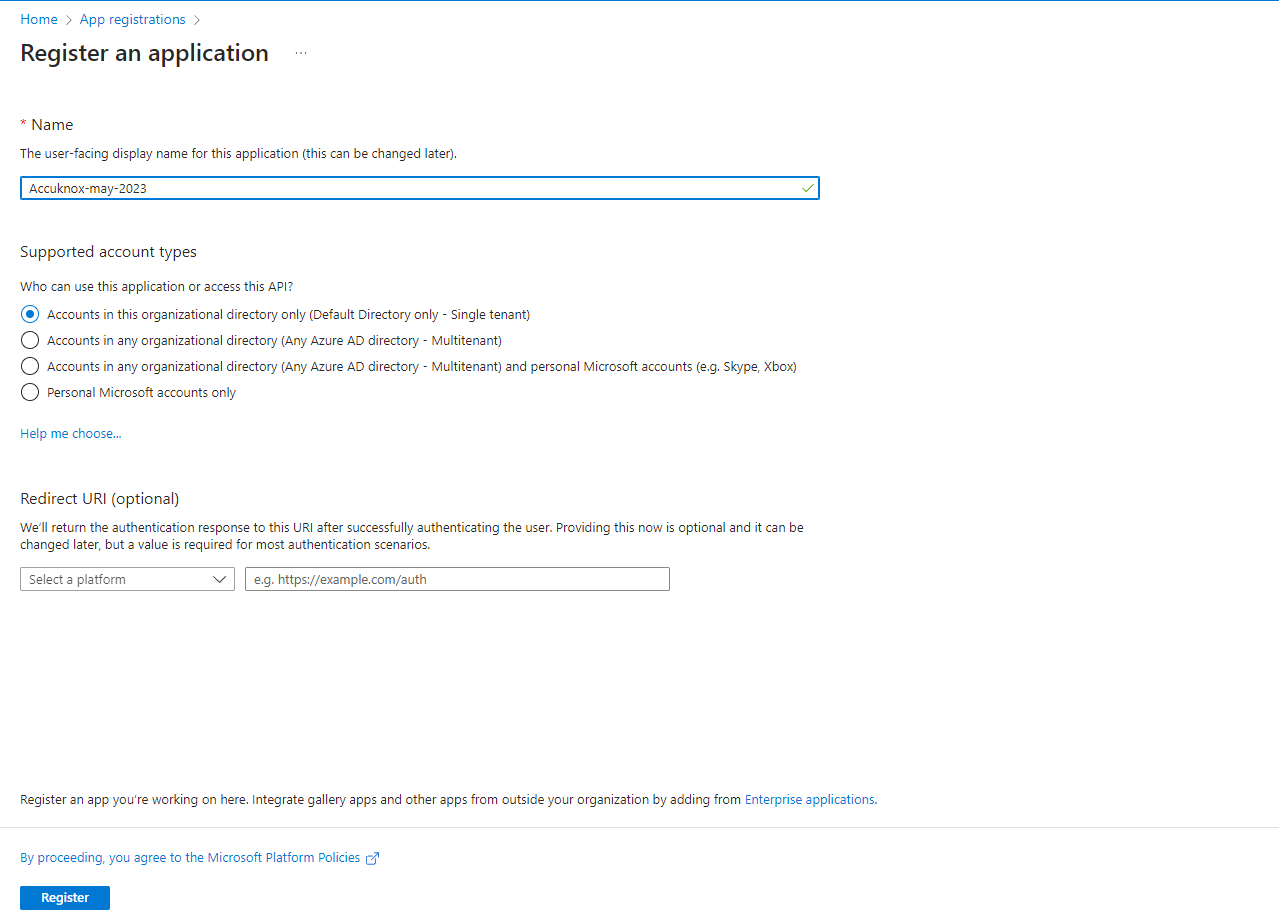
Step 4: Now your application is created, save Application ID and Directory ID as they will be needed to for onboarding on Accuknox Saas and then click on ‘Add a certificate or secret’

Step 5: Click on new client secret and enter the name and expiration date to get secret id and secret value, save this secret value as this will also be needed for onboarding.

Step 6: Next, go to API permissions tab and click on 'Add permission'

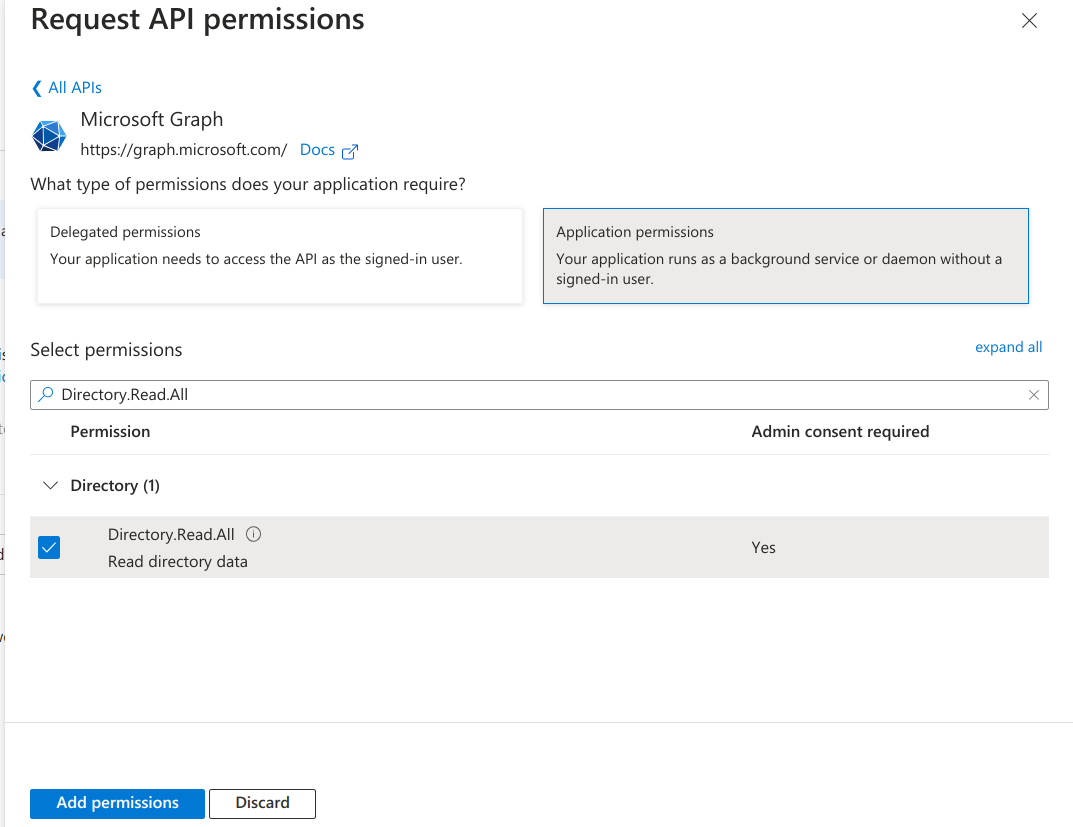
Step 7: On the screen that appears, click on 'Microsoft Graph'

Step 8: Next, select Application Permissions and then search for Directory.Read.All and click on Add permissions
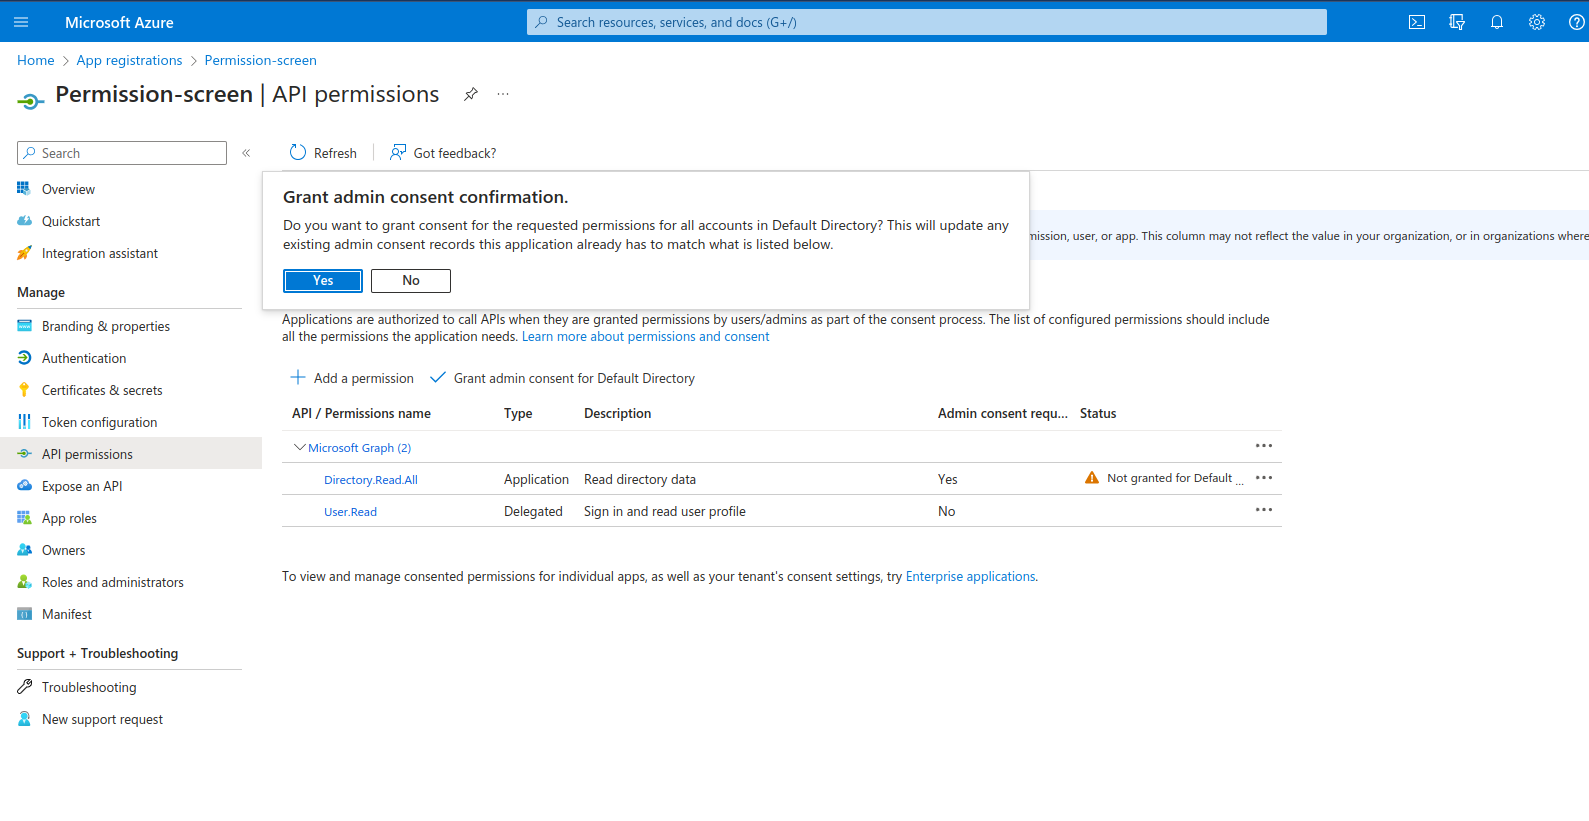
Step 9: Select ‘Grant Admin Consent’ for Default Directory and click on ‘Yes’
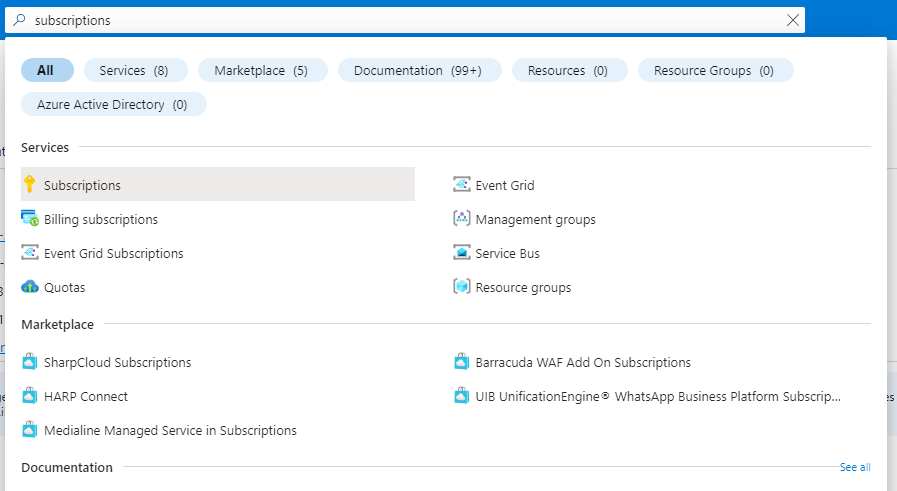
Step 10: Now we need to give Security read permissions to this registered Application , to do that go to subscriptions
Step 11: First save the subscription ID and click on the subscription name , here it is “Microsoft Azure Sponsorship“

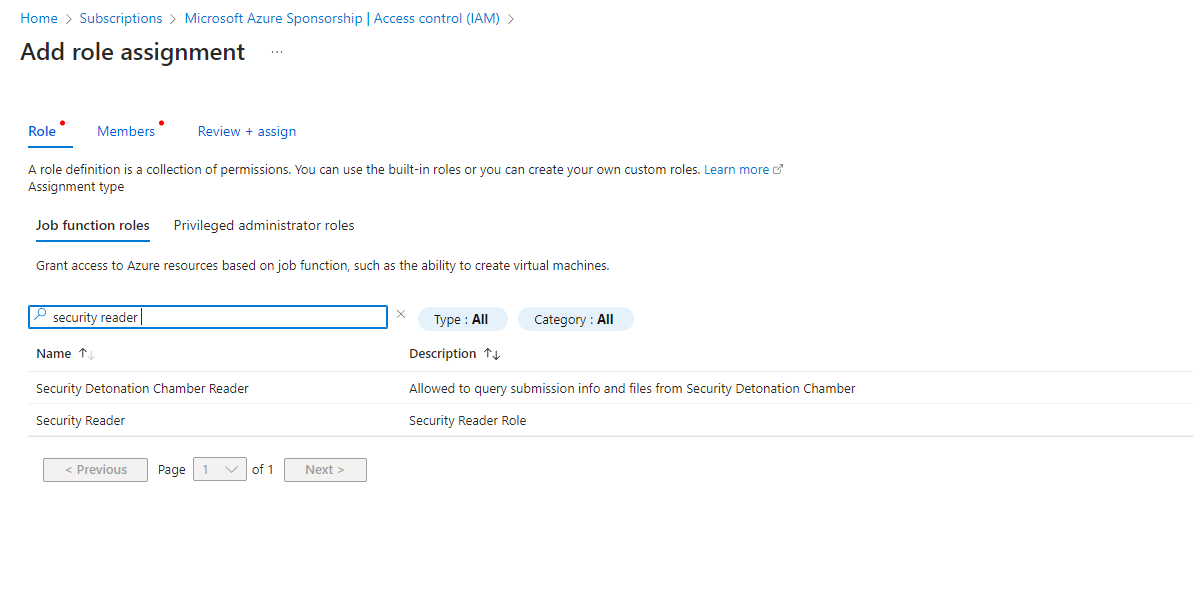
Step 12: Navigate to Access control(IAM) and go to Roles , here select Add and Add role assignment

Step 13: Search for “Security Reader” Job function Role, select it and press next
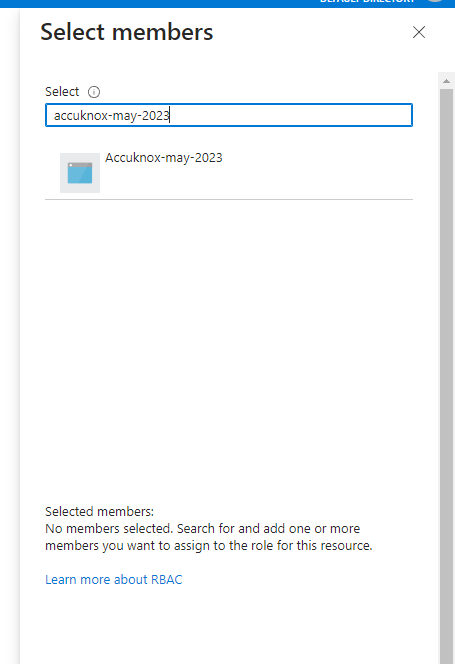
Step 14: In the member section click on Select members it will open a dropdown menu on the right hand side
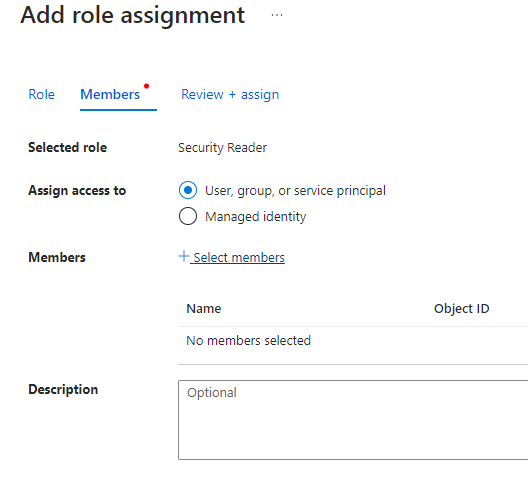
Step 15: Here search for the Application that you registered in the beginning , select the application and click on review and assign.
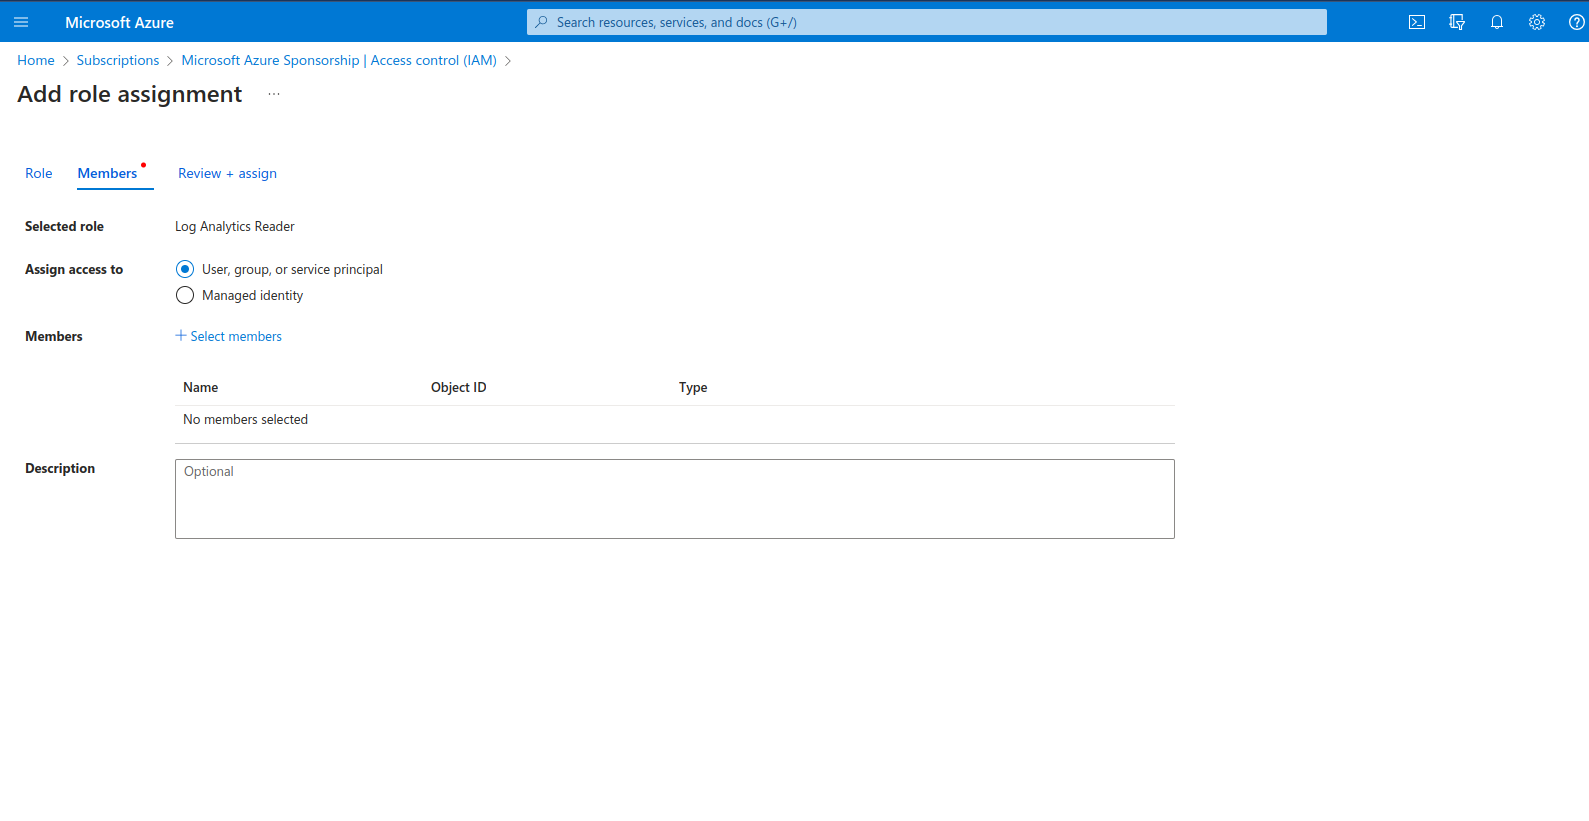
Step 16: Similarly, we have to add another role. This time, search for Log Analytics Reader. Select it and click next

Step 17: Now, click on Select members, select the application that was created similar to the previous role. Finally, click on Review and Assign.
2. From AccuKnox SaaS UI
Configuring your Azure cloud account is complete, now we need to onboard the cloud account onto Accuknox Saas Platform.
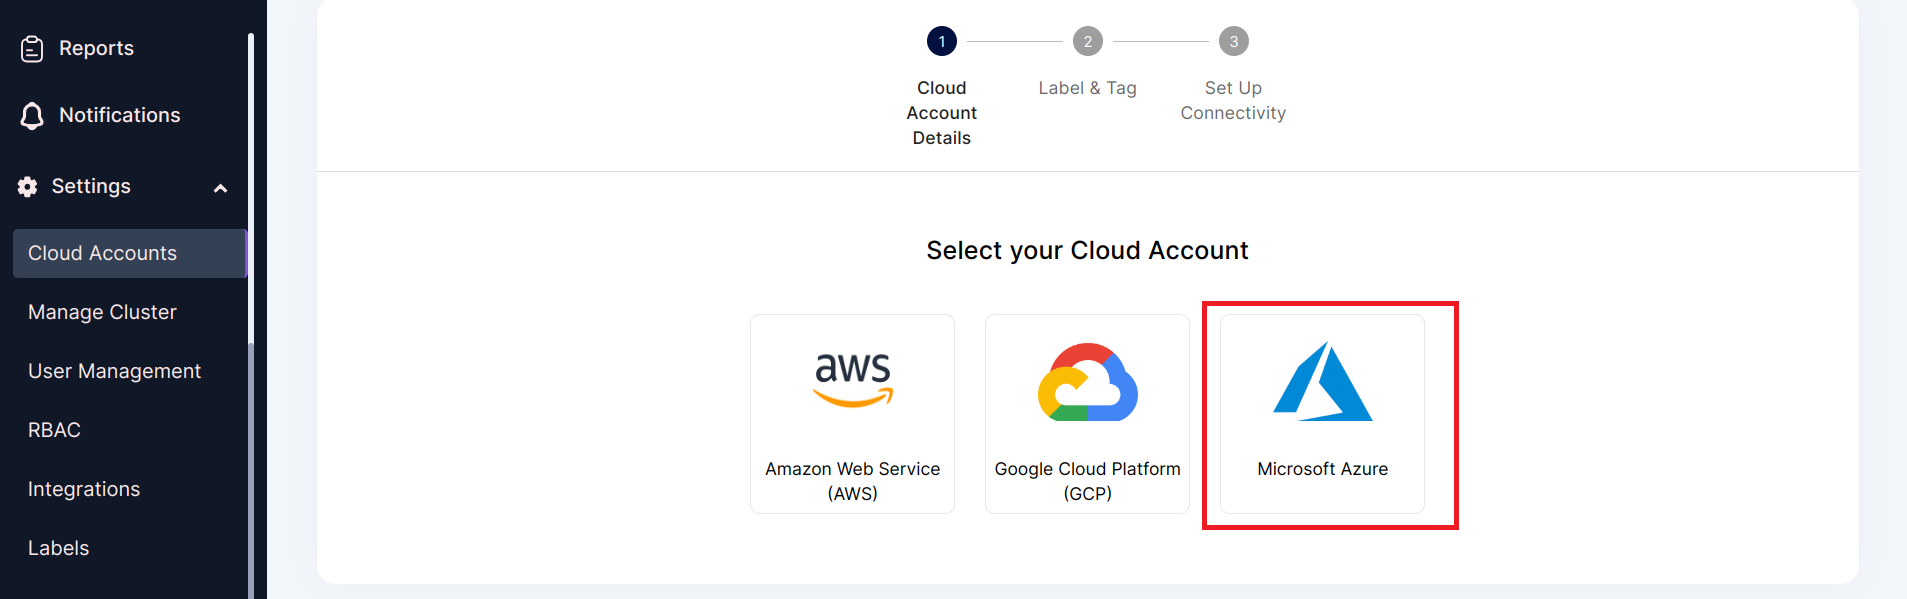
Step 1: Go to settings-> Cloud Account and click on Add Account
Step 2: Select Microsoft Azure as Cloud Account Type
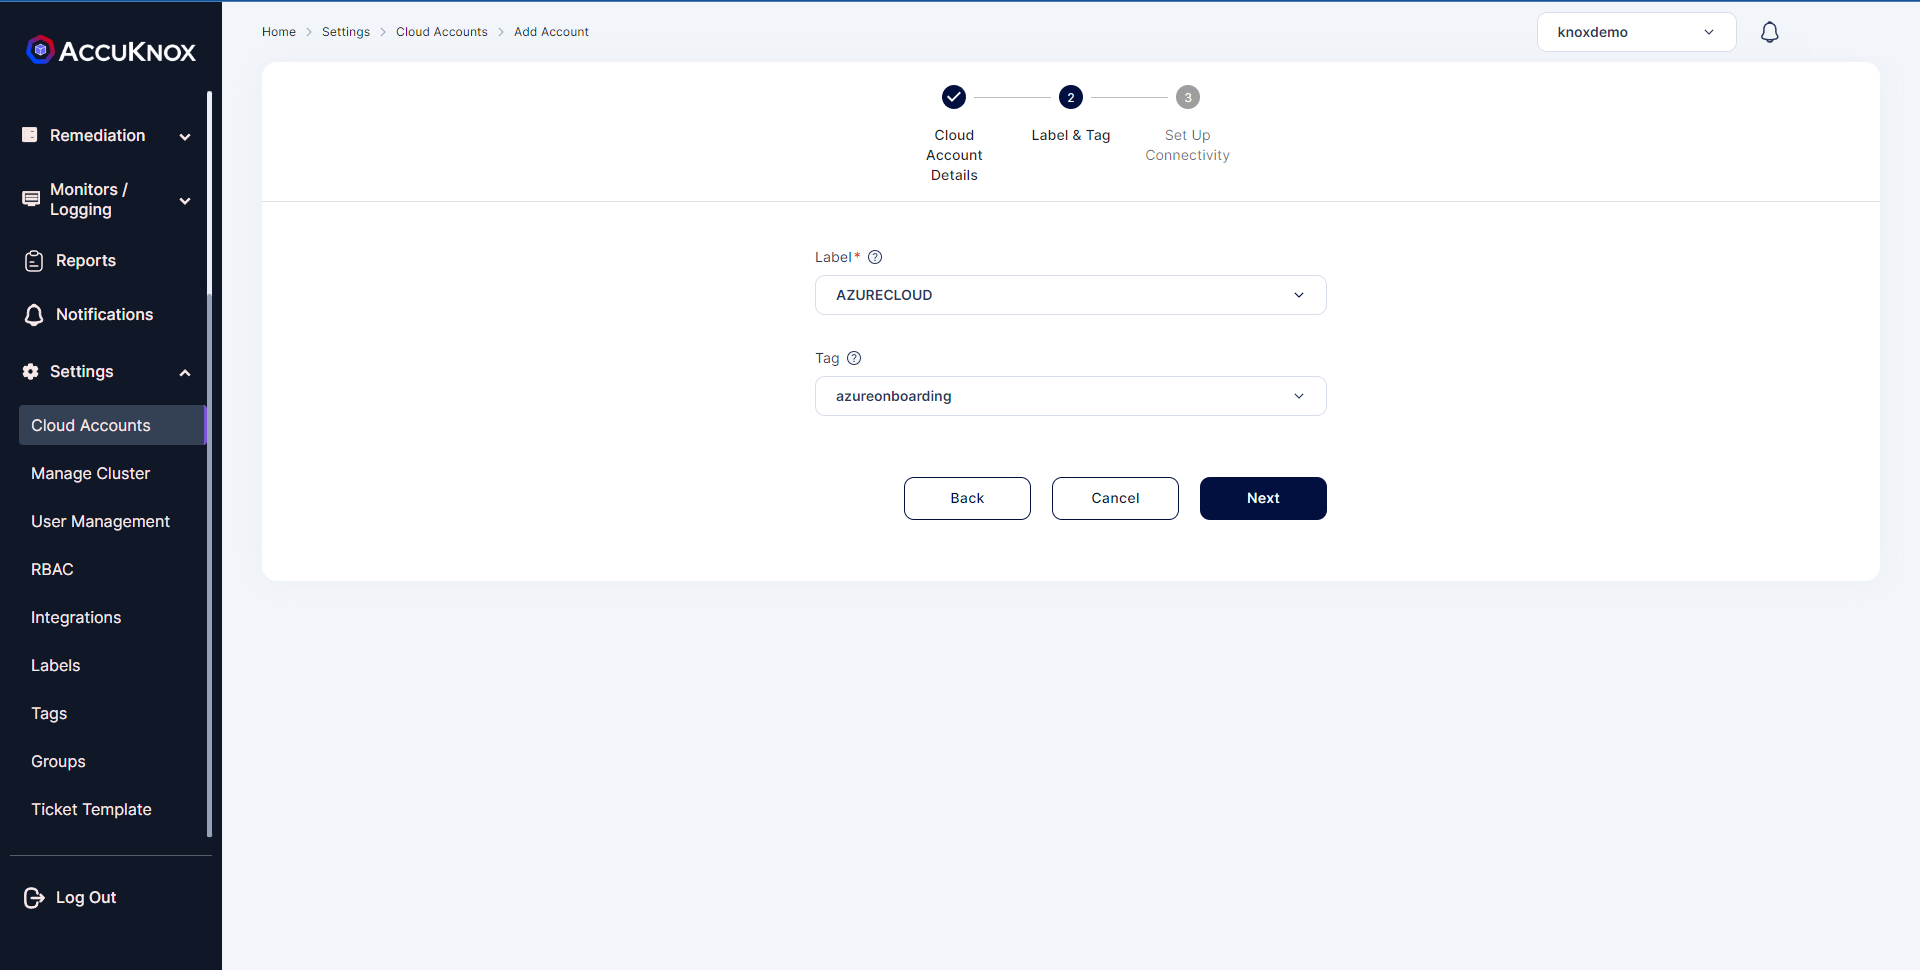
Step 3: Select or create label and Tags that will be associated with this Cloud Account
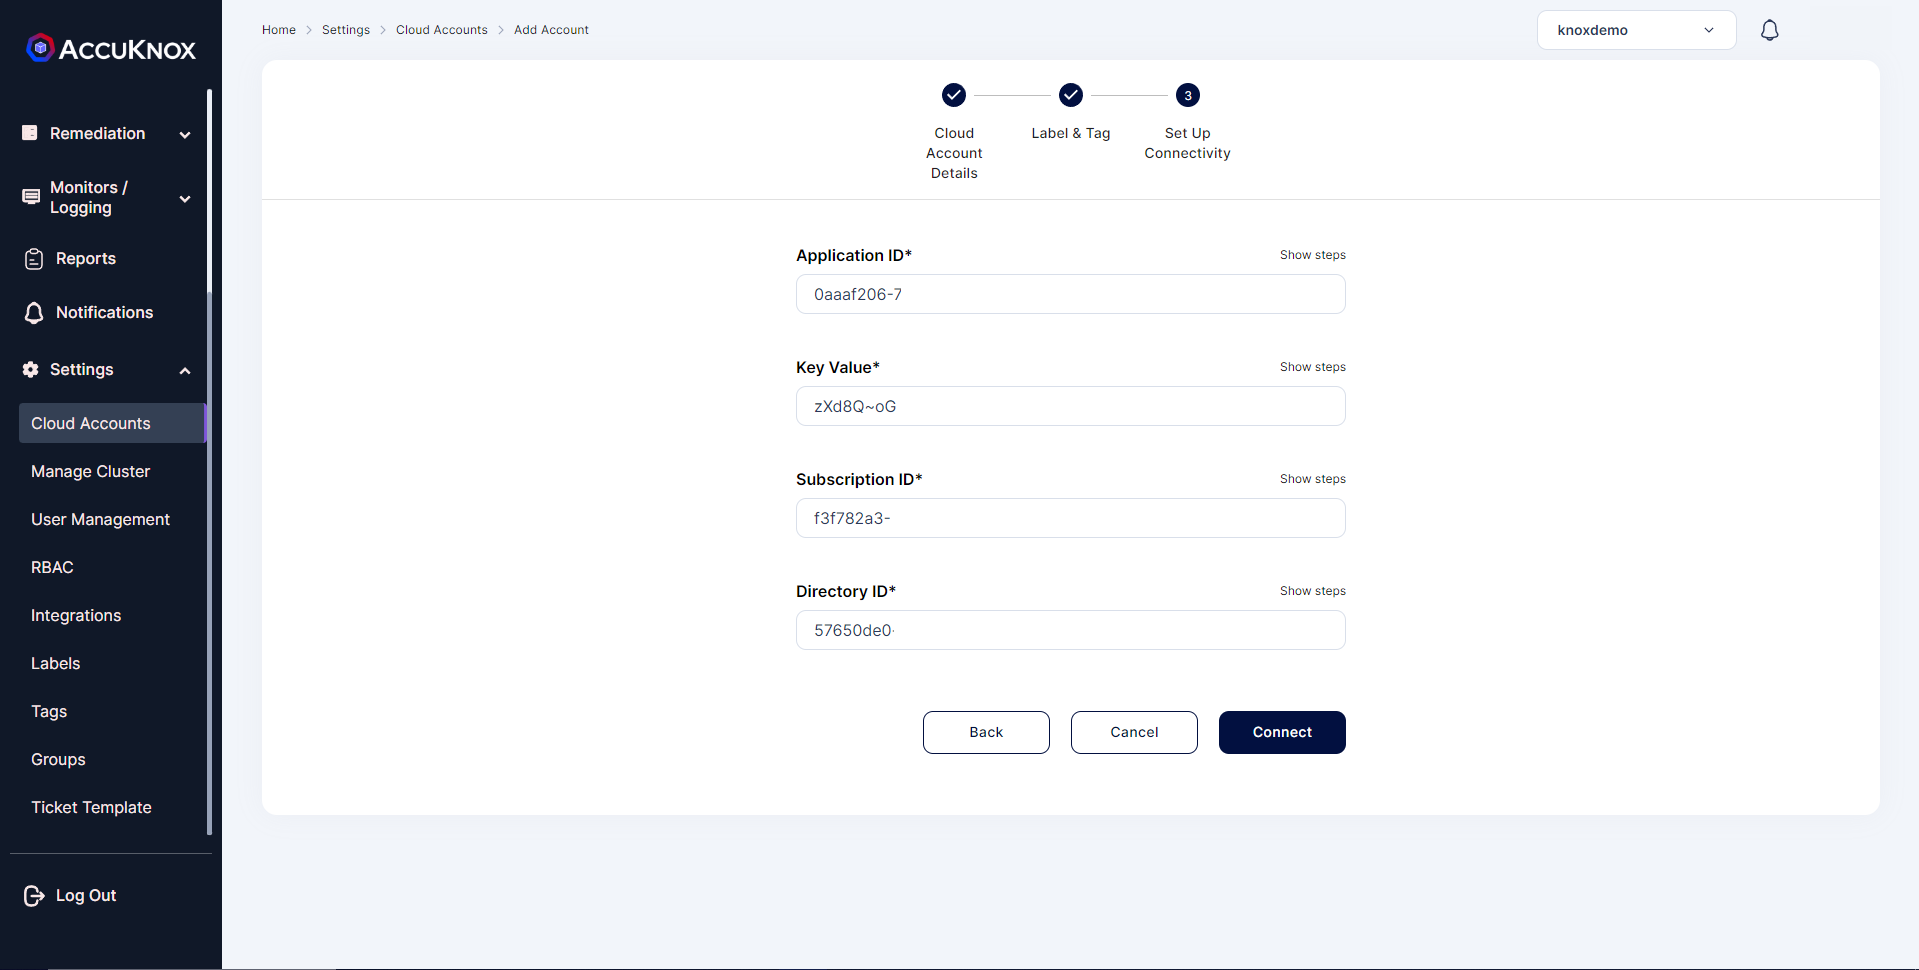
Step 4: Enter the details that we saved earlier during the steps for app registration and subscription id from subscriptions in azure portal and click on connect
Step 5: After successfully connecting your cloud account will show up in the list