Asset Inventory Guide
Users with multiple cloud accounts and workloads across various public clouds often face challenges in getting a comprehensive view of their cloud assets in a single place. Switching between various cloud provider consoles to monitor these assets becomes a huge problem.
AccuKnox solves this user problem by providing a single pane of view for cloud accounts, assets, and workloads present across multiple cloud platforms.
Once the user onboards the cloud account, the AccuKnox CSPM tool scans the cloud account for assets like hosts, applications, Web APIs, containers, clusters, and more. Asset count will increase or decrease based on changes in the onboarded cloud account. This is handled by periodic scans that the AccuKnox CSPM tool runs at fixed time intervals.
AccuKnox gives users the ability to view their assets from two different perspectives.
Step 1: Accessing Asset Inventory
To access the ‘Asset Inventory’, the first step is to:
- Click on ‘Inventory’
- Then click on ‘Cloud Assets’
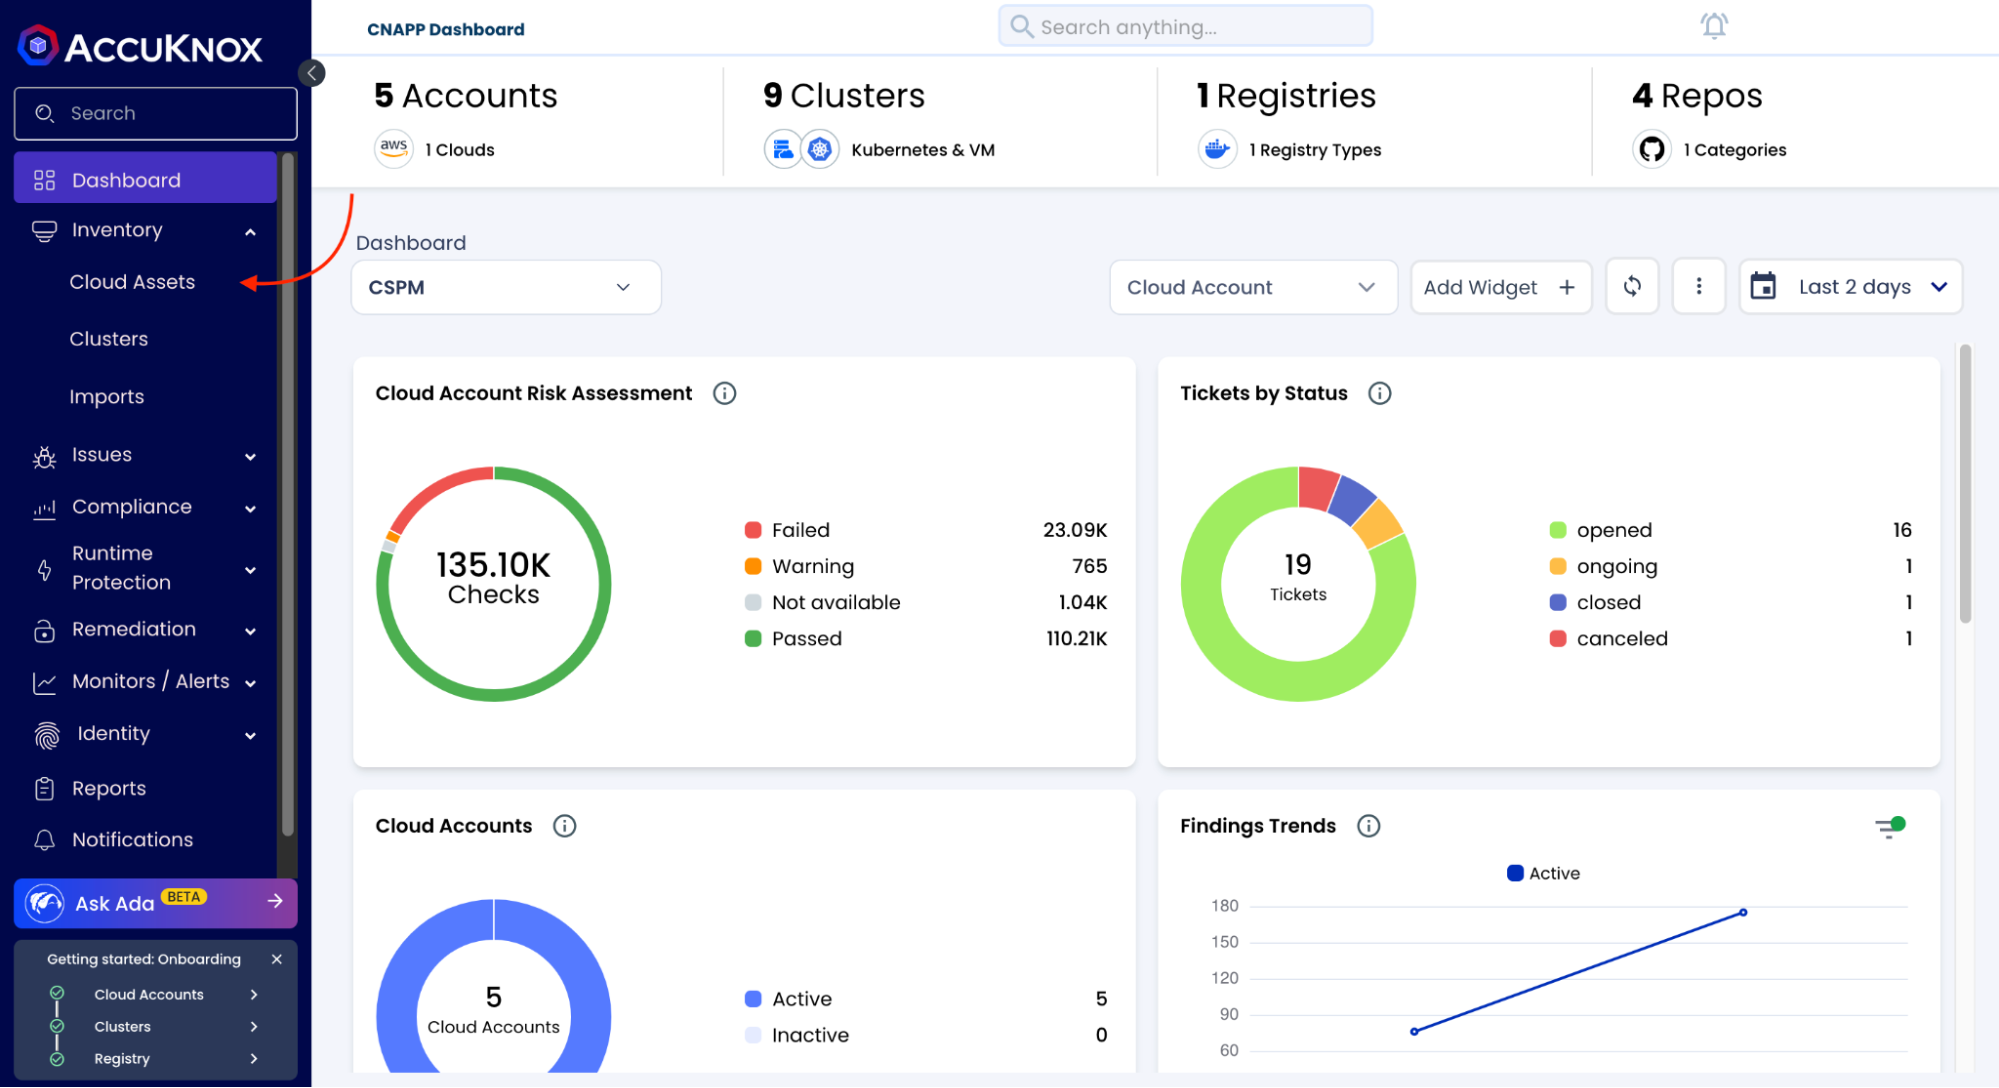
Step 2: List Perspective
Inside ‘Cloud Assets’, users have the assets displayed in the list perspective, which separates them by ‘Asset Category’ and provides other useful information such as the findings associated with that category.
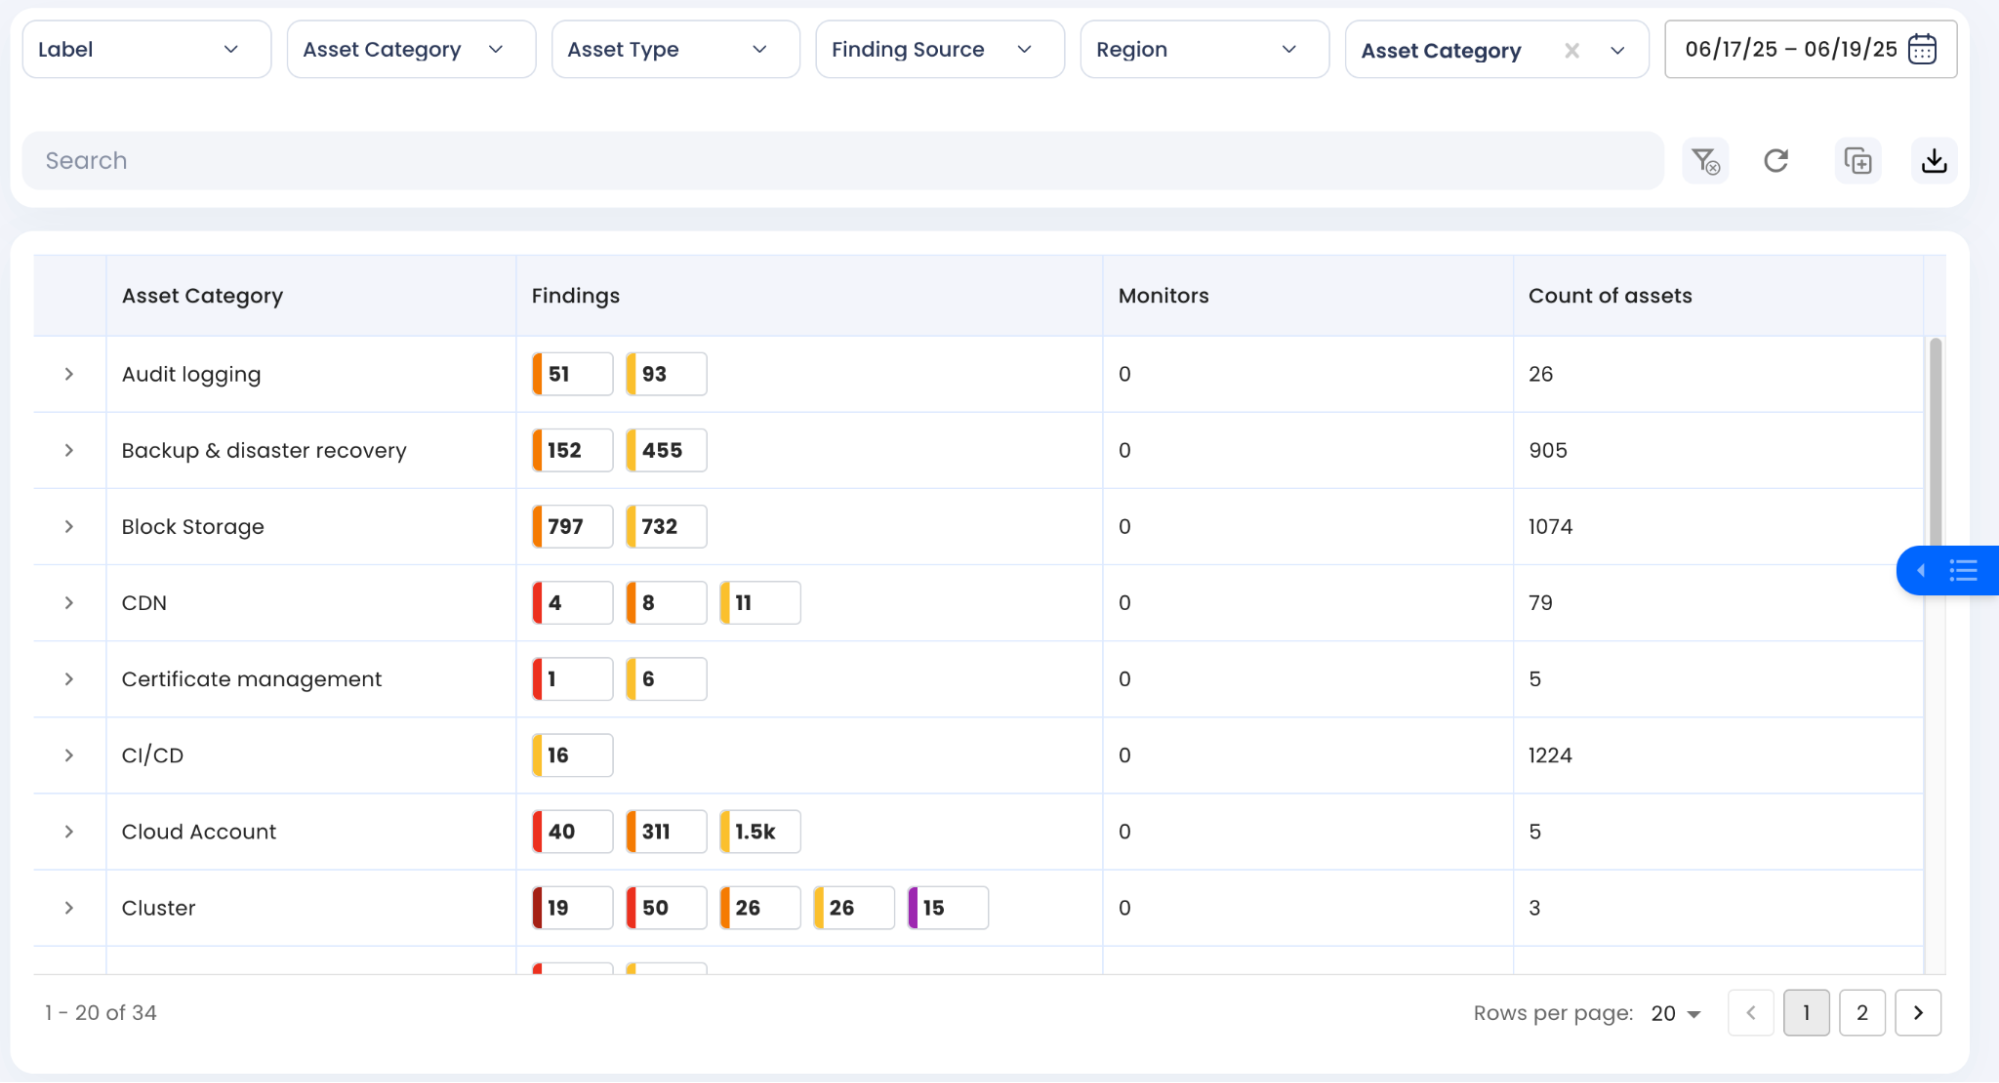
Update Assets View
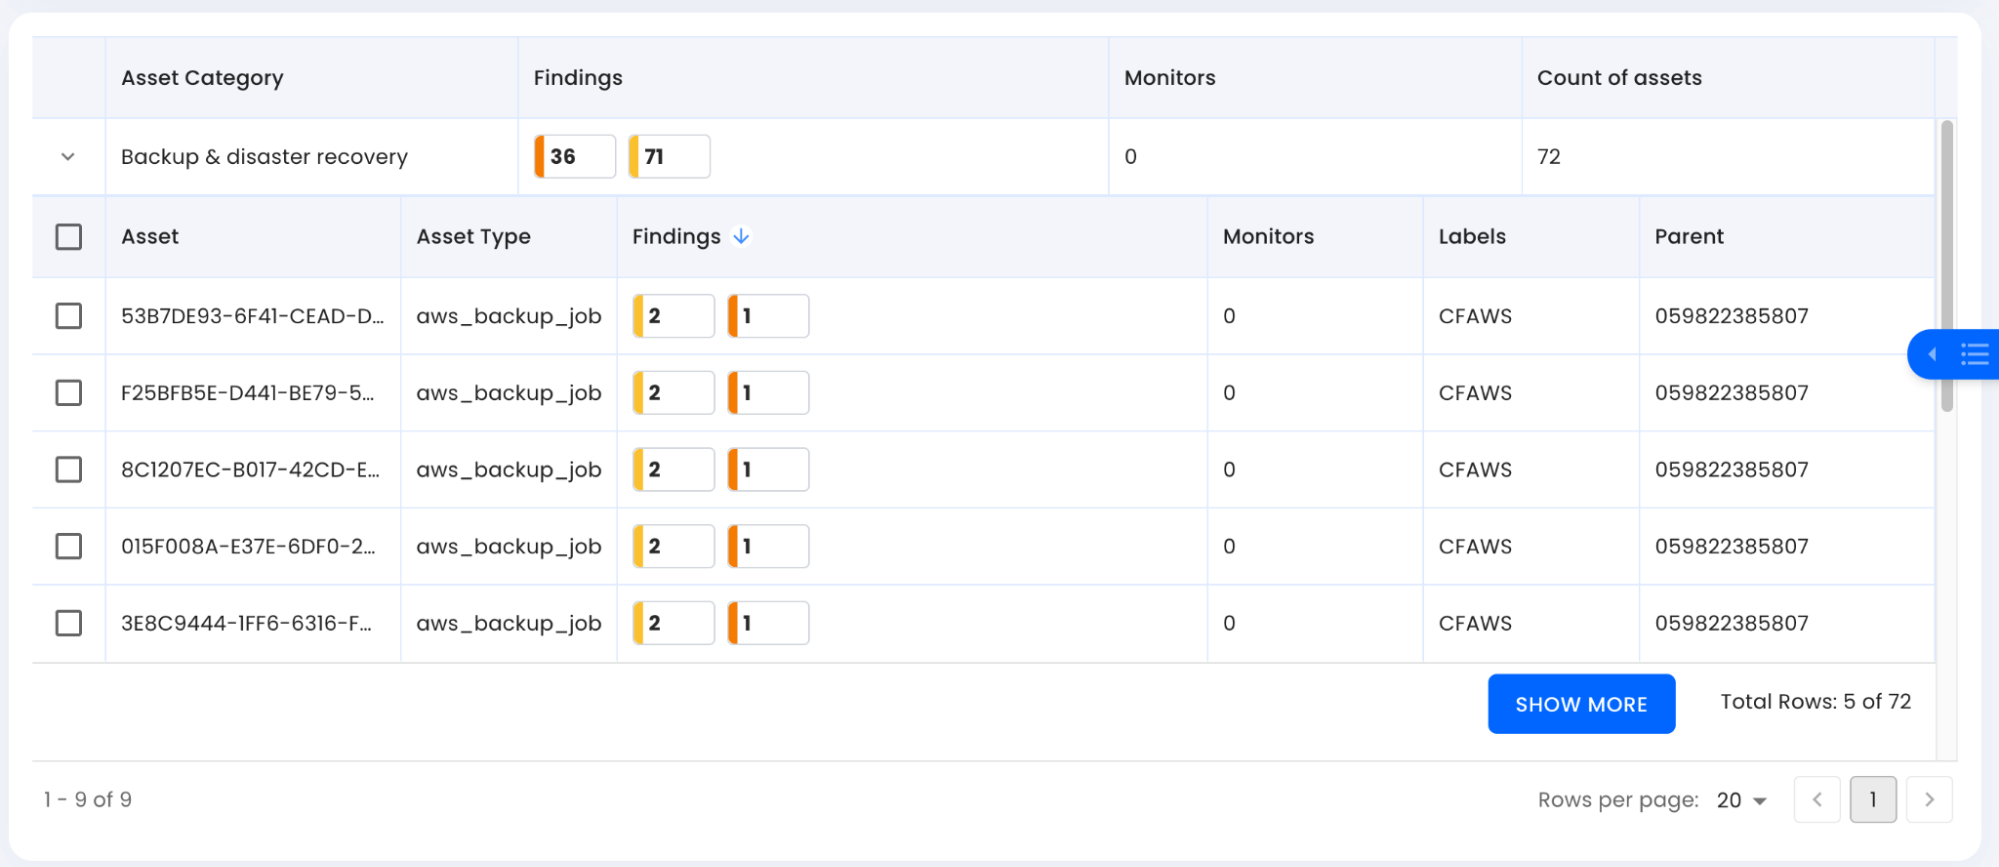
If desired, the user can click the asset category to view in more detail:
- The specific asset
- Its type
- Findings
- And more
Step 3: Hierarchy Perspective
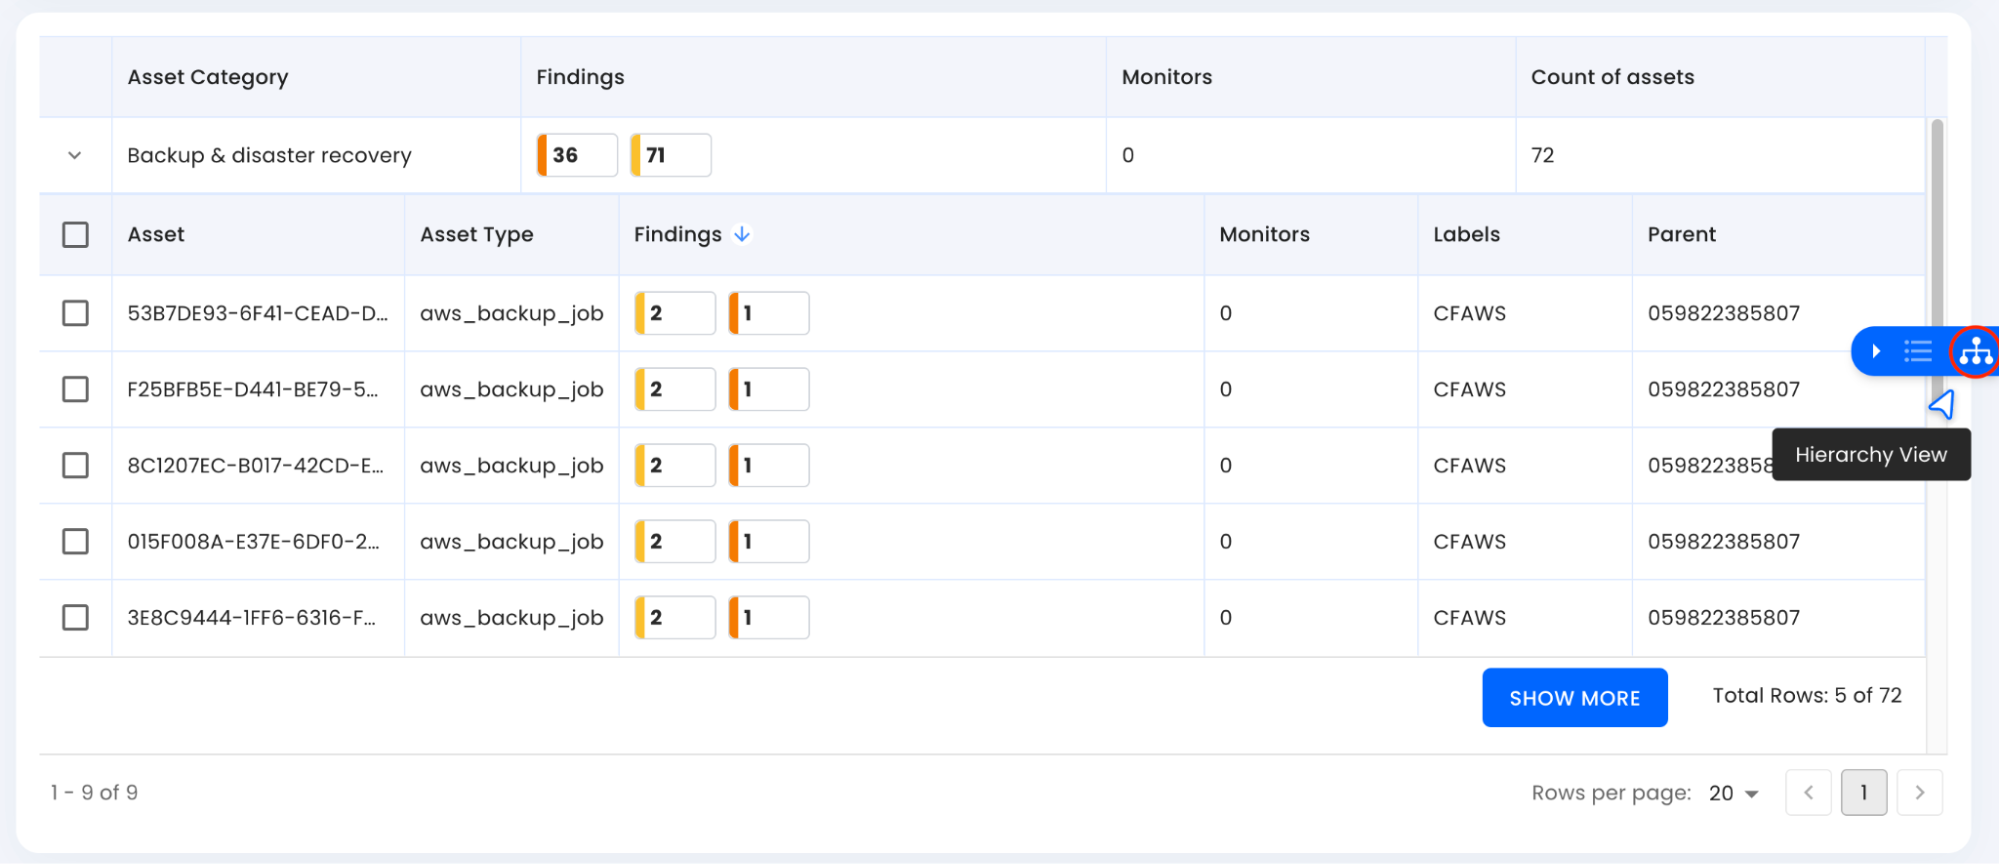
The second perspective is the hierarchy view, which can be accessed by clicking on the blue button on the right side of the screen.
The hierarchical perspective provides users with a different view of their onboarded assets, giving versatility and options that satisfy their needs.
Step 4: Using Dashboard Widgets
Widgets on the main dashboard are another opportunity to get useful insights about assets. Asset findings will be listed along with a graphical view of asset findings that can be explored further.
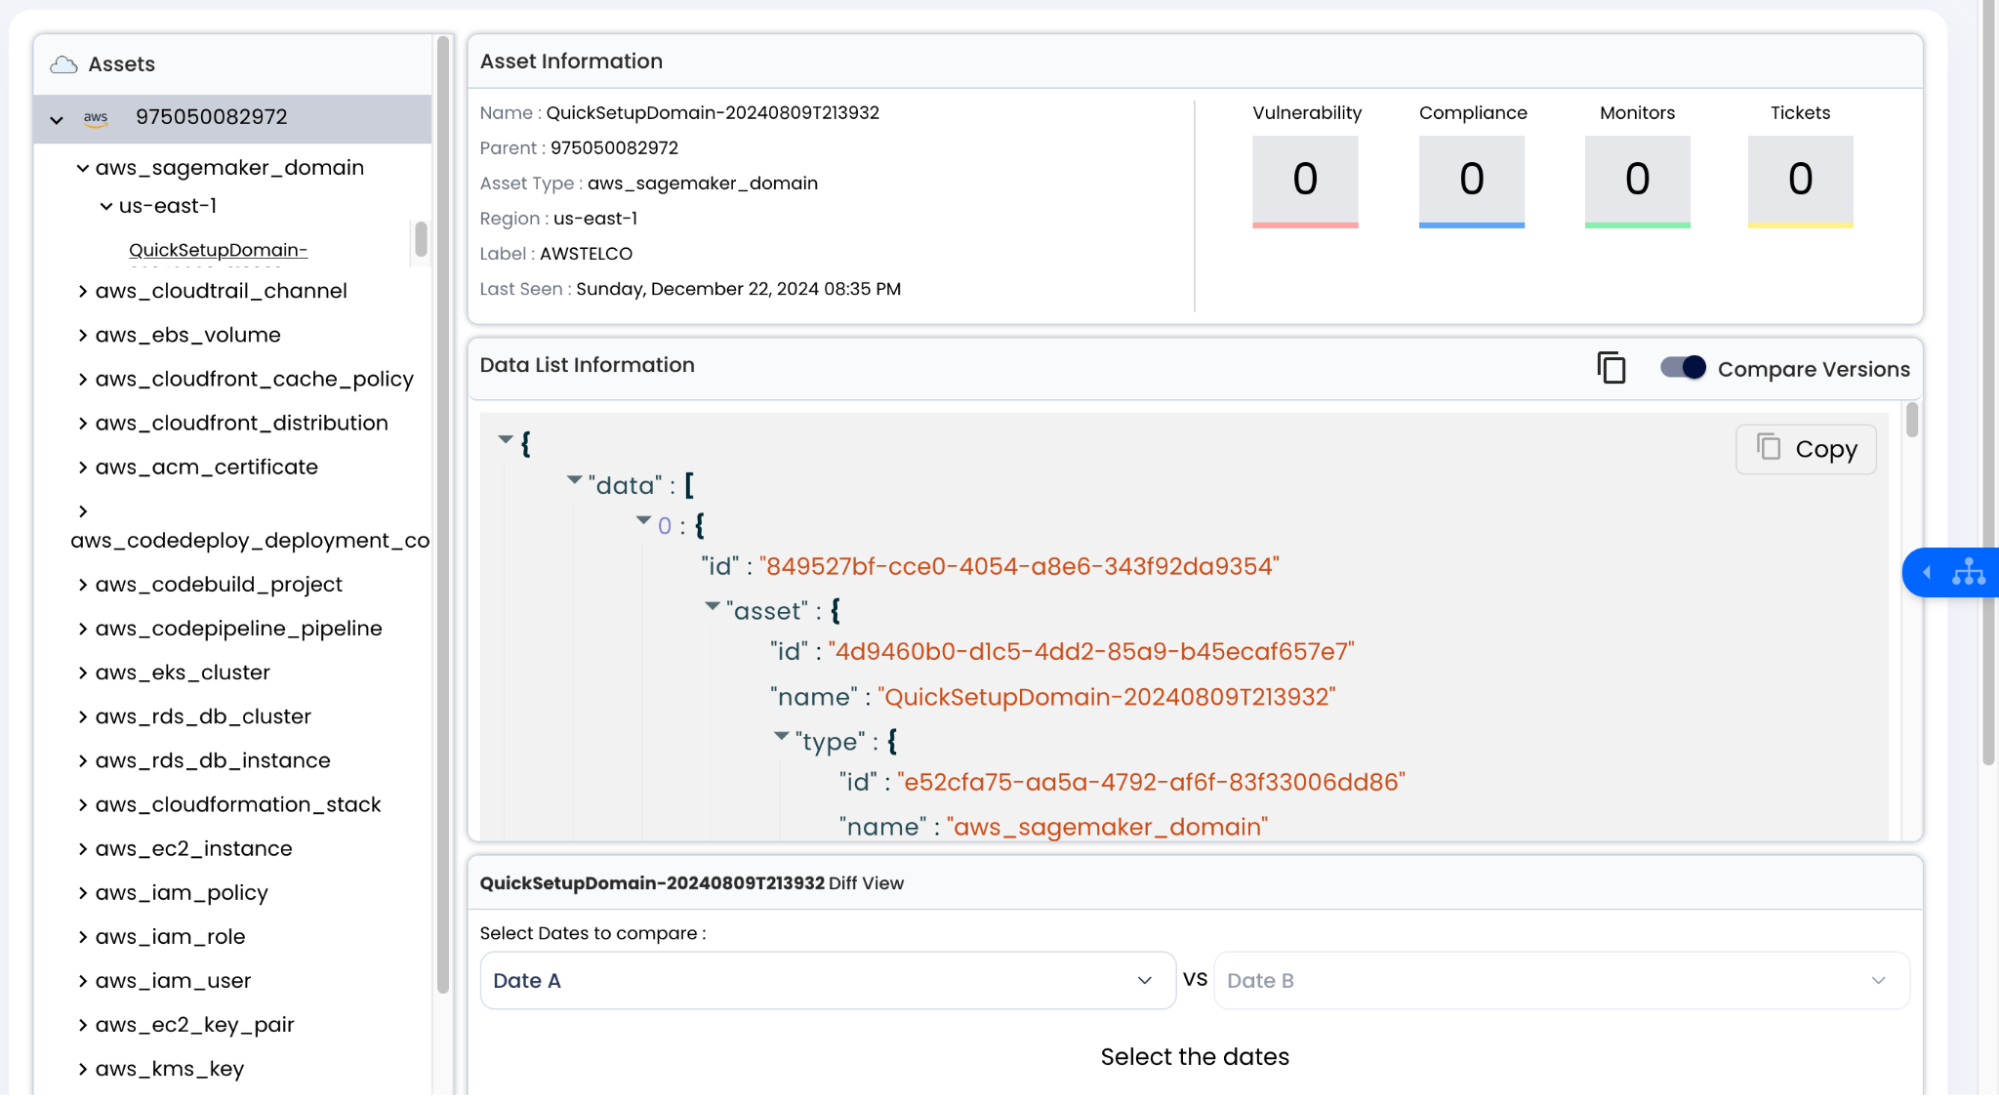
🔍 Step 5: Asset Details
When the user clicks one of the assets from the list, they will get detailed information such as:
- Asset name
- Asset type
- Vulnerability findings associated with the asset
- Vulnerability name
- Message
- Risk factor
- Description
- When the vulnerability was scanned
- Cloud account
- Cloud Type
- Asset location
- Associated compliance
- Status of the finding
- Asset label
- A boolean to indicate if the vulnerability should be ignored or not
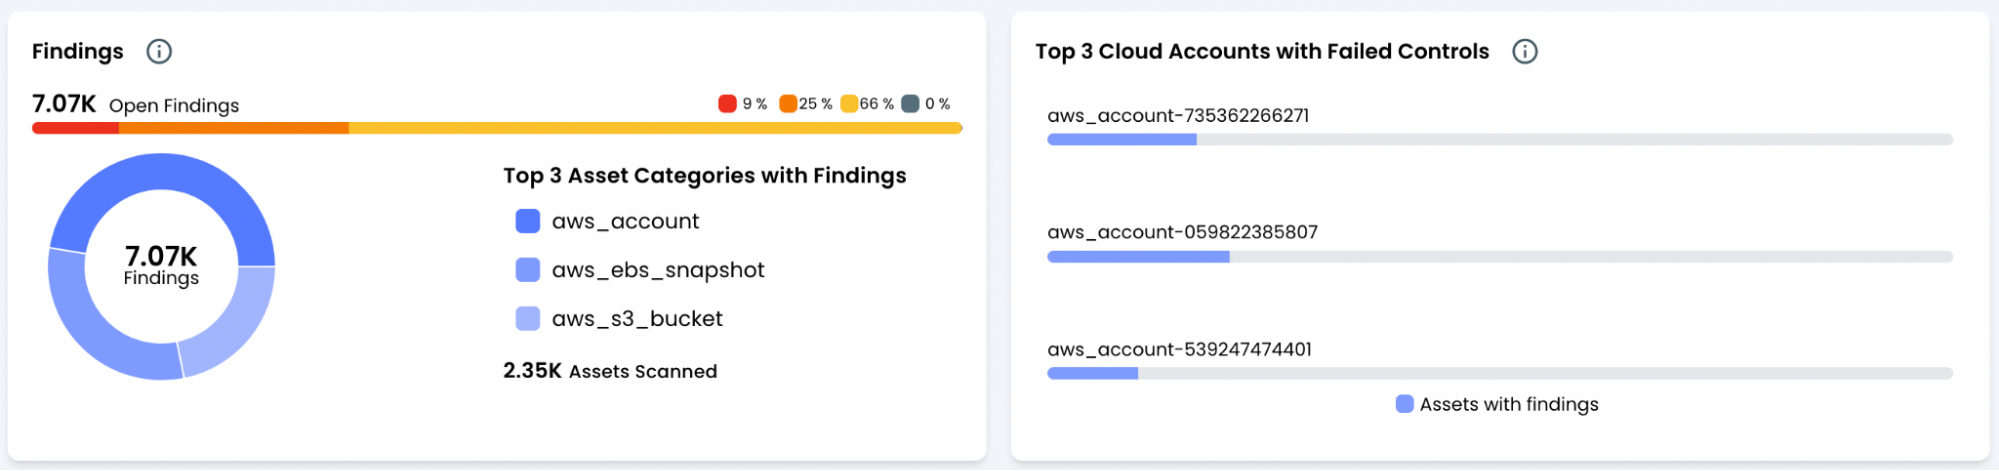
AccuKnox SaaS provides the vulnerability findings that have passed or failed the baseline compliance set for the cloud account.
See How Assets and Findings Connect
The Security Graph tab draws the relationships between assets and findings, so you can read the blast radius of one compromised node. You can open it from two places:
- Asset graph: Go to Inventory → Cloud Assets, open an asset, then select Security Graph. The graph centers on that asset and shows related assets and their findings.
- Findings graph: Go to Issues → Findings, open a finding, then select Security Graph. The graph shows which other assets carry the same finding.
Security Graph is on by default and covers cloud findings on AWS, Azure, and GCP. Run a scan first, because the graph is built from scan data. See Security Graph.