How to Configure Custom Reports
NOTE
For this feature to be enabled, contact the Support team at support@accuknox.com with your custom reporting requirements. The AccuKnox Support team will configure the report template from the backend. After that, you can generate on-demand reports or configure scheduled reports.
To generate an on-demand or scheduled report, users must follow the steps below.
On-demand custom Report generation
Step 1: Navigate to Reports → Custom Reports.
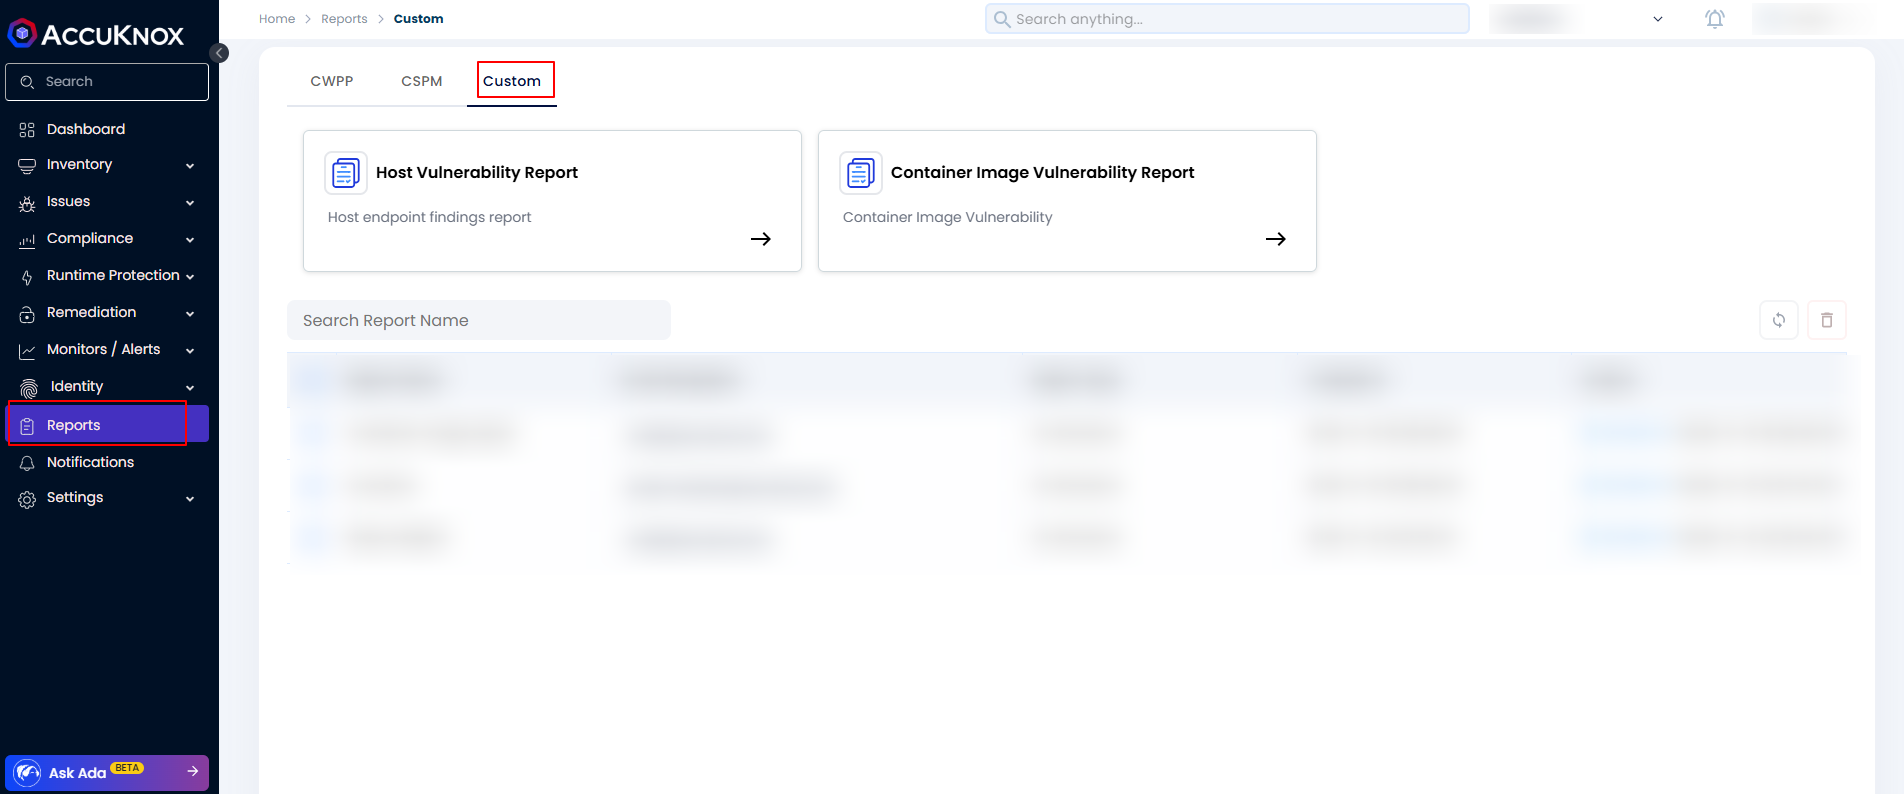
Step 2: Select the report you want to configure from the list of customized reports shown in the UI.
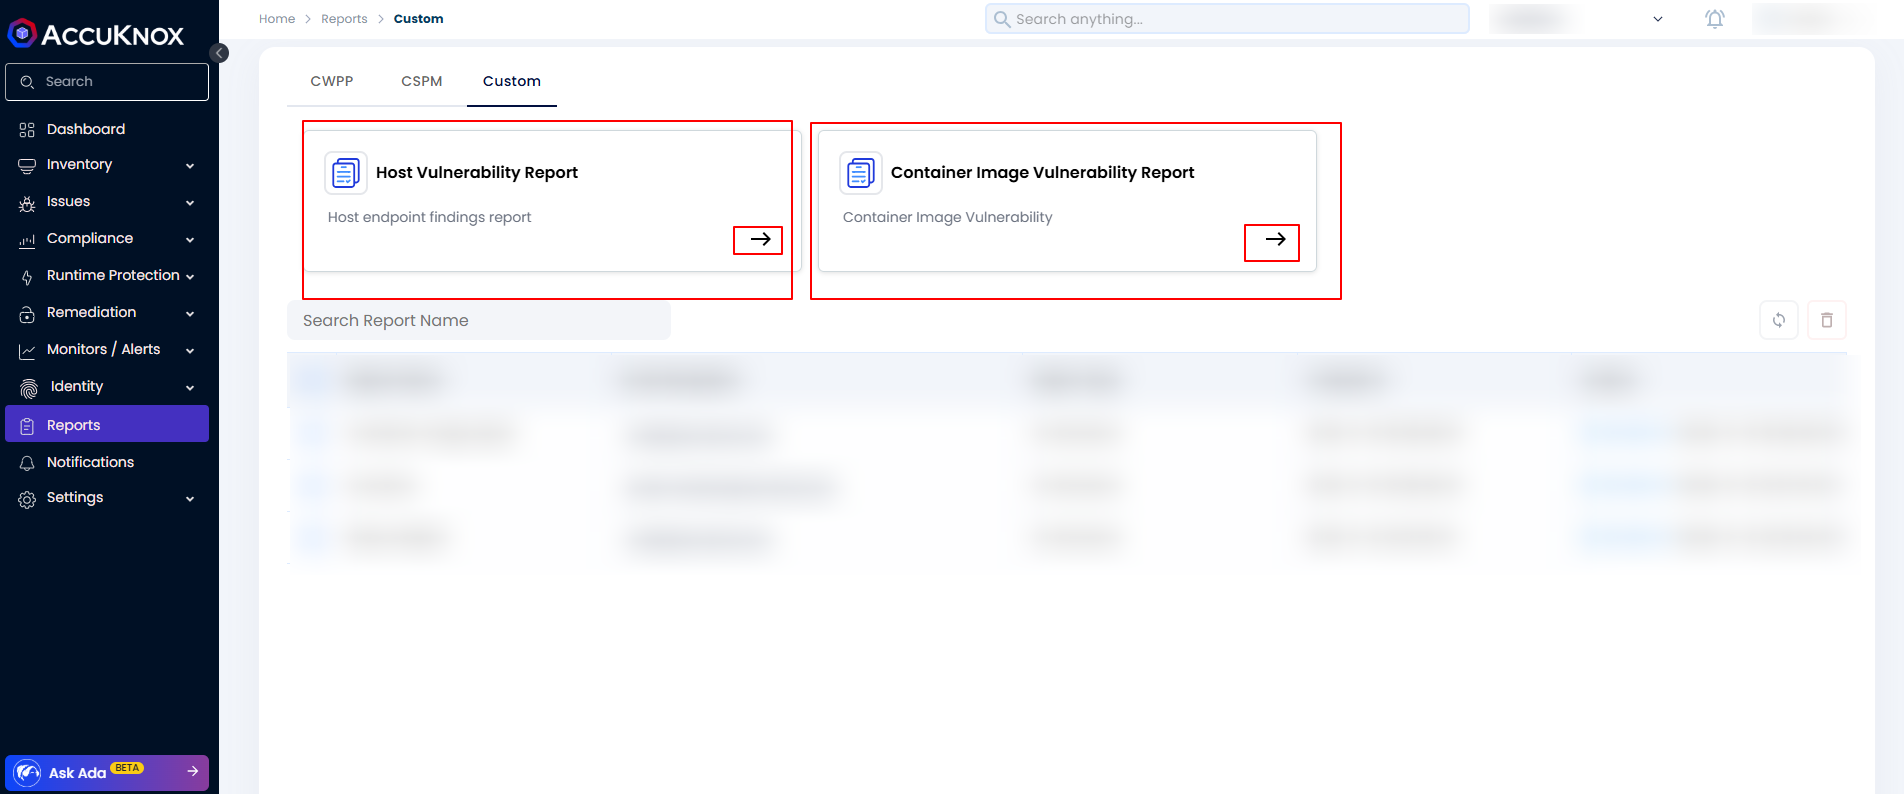
Step 3: Choose to generate the report on-demand or schedule it. For an on-demand report, fill in the following fields: report name, email address to send the report to, and the duration (selectable from the dropdown). Once these fields are filled, the Save button will be enabled.

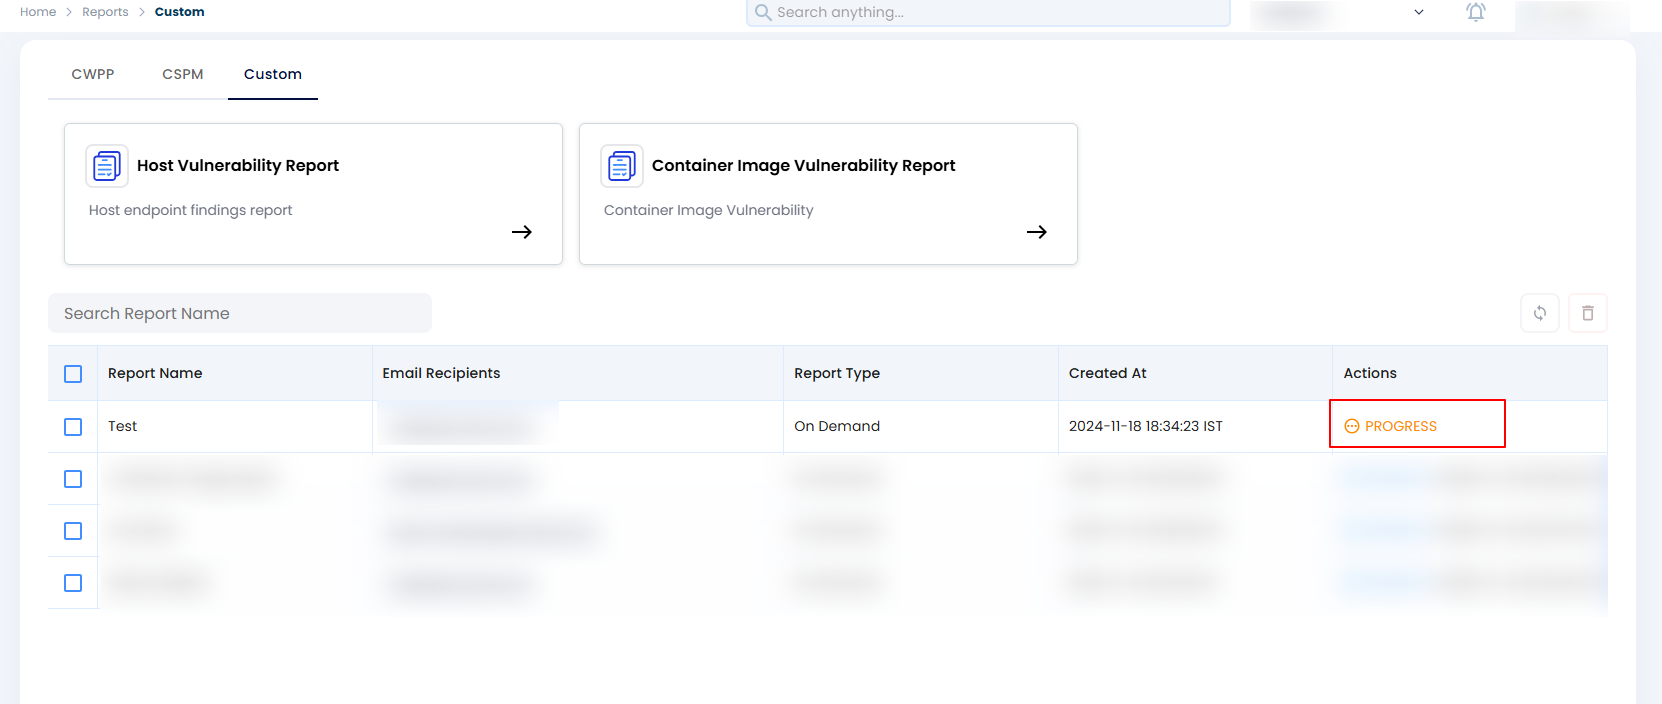
Step 4: Once the on-demand report is saved, it appears in the UI with its current progress state.
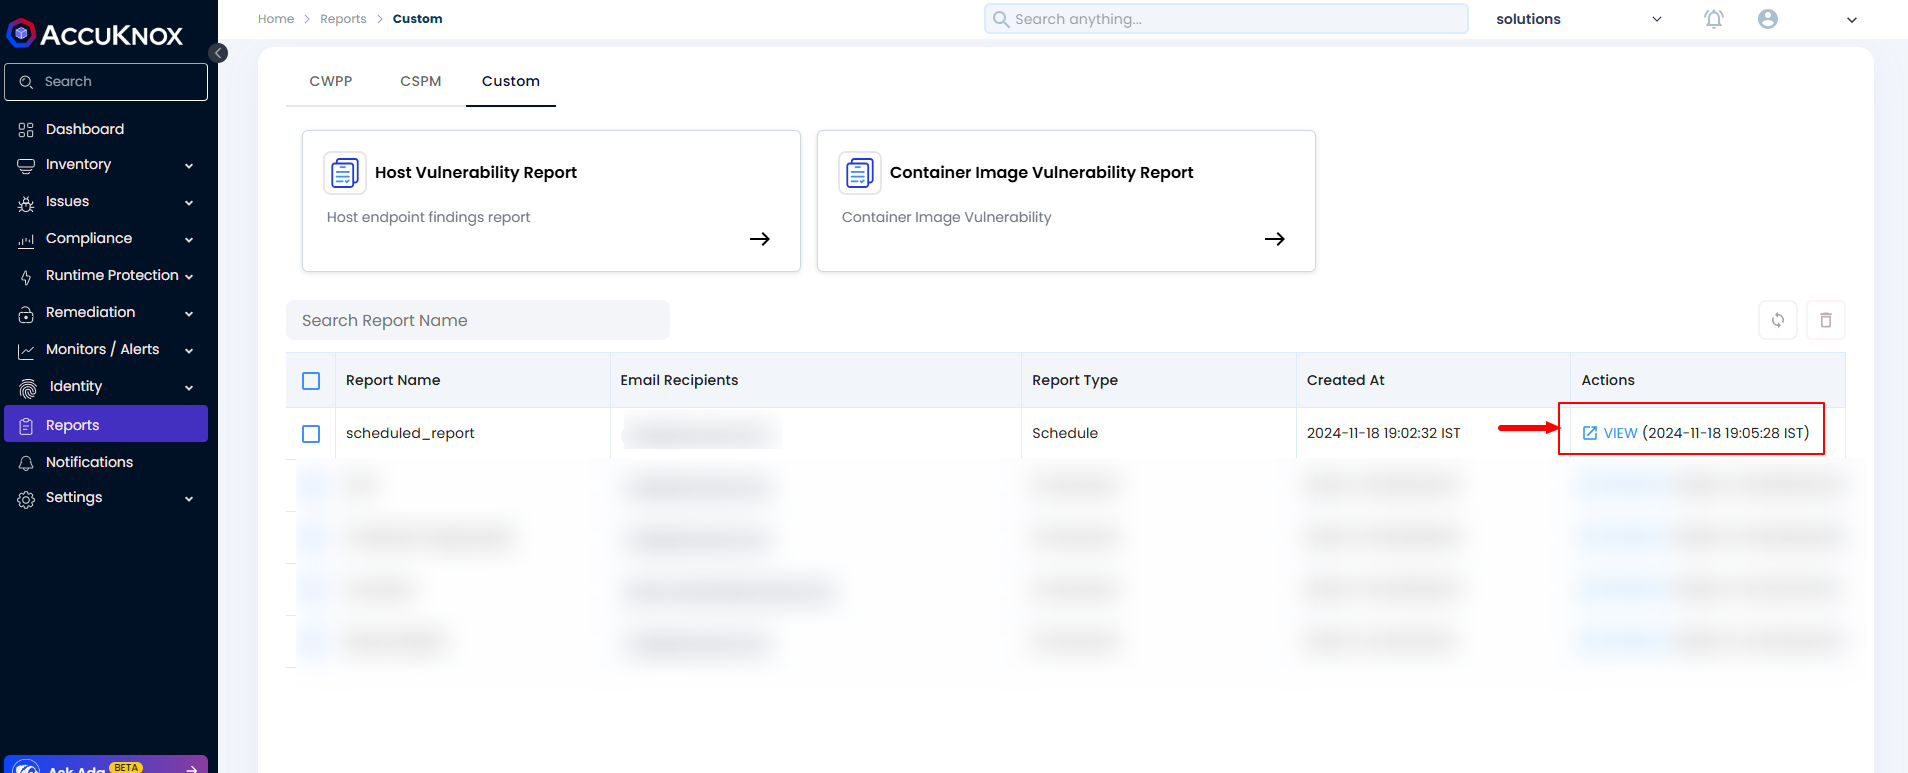
Step 5: After report generation completes, you can see the Generate option in the UI, and the report will be sent to the specified email address. Click Generate report to view it directly in the UI.
Scheduling Custom Report
Step 1: Navigate to Reports → Custom Reports.
Step 2: Select the report you want to configure from the list of customized reports.
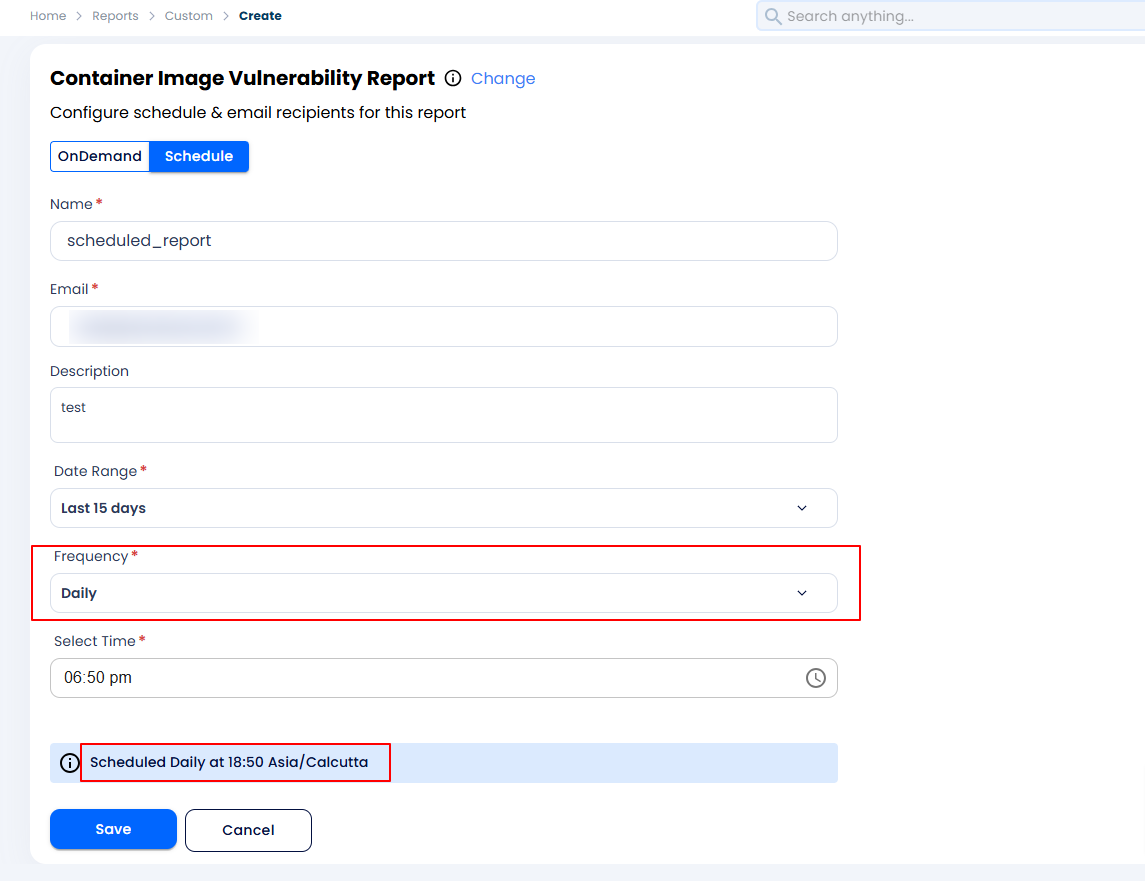
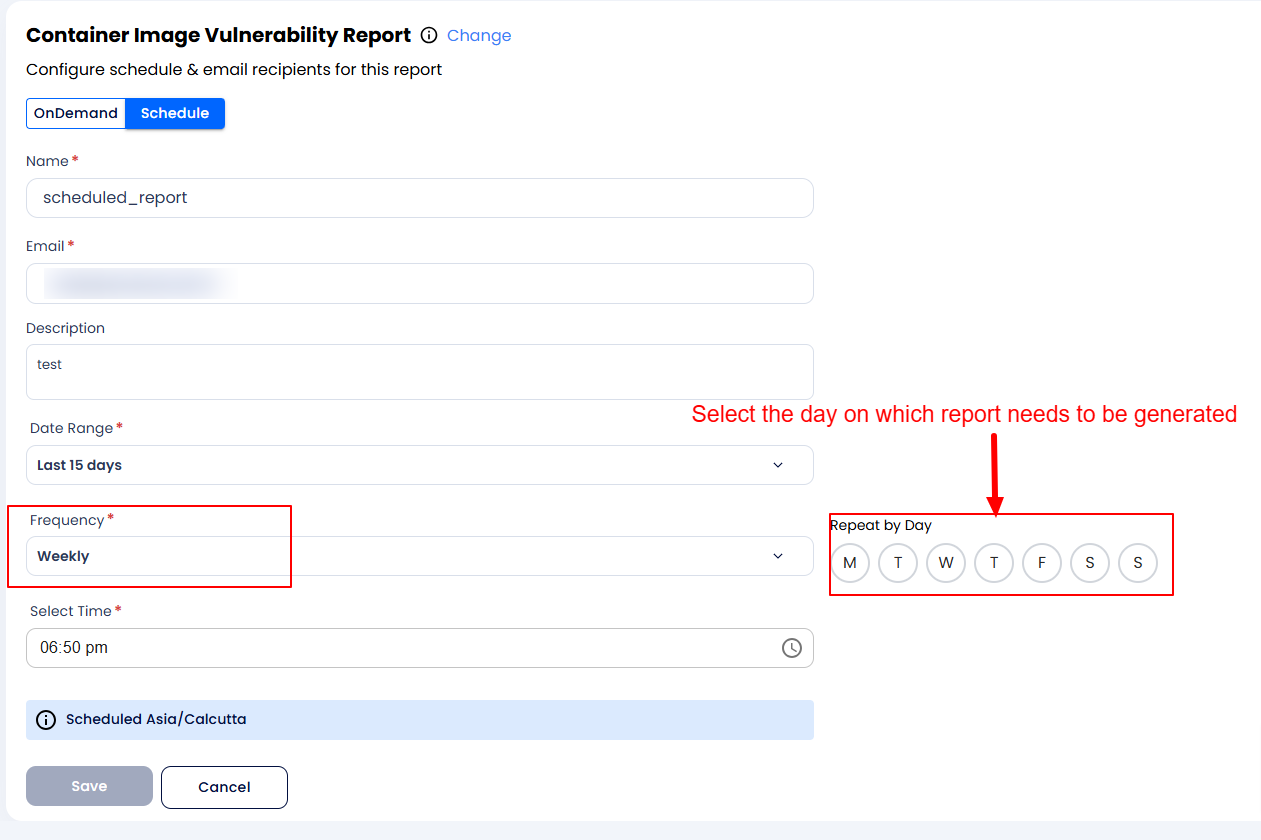
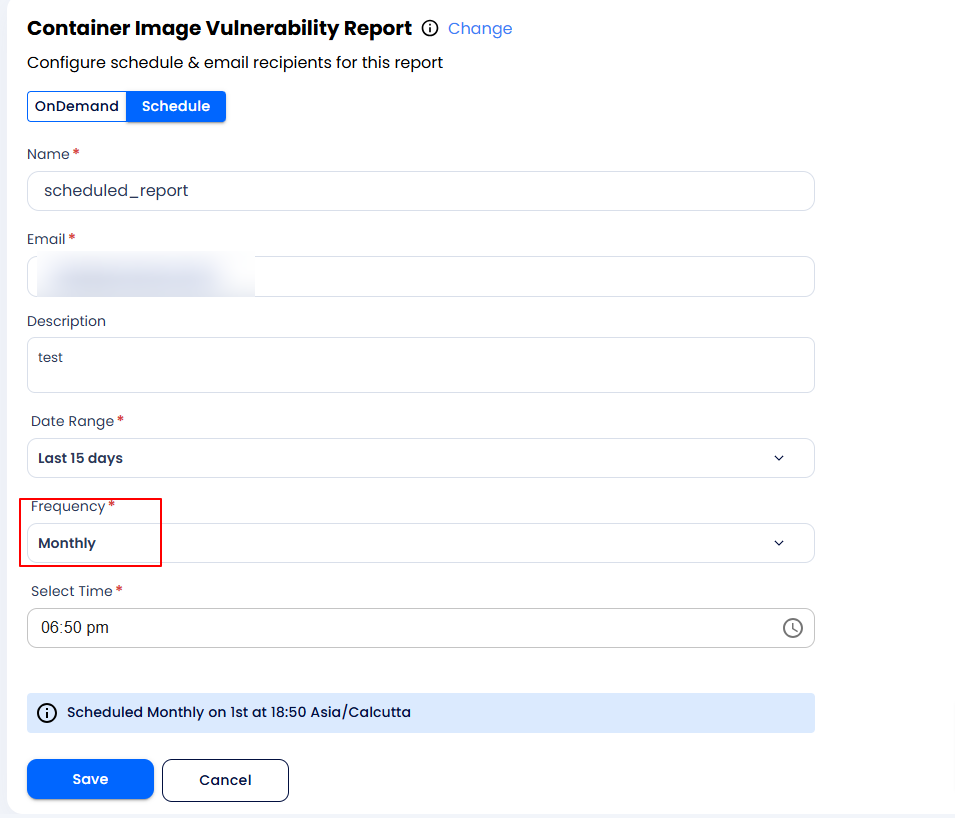
Step 3: Choose to configure the report as a scheduled report or generate it on-demand. To schedule a custom report, fill in the name, duration, and scheduling frequency. AccuKnox provides three scheduling frequency options:
-
Daily Report: users can select the frequency as daily to receive the report every day at the configured time.
-
Weekly: Users can also schedule the report weekly and select the day on a week when the report needs to be generated.
-
Monthly: Users can also configure the report duration as monthly where they will be getting the report on the 1st of every month. It will soon be configurable as the user-defined date as well.
Step 4: Once the report generation is completed you can see the View option in the UI as well as the report will be mailed to the email address. If the user wants to see the report in the UI they can click on the View.