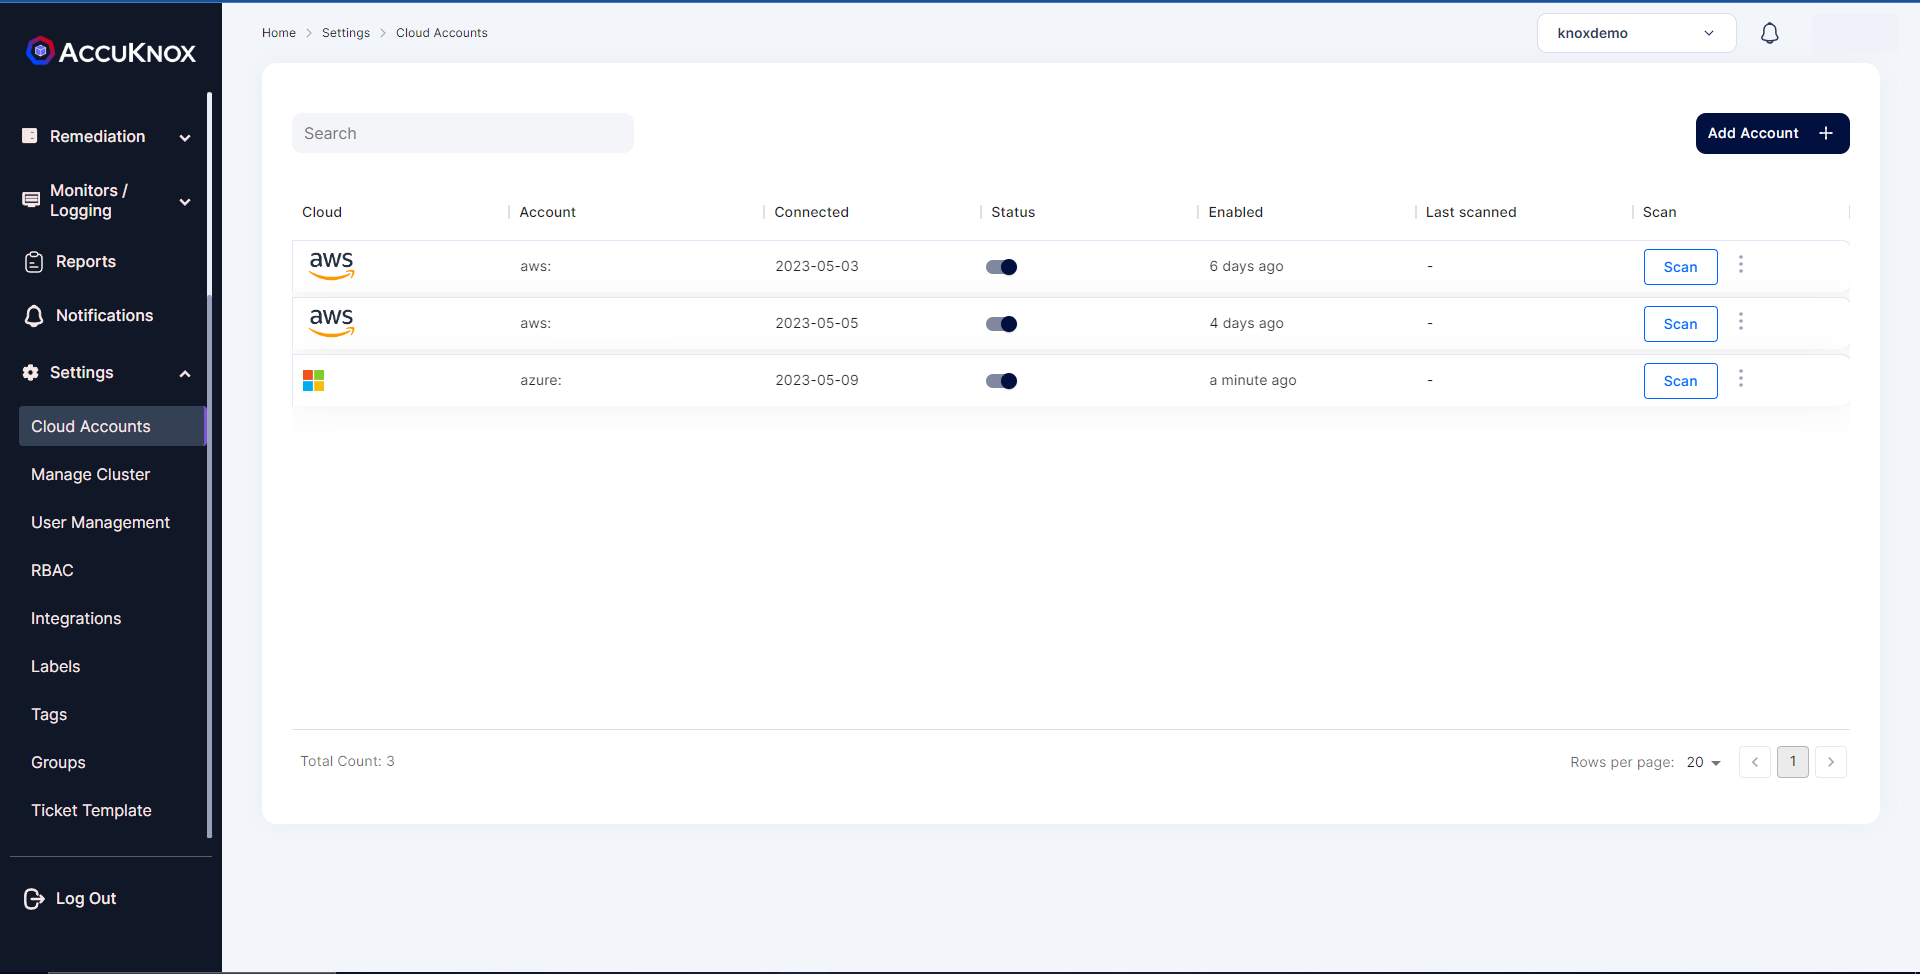
Azure AI/ML Cloud Onboarding
In this section we can find the steps to onboard an Azure cloud account to the AccuKnox SaaS platform.
What cloud onboarding enables
Follow the steps on this page to enable Shadow AI Discovery for your Azure account. Onboarding turns on these AI Security features:
- Model and Data Security
- Shadow AI Discovery
- Prompt Firewall for Cloud Assets
Rapid Onboarding (via Azure)
For Azure Onboarding it is required to register an App and grant Security read access to that App from the Azure portal.
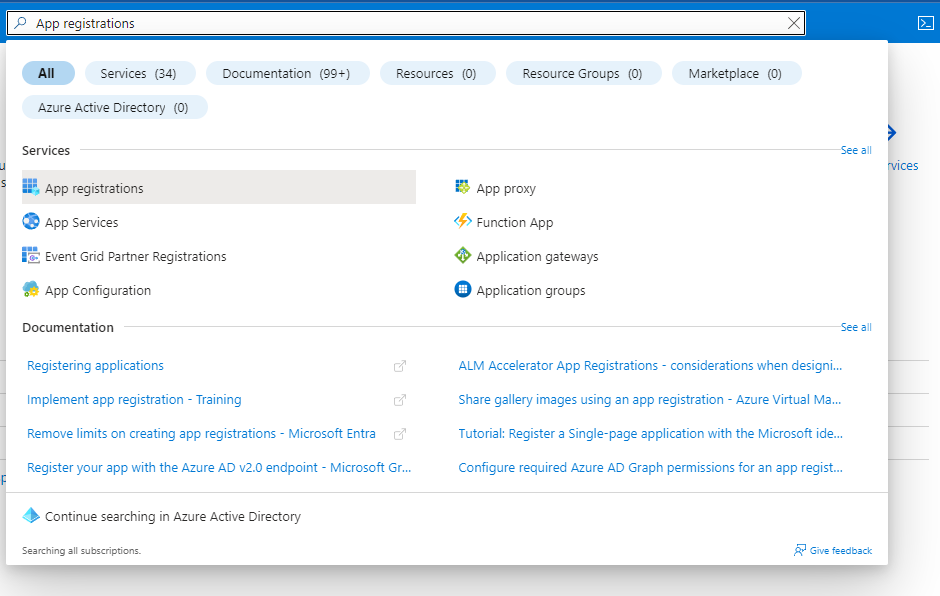
Step 1: Go to your Azure Portal and search for App registrations and open it
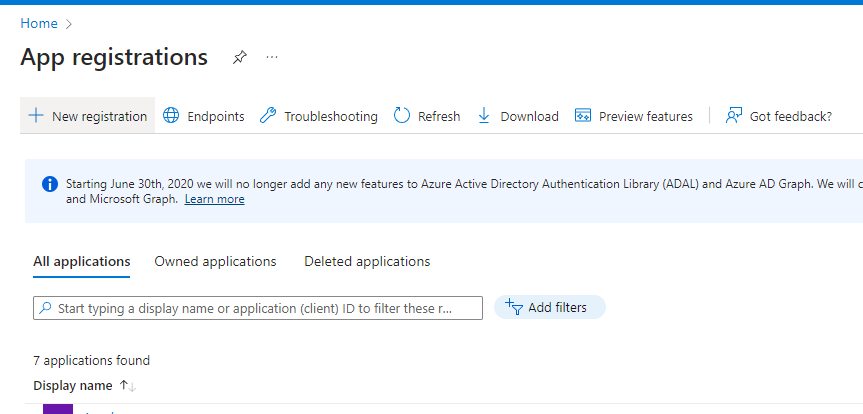
Step 2: Here click on New registration
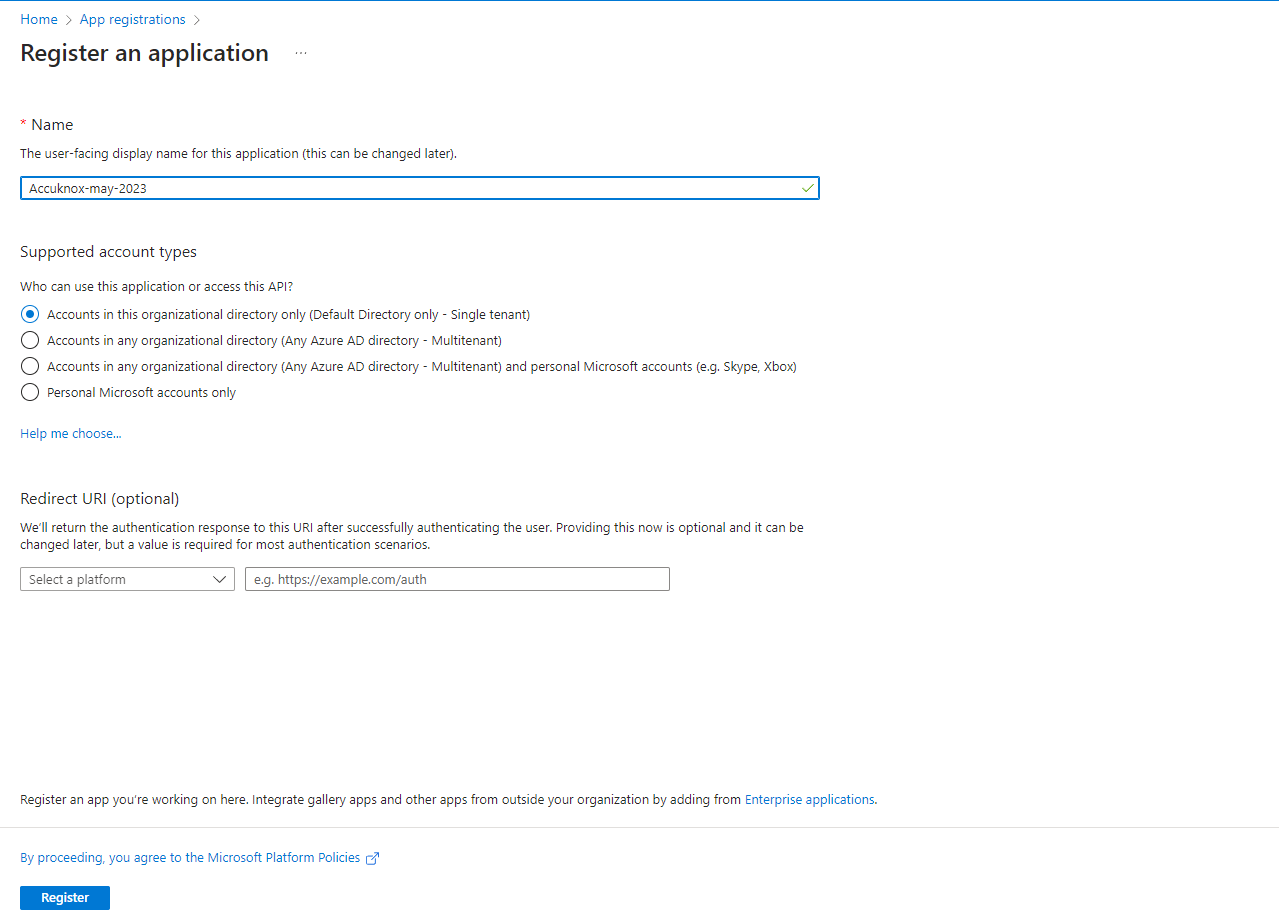
Step 3: Give your application a name, remember this name as it will be used again later, For the rest keep the default settings
Step 4: Now your application is created. Save the Application ID and Directory ID as they will be needed for onboarding on AccuKnox SaaS, then click on 'Add a certificate or secret'
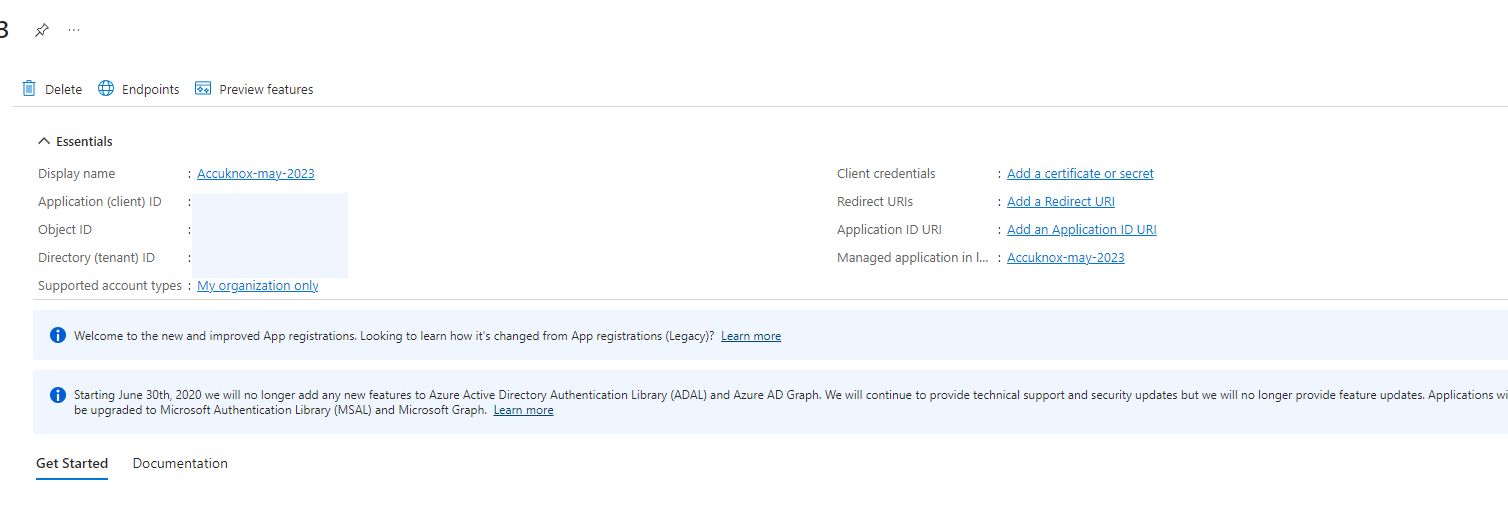
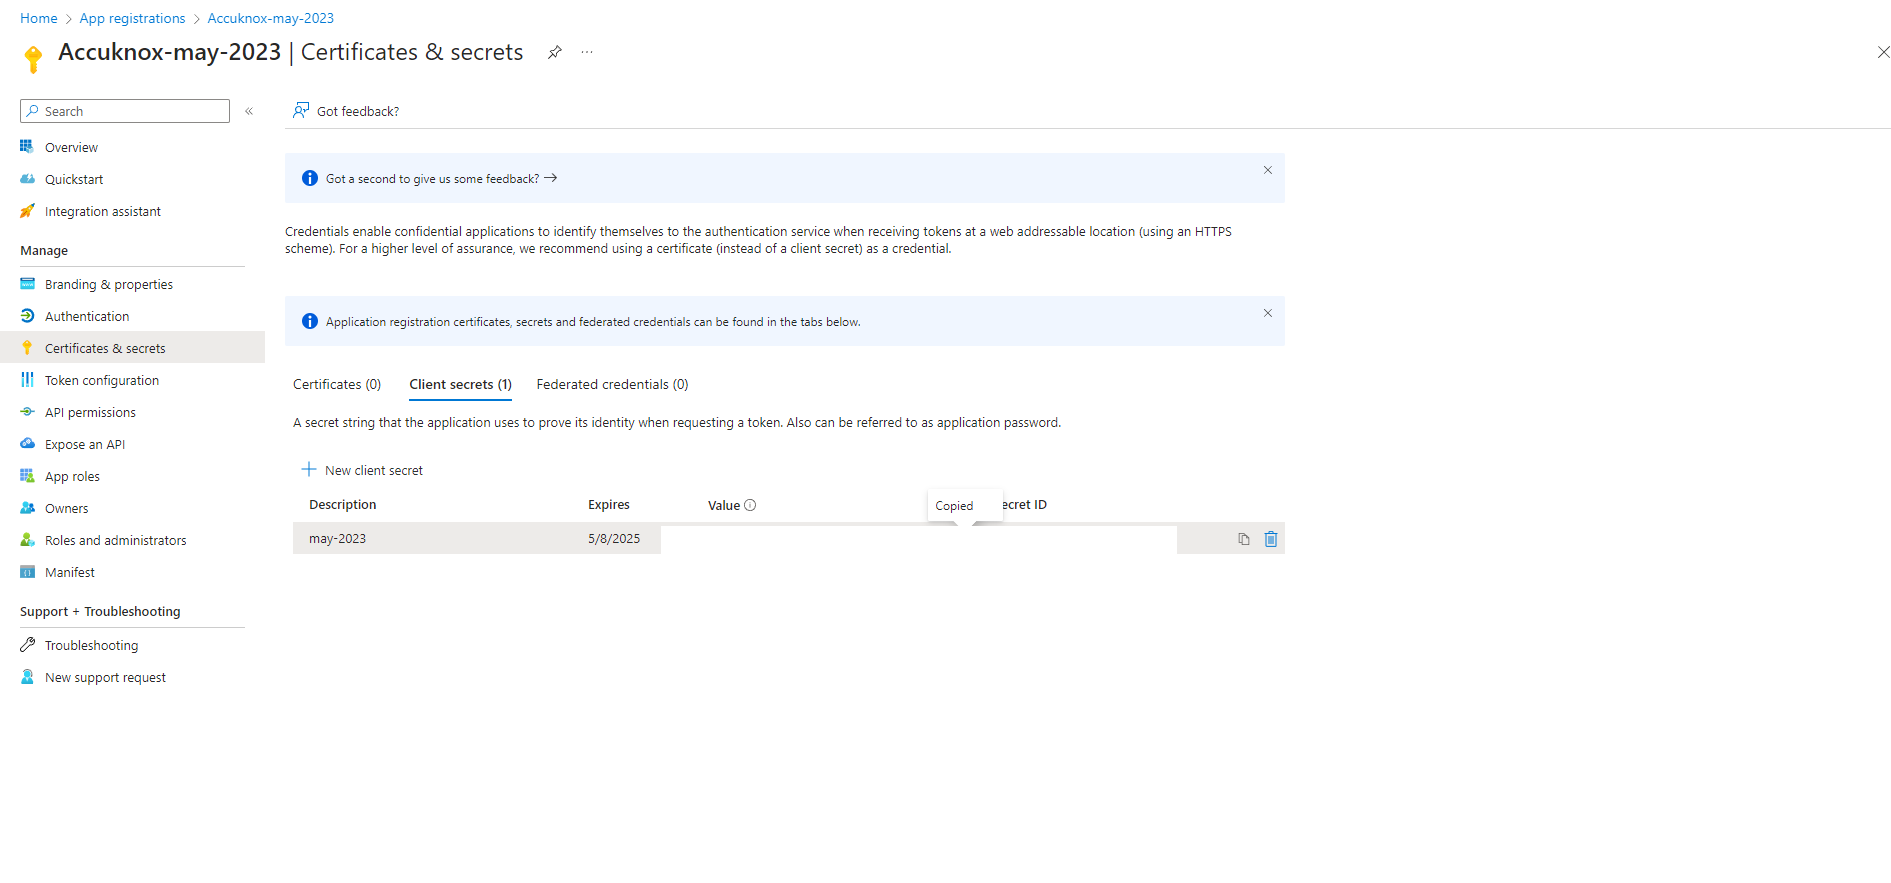
Step 5: Click on new client secret and enter the name and expiration date to get secret id and secret value, save this secret value as this will also be needed for onboarding.
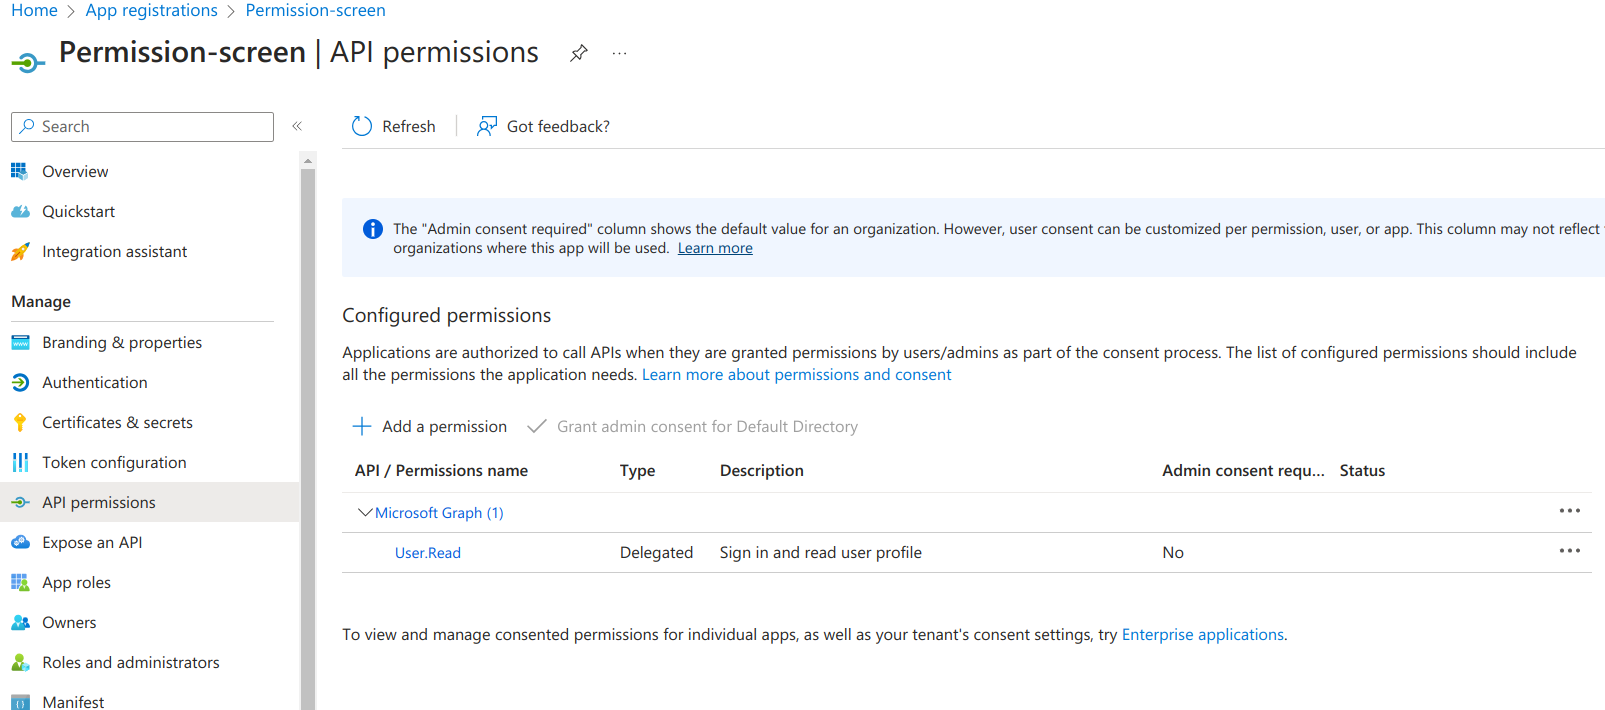
Step 6: Next, go to API permissions tab and click on 'Add permission'
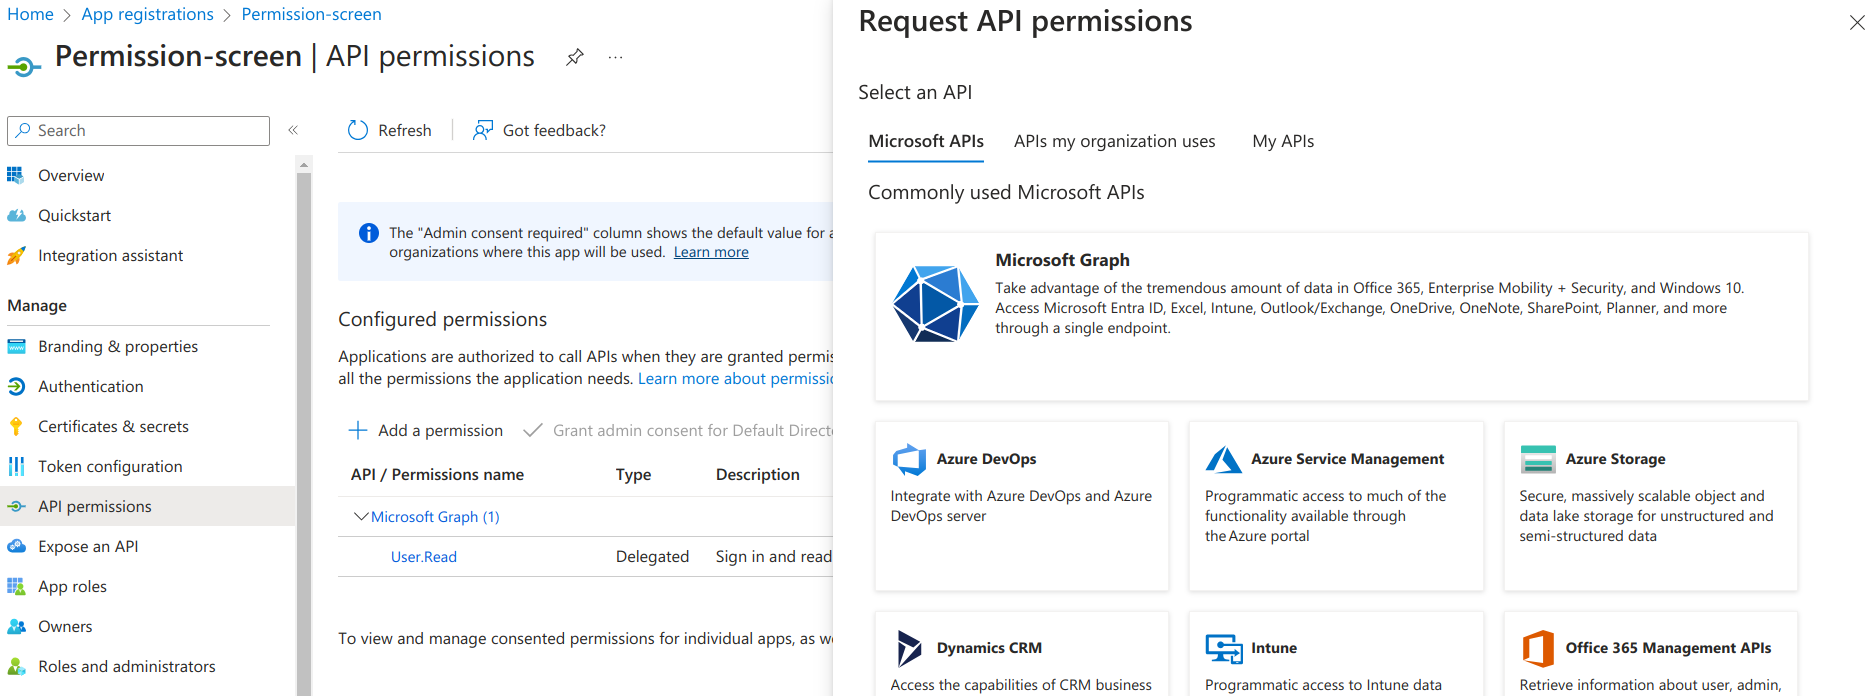
Step 7: On the screen that appears, click on 'Microsoft Graph'
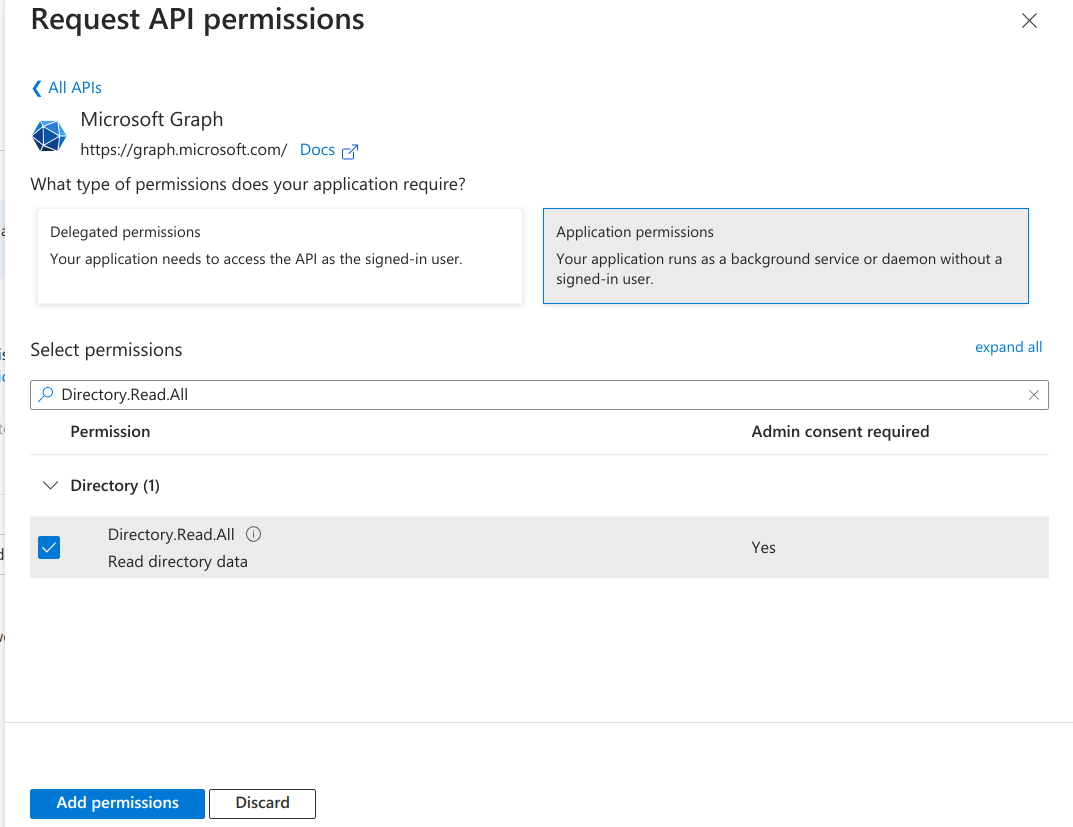
Step 8: Select Application Permissions and add each of the following permissions:
Directory.Read.AllAuditLogsQuery-CRM.Read.All
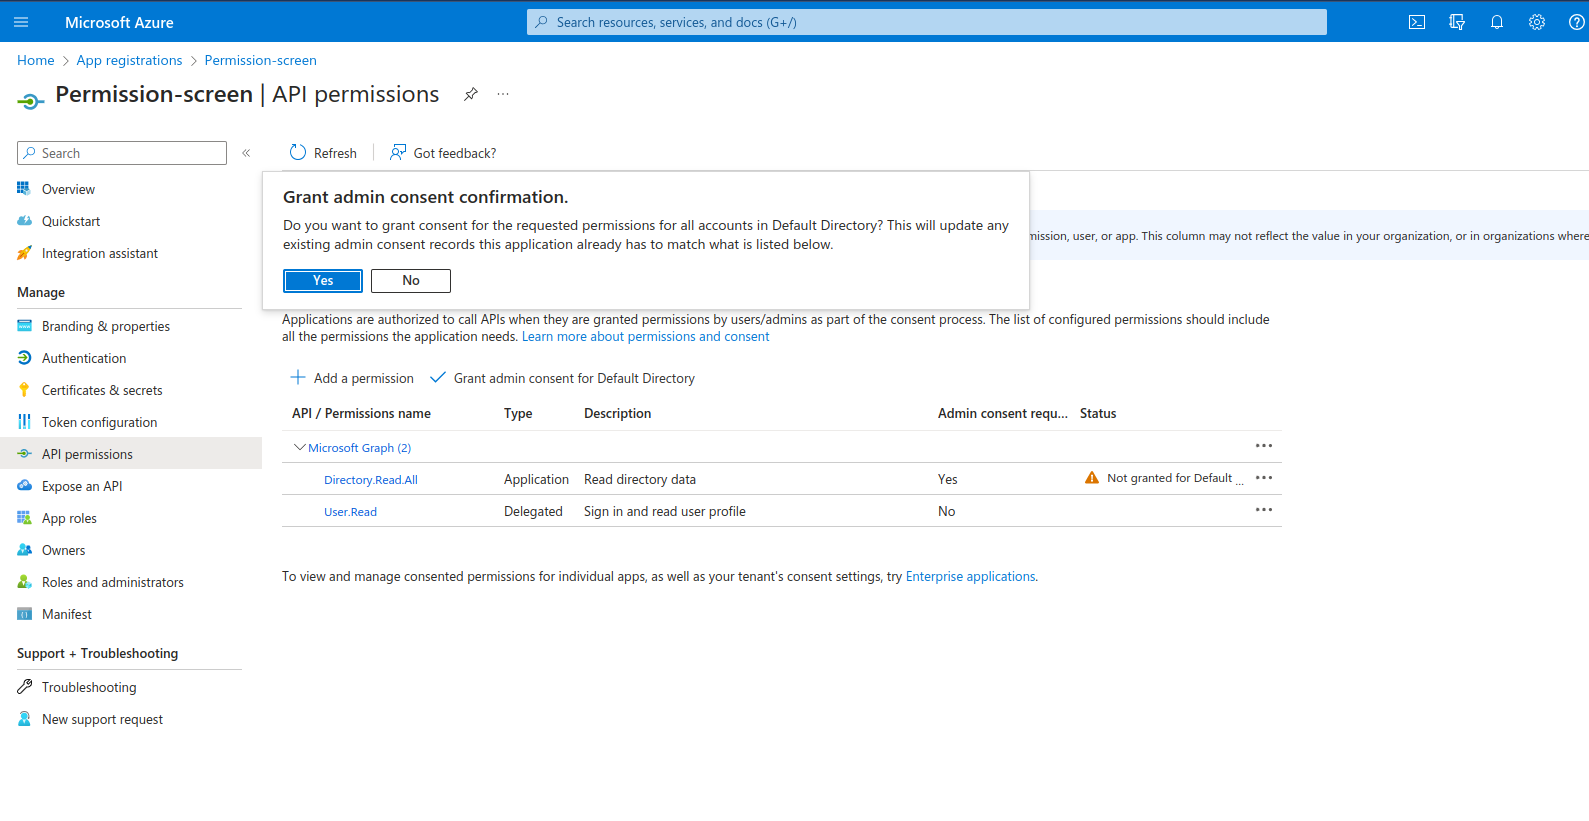
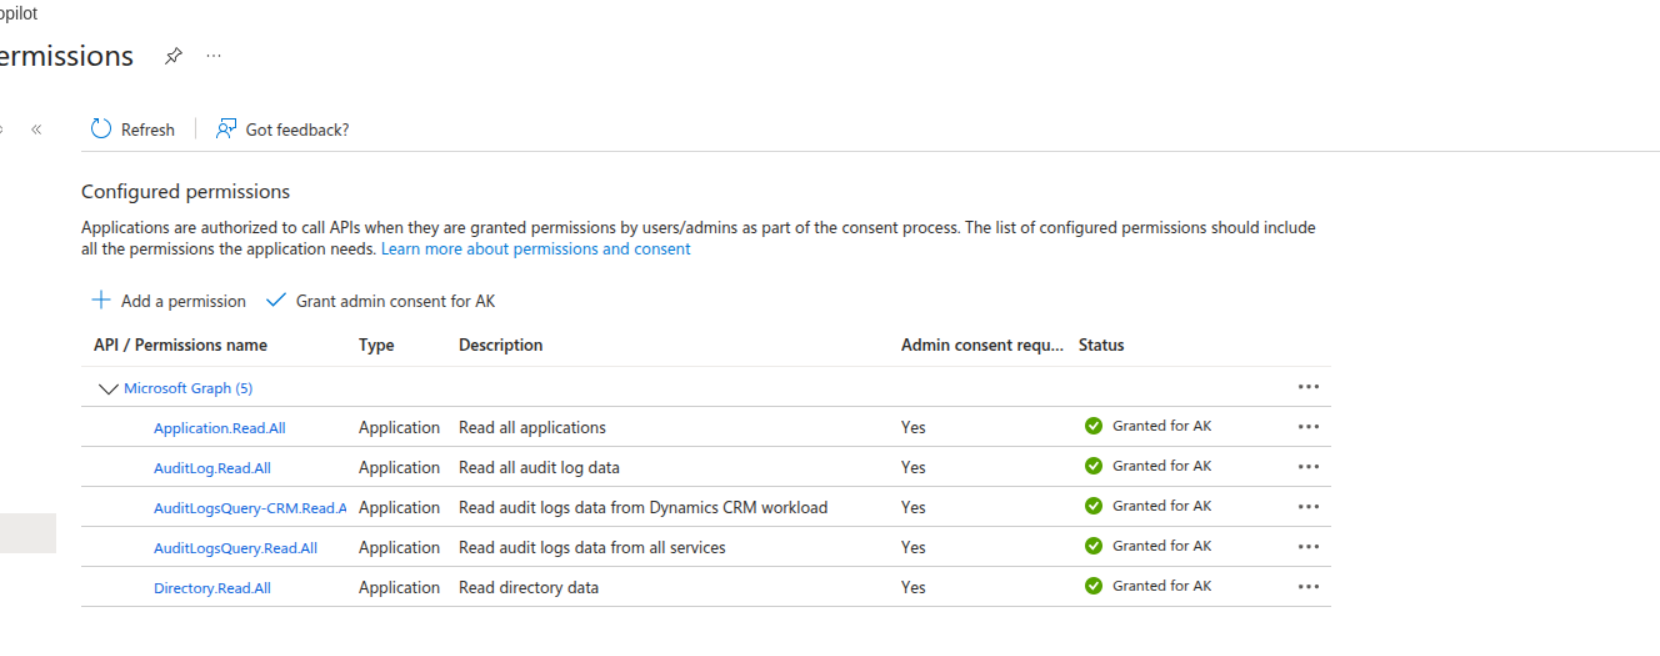
Step 9: Select ‘Grant Admin Consent’ for Default Directory and click on ‘Yes’. Confirm all permissions show a Granted status.
Step 10: Now we need to give Security read permissions to this registered Application , to do that go to subscriptions
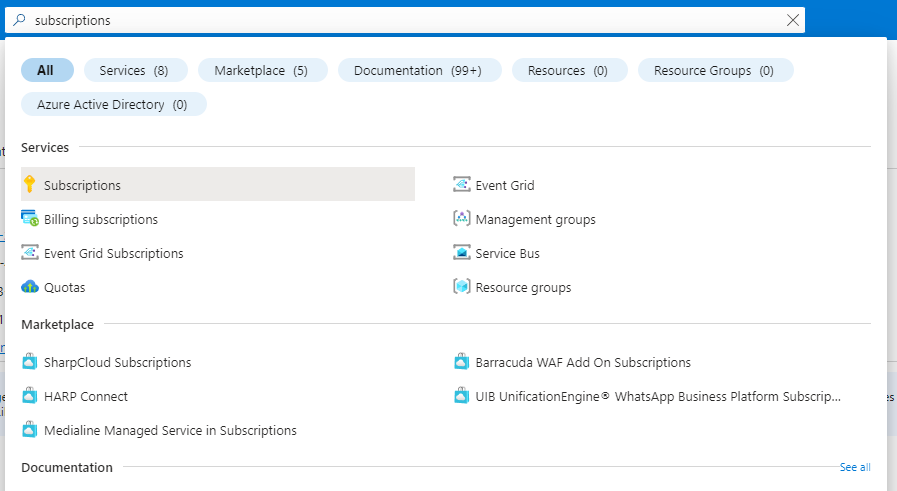
Step 11: First save the subscription ID and click on the subscription name , here it is “Microsoft Azure Sponsorship“
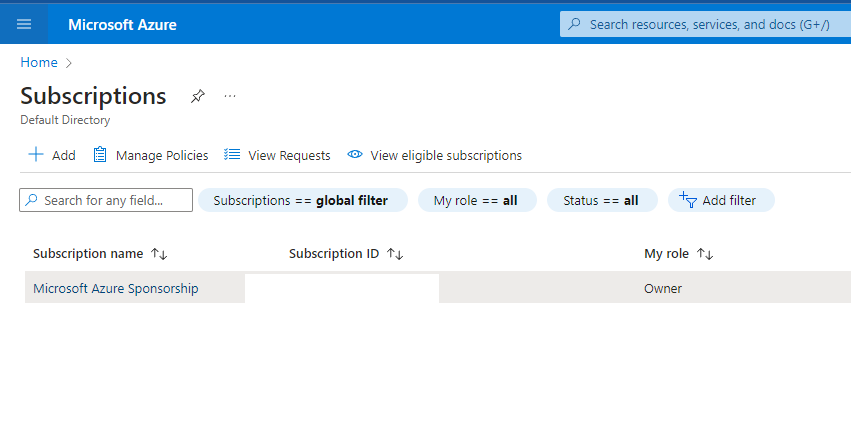
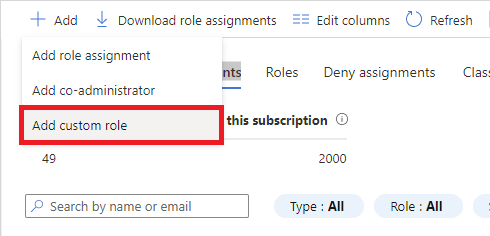
Step 12: Navigate to Access control(IAM) and go to Roles , here select Add > Add Custom Role
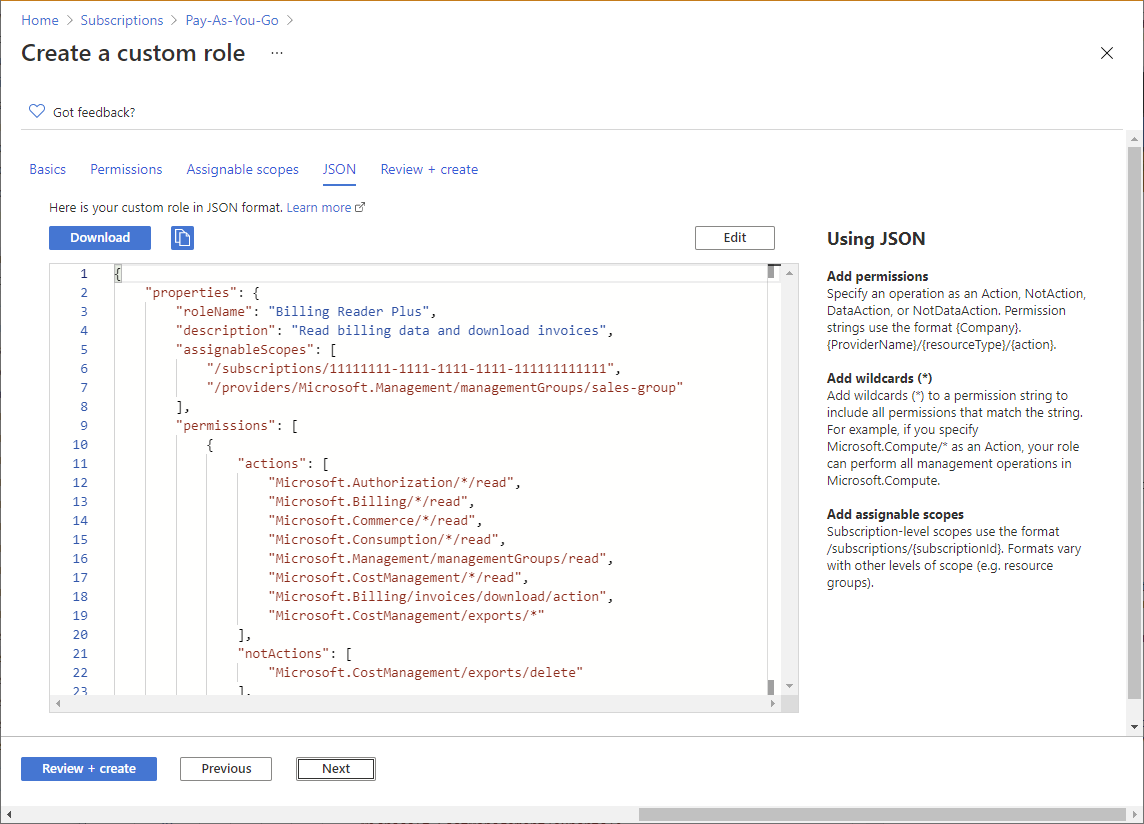
Create a custom role with the following JSON. Paste the whole JSON, because the role needs both the actions and the dataActions lists. The Microsoft.MachineLearningServices permissions go under actions, and the Microsoft.CognitiveServices permissions go under dataActions.
{
    "actions": [
        "Microsoft.MachineLearningServices/workspaces/onlineEndpoints/score/action",
        "Microsoft.MachineLearningServices/workspaces/onlineEndpoints/token/action",
        "Microsoft.MachineLearningServices/workspaces/serverlessEndpoints/listKeys/action",
        "Microsoft.MachineLearningServices/workspaces/agents/action"
    ],
    "notActions": [],
    "dataActions": [
        "Microsoft.CognitiveServices/accounts/AIServices/agents/write",
        "Microsoft.CognitiveServices/accounts/MaaS/*/action",
        "Microsoft.CognitiveServices/accounts/OpenAI/assistants/threads/write",
        "Microsoft.CognitiveServices/accounts/OpenAI/deployments/*/action",
        "Microsoft.CognitiveServices/accounts/AIServices/applications/invoke/action",
        "Microsoft.CognitiveServices/accounts/OpenAI/assistants/threads/runs/write",
        "Microsoft.CognitiveServices/accounts/AIServices/evaluations/write",
        "Microsoft.CognitiveServices/accounts/OpenAI/assistants/threads/messages/write"
    ],
    "notDataActions": []
}
It will look similar to this (use the above listed permissions):
What each permission does for AI/ML red teaming
AI/ML red teaming uses these permissions. Each group lets AccuKnox do one task against your Azure AI resources:
| What AccuKnox does | Permissions |
|---|---|
| Access and evaluate Foundry Agents | Microsoft.MachineLearningServices/workspaces/agents/actionMicrosoft.CognitiveServices/accounts/AIServices/agents/write |
| Invoke and score online and serverless model endpoints | Microsoft.MachineLearningServices/workspaces/onlineEndpoints/score/actionMicrosoft.MachineLearningServices/workspaces/onlineEndpoints/token/actionMicrosoft.MachineLearningServices/workspaces/serverlessEndpoints/listKeys/action |
| Invoke AI Services applications and MaaS models | Microsoft.CognitiveServices/accounts/AIServices/applications/invoke/actionMicrosoft.CognitiveServices/accounts/MaaS/*/action |
| Create assistant threads, messages and runs | Microsoft.CognitiveServices/accounts/OpenAI/assistants/threads/writeMicrosoft.CognitiveServices/accounts/OpenAI/assistants/threads/messages/writeMicrosoft.CognitiveServices/accounts/OpenAI/assistants/threads/runs/write |
| Run AI evaluations and validate red team results | Microsoft.CognitiveServices/accounts/AIServices/evaluations/write |
| Perform OpenAI deployment operations | Microsoft.CognitiveServices/accounts/OpenAI/deployments/*/action |
Step 13: Apply the following built-in roles to the registered application: Reader, Storage Blob Data Reader, Cognitive Services Data Reader, and Foundry Agent Consumer.
Foundry Agent Consumer is for AI/ML red teaming. AccuKnox uses this role to access and interact with your Foundry Agents during a red team scan.
For each role:
- Go to Azure Portal → Subscriptions (or Resource Groups) → select your target scope.
- Open Access control (IAM) → click Add > Add role assignment.
-
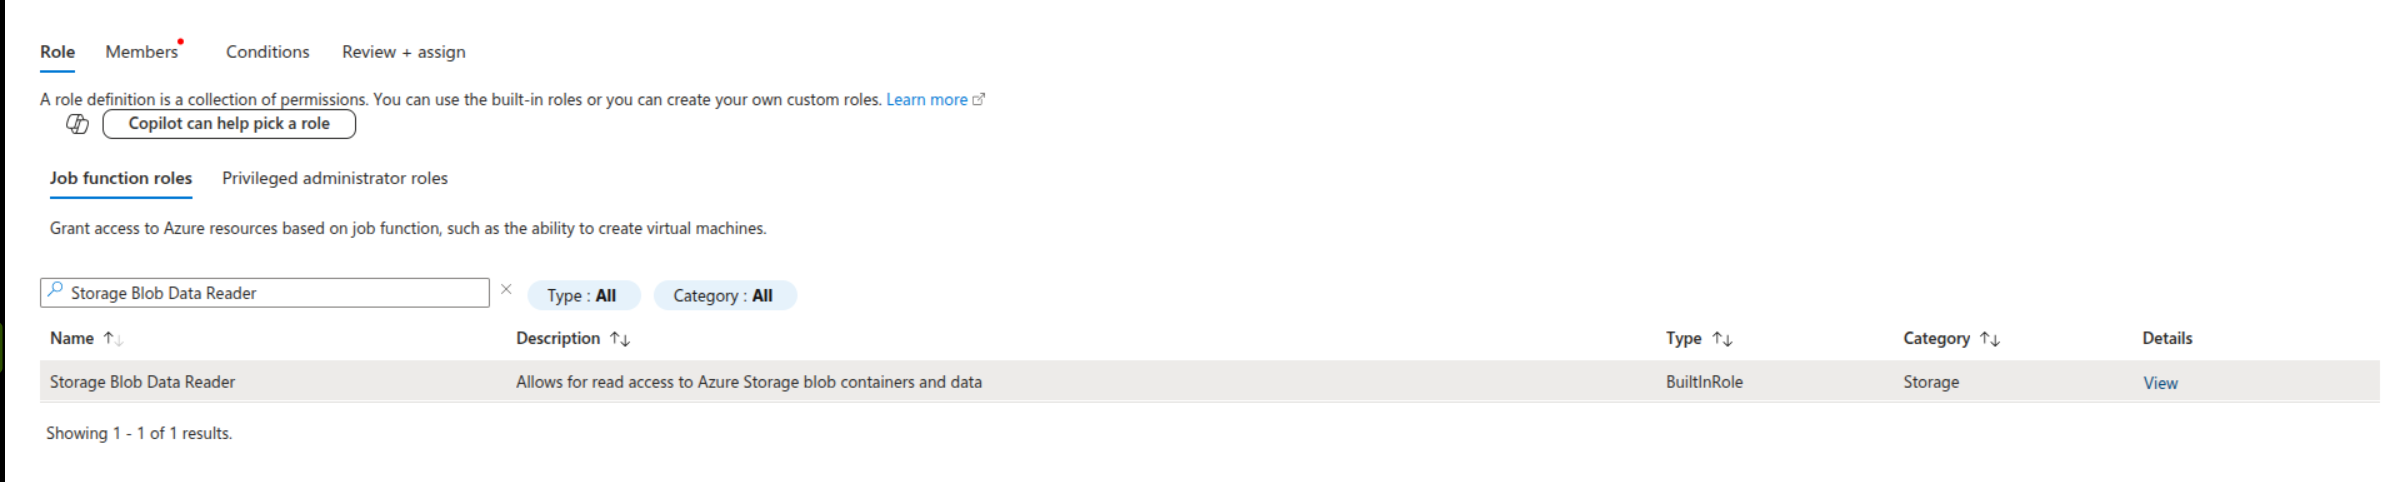
In the Role tab, search for and select the role, then click Next.
Example: selecting the Storage Blob Data Reader role
-
In the Members tab, click Select members and search for the application you registered.
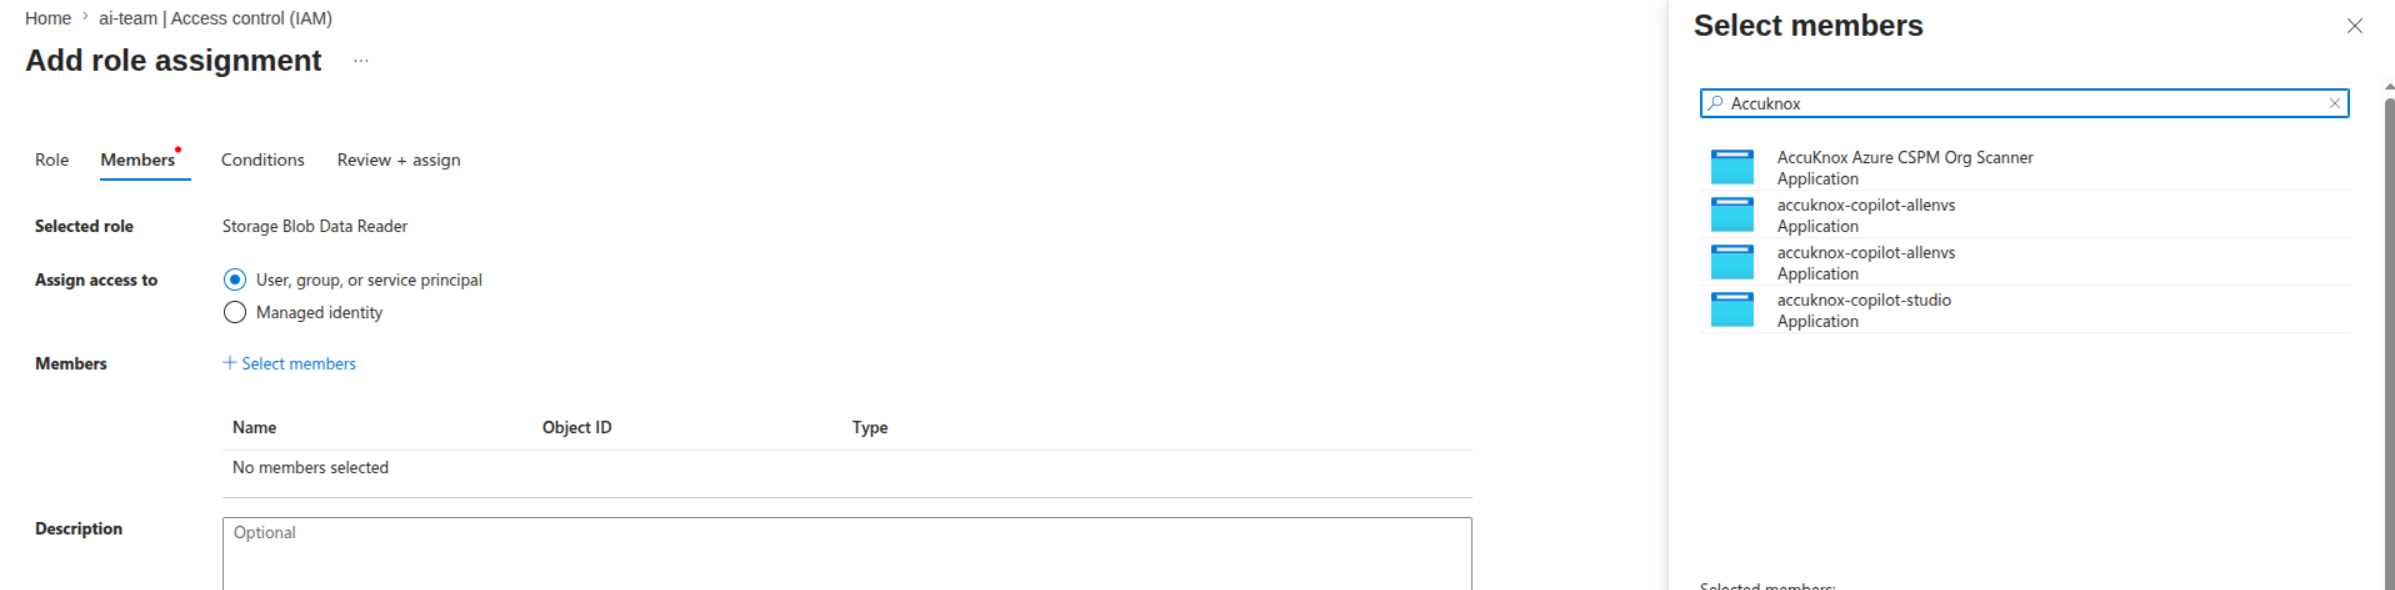
-
Select the application (e.g., AccuKnox Azure CSPM Org Scanner) and click Review + assign.
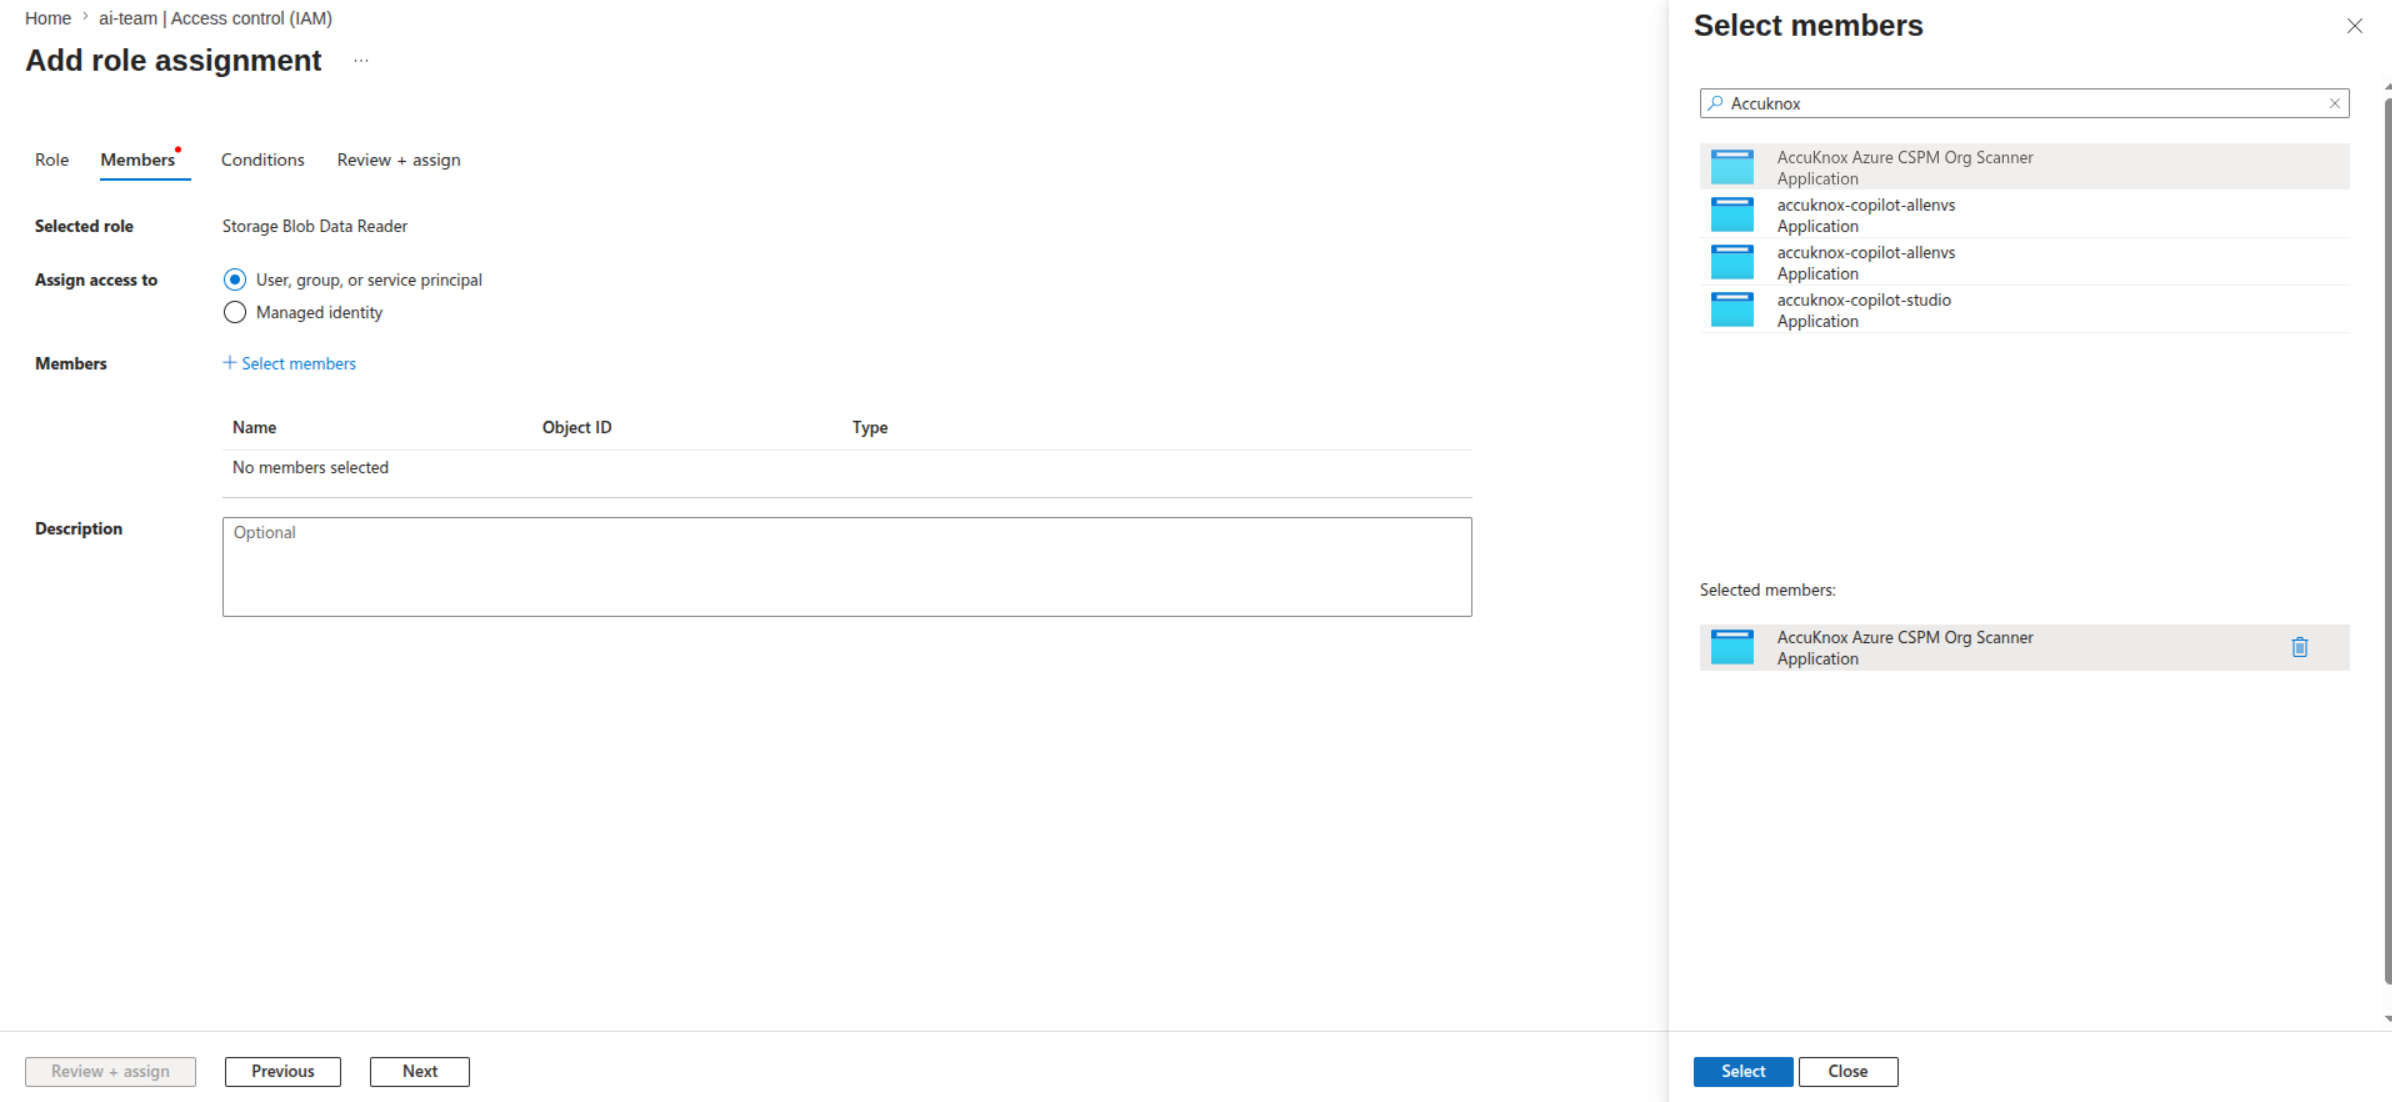
Repeat this process for all four roles.
Using Power Platform?
If you're integrating with Microsoft Power Platform, complete the Power Platform integration steps before proceeding to the AccuKnox SaaS UI onboarding below.
From AccuKnox SaaS UI
Configuring your Azure cloud account is complete. Now we need to onboard the cloud account onto the AccuKnox SaaS Platform.
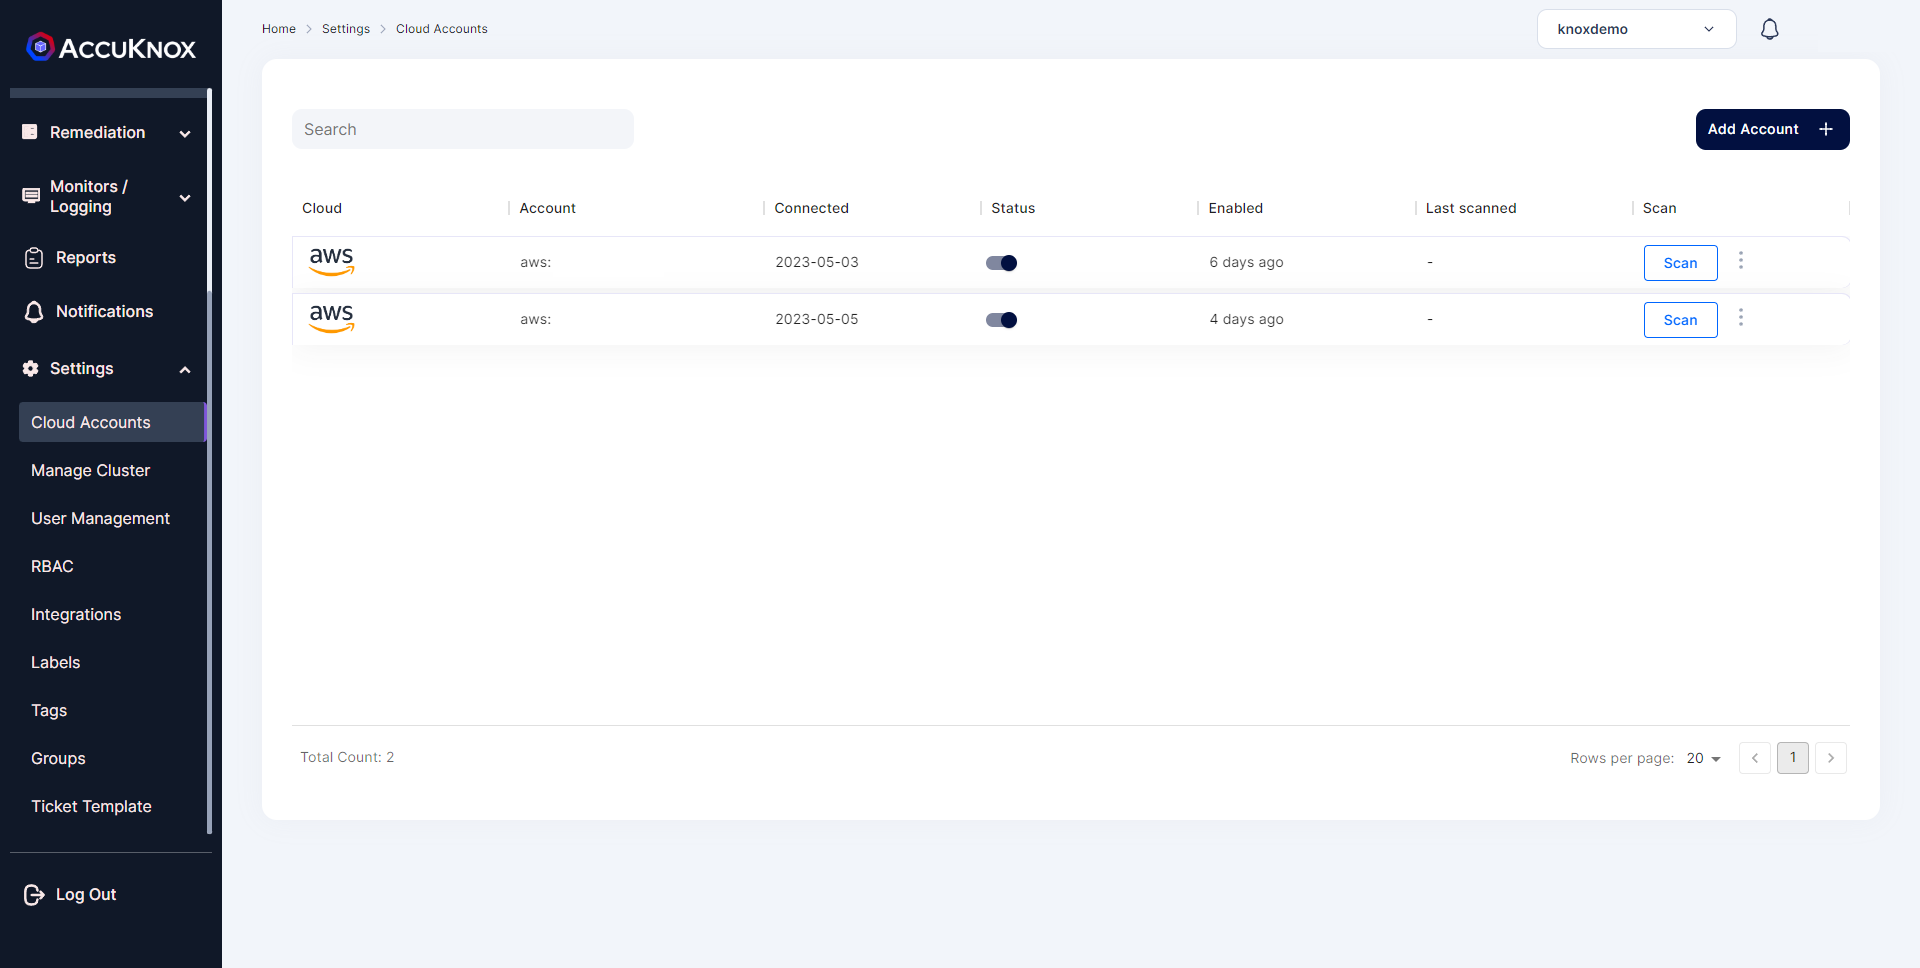
Step 1: Go to Settings → Cloud Accounts and click on Add Account
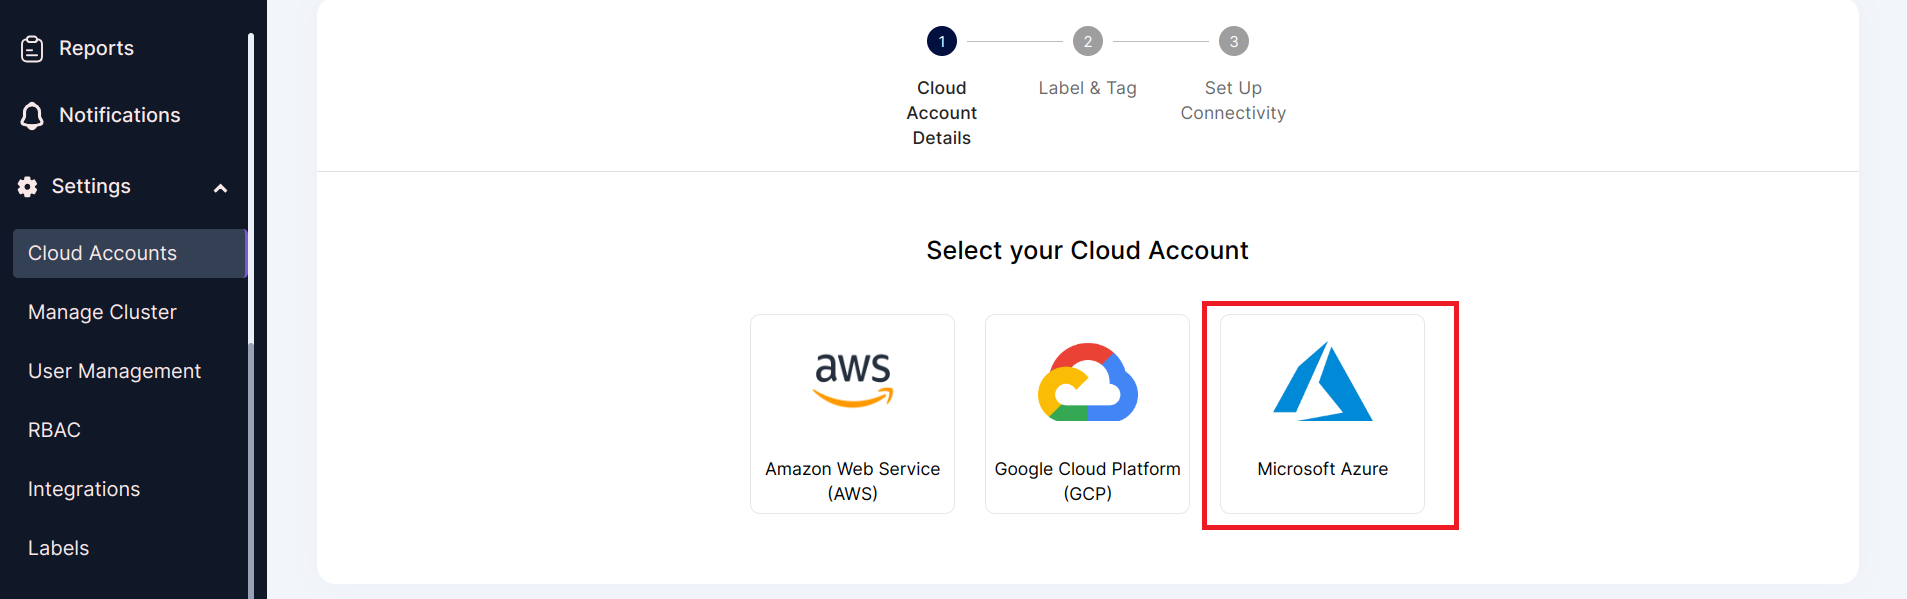
Step 2: Select Microsoft Azure as Cloud Account Type
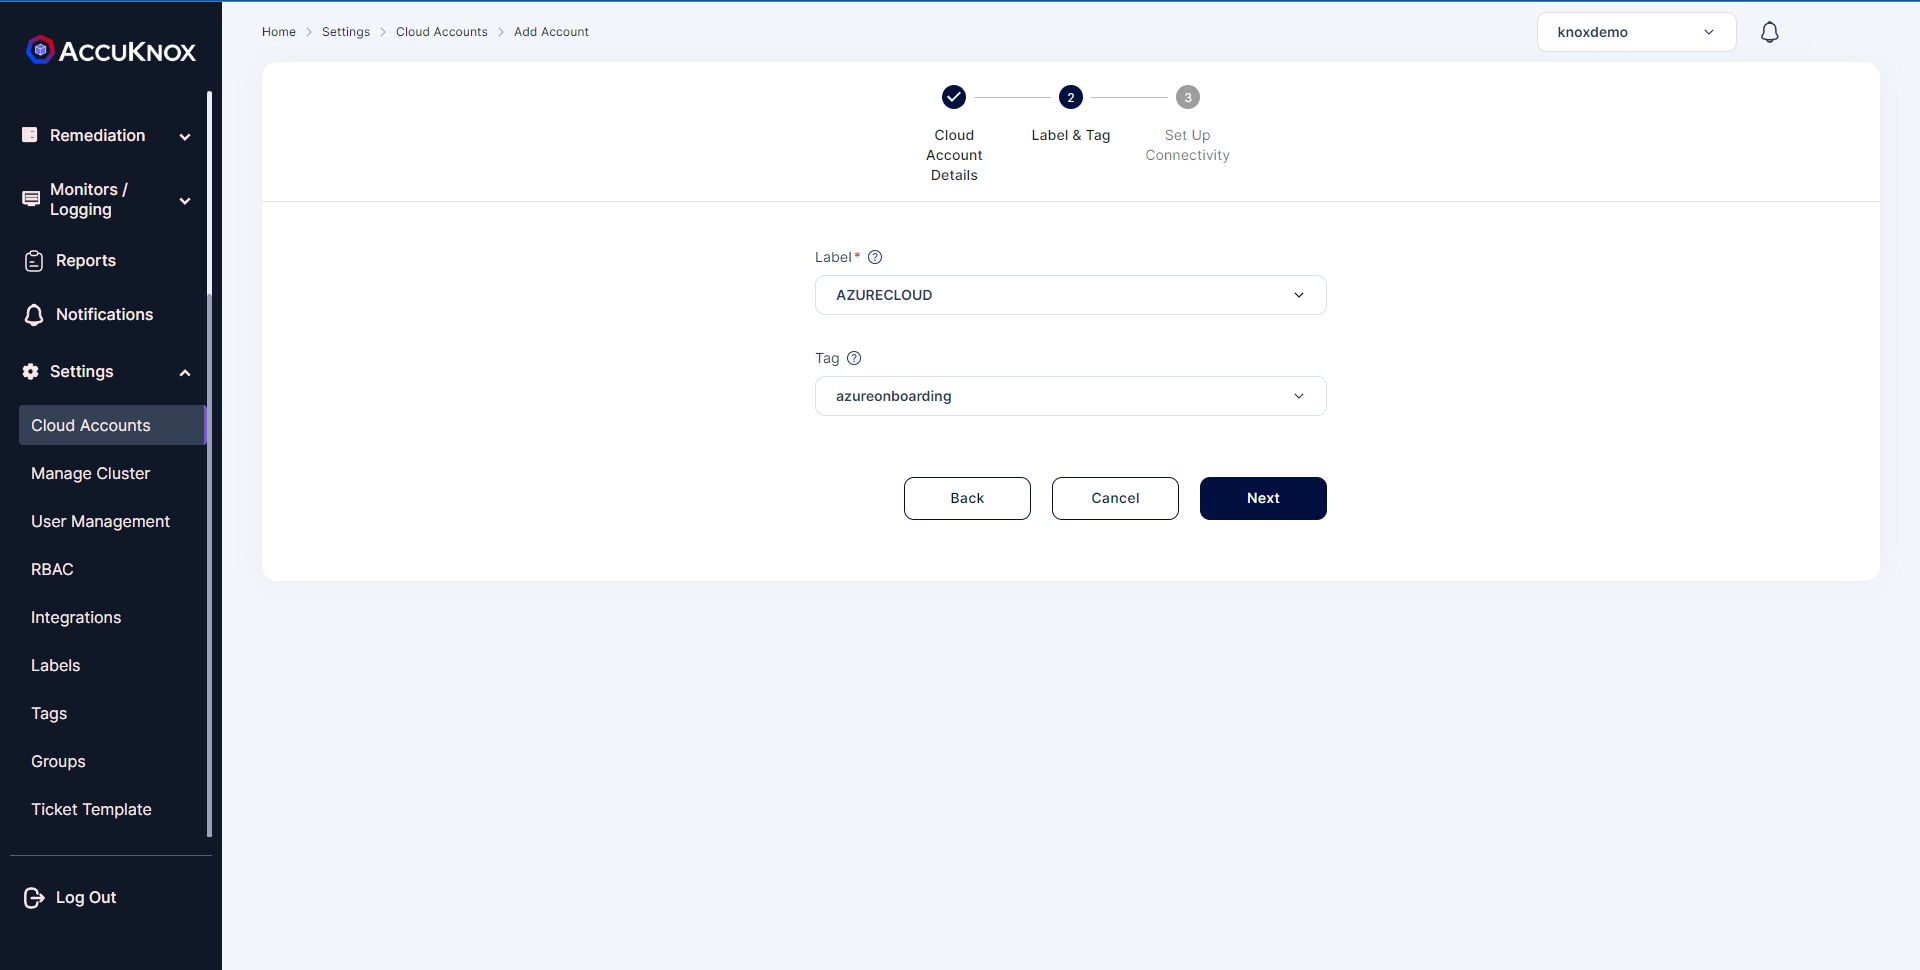
Step 3: Select or create label and Tags that will be associated with this Cloud Account
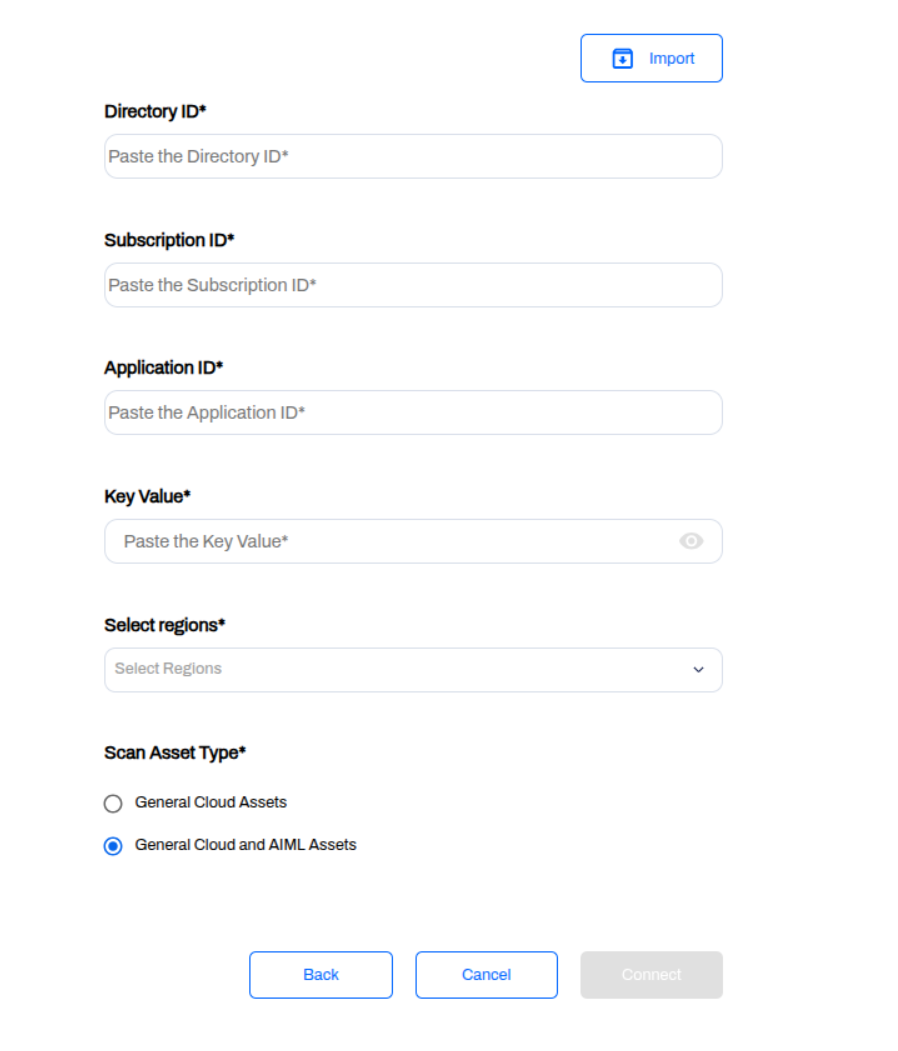
Step 4: Enter the details saved during app registration (Application ID, Directory ID, Secret Value) and the Subscription ID from the Azure portal. Check the "AI/ML Assets" box to enable AI/ML asset discovery and monitoring. Click Connect.
Step 5: After successfully connecting your cloud account will show up in the list