ML Model Static Scans
AccuKnox provides static analysis for Machine Learning (ML) models to identify vulnerabilities, security risks, and compliance issues. This guide walks you through setting up and running ML Model Static Scans for models hosted on GitHub and Hugging Face.
Why are ML Scans Needed?
Machine Learning models are becoming integral parts of modern applications, but they also introduce new attack vectors. ML Static Scans are essential for:
- Vulnerability Detection: Identifying known vulnerabilities in model files (e.g., pickle deserialization attacks).
- Supply Chain Security: Confirming that models imported from public repositories (like Hugging Face) are safe to use.
- Compliance: Meeting security standards by scanning AI/ML assets for risks.
- Model Integrity: Verifying that model weights and configurations have not been tampered with.
What the Scan Checks
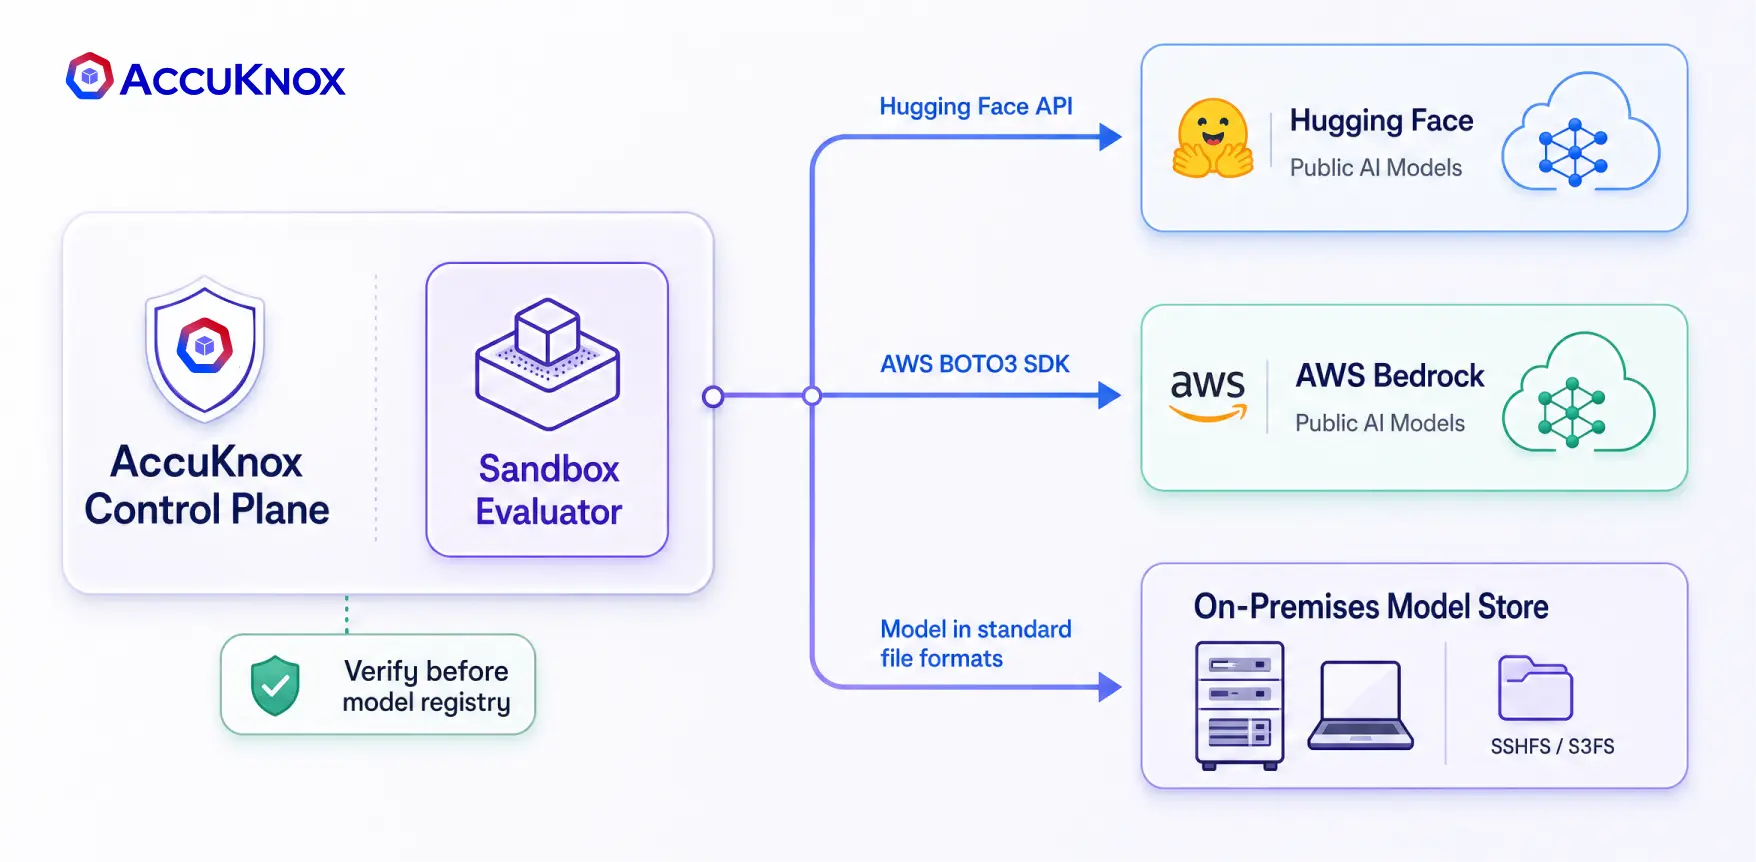
The scan runs in the AccuKnox sandbox evaluator, not on your network. It reads the model from its source, so the check applies to what the source serves today.
The scan verifies a public model across four areas before you promote it. Three describe what the publisher disclosed. One describes the artifact.
- Supply chain and provenance. Who authored the model, the country of origin, whether the training dataset is disclosed, the license, and how widely the model is used.
- Adversarial robustness. Whether the publisher disclosed robustness evaluations, and whether bias and fairness evaluations exist.
- Data and privacy risks. Whether the model card discloses PII, and whether the model shows elevated membership inference risk.
- Model file security. Whether the artifact uses a safe file format, whether it carries an unsafe pickle, and whether its config files embed scripts.
Treat model file security as blocking. An unsafe pickle executes at load time, before your runtime controls observe the model. The other three describe risk you accept or reject as a business decision. See Pickle Code Injection for a working demonstration.
Make the scan a gate, not a habit
Running this scan from the console depends on somebody remembering. To require it, wire it into the pull request that proposes the model. See Gate Model Adoption on a Pull Request.
Setting up an ML Static Scan
Follow these steps to configure a scan for your ML models.
Step 1: Add a New Collector
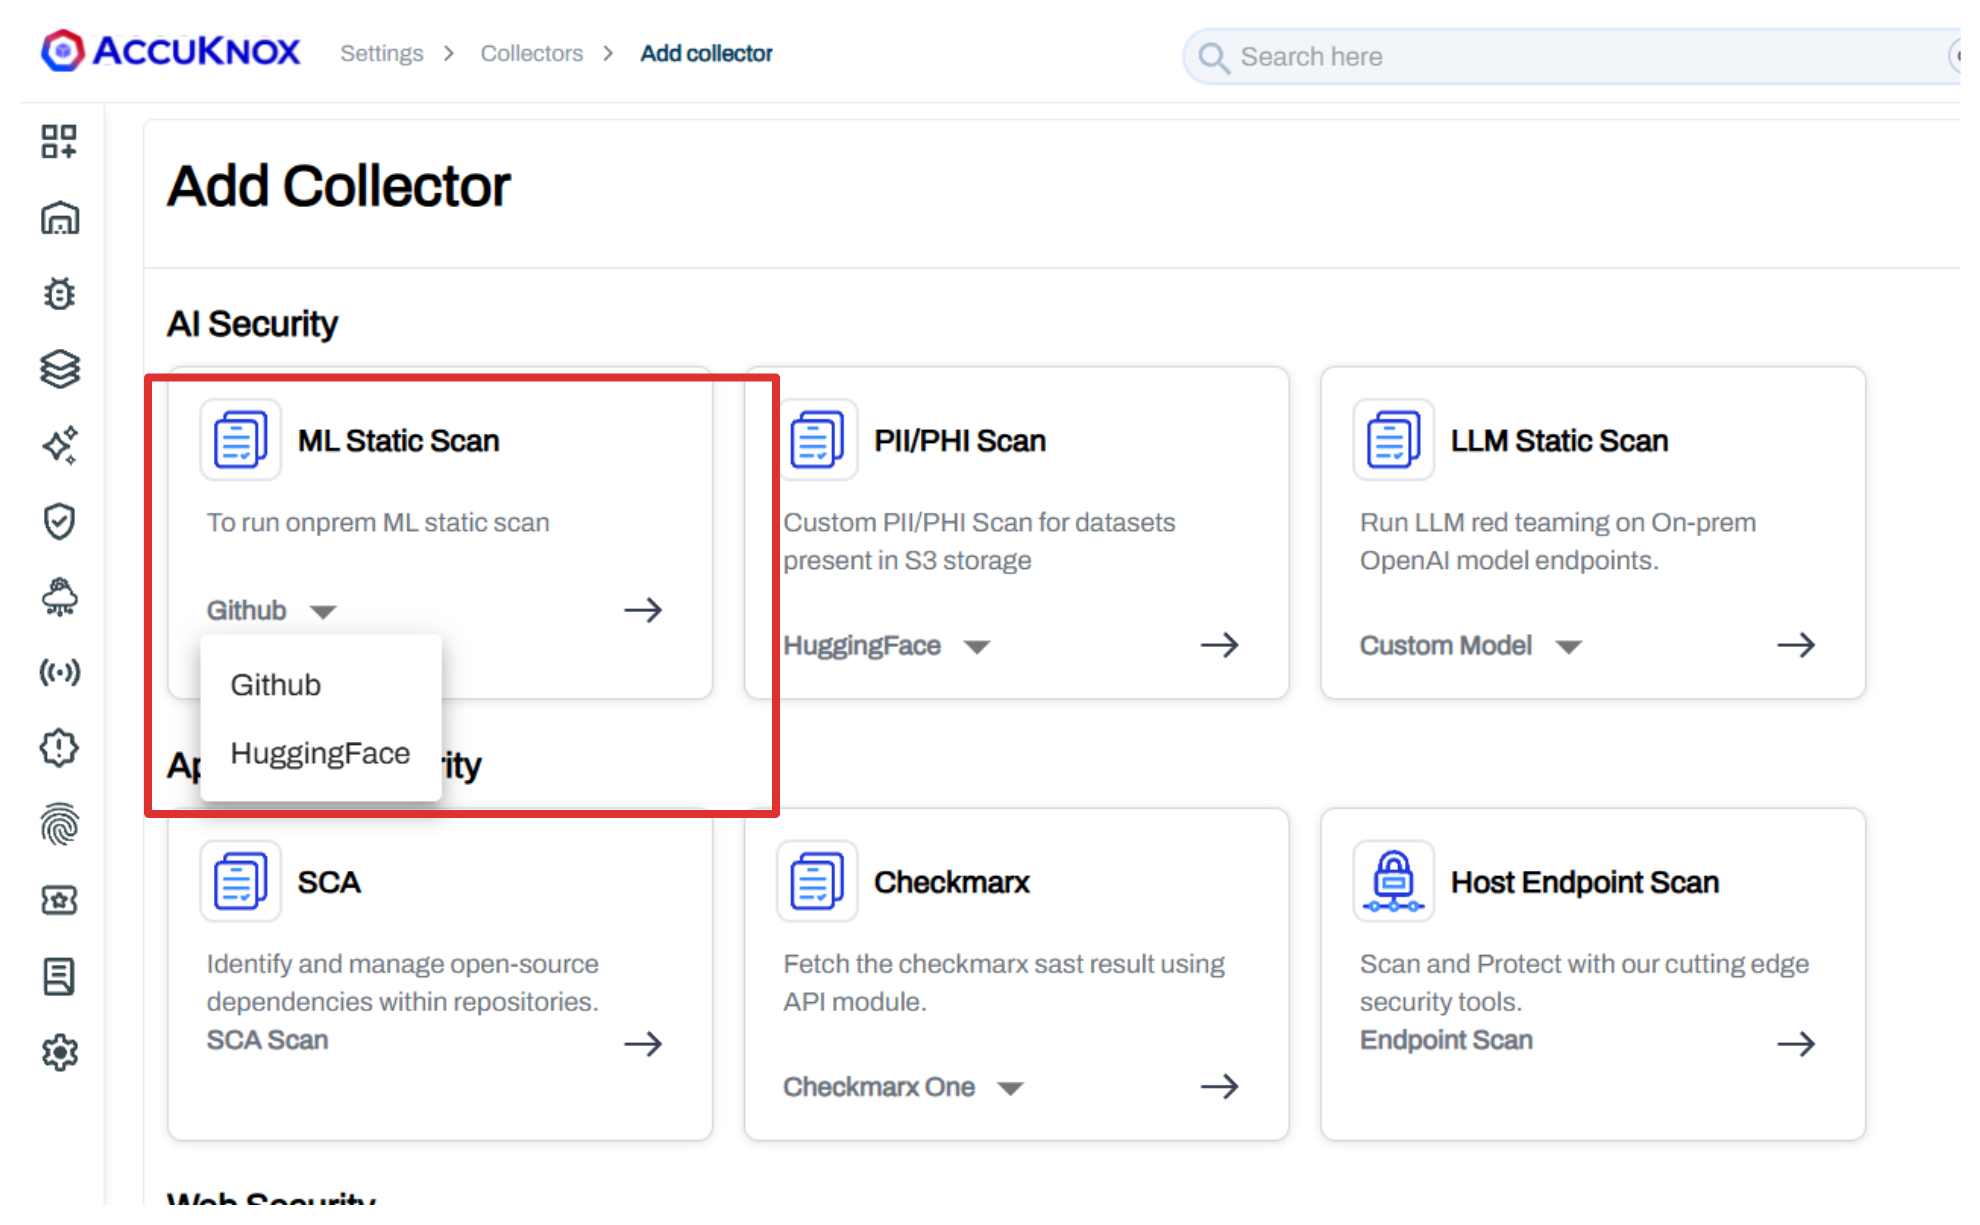
- Navigate to Settings > Collectors in the AccuKnox dashboard.
- Click on Add Collector.
- Select ML-Static-Scan from the available options.
- Choose your platform: GitHub or Hugging Face, depending on where your models reside.
Step 2: Configure Repository Details
Enter the required credentials and repository information.
For GitHub:
- Token: Your GitHub Personal Access Token (PAT).
- Repository Owner: The username or organization name.
- Repository Name: The name of the repository.
- Repository Branch: The branch to scan (e.g.,
main).
For Hugging Face:
-
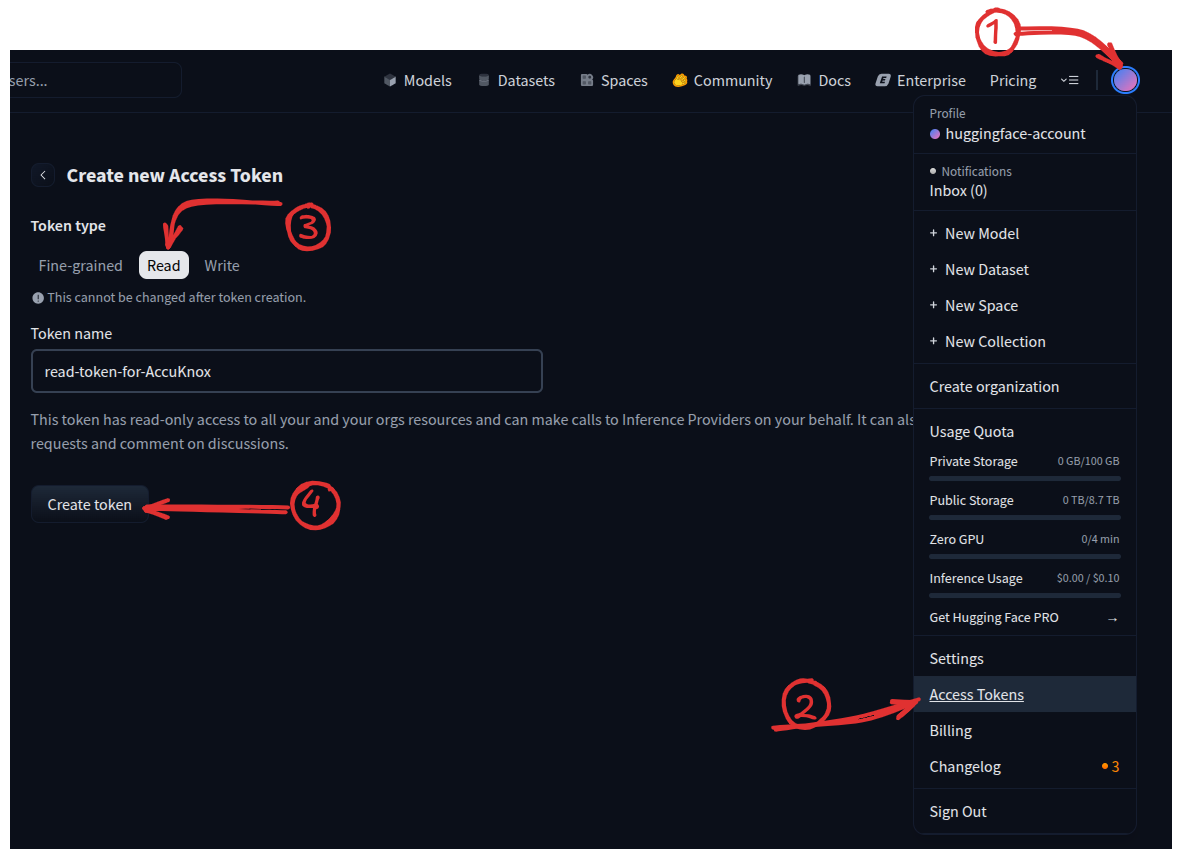
Token: Your Hugging Face Access Token. Generate a token with 'Read' permissions from your Hugging Face account settings. Click here to generate a token
-
Repository Name: The name of the model repository (e.g.,
bert-base-uncased).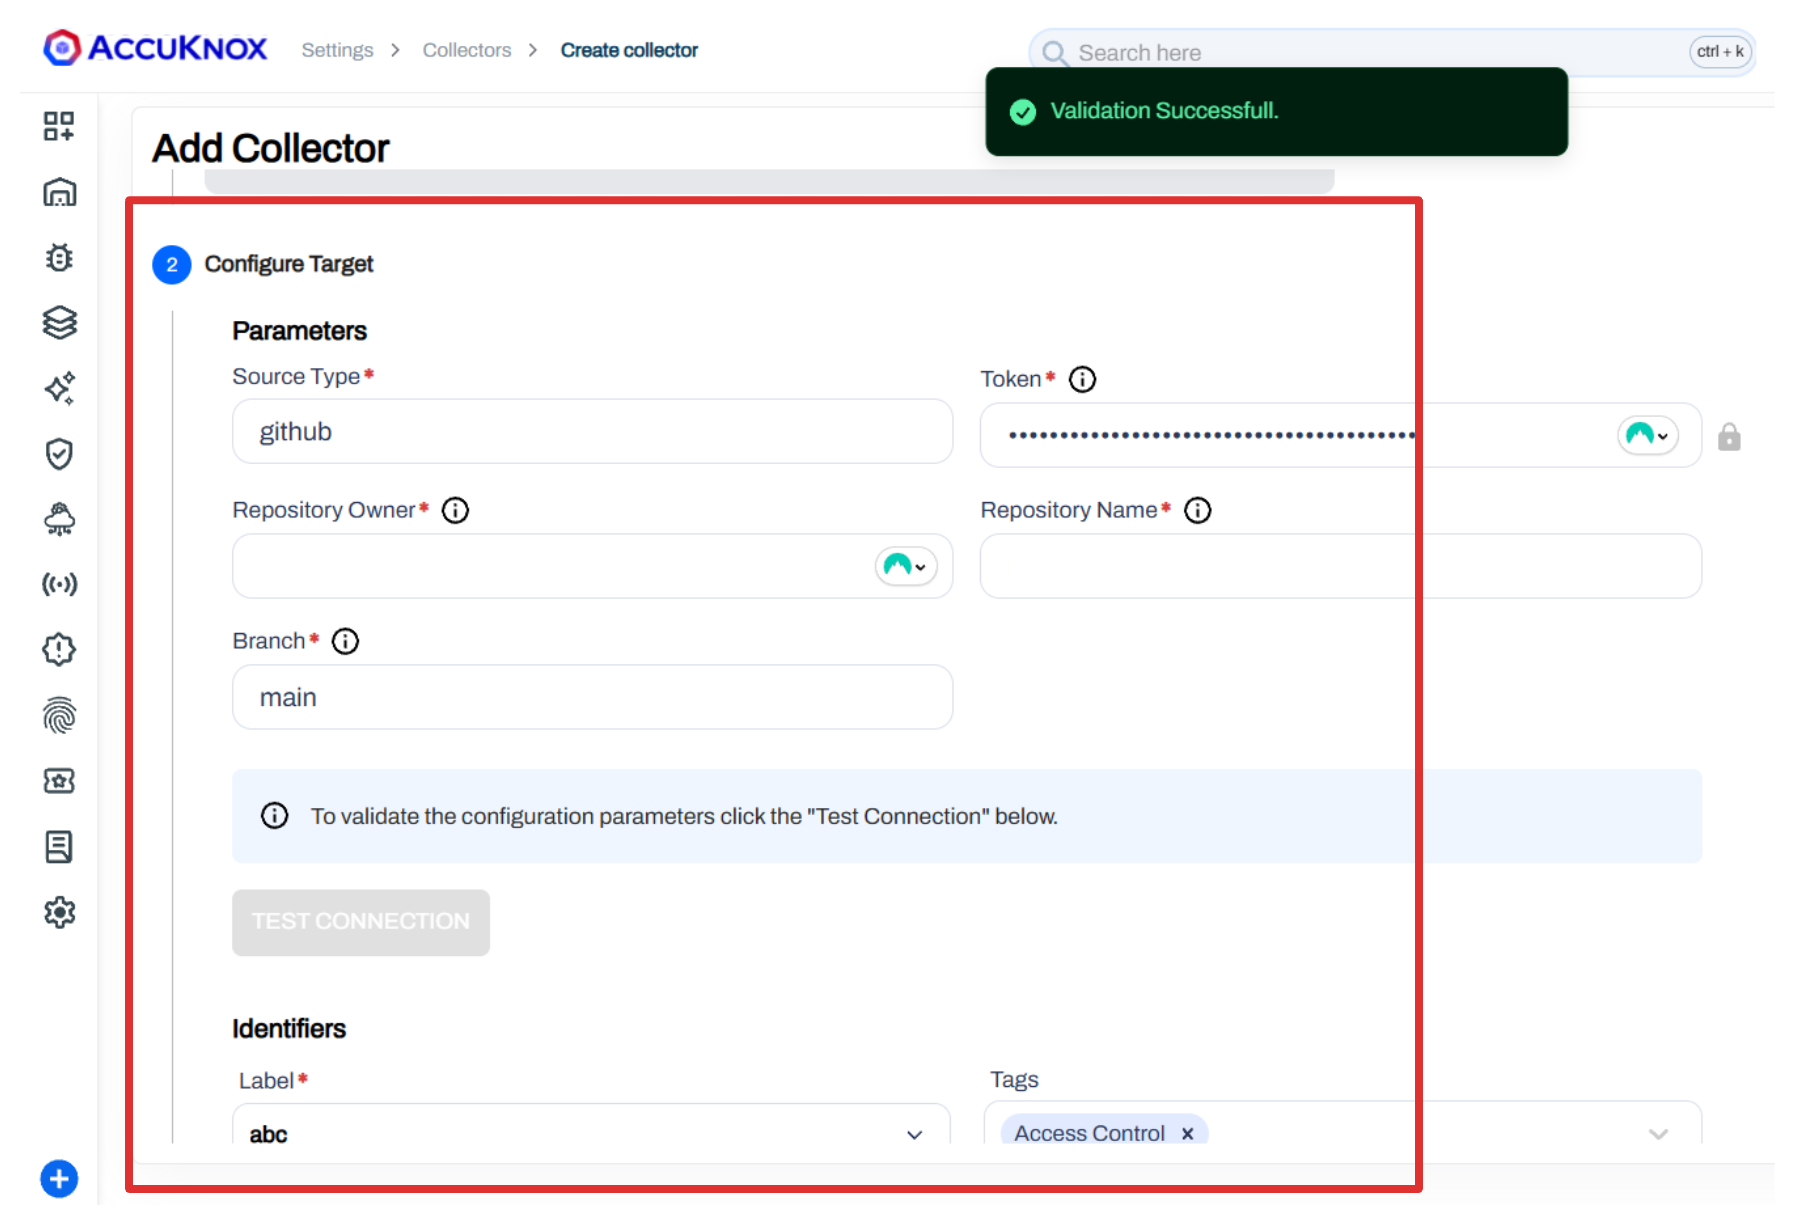
Step 3: Add Identifiers
Add Labels and Tags to categorize your ML models. This helps in filtering and managing assets within the AccuKnox platform.
Step 4: Validate Connection
Once you have entered the credentials, click on Test to validate the connection to your repository. Confirm the validation succeeds before you continue.
Step 5: Schedule the Scan
Configure the Schedule and Notification settings:
- Under Cron Job, define the frequency of the scan (e.g., daily, weekly).
- The system will display the Next Scan time based on your configuration.
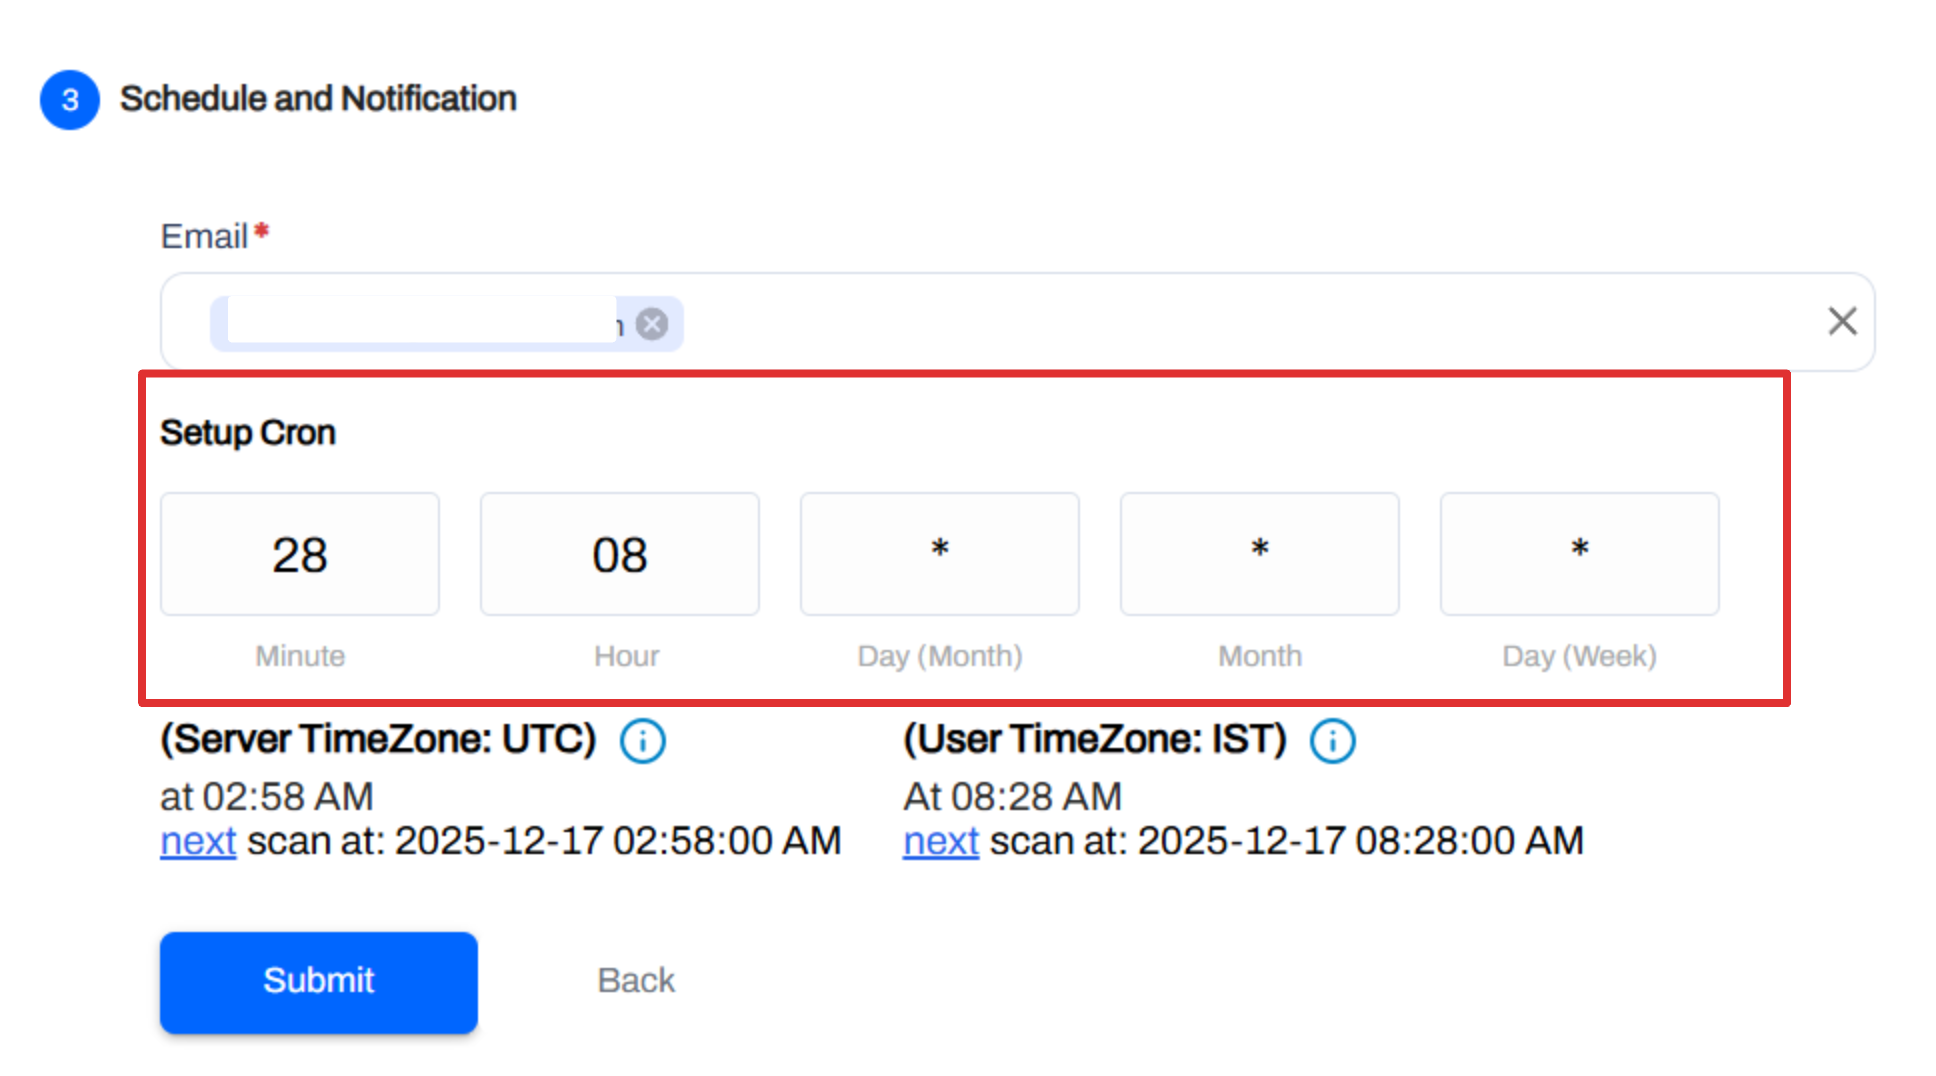
Click Save to create the collector.
Viewing Scan Results
Supported Model Formats
AccuKnox currently supports scanning for the following ML model formats:
- Pickle: Python object serialization.
- HDF5/H5: Hierarchical Data Format used in Keras.
- TensorFlow SavedModel: TensorFlow's native serialization format.
- Model Checkpoints: Periodic snapshots of training progress.
- ONNX: An interoperable format for sharing models across different tools.
Once the scan is triggered (either manually or via the schedule), AccuKnox will analyze the repository.
- Go to Issues or the Collectors page.
- Click on the Findings count for your ML Static Scan collector.
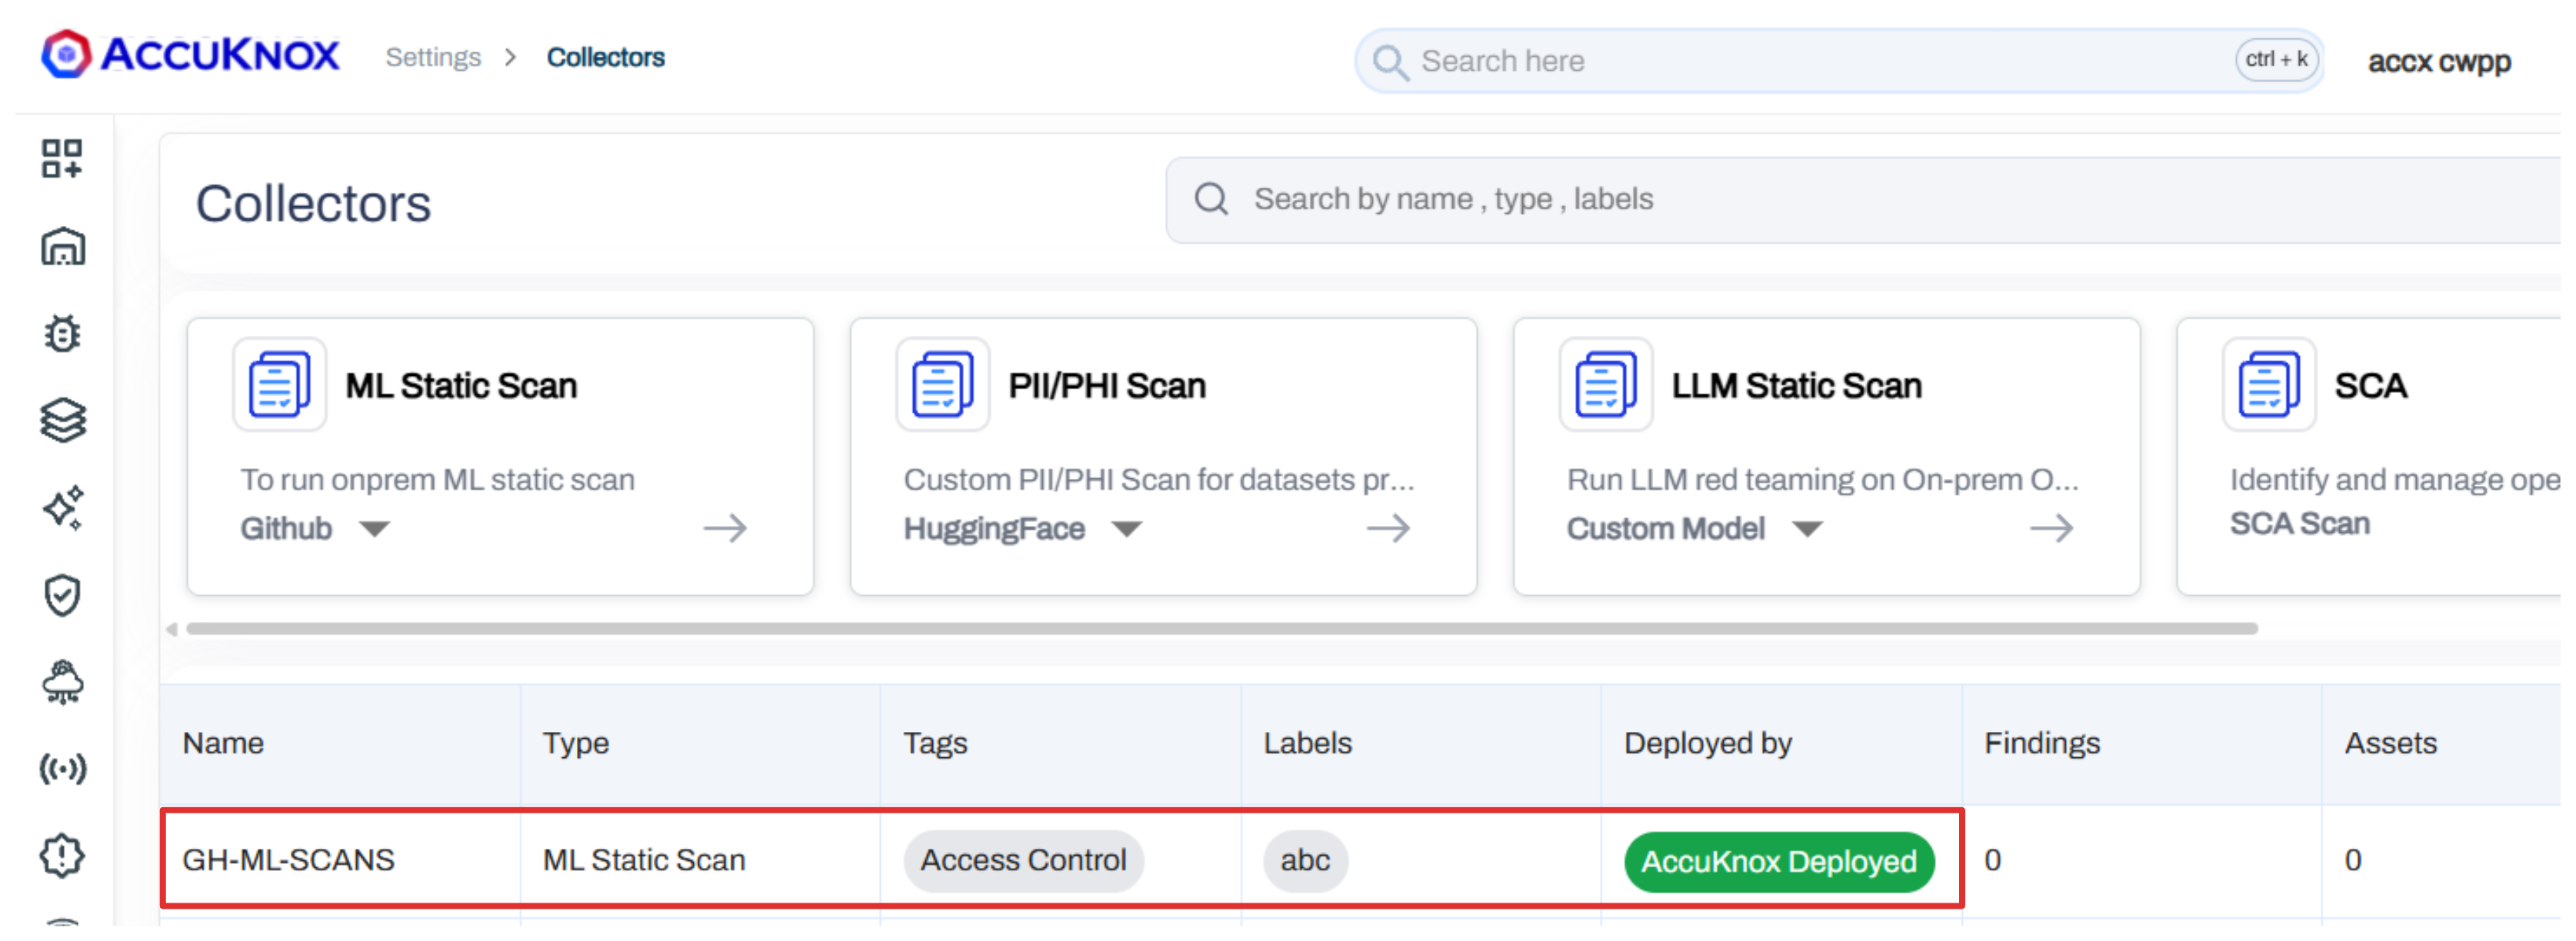
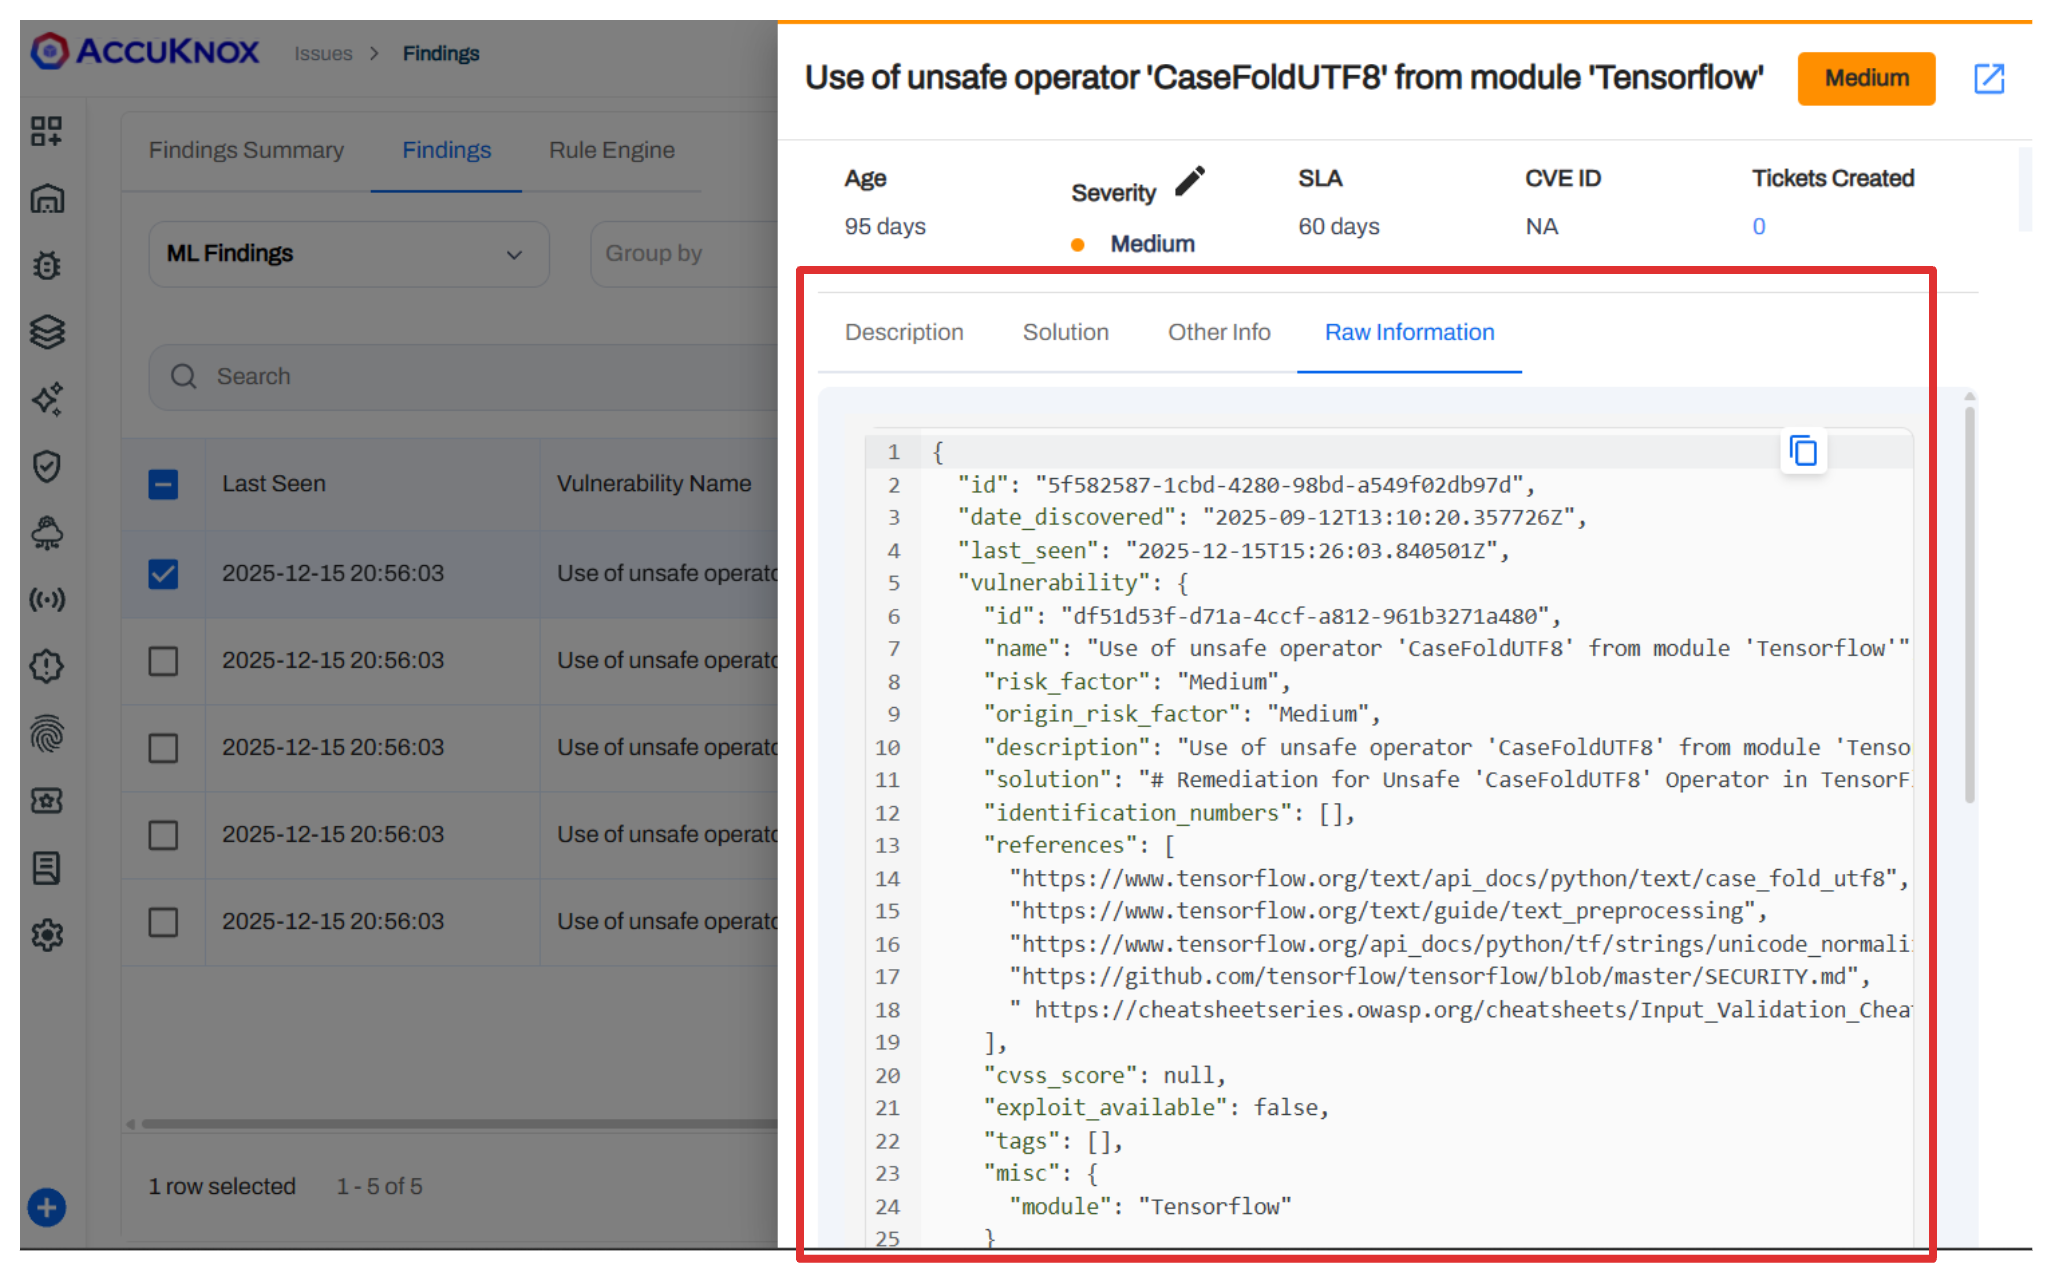
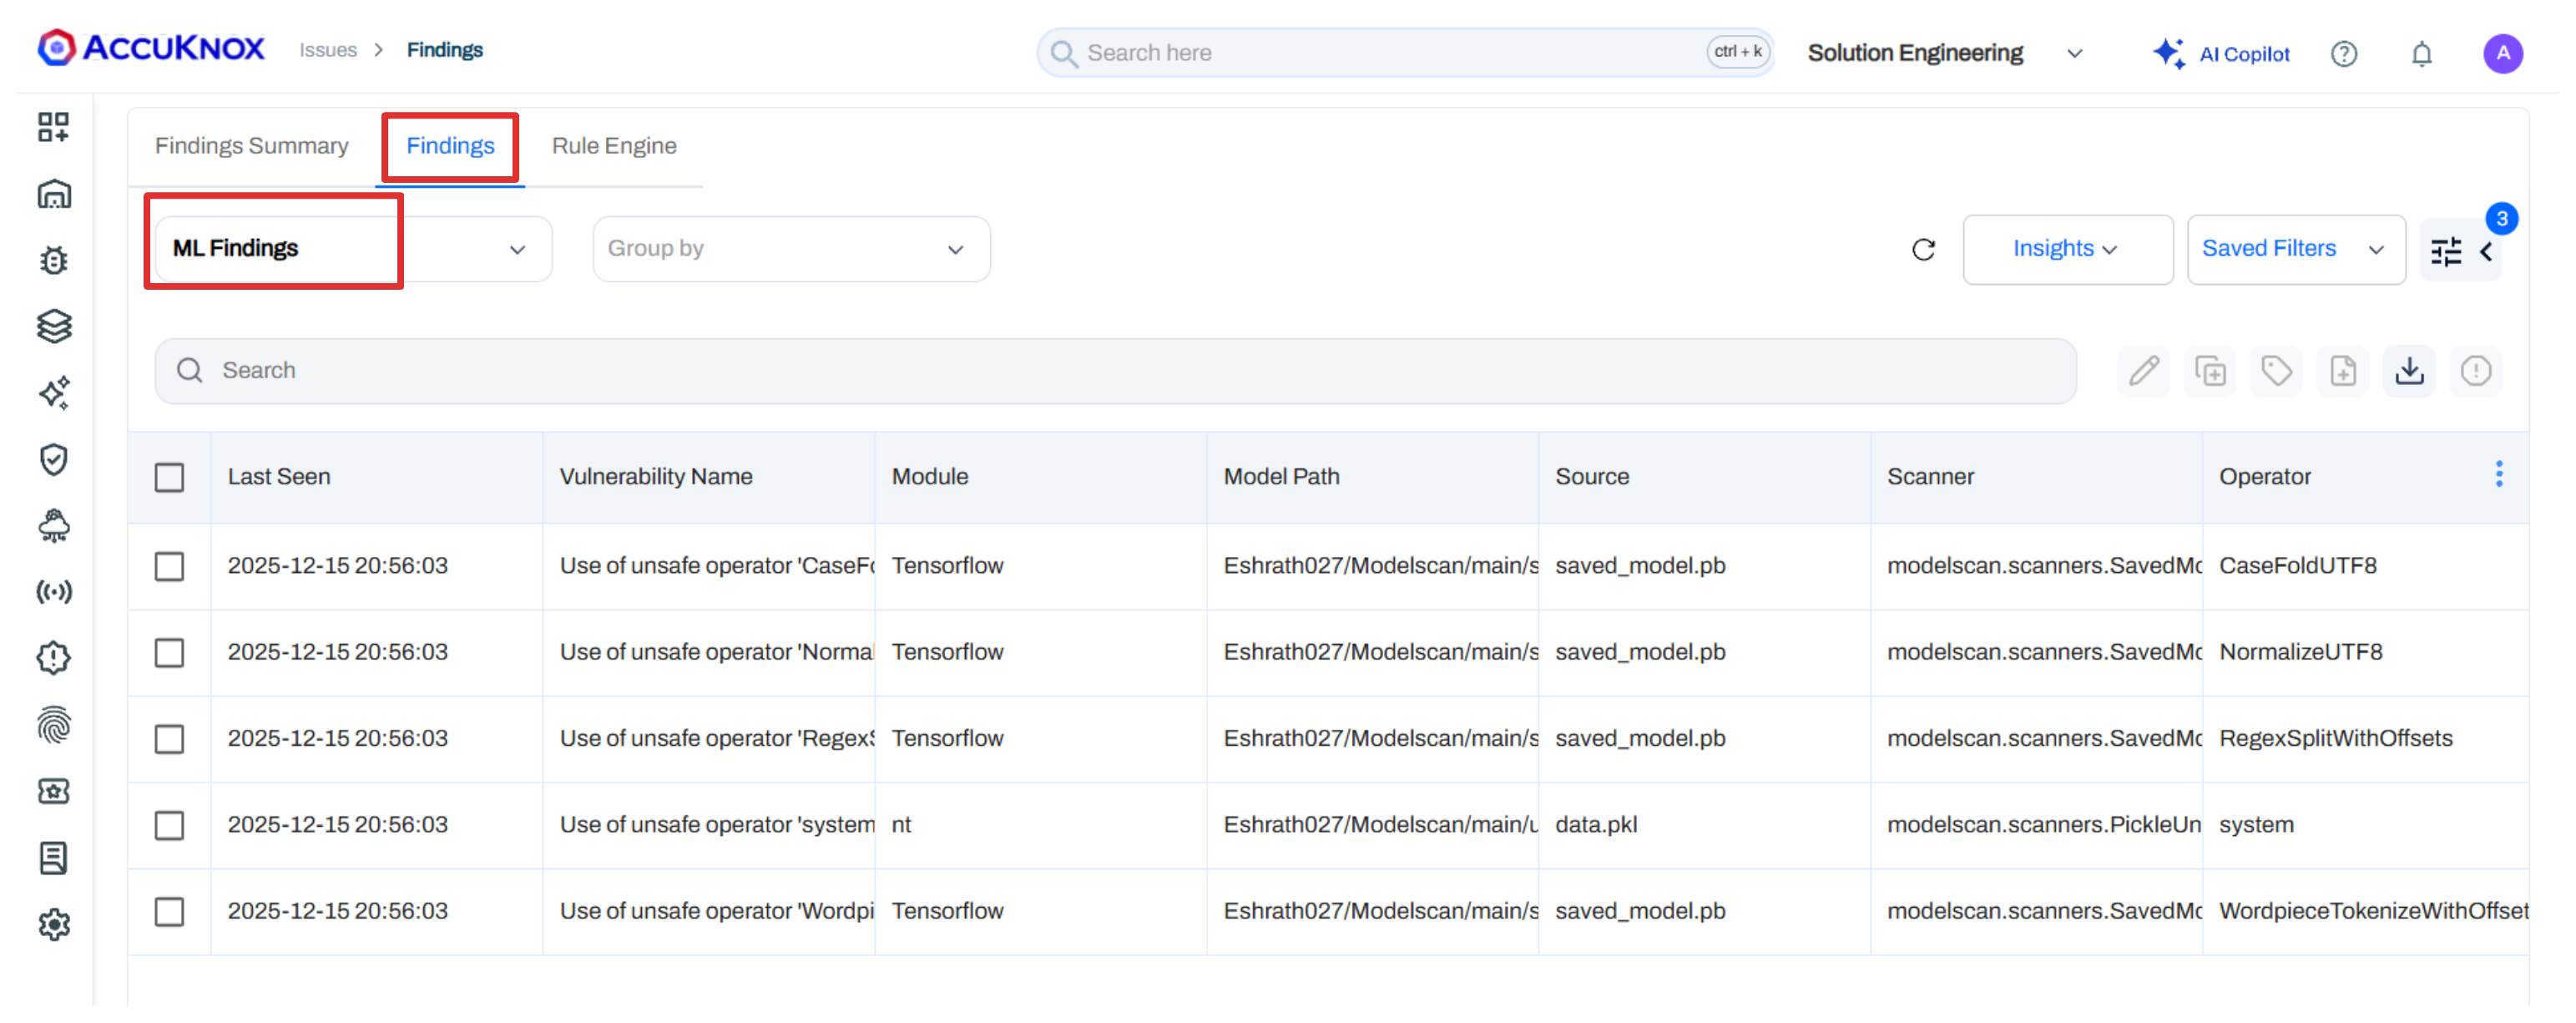
You will be redirected to the ML Findings page, which lists details such as:
- Vulnerability Name: The specific issue detected.
- Model Path: Location of the vulnerable file.
- Source: The repository source.
- Scanner & Operator: Tools used for detection.
- Last Seen: Timestamp of the latest detection.
Analyzing Findings
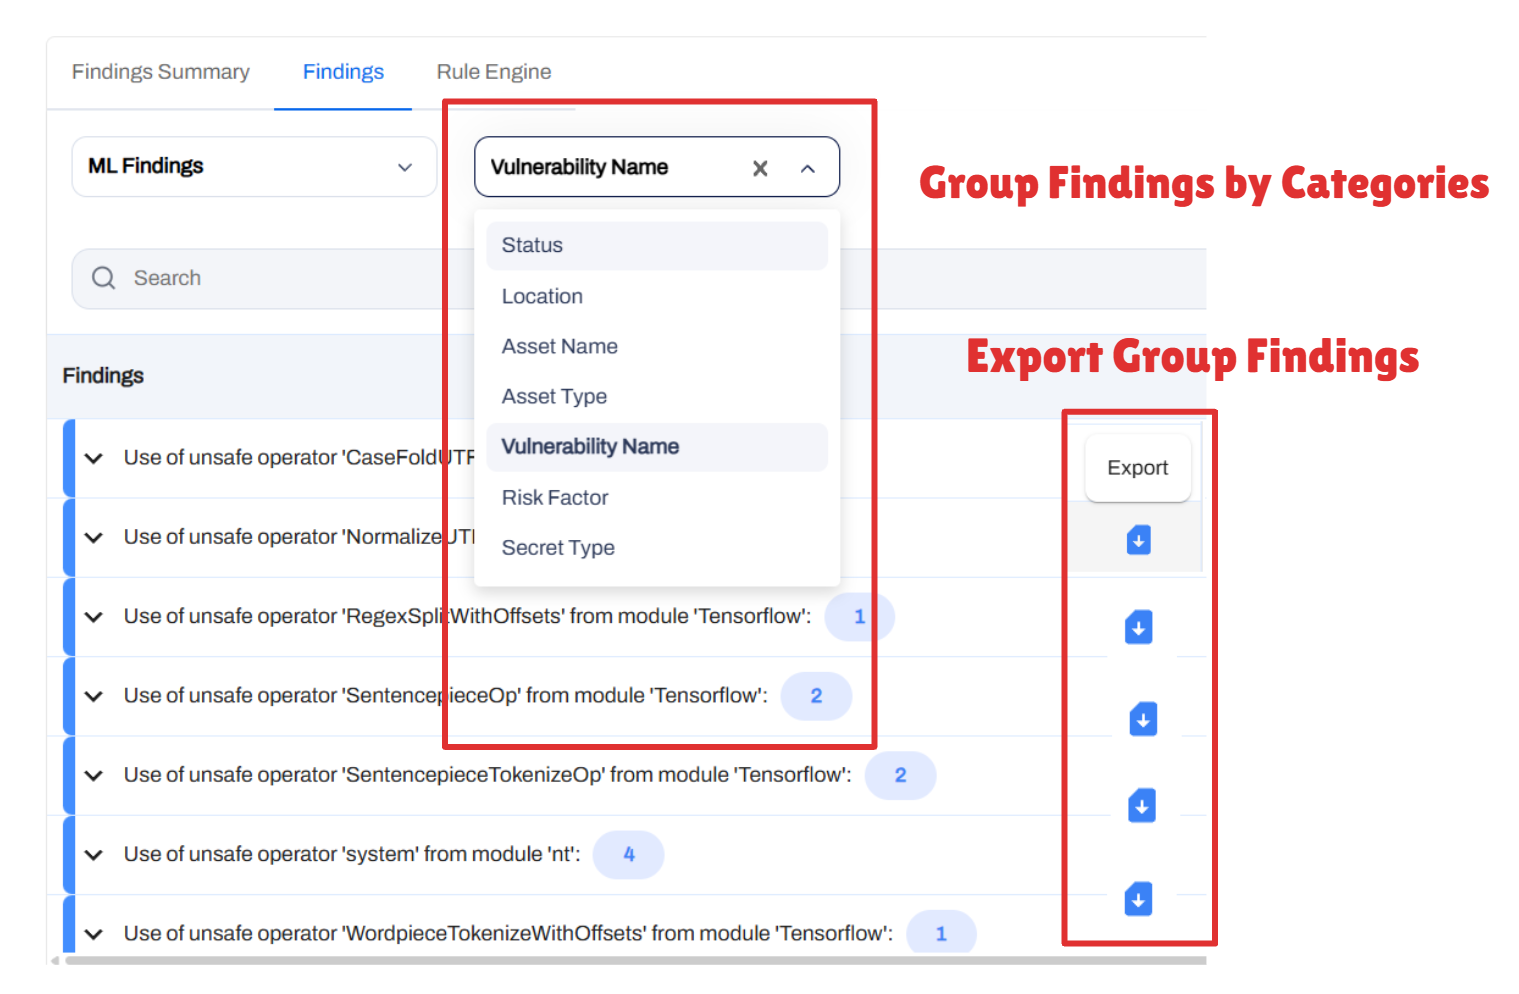
Group ML Scan Findings
You can group findings by different parameters such as Status, Location, Vulnerability Name, Risk Factor, etc. Use the Group By dropdown to select your preferred grouping. This helps in organizing and prioritizing vulnerabilities effectively. The grouped view provides a consolidated look at similar issues, making it easier to assess the overall security posture of your ML assets and can easily be exported for reporting purposes.
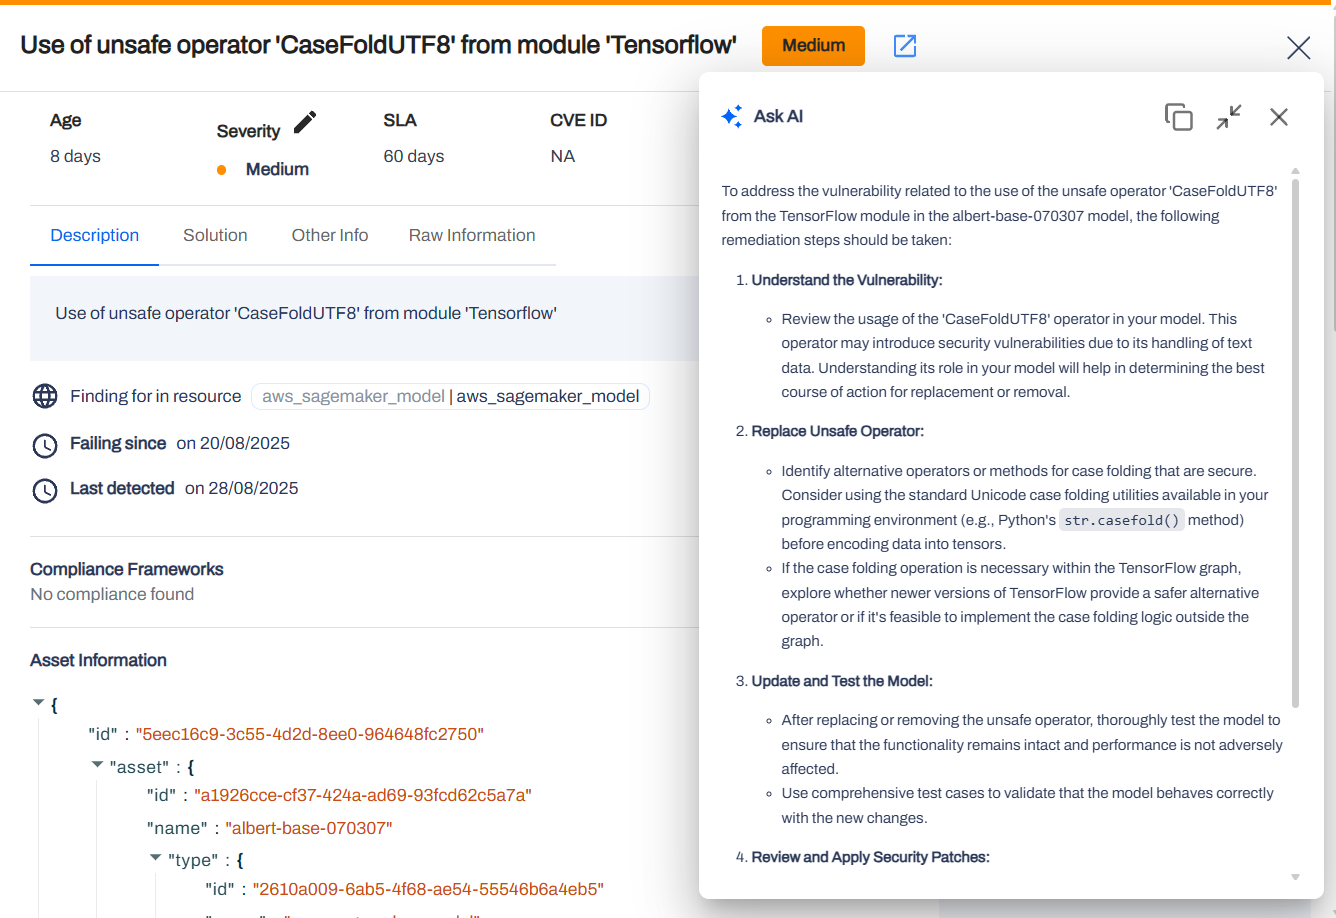
Ask AI for Remediation
Click on the Ask AI button in the detailed pane to get AI-generated remediation steps for the identified issue. This feature leverages advanced LLM capabilities to provide actionable insights based on the specific vulnerability detected.
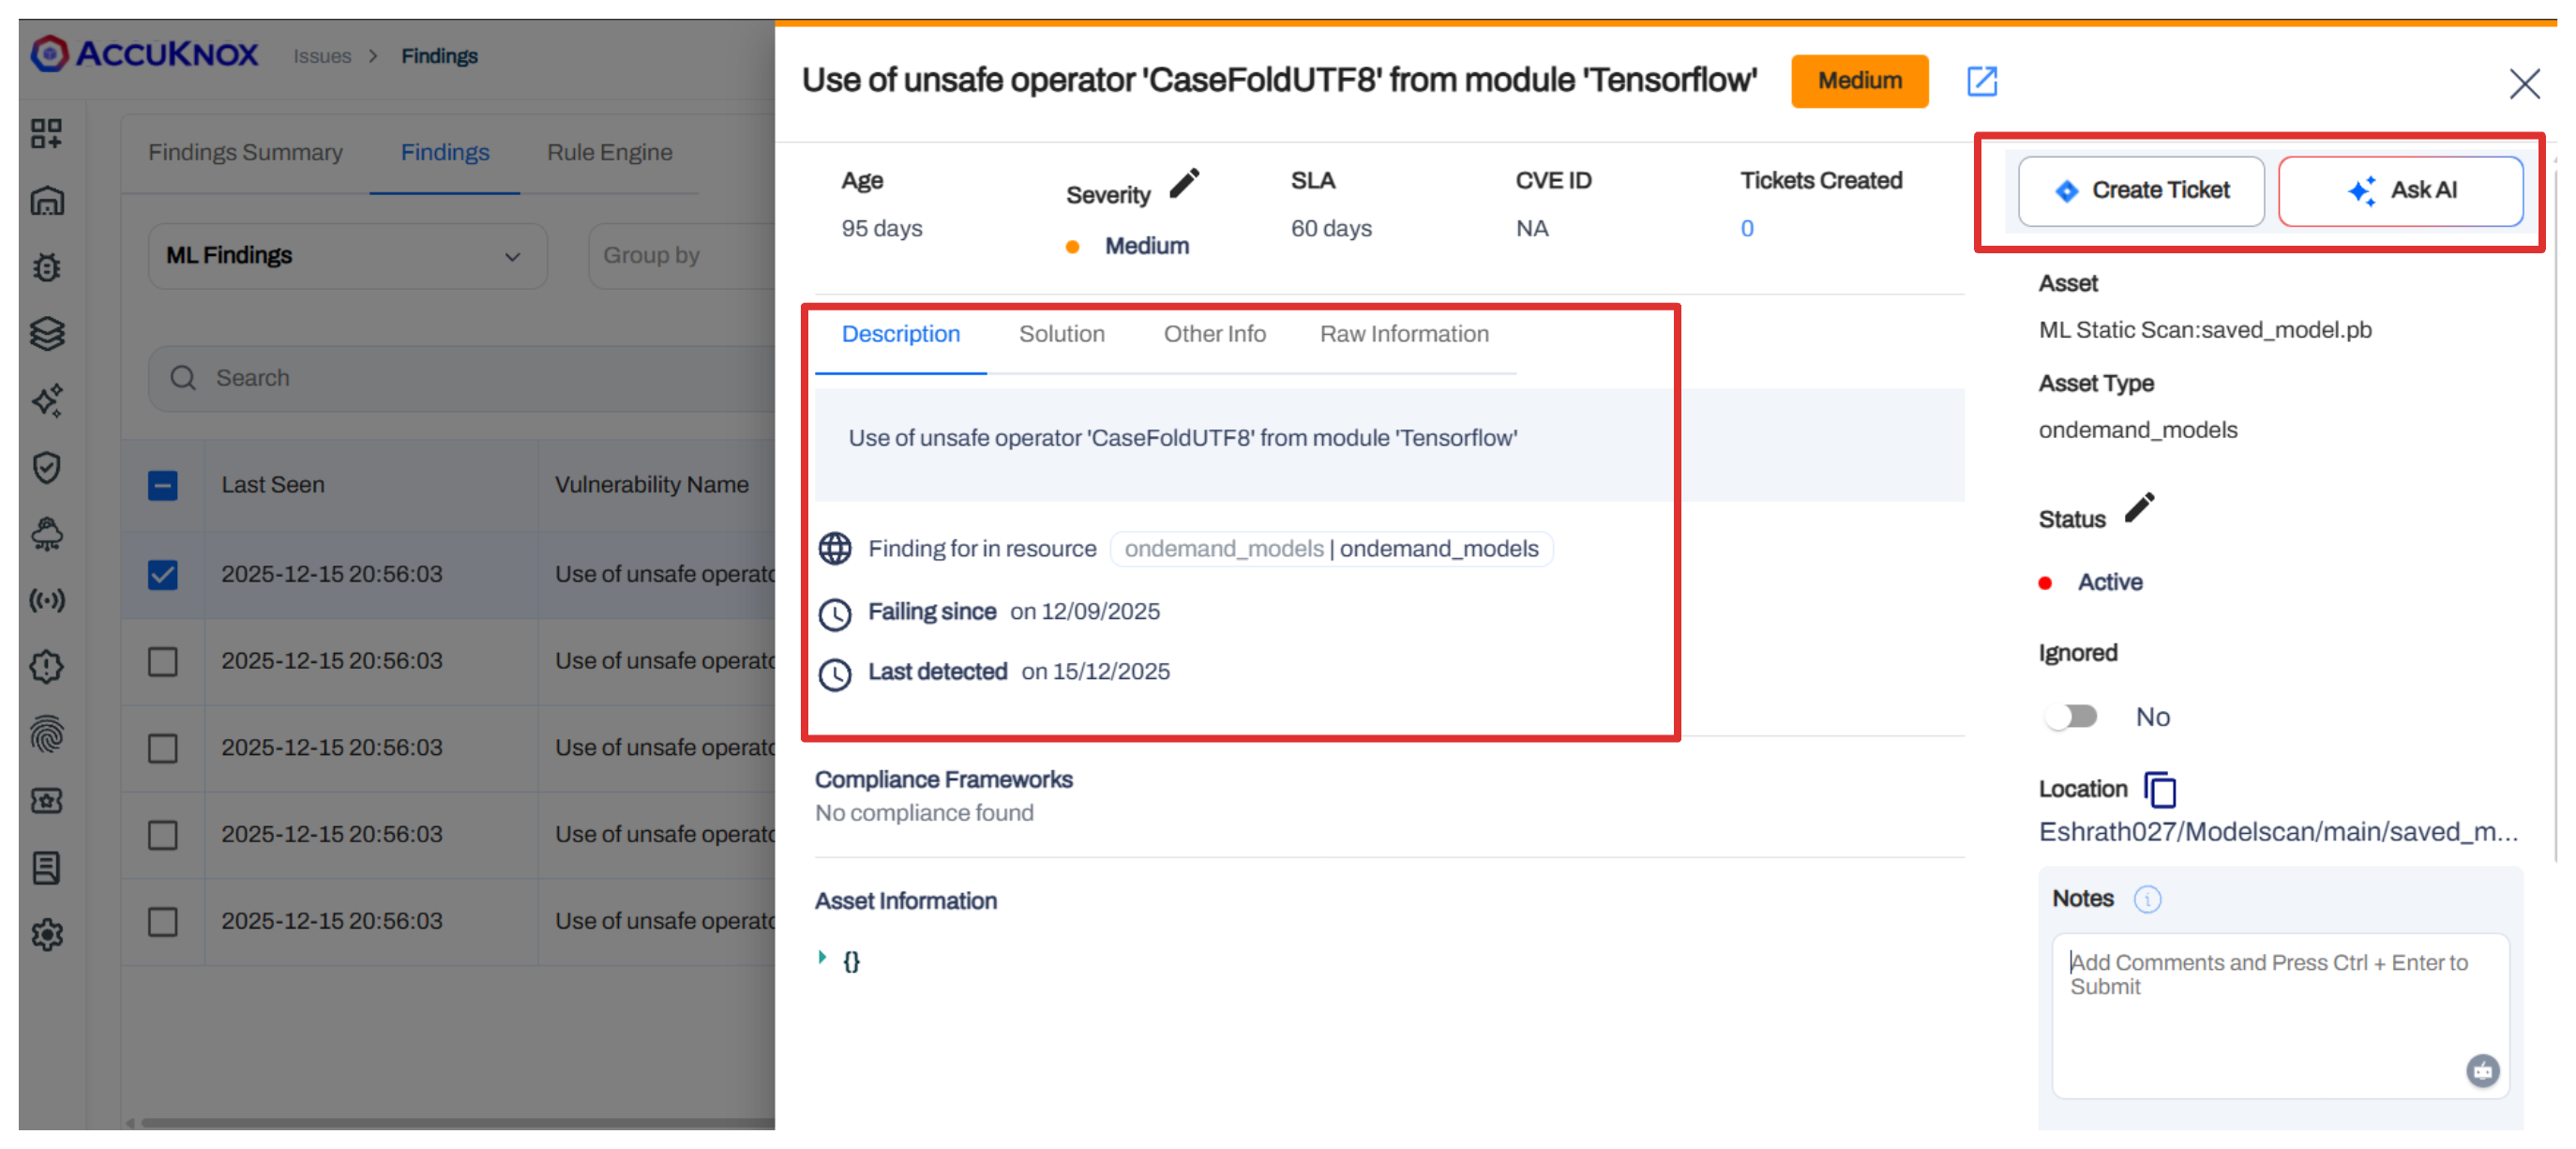
Detailed Finding View
Click on any finding to open the Detailed Pane. Here you can:
-
View a detailed Description of the vulnerability.
-
Create Ticket: Integrate with your ticketing system (e.g., Jira) to track remediation.
- Ask AI: Use the "Ask AI" button for assisted remediation advice.
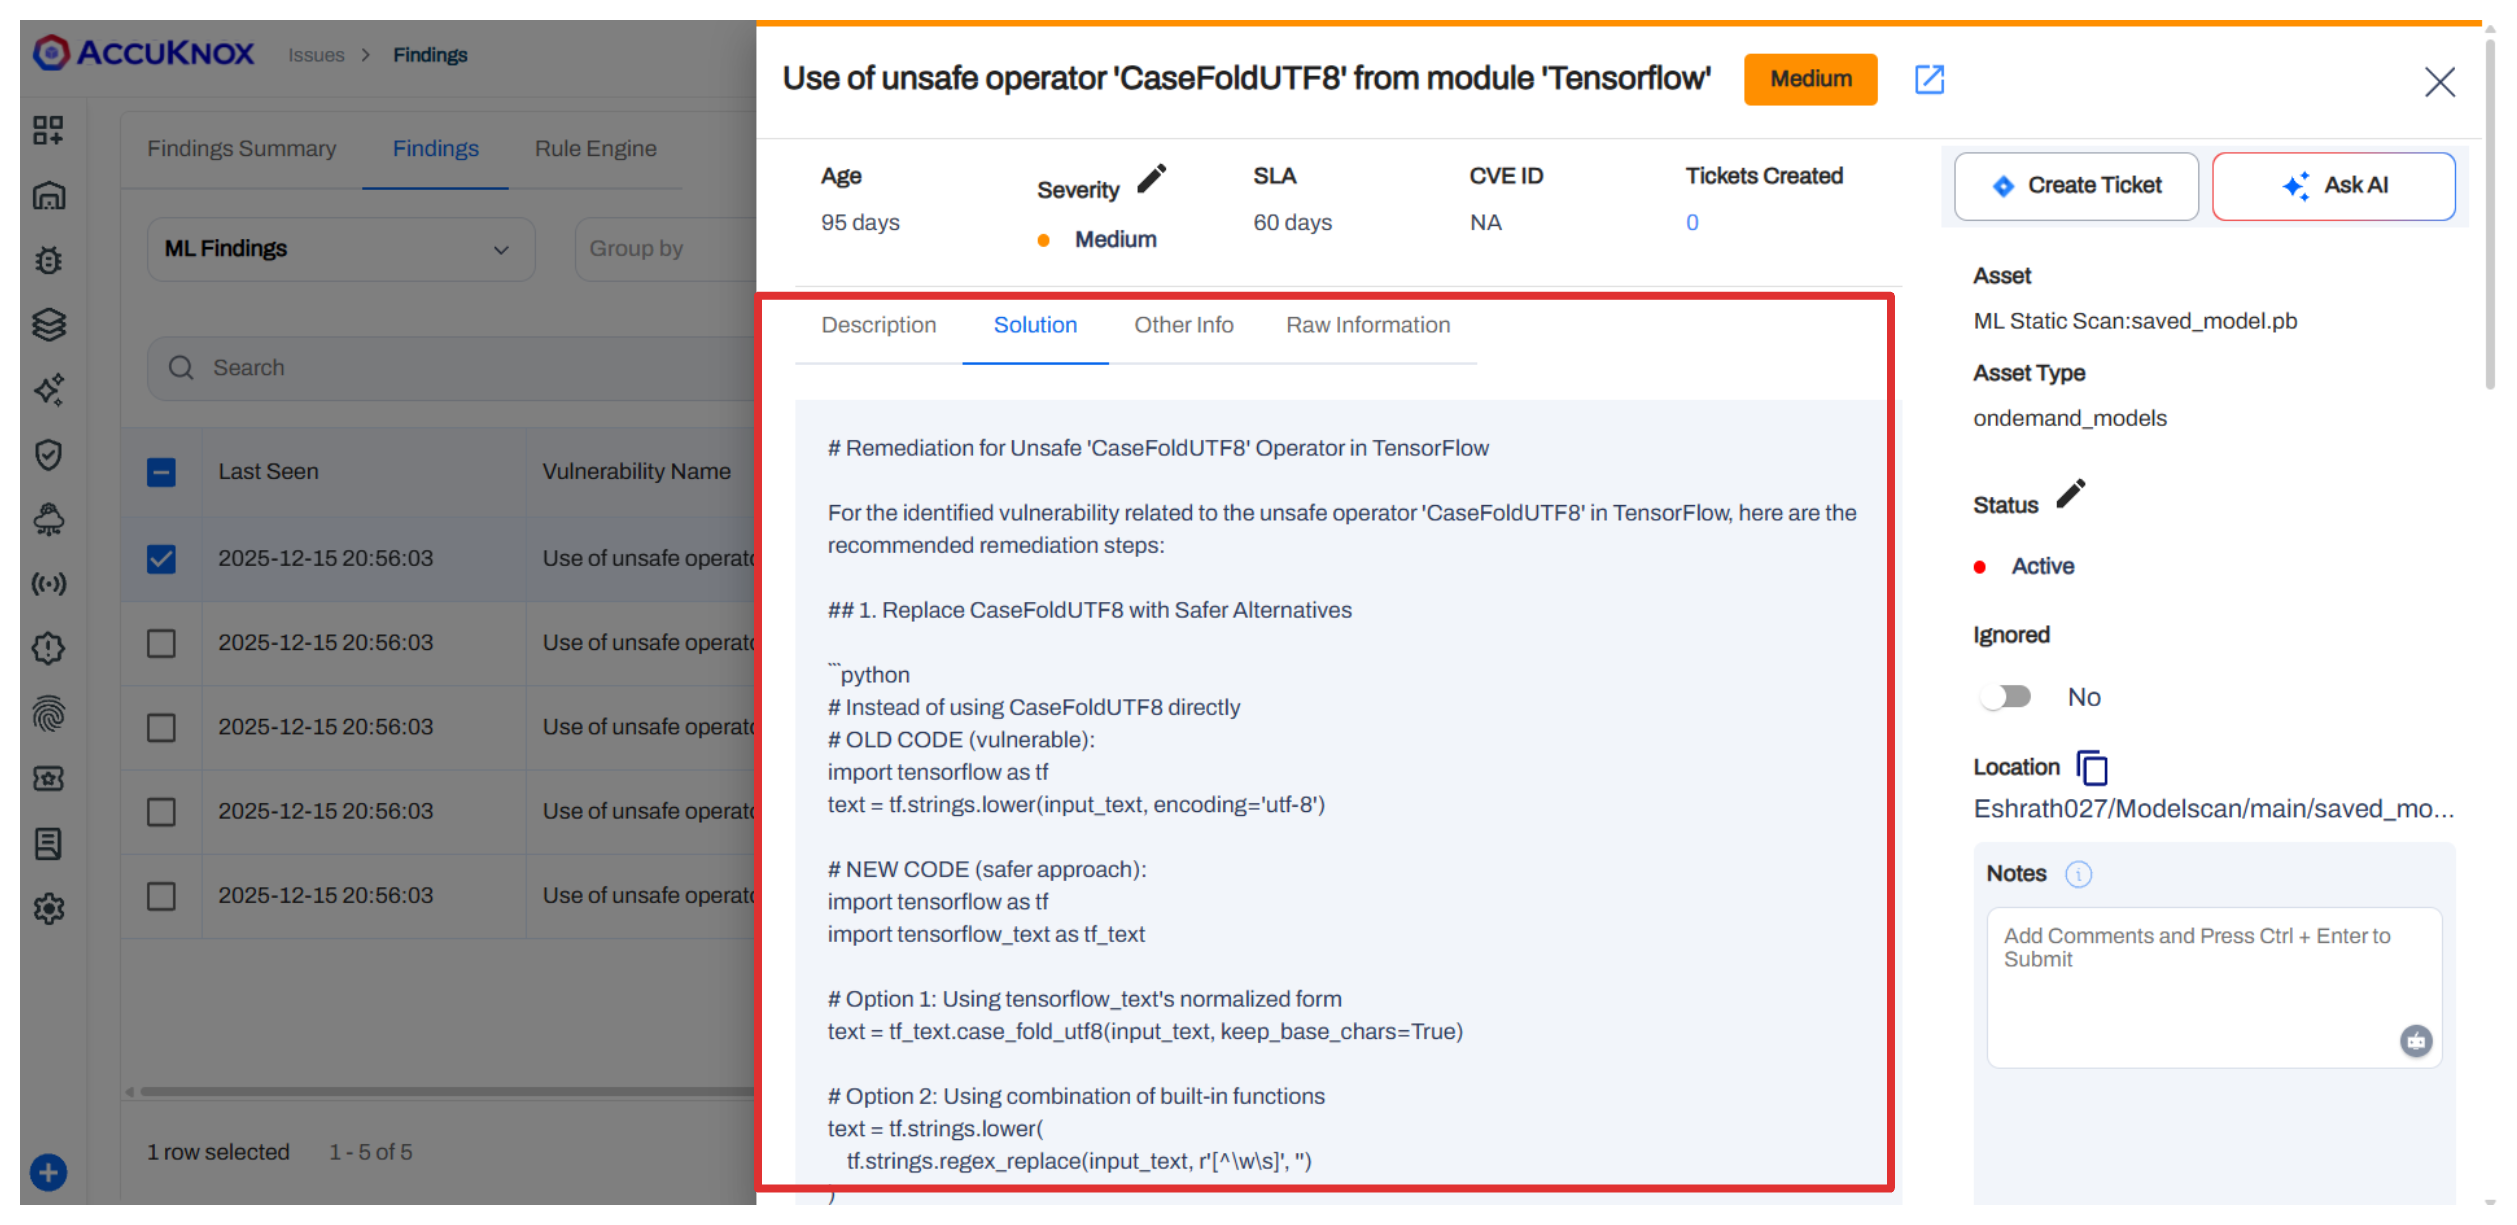
-
See the recommended Solution.
-
Access Raw Information for in-depth analysis.