Prompt Firewall plugin deployment with Intune
This guide provides step-by-step instructions to silently install and configure the AccuKnox Prompt Firewall extension for Google Chrome and Microsoft Edge across Windows and macOS devices using Microsoft Intune.
Pick your platform.


Prerequisites
- An Intune account with permission to create device configuration profiles
- An AccuKnox API key. Generate one under AI Security > Integrations, as shown in Step 1 of the Chrome guide
- The AccuKnox
.admxtemplate file and its matching.admllanguage file, for Windows - The AccuKnox
.mobileconfigprofile, for macOS [confirm where a customer downloads the .admx, .adml and .mobileconfig files]
Chrome and Edge use the same extension identity.
| Item | Value |
|---|---|
| Extension ID | kmagbijfphbjmdknglijkpjopohiedkj |
| Update URL | https://promptfirewall-plugin-extension.s3.ap-south-1.amazonaws.com/update_v2.xml |
The API key is a secret
The key is a JWT token that reaches your AccuKnox tenant. Keep it inside Intune. Do not paste it into a shared document, a ticket, or a screenshot.
What this guide does not cover
- Edge on macOS. The macOS profile below targets Chrome only.
- Firefox. Install it per device with the Firefox integration guide.
- A single machine. Install it by hand with the Chrome guide or the Edge guide.
Windows deployment for Chrome and Edge
Windows takes three profiles, in this order.
Step 1. Force install the extension
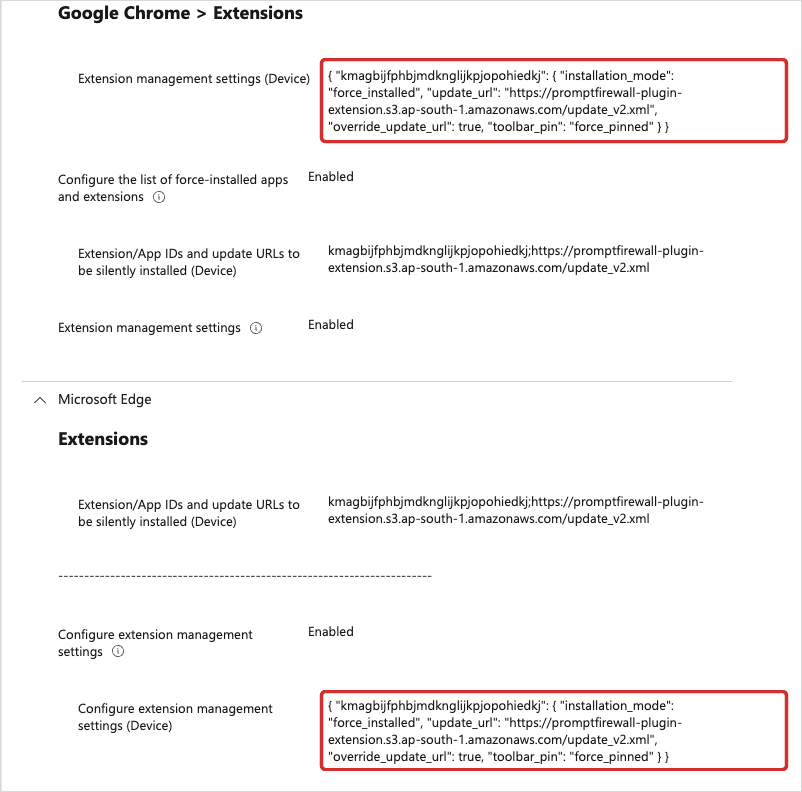
The Settings catalog carries the browser extension policies for both Chrome and Edge, so one profile covers both.
- Open the Microsoft Intune admin center.
- Go to Devices > Configuration and click Create profile.
- Select Windows 10 and later as the platform.
- Select Settings catalog as the profile type.
- Add the Extension management settings setting for Google Chrome.
- Add the same setting for Microsoft Edge.
- Set both settings to Enabled.
-
Paste this configuration string into the value box of each one.
{ "kmagbijfphbjmdknglijkpjopohiedkj": { "installation_mode": "force_installed", "update_url": "https://promptfirewall-plugin-extension.s3.ap-south-1.amazonaws.com/update_v2.xml", "override_update_url": true, "toolbar_pin": "force_pinned" } } -
Assign the profile to your Windows device groups and save.
force_installed blocks the user from removing the extension. force_pinned keeps the AccuKnox icon visible on the toolbar.
Step 2. Import the ADMX and ADML templates
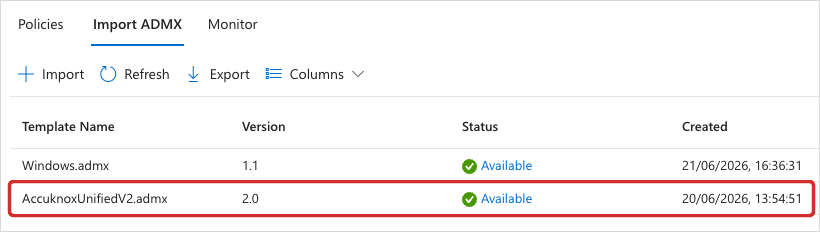
The Settings catalog has no fields for the AccuKnox API key. Those fields arrive with the AccuKnox administrative template, so upload it before you create the configuration profile.
- Go to Devices > Configuration and open the Import ADMX tab. Some tenants list the same page under Tenant administration > Custom ADMX.
- Click Import.
- Upload the AccuKnox
.admxfile and its matching.admllanguage file. - Wait for Status to read Available.
An upload can stay in a pending state. That usually means the .adml language file is missing, or that it does not match the .admx file.
Step 3. Push the API key and the scan settings
- Go to Devices > Configuration and click Create profile.
- Select Windows 10 and later as the platform.
- Select Imported Administrative templates as the profile type.
- Name the profile, for example
AccuKnox Extension Configuration. - Search the settings list for
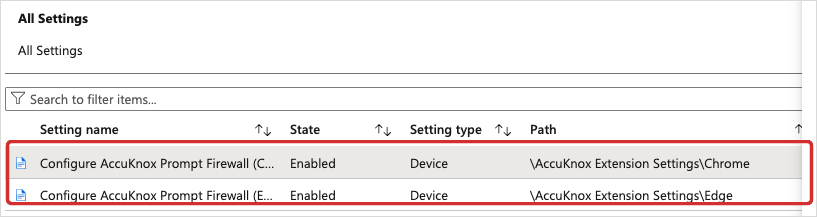
Configure AccuKnox Prompt Firewall. - Open the Chrome entry, at the path
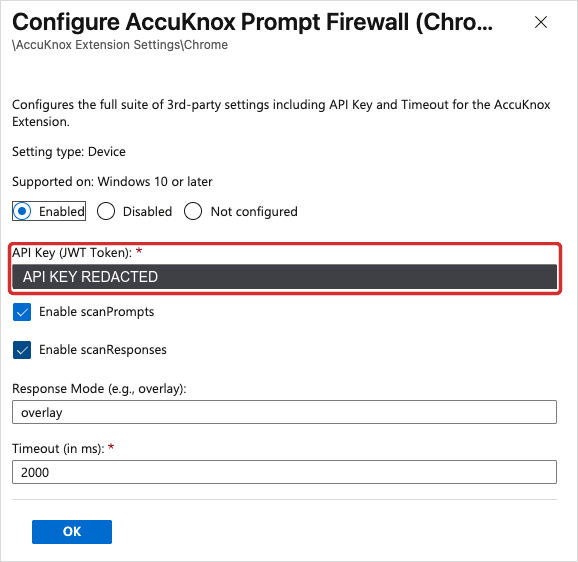
\AccuKnox Extension Settings\Chrome. - Set the policy to Enabled and fill the fields listed below.
- Repeat steps 6 and 7 for the Edge entry, at
\AccuKnox Extension Settings\Edge. - Assign the profile to your Windows device groups and save.
| Field | Value |
|---|---|
| API Key (JWT Token) | Your AccuKnox token. The field is required. |
| Enable scanPrompts | Check it to scan what the user sends to the model. |
| Enable scanResponses | Check it to scan what the model sends back. |
| Response Mode (e.g., overlay) | overlay |
| Timeout (in ms) | 2000. The field is required. |
The policy applies to Windows 10 or later. Both the Chrome entry and the Edge entry read Enabled, with a setting type of Device. A device setting applies to every user on that machine.
macOS deployment for Chrome
macOS reads no ADMX file, so the whole rollout arrives as one custom configuration profile. A single .mobileconfig file carries both parts. The ExtensionInstallForcelist payload installs the extension and stops the user from removing it. The settings payload carries the API key and the timeout.
- Check that your
.mobileconfigfile contains both payloads. - Go to Devices > macOS > Configuration profiles.
- Click Create profile.
- Select Templates as the profile type, then select Custom.
- Name the profile, for example
AccuKnox Prompt Firewall - Mac Chrome Settings. - Upload the
.mobileconfigfile into the configuration payload box. - Review the settings, assign the profile to your macOS device groups, and click Save.
Confirm the rollout worked
Pick one enrolled device and open Chrome or Edge on it. The AccuKnox icon sits on the toolbar, because force_pinned puts it there.
Click the icon. Look for a green status dot next to AccuKnox Prompt Firewall. The dot means the extension reached your tenant with the key from Intune. Send a test prompt in ChatGPT, Claude, GitHub Copilot, or Gemini. Then open AI Security > Request Log in AccuKnox and find the matching entry. The Chrome integration guide shows what the popup and the log look like.