OpenShift VM Scanning (Agentless)
AccuKnox scans virtual machines running on Red Hat OpenShift Virtualization without installing anything inside the VMs. You install one operator on the cluster, point it at your AccuKnox tenant, and it does the rest on a schedule you choose.
Nothing about your VMs leaves the cluster except the scan findings.
How the scan works
The operator installs two things: a Scan resource and a Schedule resource. You only create the Schedule. Everything below happens on its own, on the cron expression you set:
- The scheduler starts a discovery pod at the scheduled time.
- That pod lists every VM in the OpenShift Virtualization environment.
- For each VM it creates a volume snapshot.
- A second pod mounts each snapshot and scans it for vulnerabilities.
- Results are pushed to the AccuKnox artifact API.
- The snapshots and PVCs the operator created are deleted.
Discovery runs fresh on every execution, so VMs added or removed between runs are picked up automatically. You never have to update the schedule when your VM count changes.
Prerequisites
Check these before you start. The scan fails without them.
| Requirement | Why |
|---|---|
A VolumeSnapshotClass object exists in the cluster |
The operator snapshots each VM's volume before scanning it |
At least one VolumeSnapshotClass is marked default |
The operator uses the default class when it creates snapshots |
| All VMs on the cluster use the same CSI driver | Normally true already, since a cluster rarely runs two storage solutions |
cluster-admin on the OpenShift cluster |
You create a CatalogSource and install a cluster-wide operator |
| Outbound HTTPS from the cluster to your AccuKnox CSPM endpoint | Findings are pushed to the artifact API |
The VMs themselves can live in any namespace. The operator does not care which one.
Step 1: Add AccuKnox to the operator catalog
The AccuKnox operator is not listed in the OpenShift Software Catalog by default, so you add its catalog first.
-
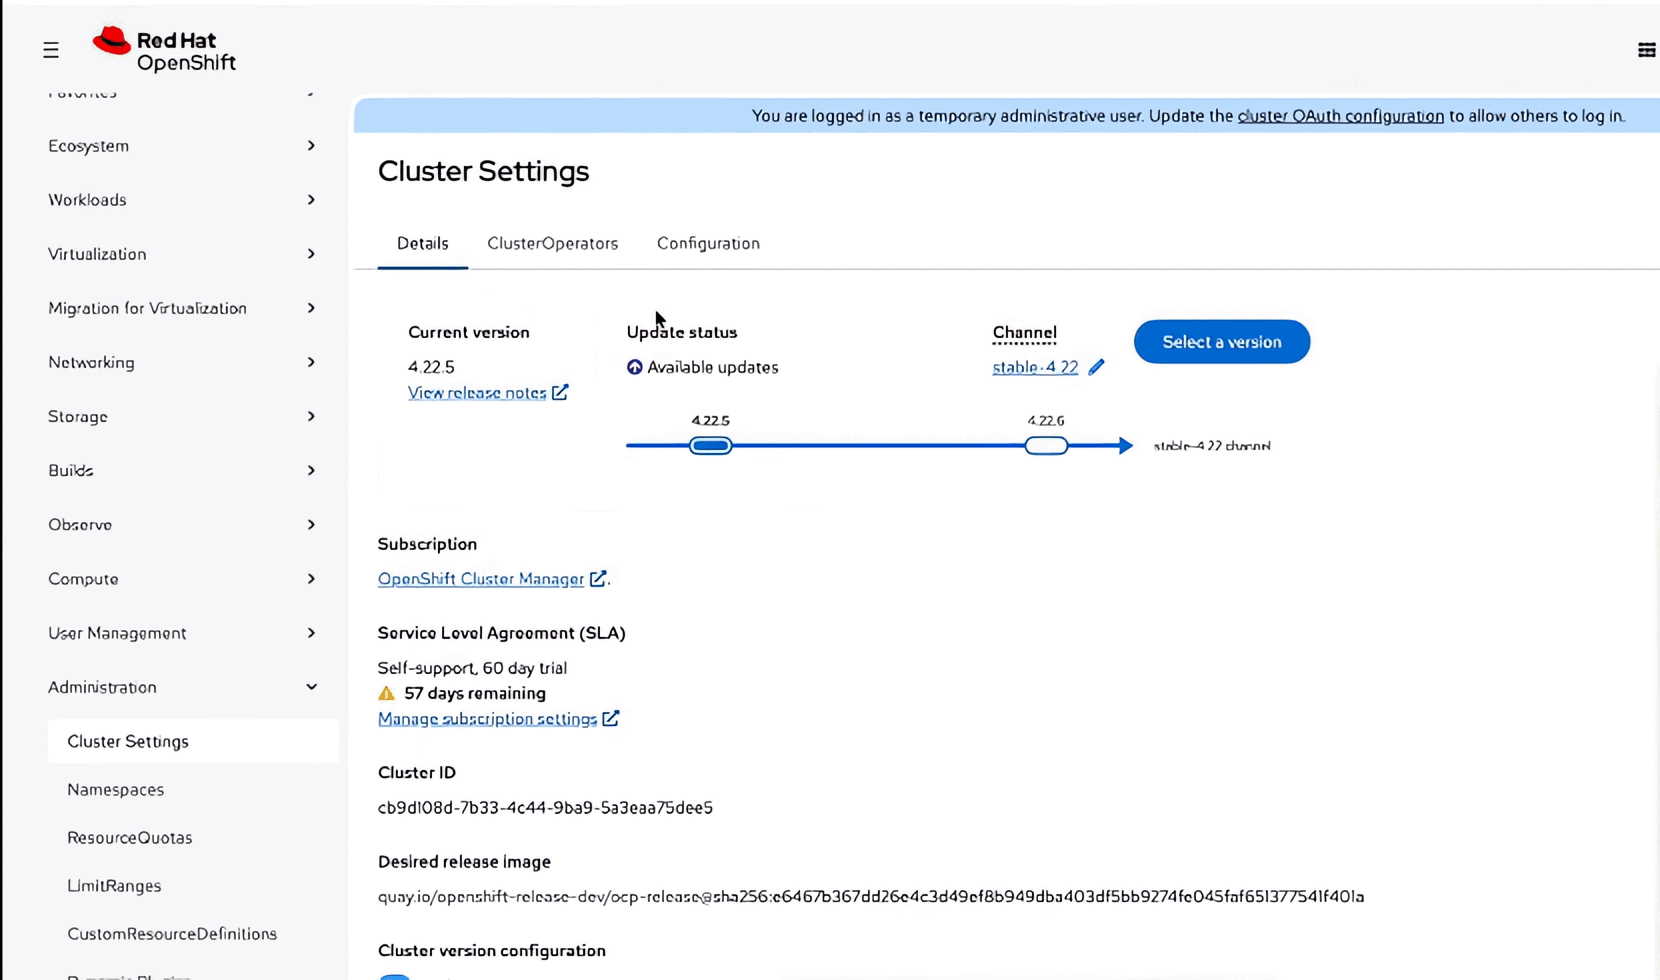
In the OpenShift web console, go to Administration → Cluster Settings.
-
Open the Configuration tab and search for OperatorHub.
-
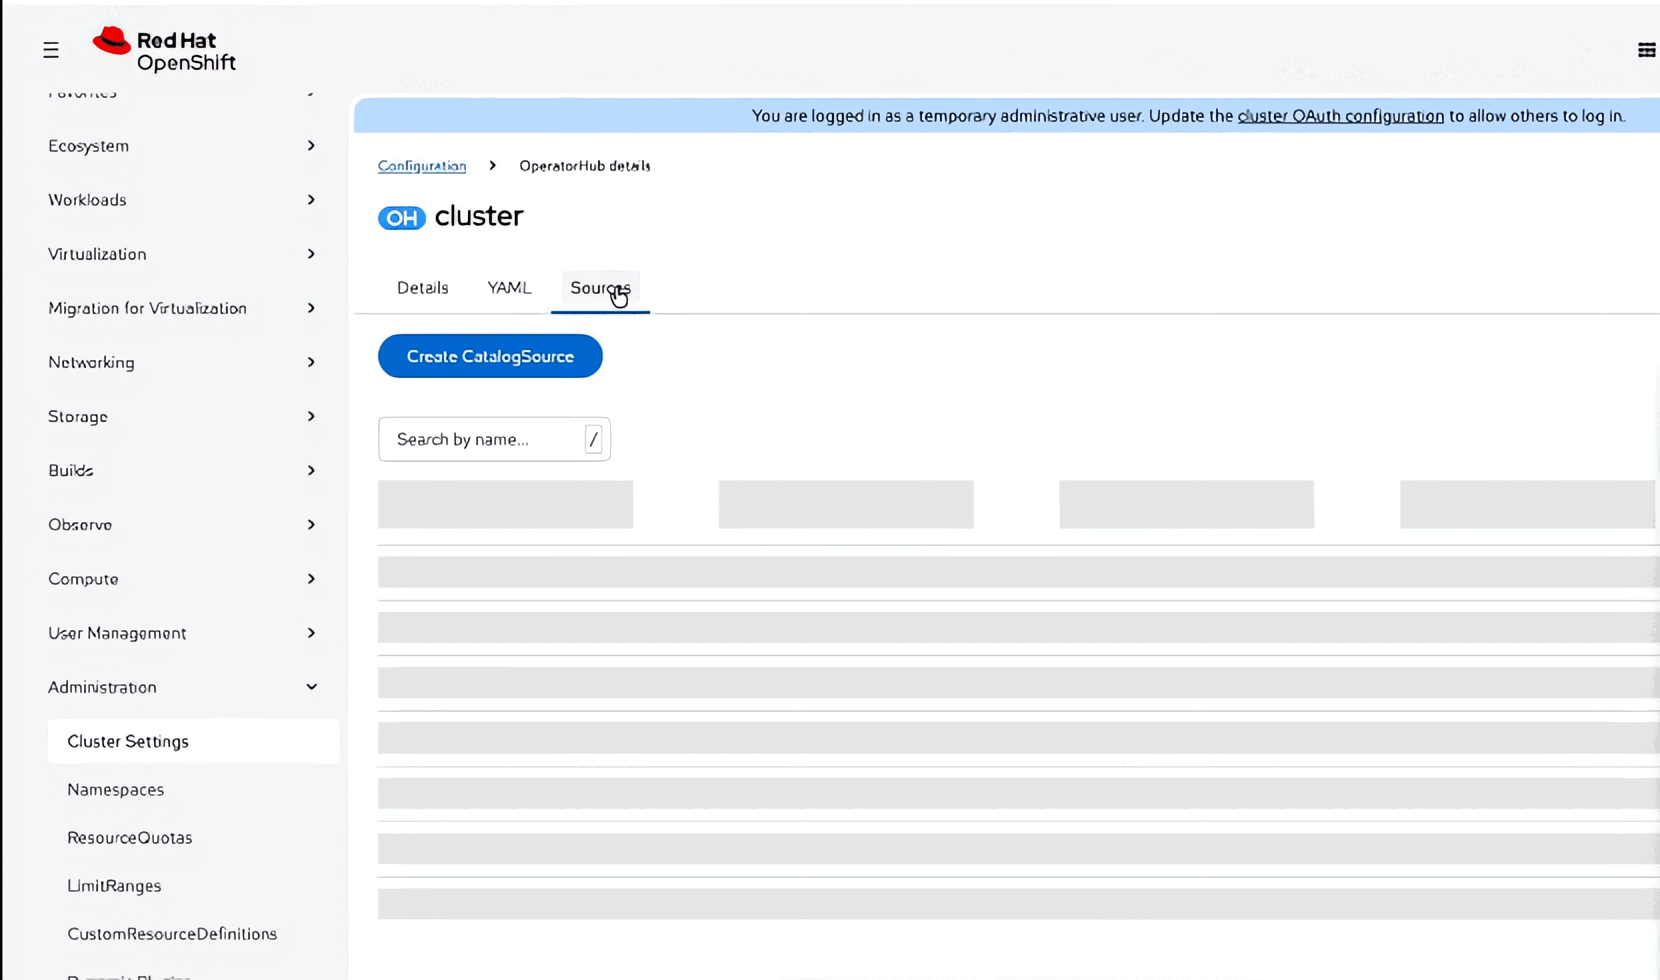
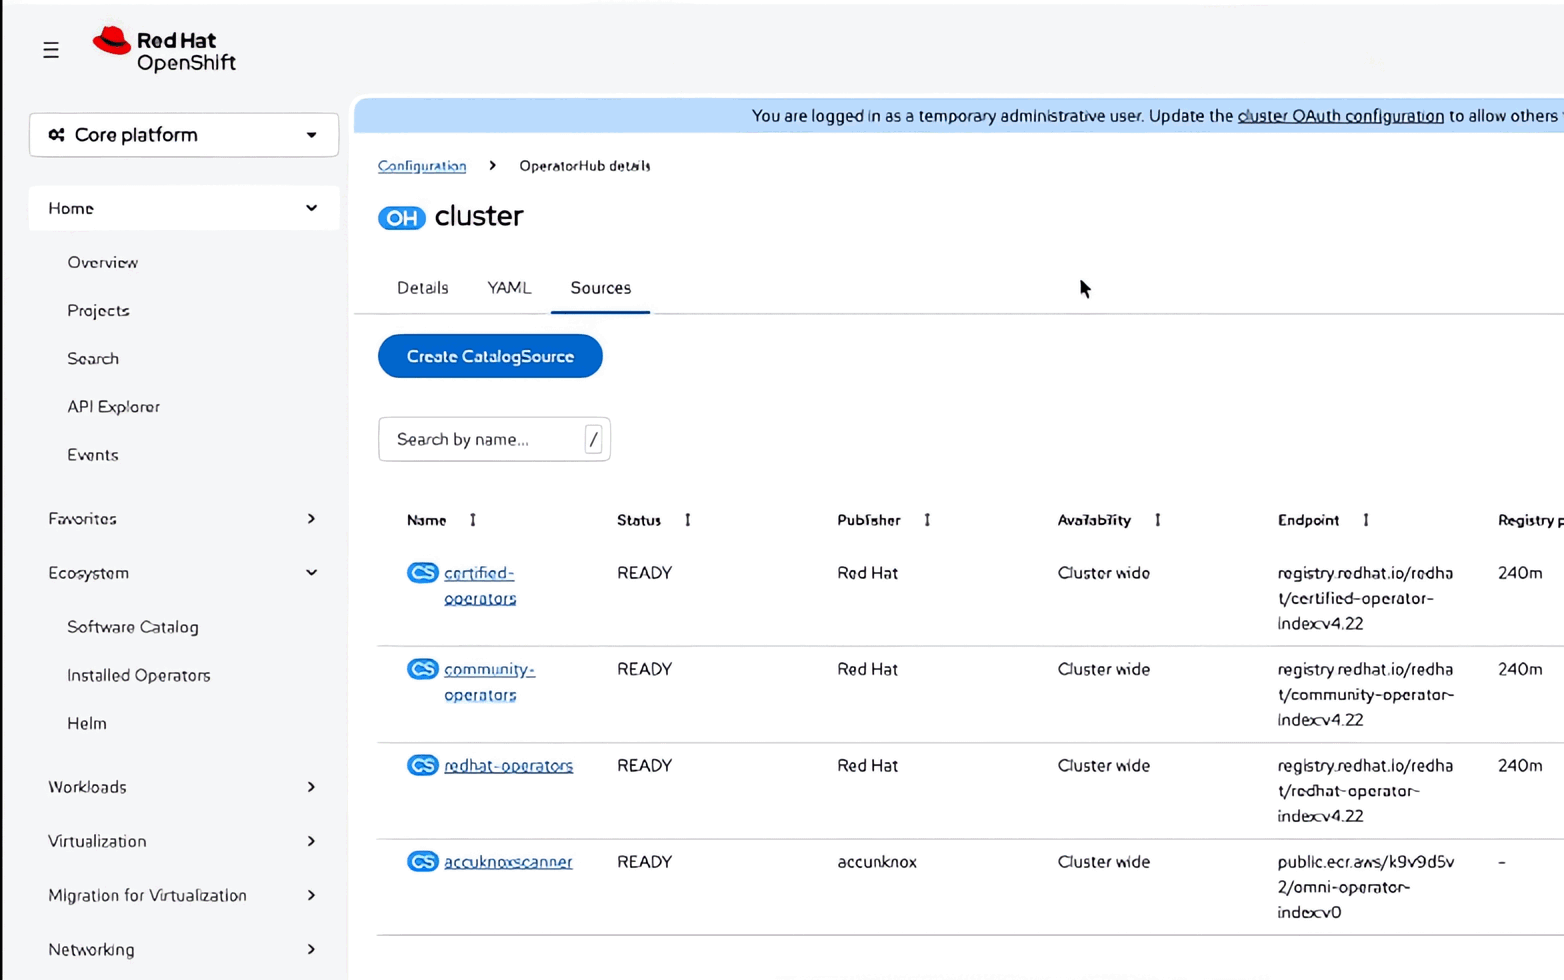
Open OperatorHub → Sources, then click Create CatalogSource.
-
Fill in the form:
Field Value CatalogSource name Anything, for example accuknoxscannerDisplay name Anything, for example AccuKnox ScannerPublisher name accuknoxImage (URL of container image) public.ecr.aws/k9v9d5v2/omni-operator-index:v0Availability Cluster-wide CatalogSource (the default) 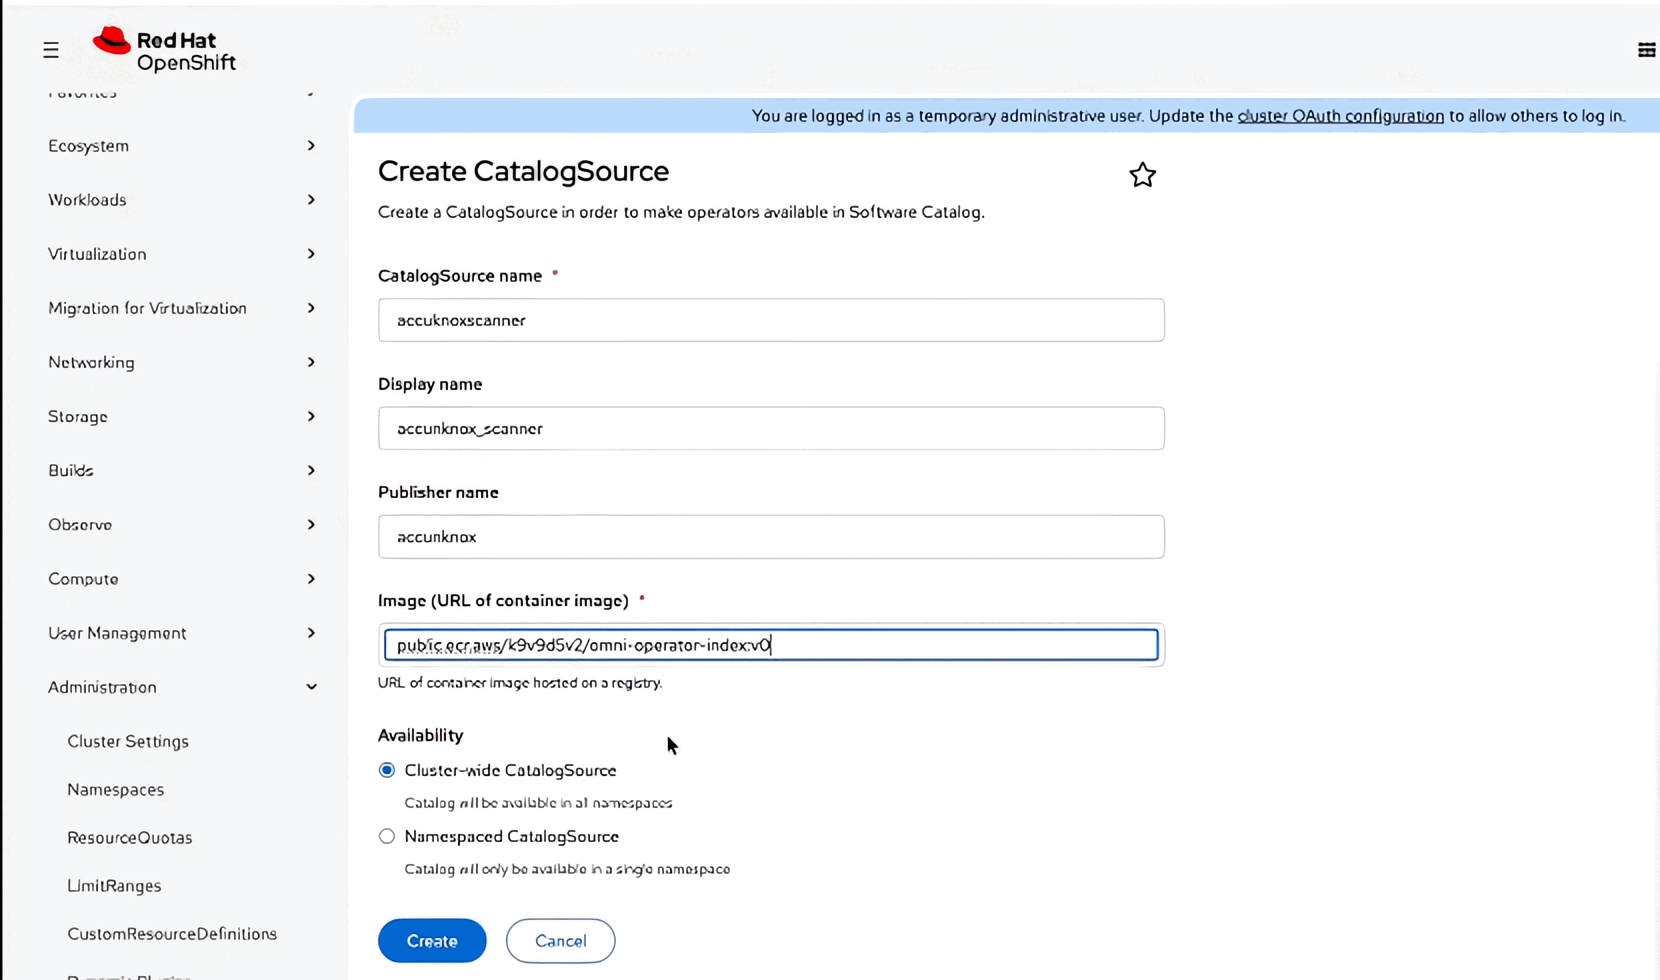
-
Click Create.
-
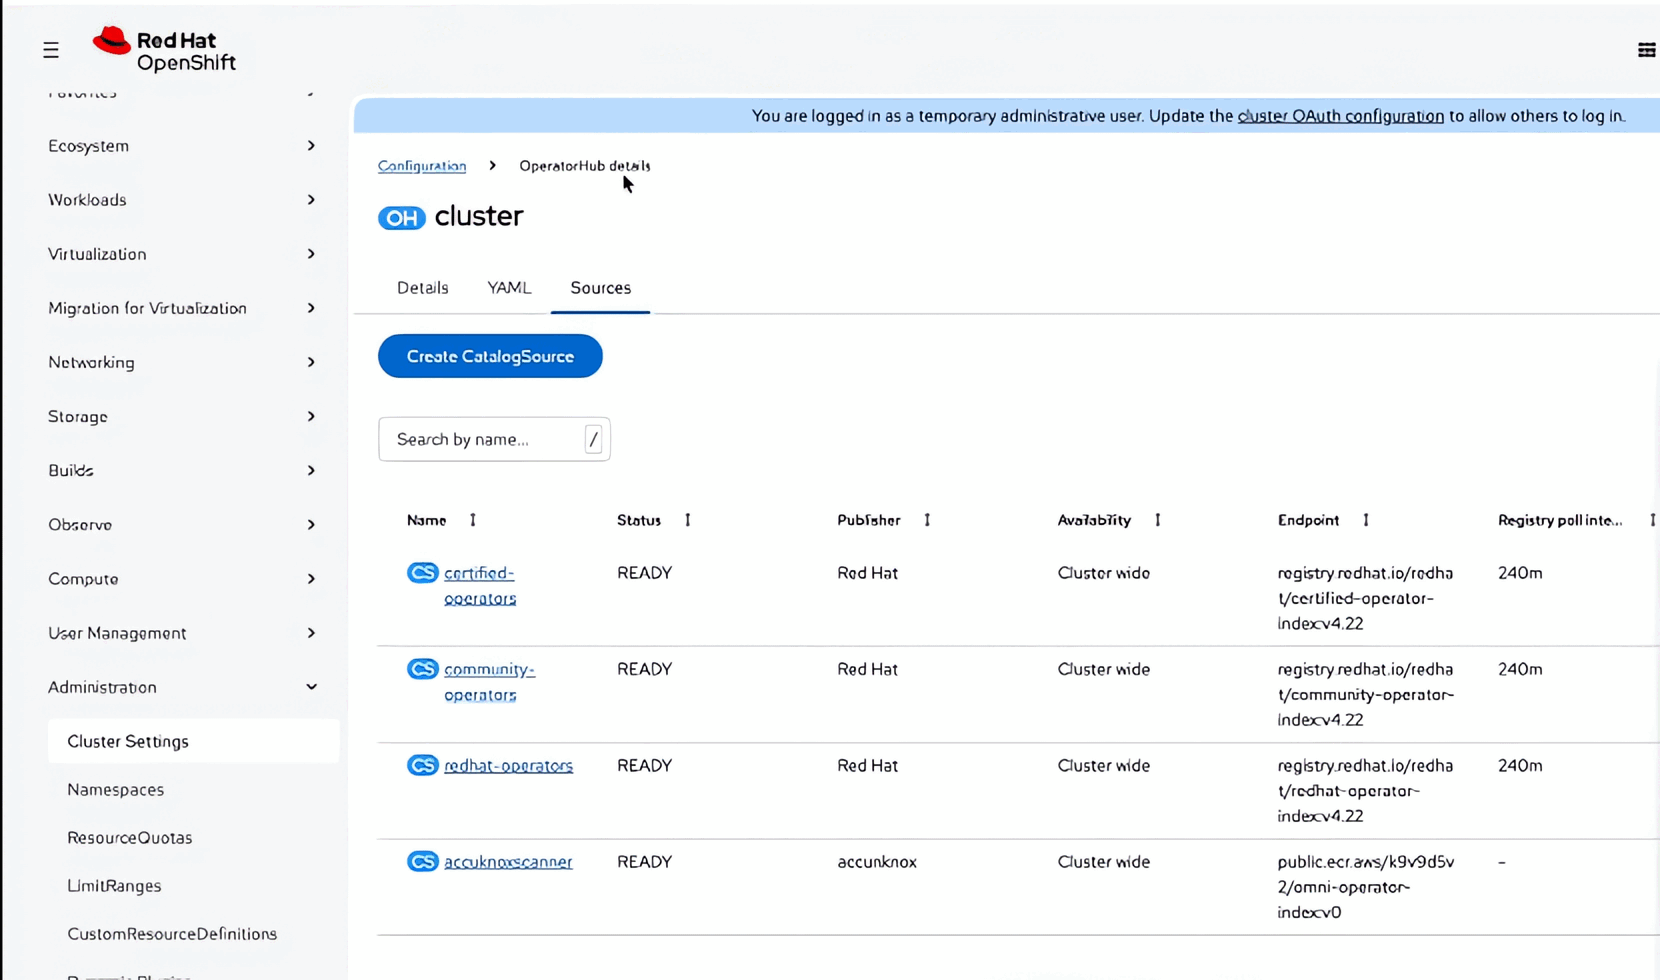
Wait for the new source to show READY in the Sources list. Anything else means the cluster could not pull the catalog image.
Cluster-wide is required
Leave Availability set to Cluster-wide CatalogSource. A namespaced catalog source only exposes the operator inside one namespace, and the scan schedule needs to reach VMs across the cluster.
Step 2: Install the operator
-
Go to Ecosystem → Software Catalog and search for
accuknox. AccuKnox VM Scanning now appears because the catalog was added in Step 1.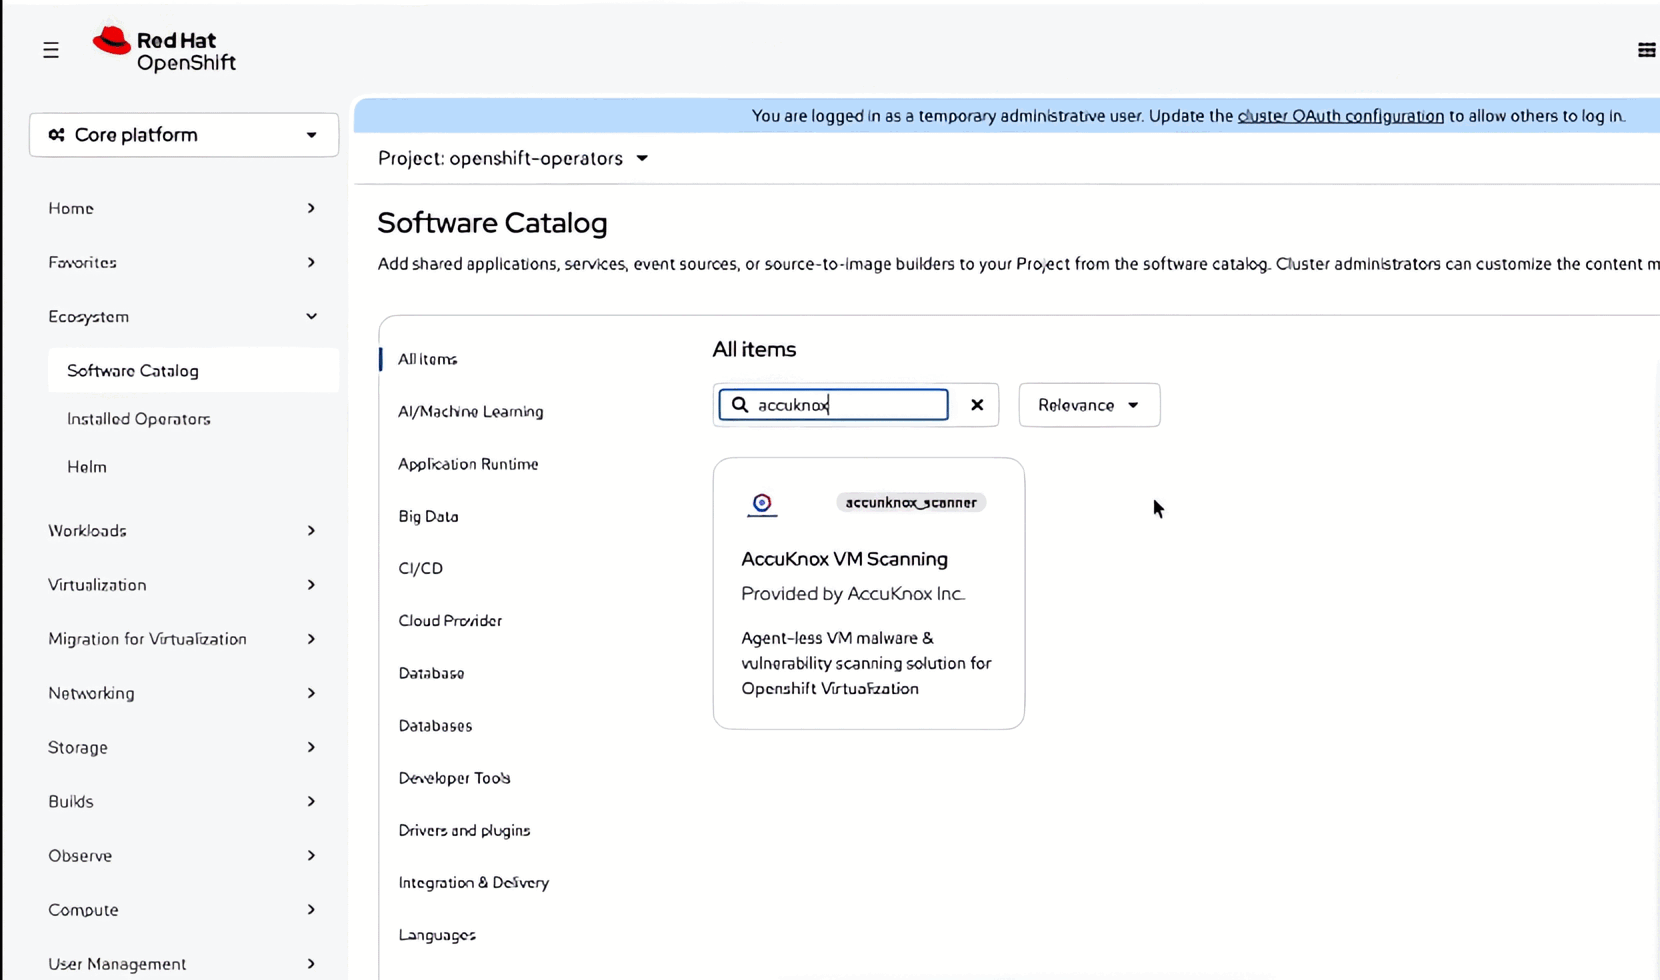
-
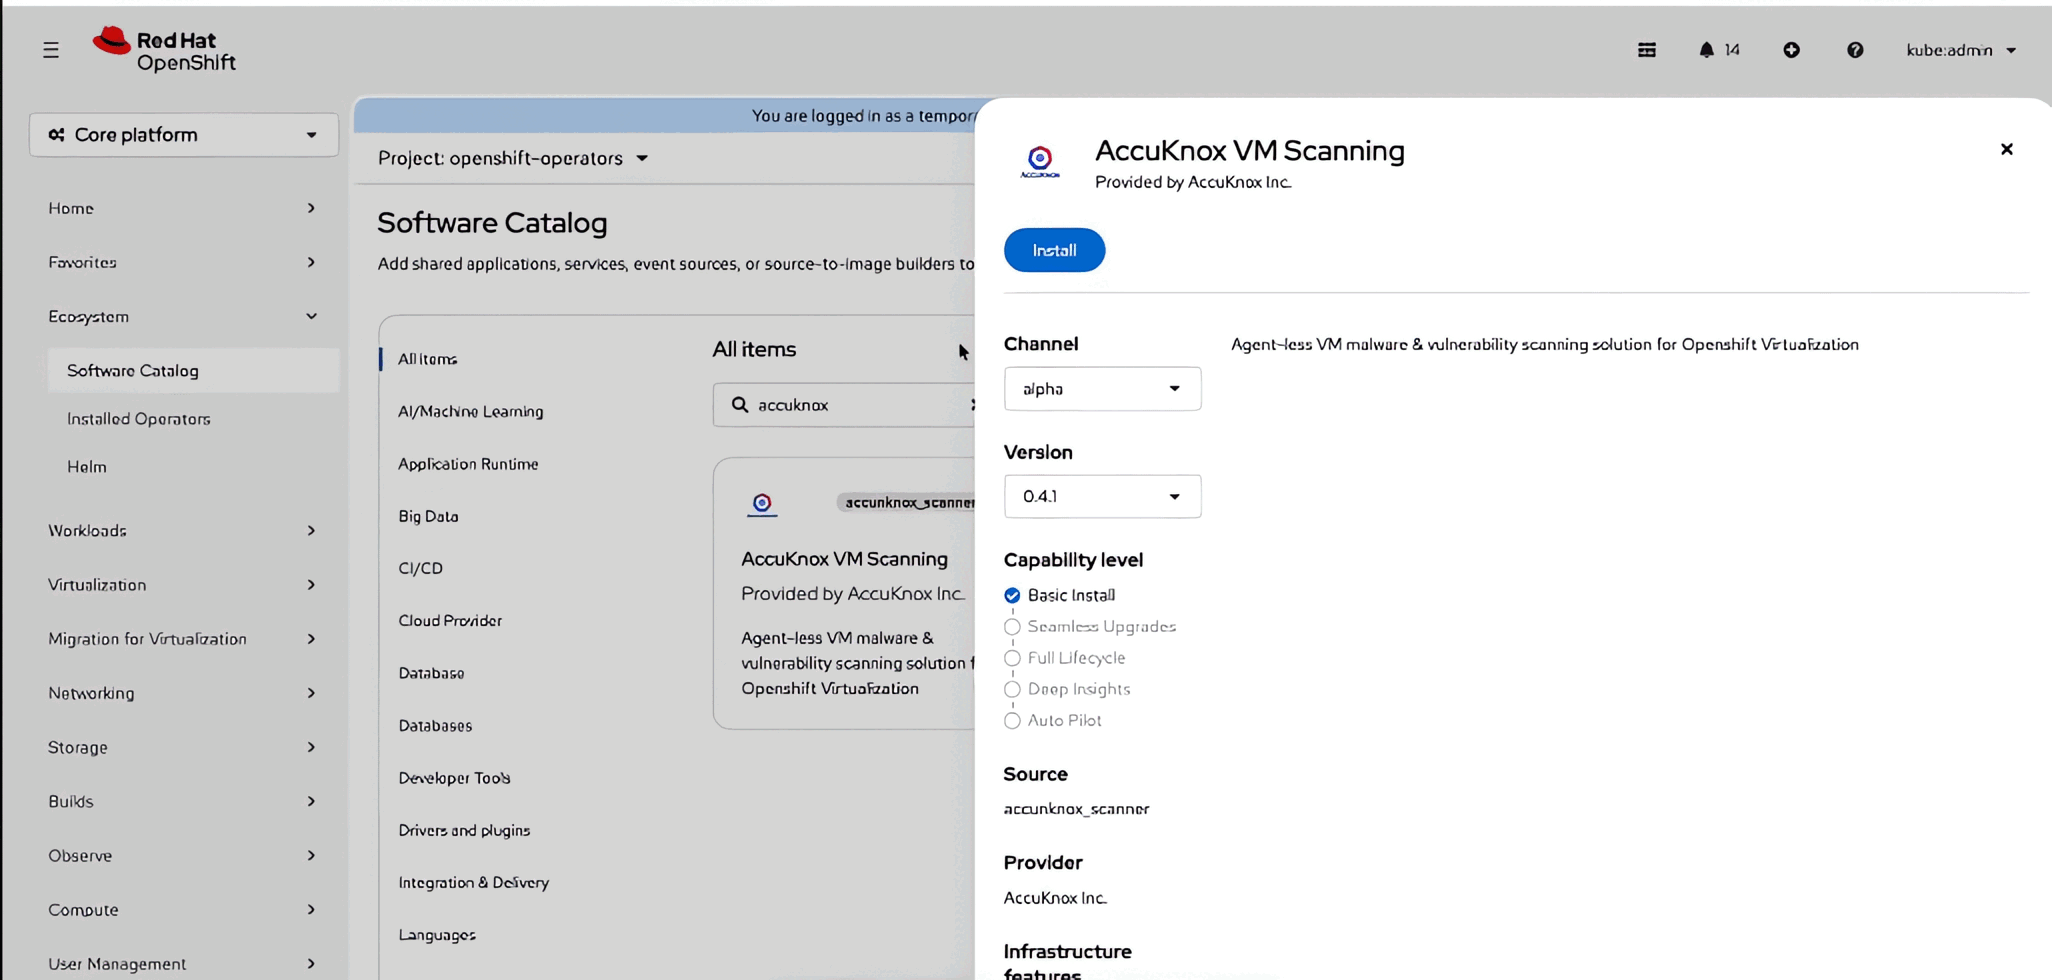
Click the tile, then click Install.
-
Keep every default on the Install Operator page, including the
openshift-operatorsinstalled namespace, and click Install.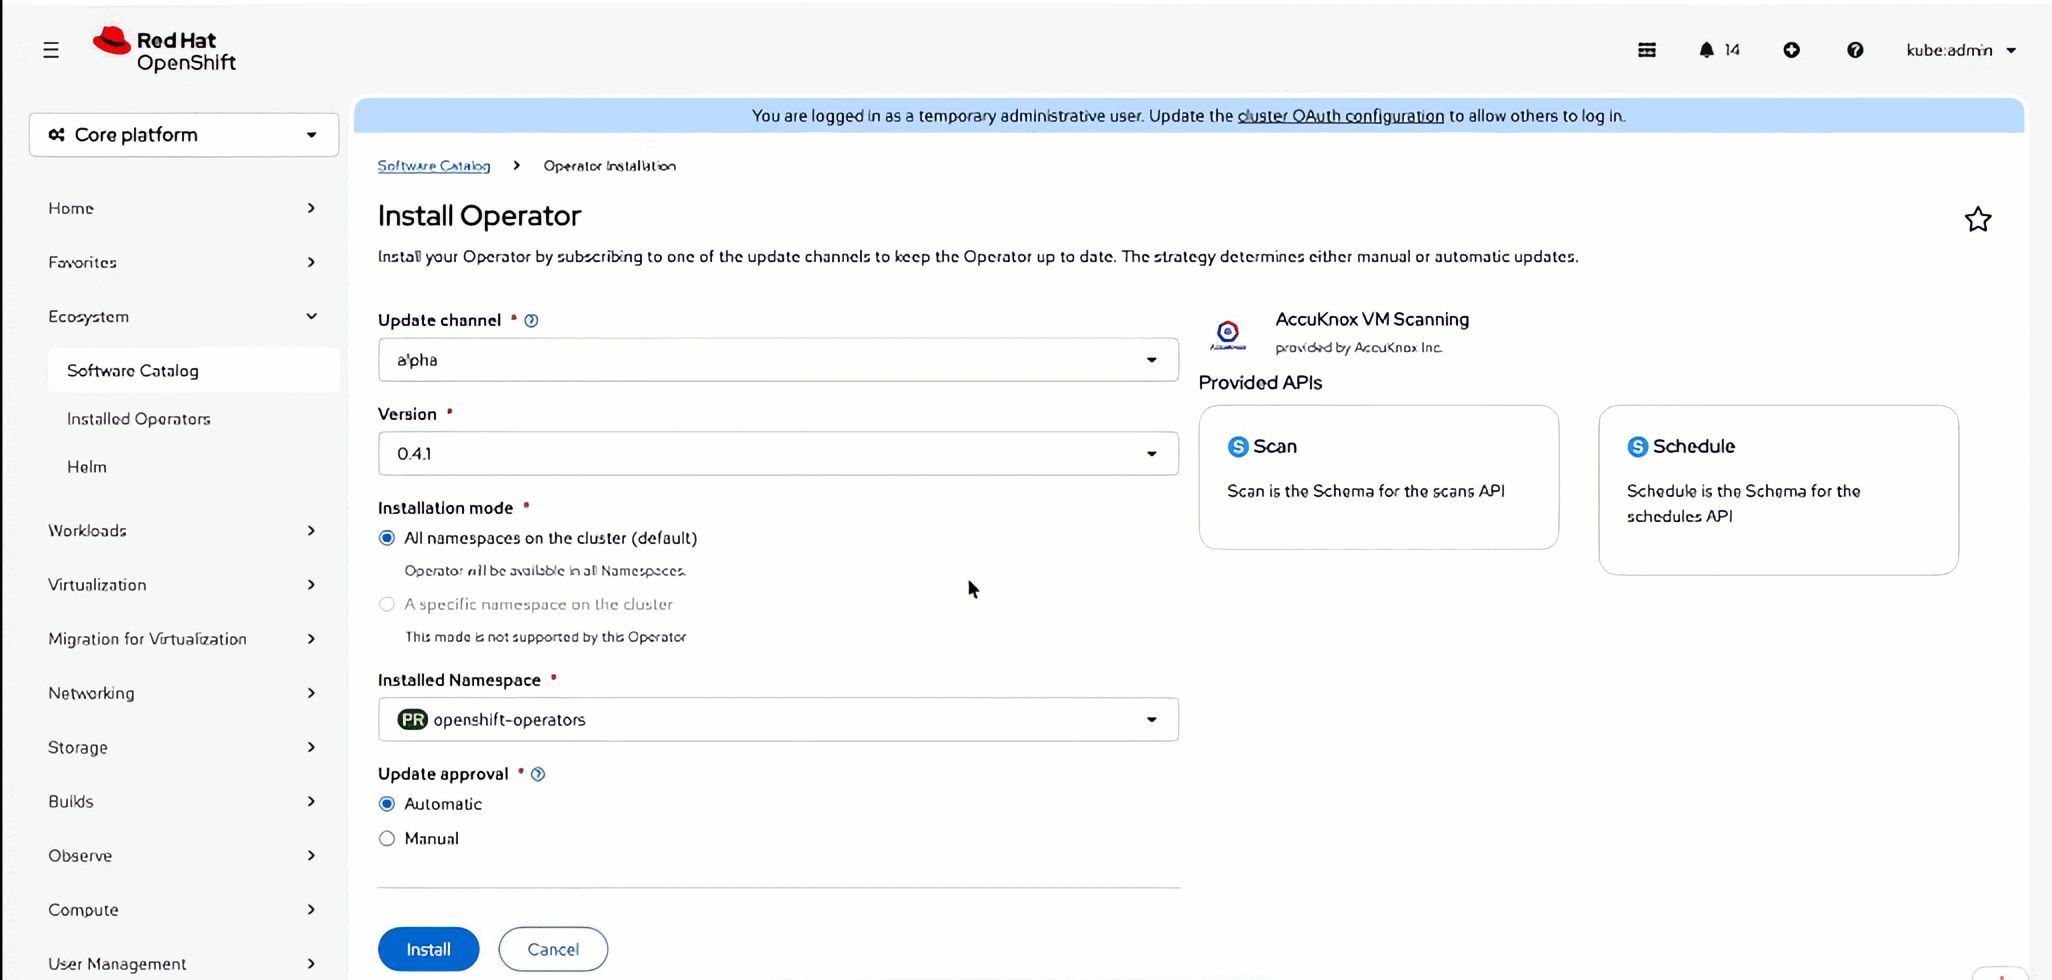
-
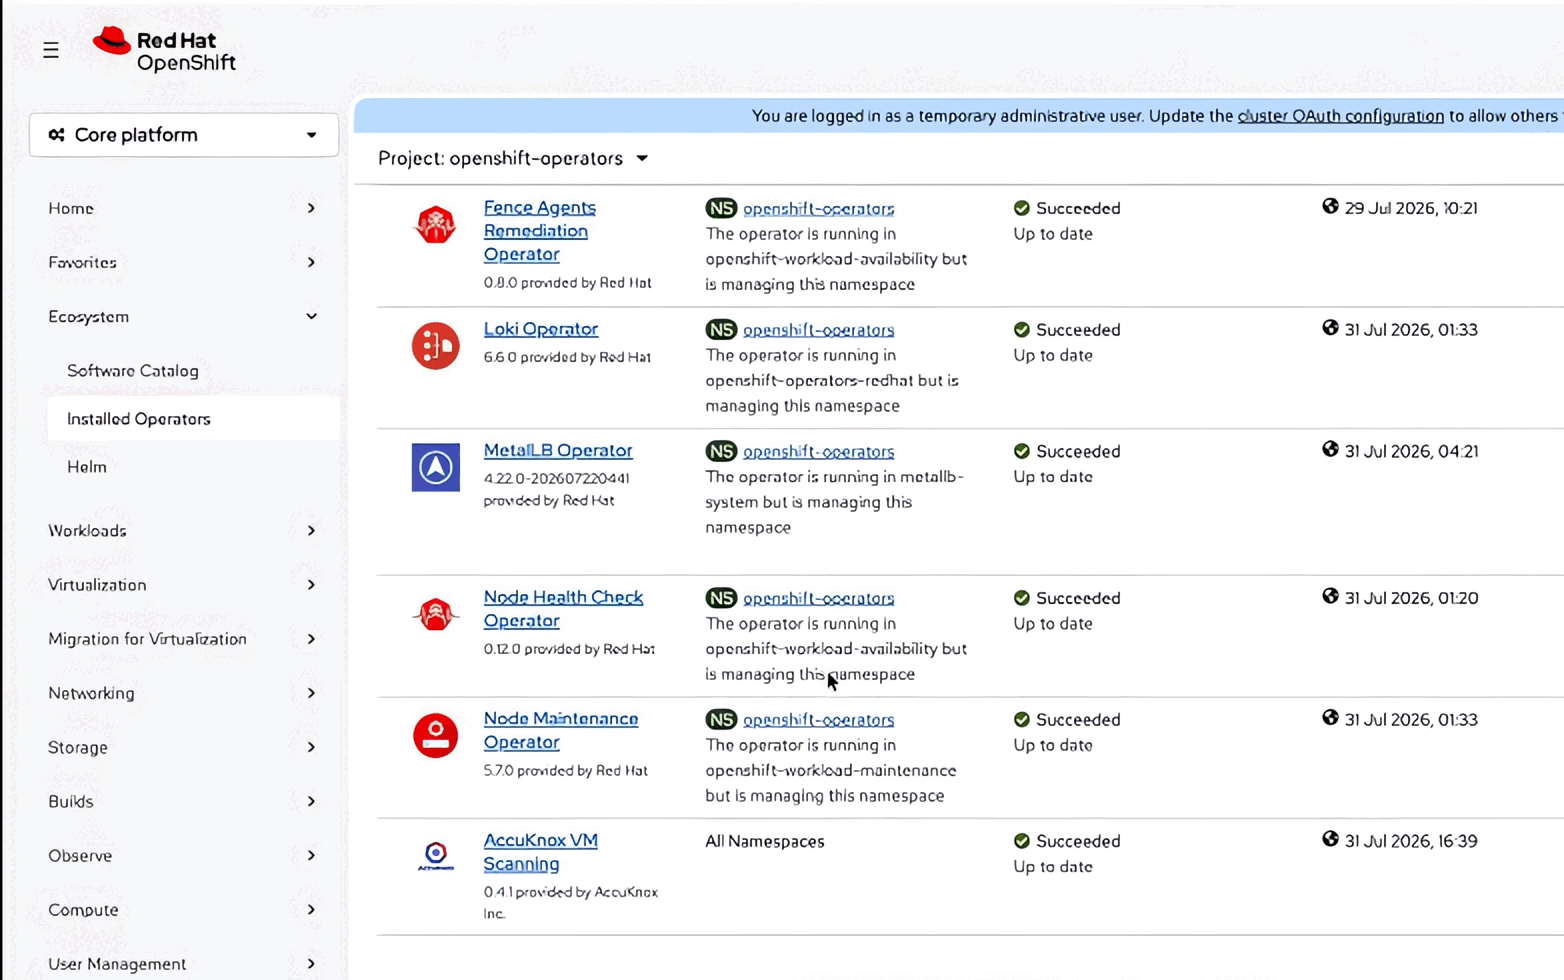
Installation takes a couple of minutes. When it finishes, the operator appears under Ecosystem → Installed Operators with two provided APIs, Scan and Schedule.
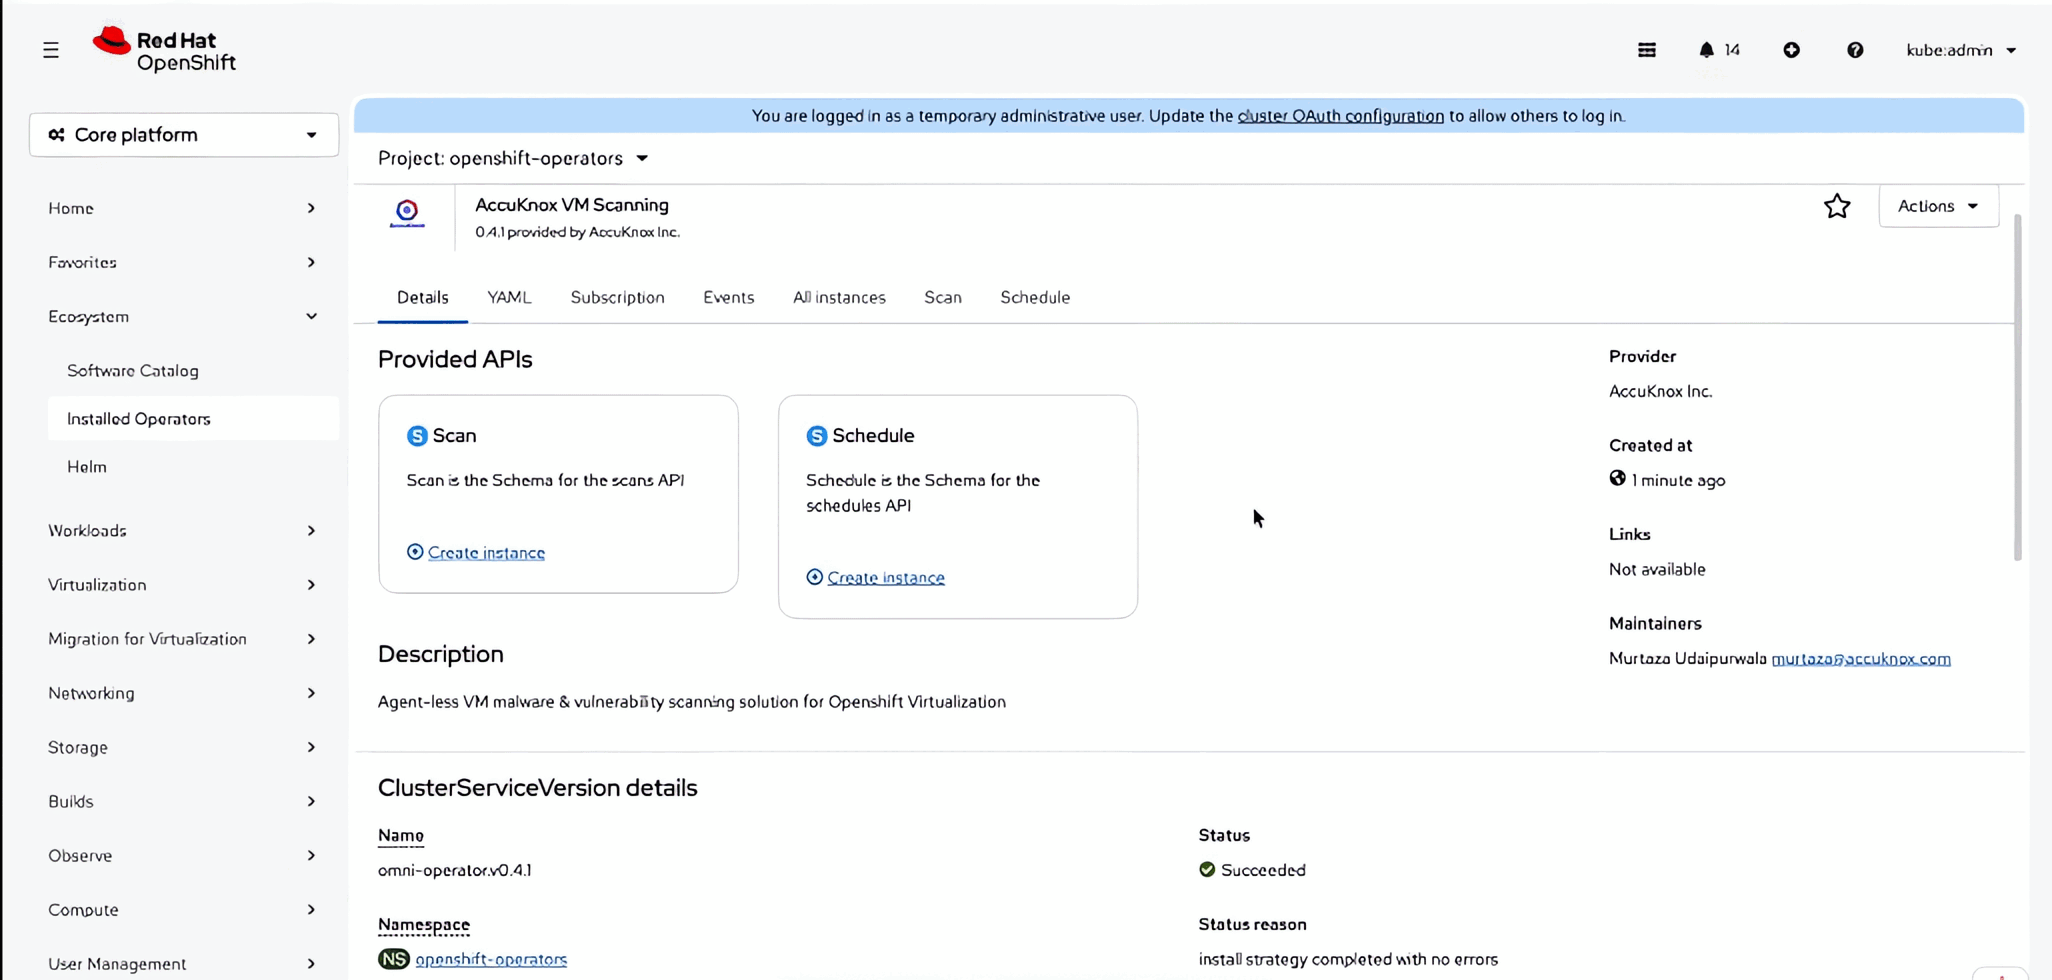
Note the namespace you installed into. You need it again in Step 3 and Step 4.
Step 3: Create a token and a label in AccuKnox
Switch to the AccuKnox control plane for this step. These two values are the only things AccuKnox generates for this flow, everything else happens in OpenShift.
Create the token
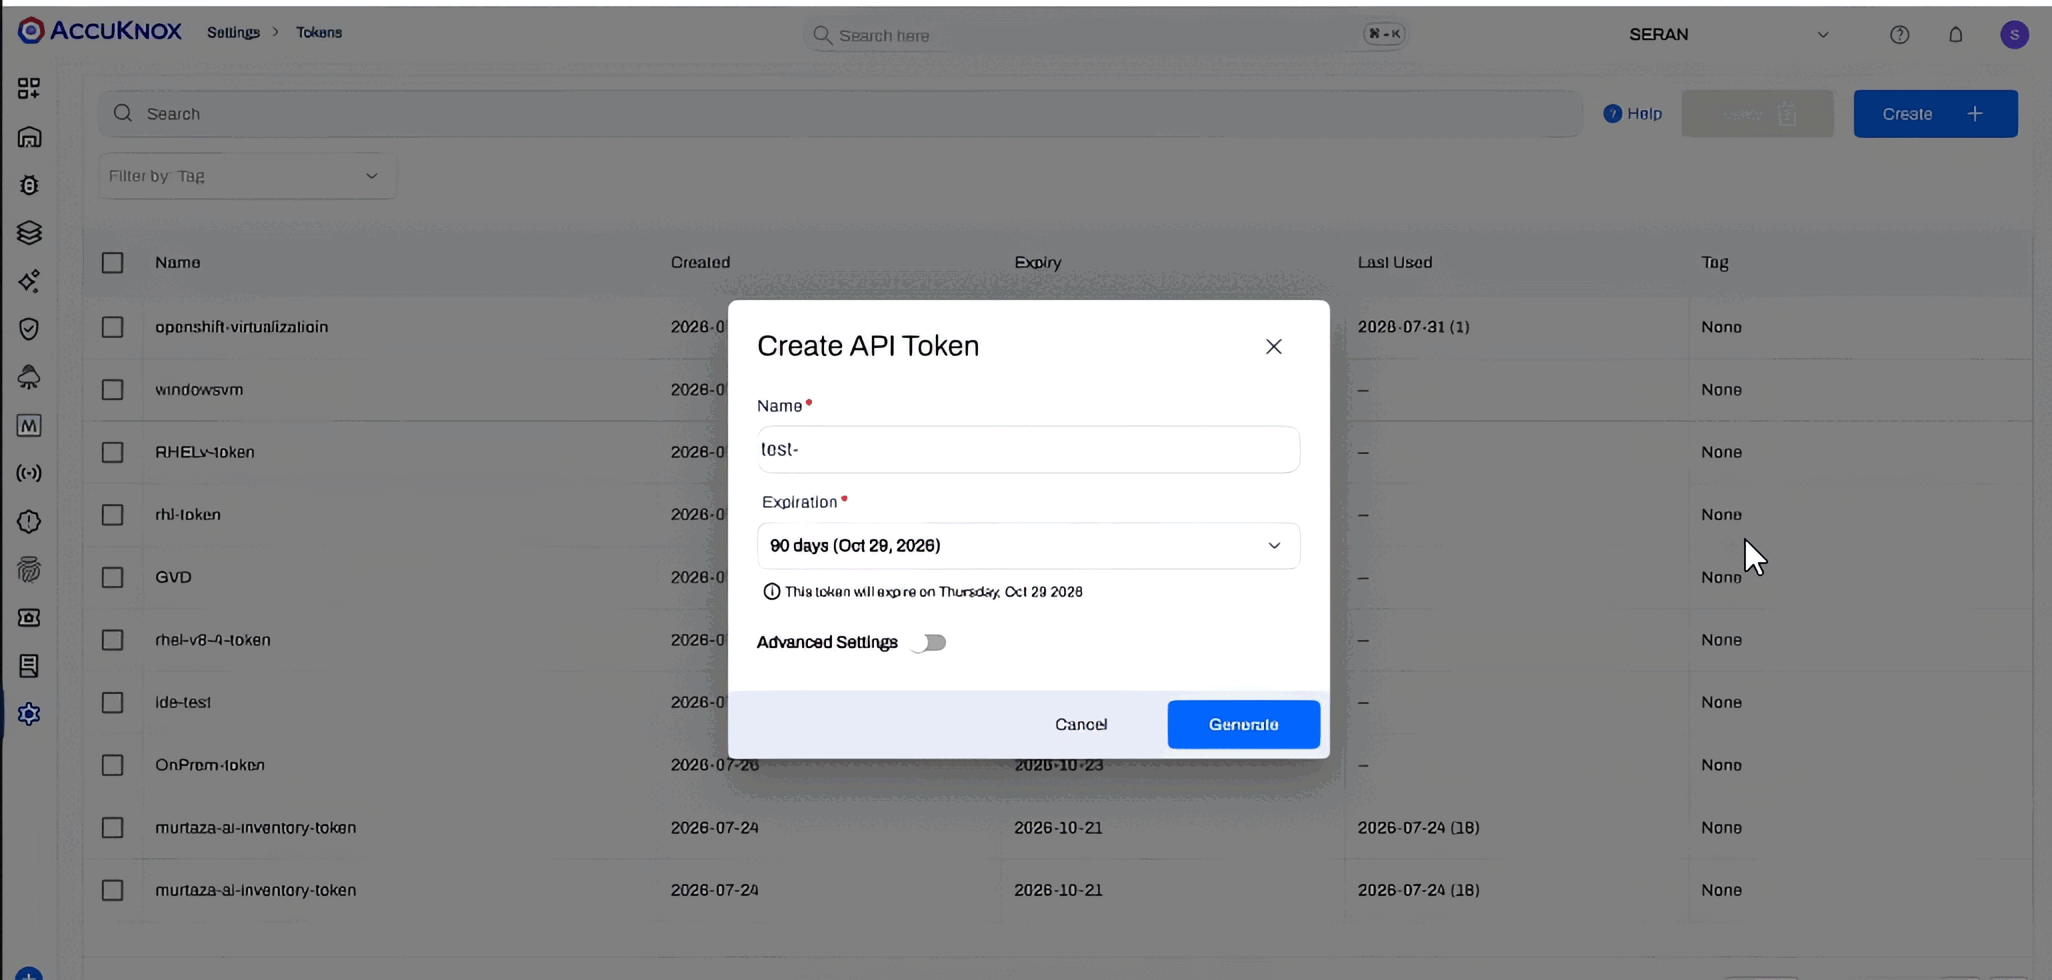
- Go to Settings → Tokens and click Create Token.
-
Give it a name and an expiry, then click Generate.
-
Copy the token now. You cannot view it again after closing the dialog.
Create the label
- Go to Settings → Labels and click + Label.
-
Enter a name that identifies this cluster, for example
openshift-prod, and save it.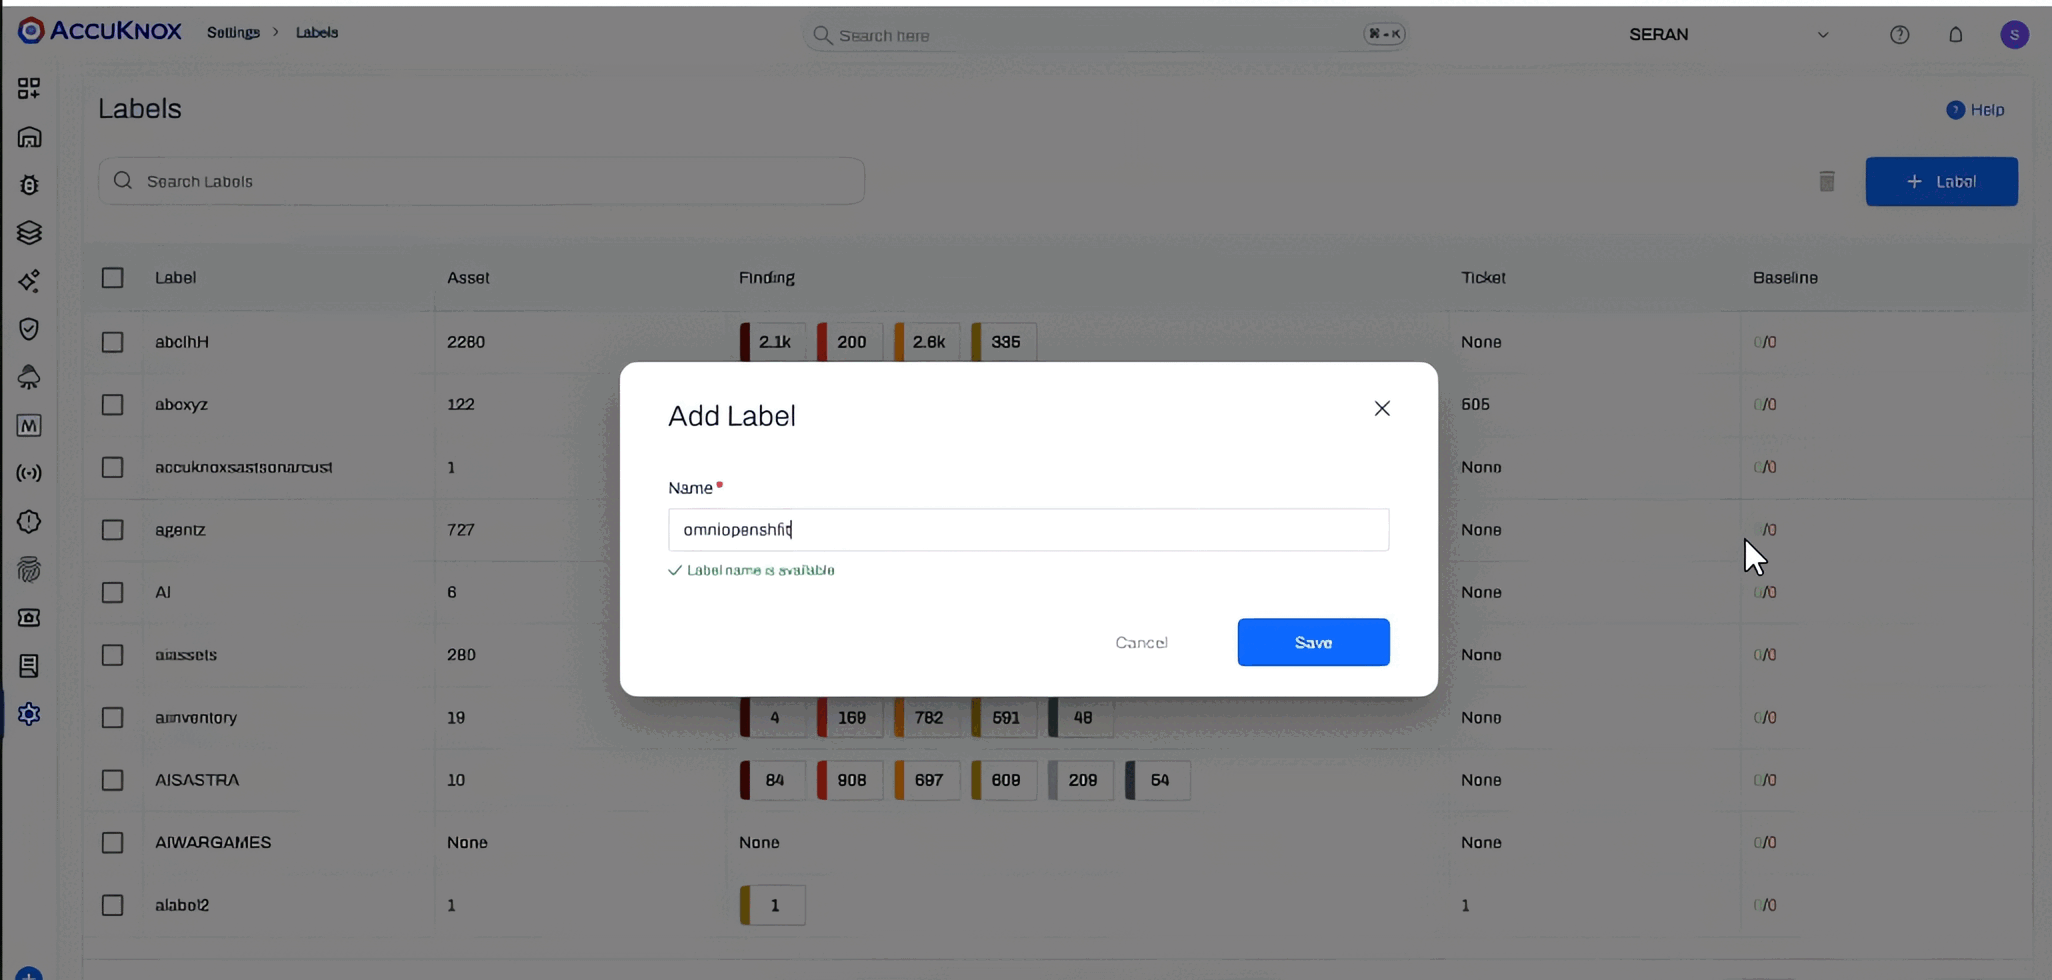
Every finding this schedule produces is tagged with this label, which is how you filter for them later. You will type the same label name into the schedule in Step 4, so it has to match exactly.
No tenant ID needed
You do not have to look up or enter a tenant ID anywhere in this flow. The operator reads the tenant from the token you just created, so the token and the label are the only two values AccuKnox gives you.
Step 4: Store the token as a secret in OpenShift
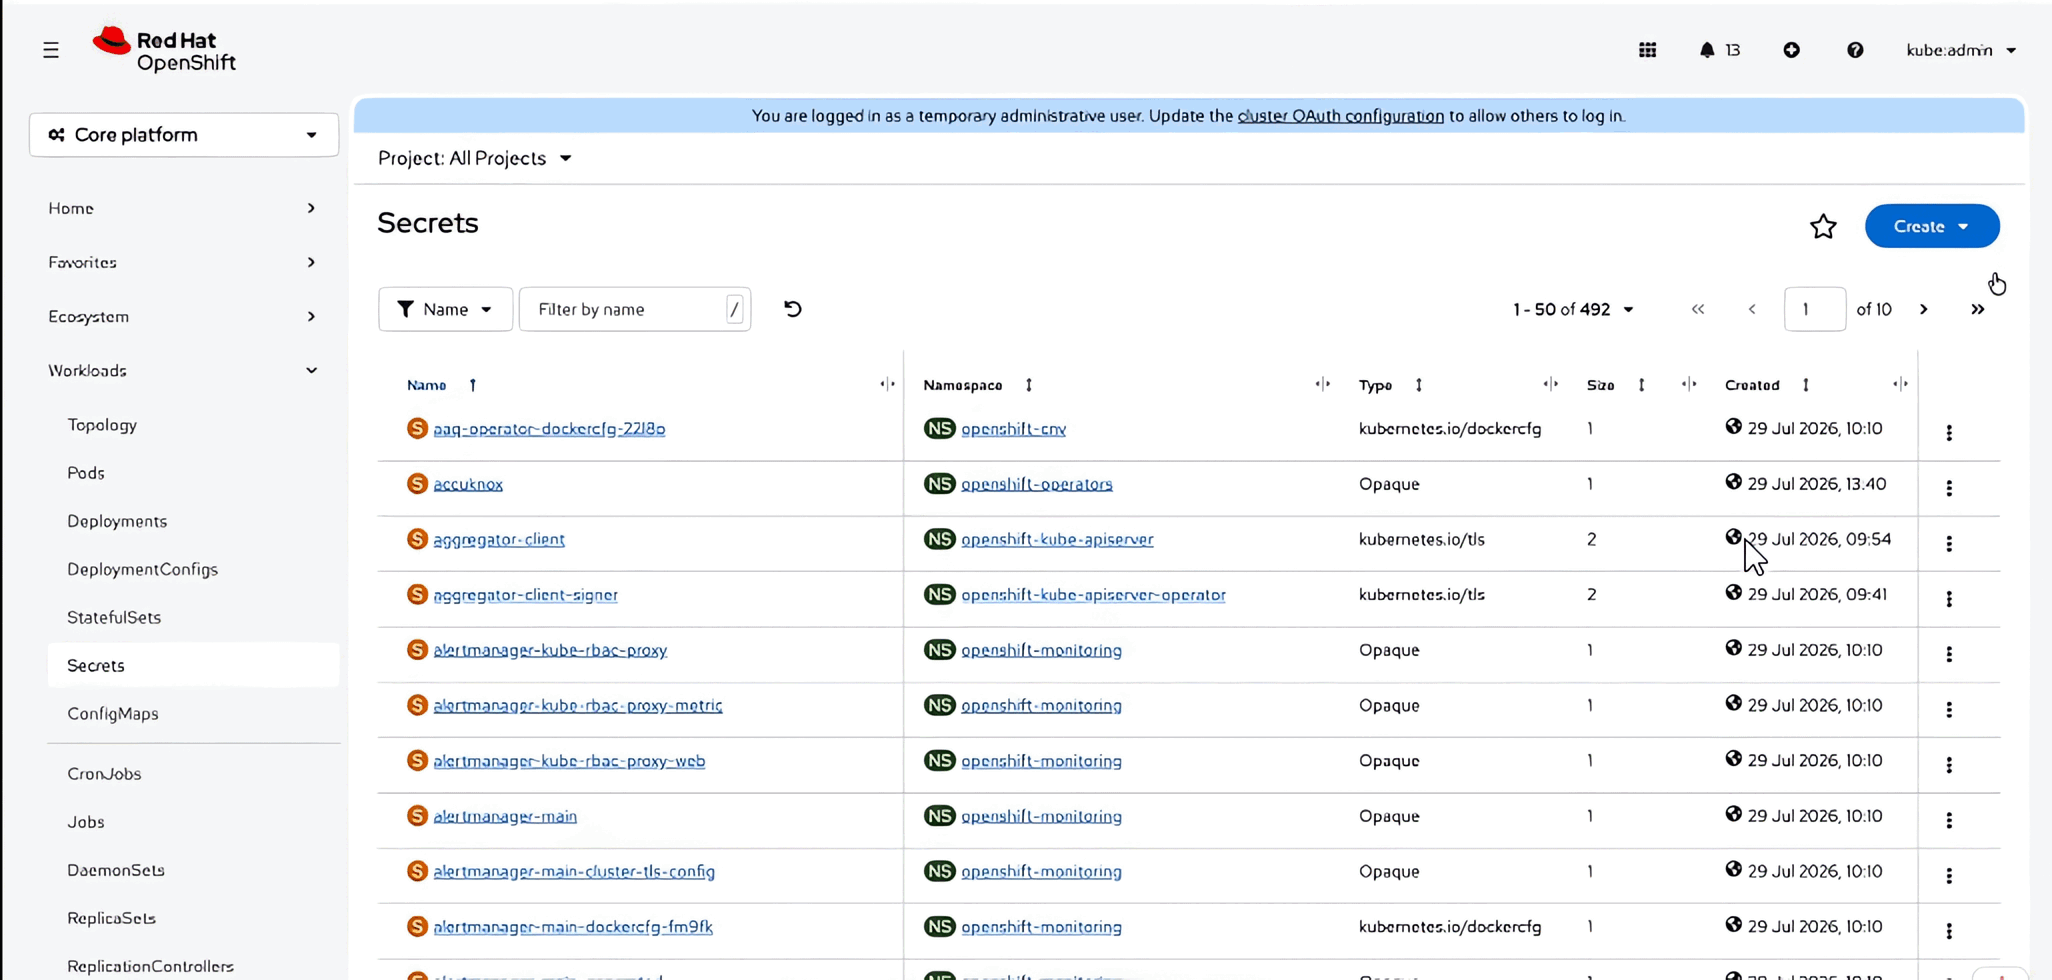
The operator reads the token from a Kubernetes secret rather than from the schedule spec, so create that secret first.
-
In OpenShift, go to Workloads → Secrets and select Create → Key/value secret.
-
Fill in the form:
Field Value Project The namespace the operator is installed in, for example openshift-operatorsSecret name Anything, for example accuknox-tokenKey Anything, for example tokenValue The token you copied in Step 3 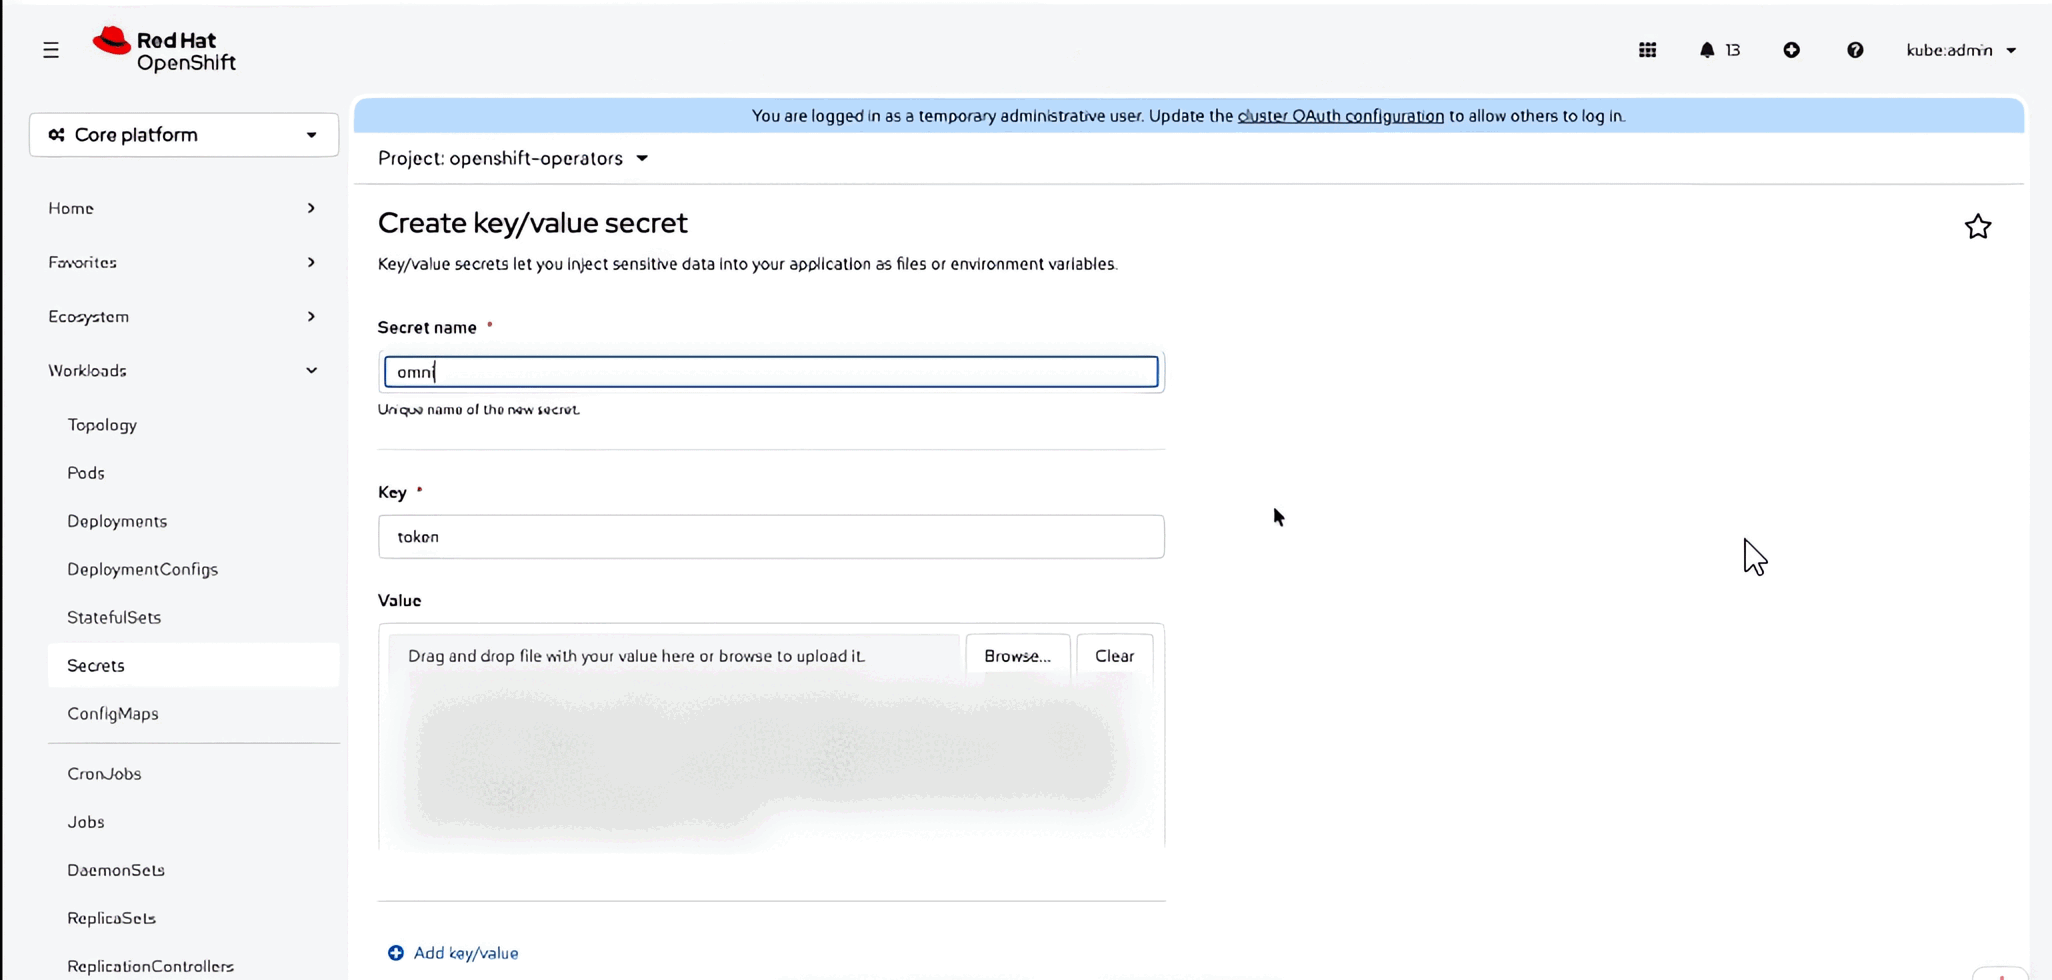
-
Click Create.
Write down the secret name, the key, and the namespace. All three go into the schedule in the next step.
The namespace has to match
Create the secret in the same namespace you will set as cronJobNamespace in Step 5. If they differ, the scan job starts and then fails to read the token.
Step 5: Create the scan schedule
-
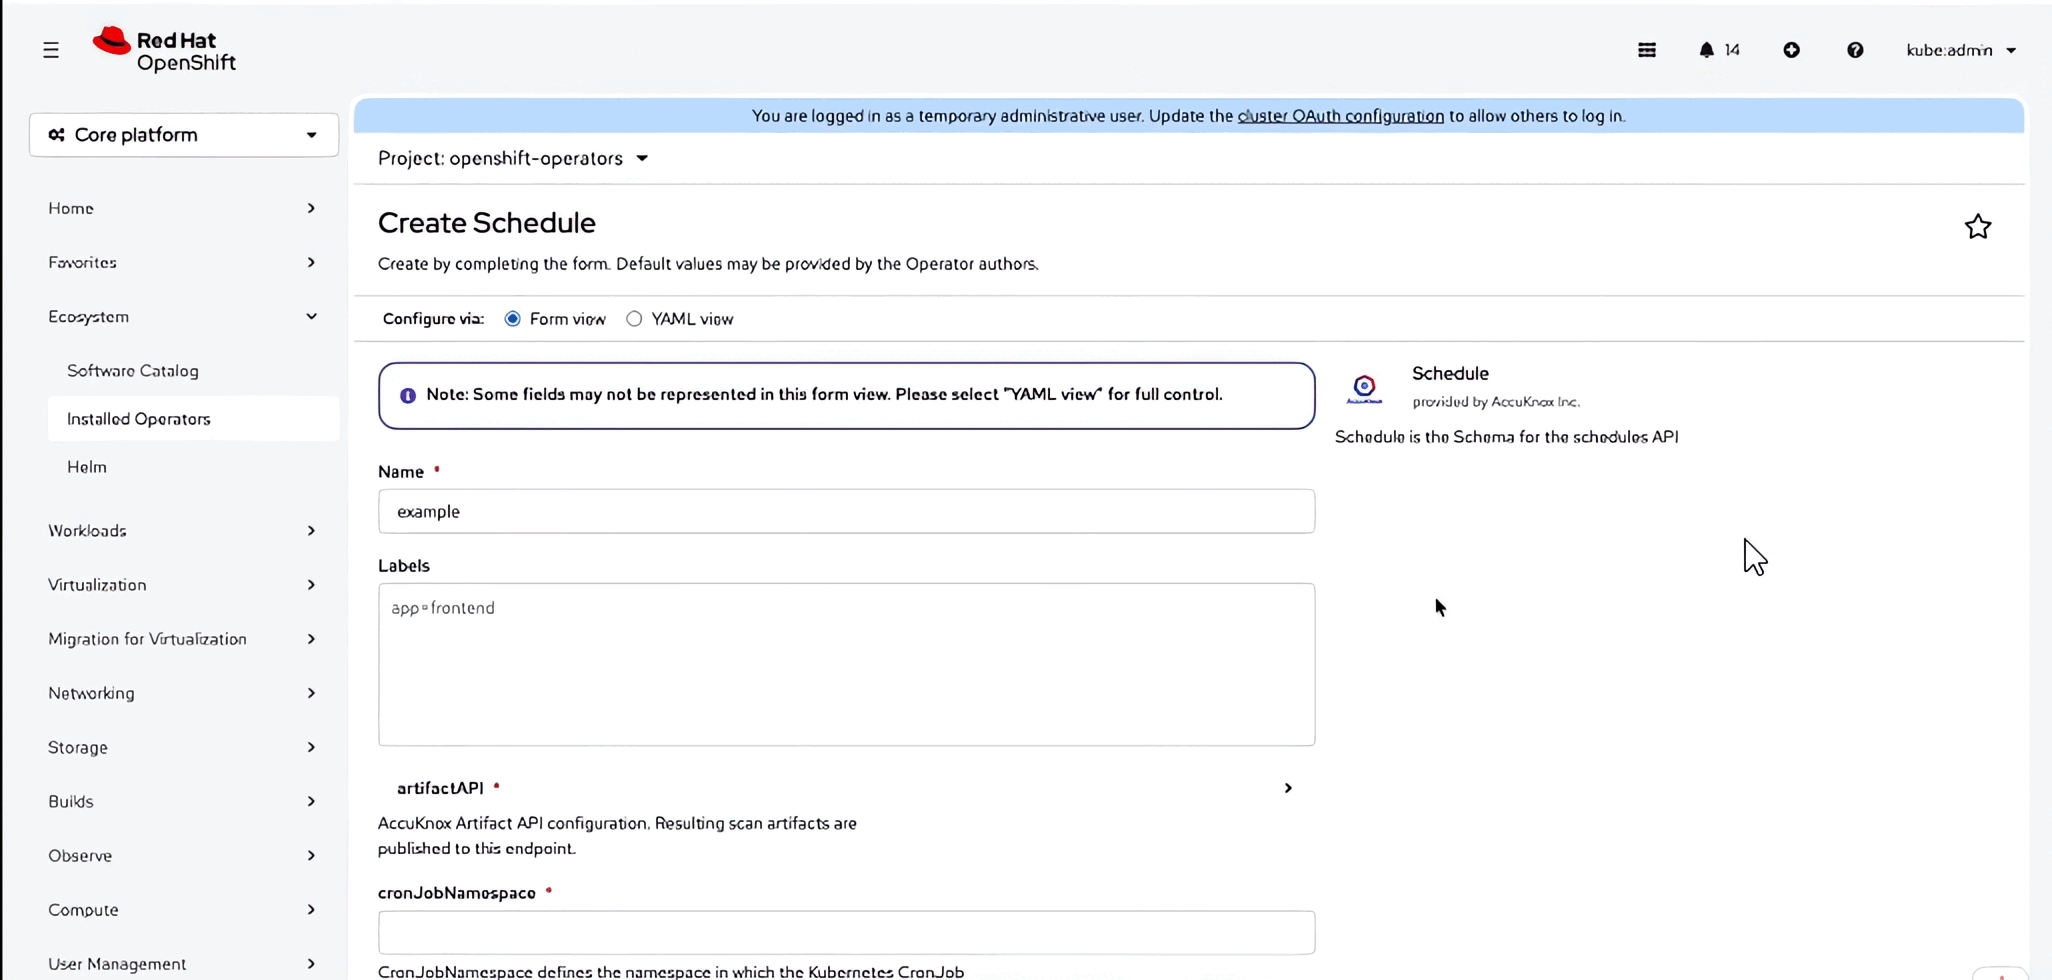
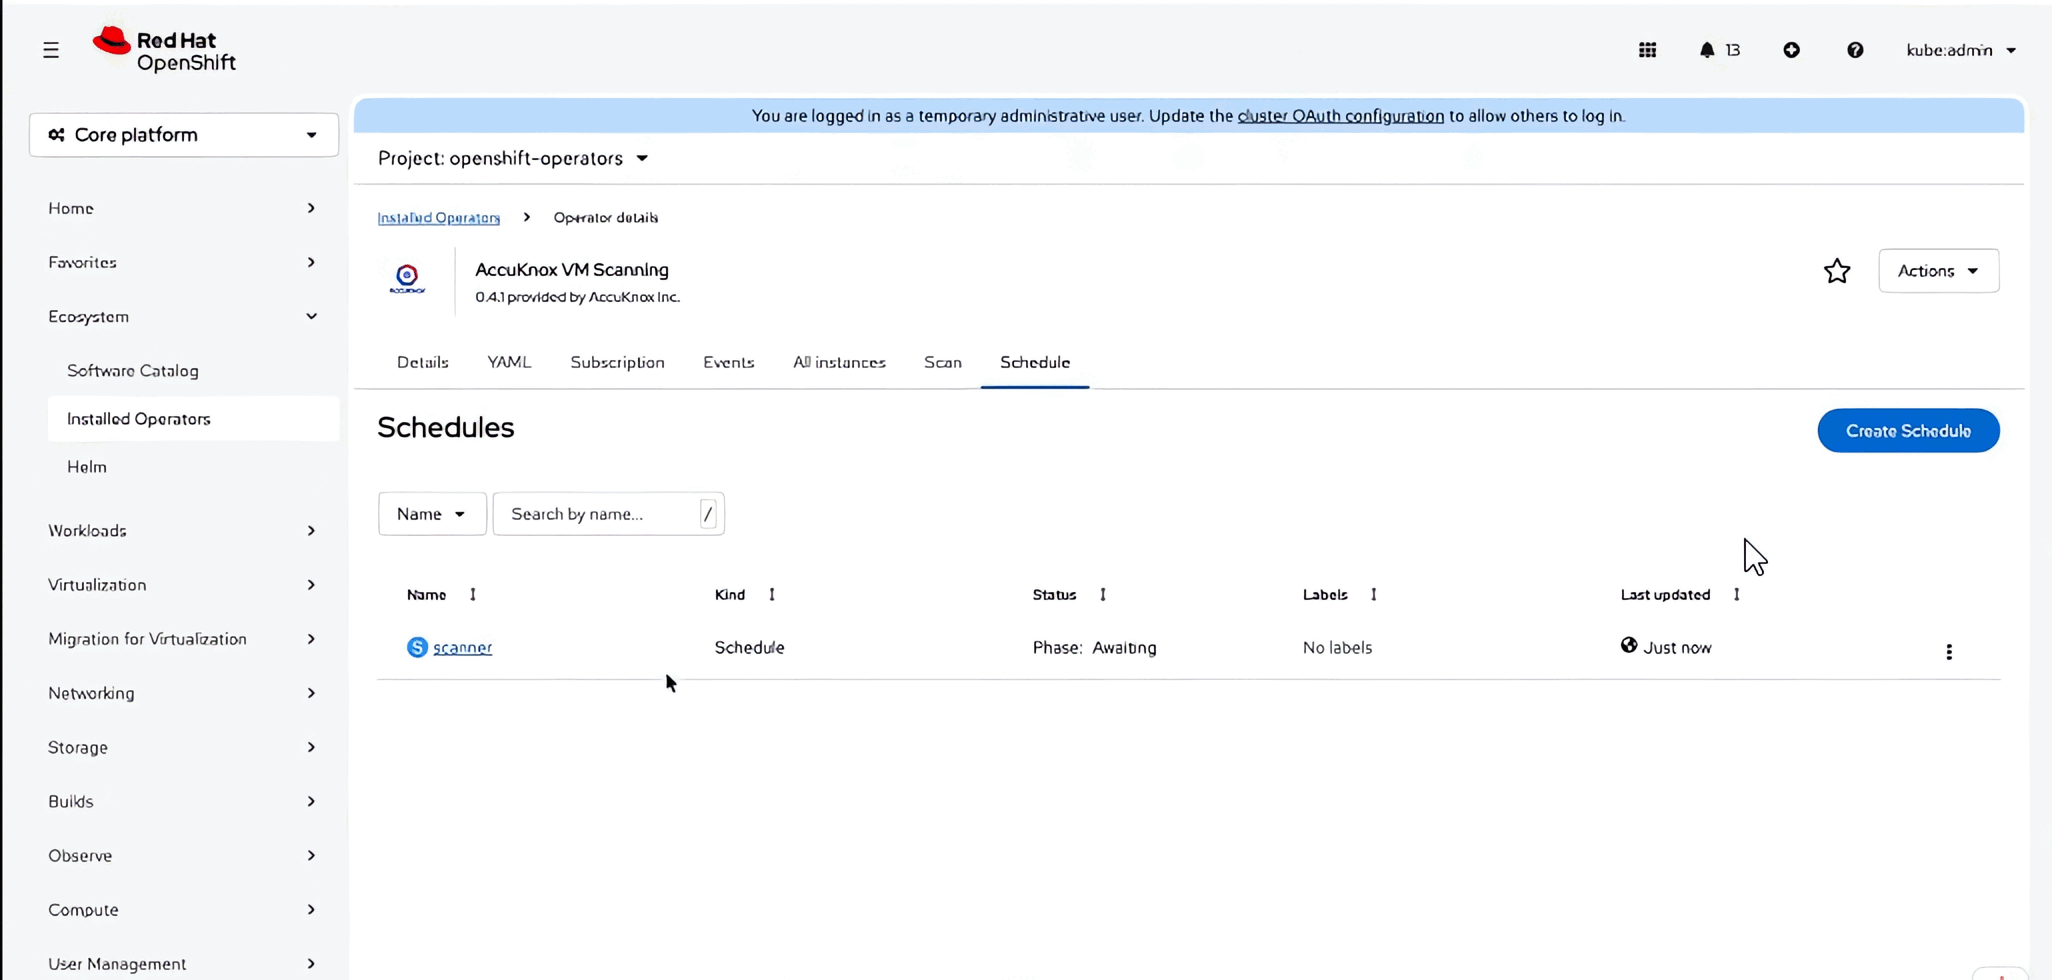
Go to Ecosystem → Installed Operators → AccuKnox VM Scanning, open the Schedule tab, and click Create Schedule.
-
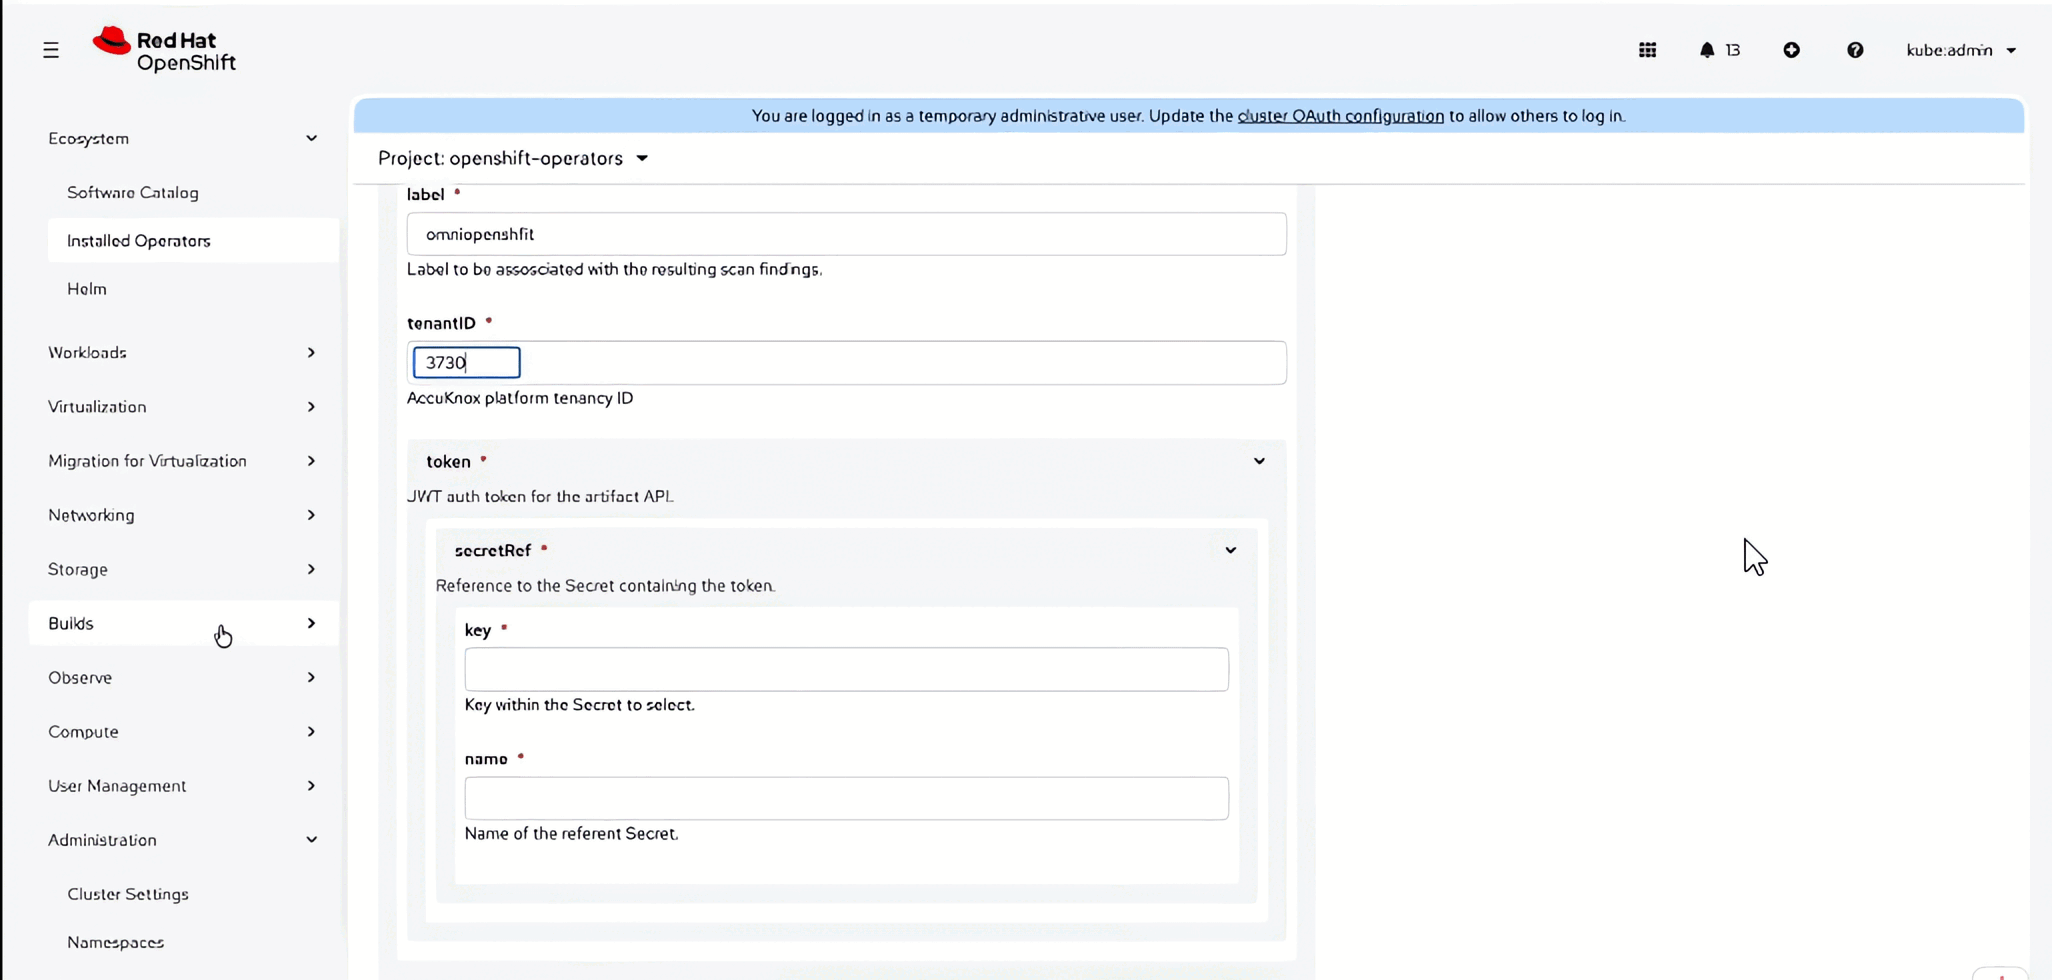
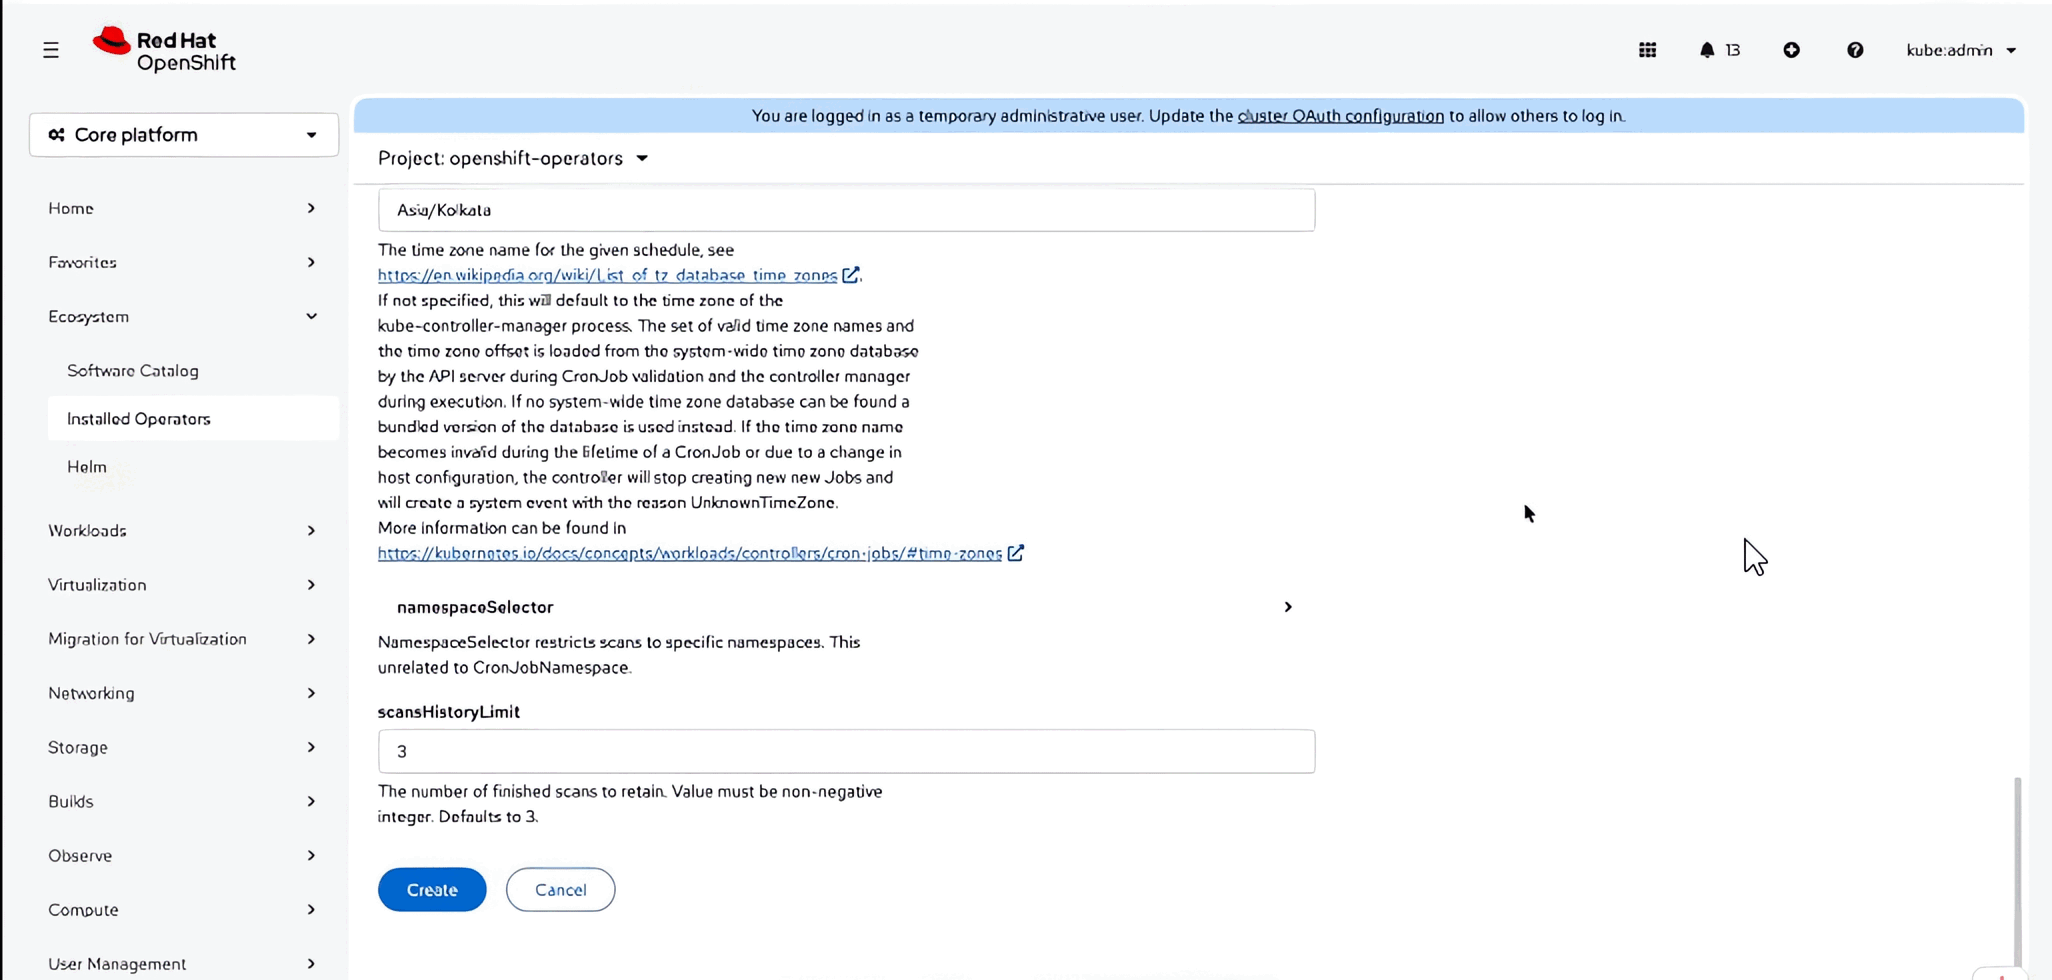
Fill in the fields below. Required fields are marked with a red asterisk in the console.
Field What to enter Name Anything, for example scannerLabels Kubernetes labels applied to the Schedule object itself. Optional, leave empty. artifactAPI → endpointYour AccuKnox artifact API URL, for example https://cspm.accuknox.com/api/v1/artifact/artifactAPI → labelThe label you created in Step 3, typed exactly artifactAPI → token → secretRef → keyThe key from the secret in Step 4, for example tokenartifactAPI → token → secretRef → nameThe secret name from Step 4, for example accuknox-tokencronJobNamespaceThe namespace the secret lives in, for example openshift-operatorsscheduleA cron expression, for example 0 2 * * *for 2 AM dailyconcurrencyHow many VM scans run at once. Start with 1.template → clusterNameAny name. This becomes the asset name for the findings in AccuKnox. timeZoneA tz database name such as Asia/Kolkata. Case-sensitive.scansHistoryLimitHow many finished scans to keep. Defaults to 3.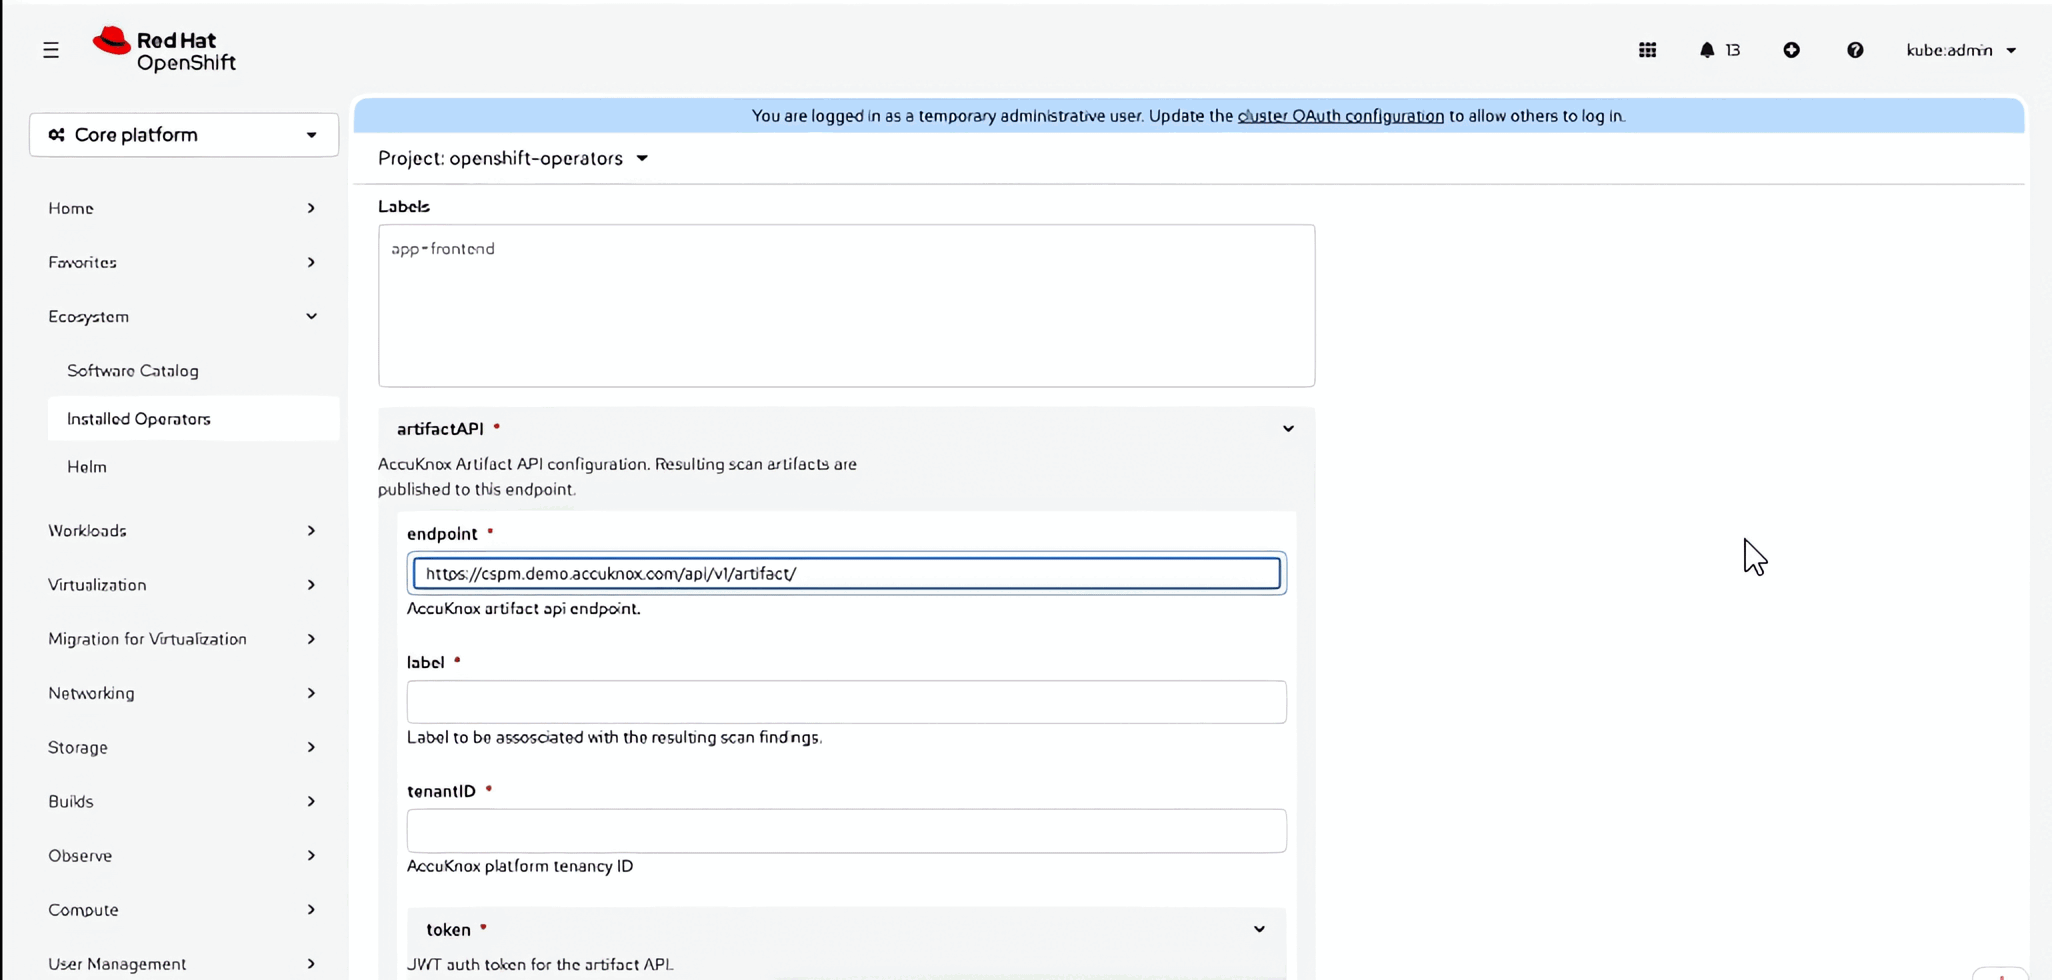
-
Click Create.
The schedule appears in the list with a phase of Awaiting until the cron expression next fires.
Testing before you commit to a schedule
Set the cron expression a few minutes into the future for the first run so you can watch it work, then edit the schedule to the cadence you actually want. Editing a schedule takes effect on the next run, and nothing has to be reinstalled.
Step 6: View the findings
Once a scan finishes, results are pushed to AccuKnox. Allow roughly 10 minutes from the end of the scan to findings appearing in the UI.
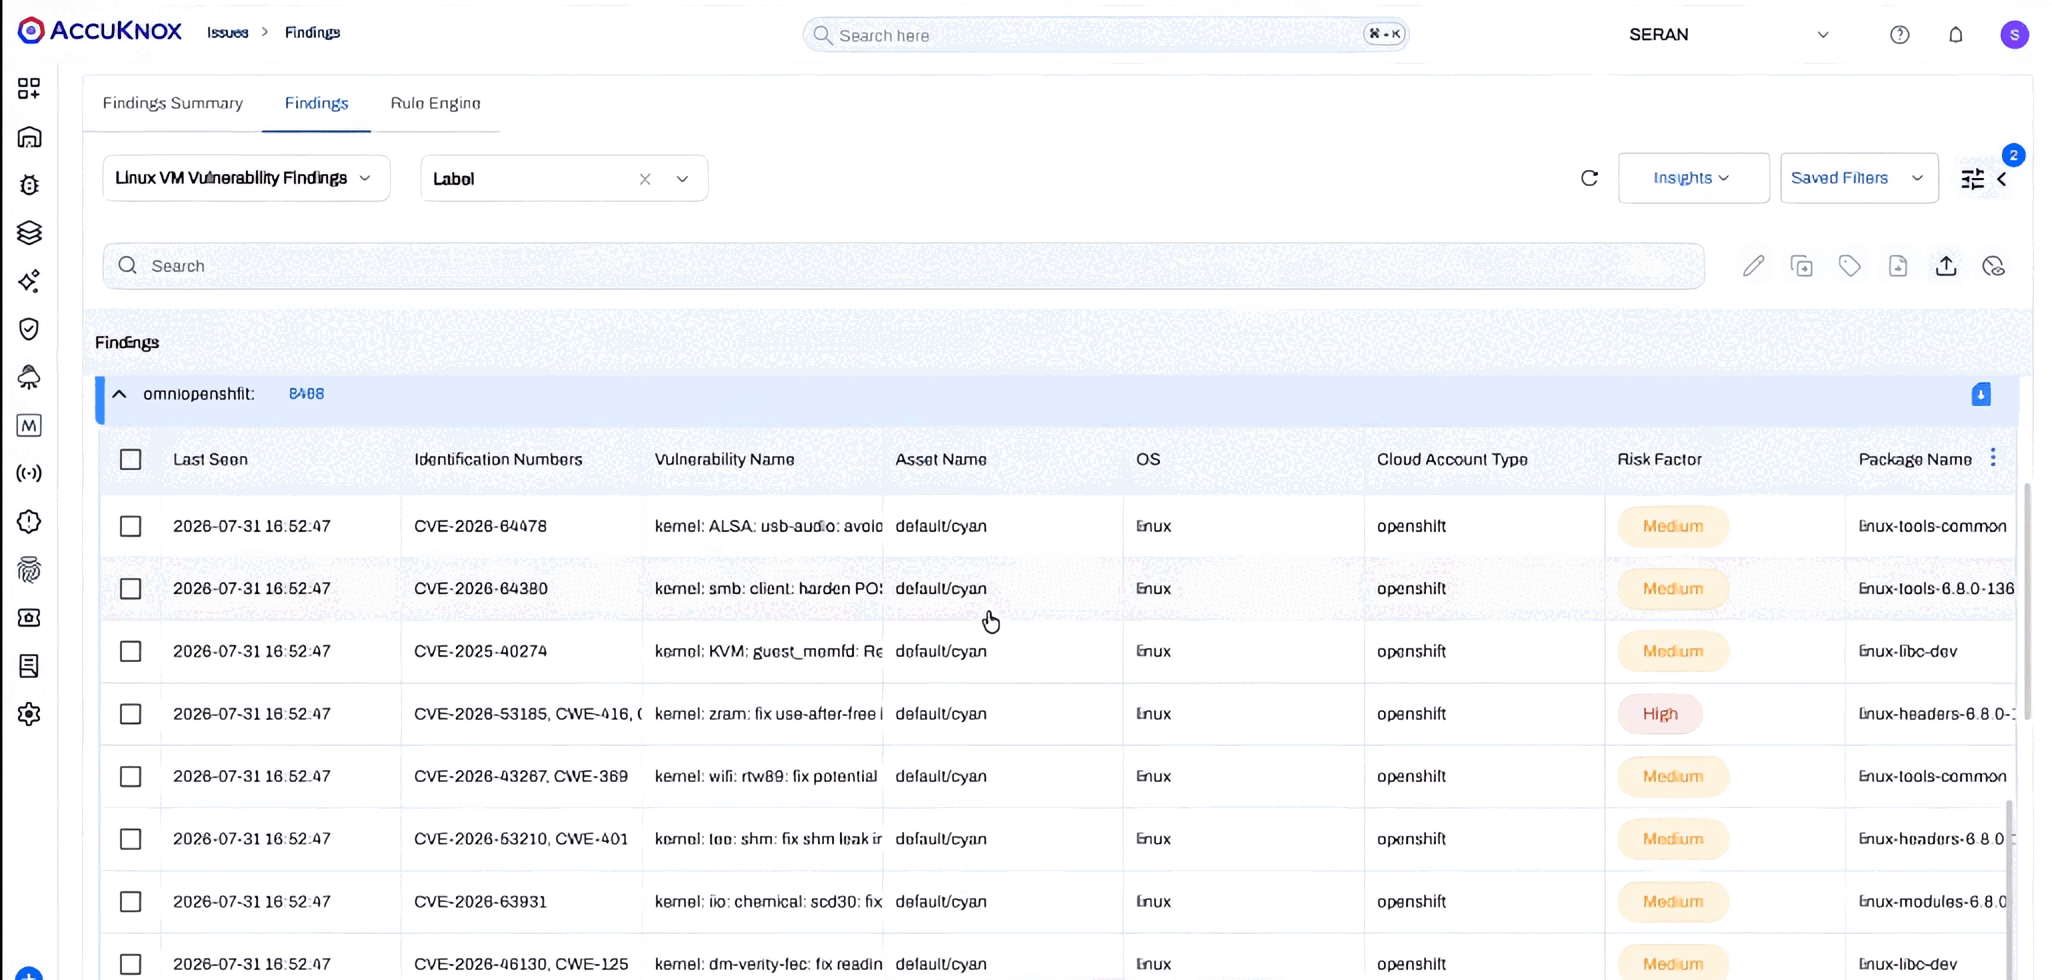
In the AccuKnox control plane, go to Issues → Findings, select Linux VM Vulnerability Findings in the findings-type dropdown, and filter by the label you created in Step 3.
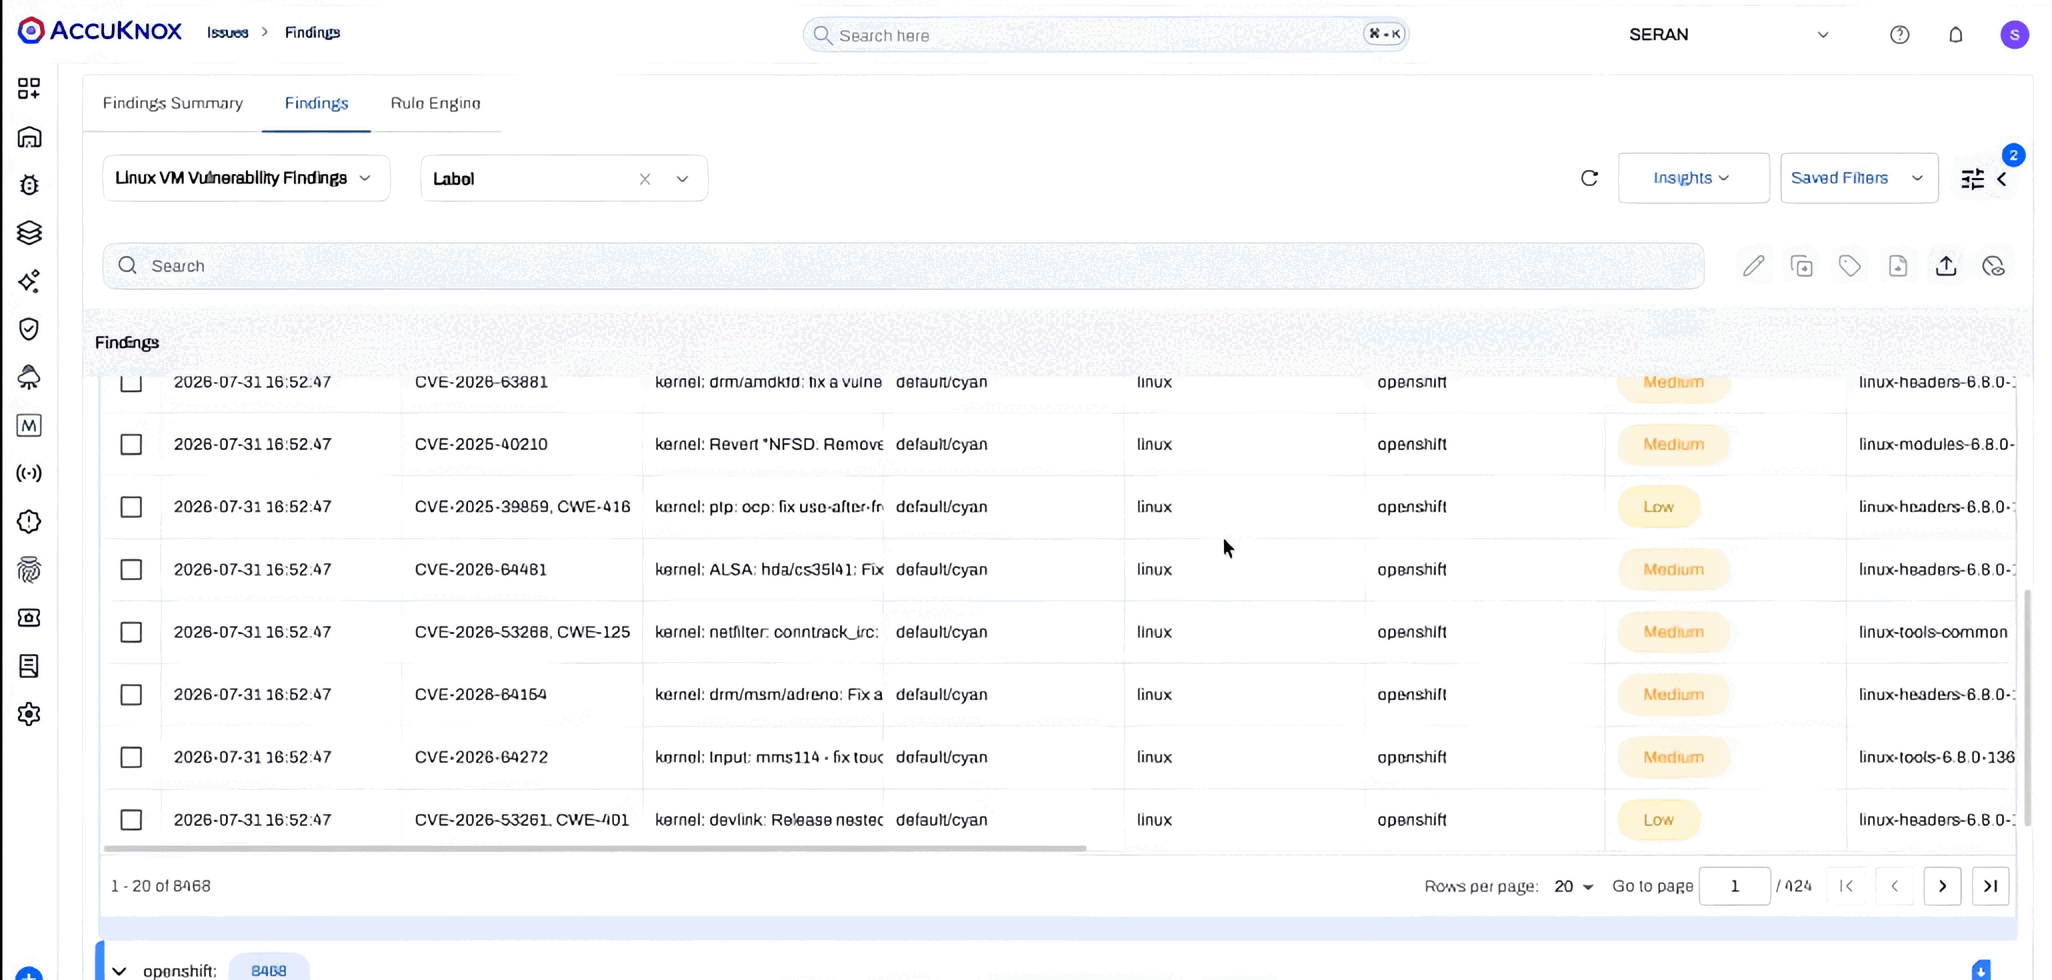
Expand a group to see the per-VM detail: CVE, package, installed version, fix version, risk factor, and the asset name you set as template → clusterName.
Scanning only some VMs
One schedule scans every VM the operator discovers. To scan a subset, or to scan different sets on different cadences, create more than one Schedule instance and give each one a VM label selector.
VMs whose labels match a given schedule are scanned by that schedule only. This is how you put production VMs on a nightly scan and development VMs on a weekly one, in the same cluster, without any other configuration.
Uninstalling
- Delete the Schedule instances first, from the operator's Schedule tab. Removing the operator does not remove the custom resources it created.
-
Go to Ecosystem → Installed Operators, select AccuKnox VM Scanning, and click Uninstall.
-
Delete the secret you created in Step 4, from Workloads → Secrets.
-
To also remove the catalog, go to Administration → Cluster Settings → Configuration → OperatorHub → Sources, then delete the catalog source you added in Step 1.
Findings already sent to AccuKnox stay in the control plane. Delete the label under Settings → Labels if you want them cleared out of your views.
Troubleshooting
| Symptom | Likely cause |
|---|---|
| Catalog source never reaches READY | The cluster cannot pull public.ecr.aws/k9v9d5v2/omni-operator-index:v0. Check egress and any image registry mirroring policy. |
| Operator does not appear in the Software Catalog | The catalog source is namespaced rather than cluster-wide, or it is not READY yet. |
| Schedule stays in Awaiting past its cron time | Check the cron expression and the timeZone value. Time zone names are case-sensitive. |
| Scan pod starts and then fails | The secret name, key, or namespace in the schedule does not match the secret you created, or cronJobNamespace points at a different namespace. |
| Snapshot creation fails | No default VolumeSnapshotClass, or the VMs use a CSI driver the default class does not cover. |
| Scan completes but no findings in AccuKnox | Wrong endpoint or an expired token. Also confirm you are filtering Findings by the right label. |
Related
- Cloud Based VM Scanning (Agentless) for AWS, GCP, and Azure
- Agent based VM scanning for Linux