Generate xBOM via knoxctl
Use the knoxctl local UI to interactively scan filesystems, container images, and AI/ML models, then push results directly to your AccuKnox tenant.
Prerequisites:
knoxctlbinary installed on your system- AccuKnox project, labels, and access key created — see Common Prerequisites
Note
Windows-specific installation steps for knoxctl are not documented on this page. Use the official knoxctl documentation and GitHub repository to get the current installation method and binaries.
Step 1: Run knoxctl
Open your terminal and verify the installation:
./knoxctl.exe -h
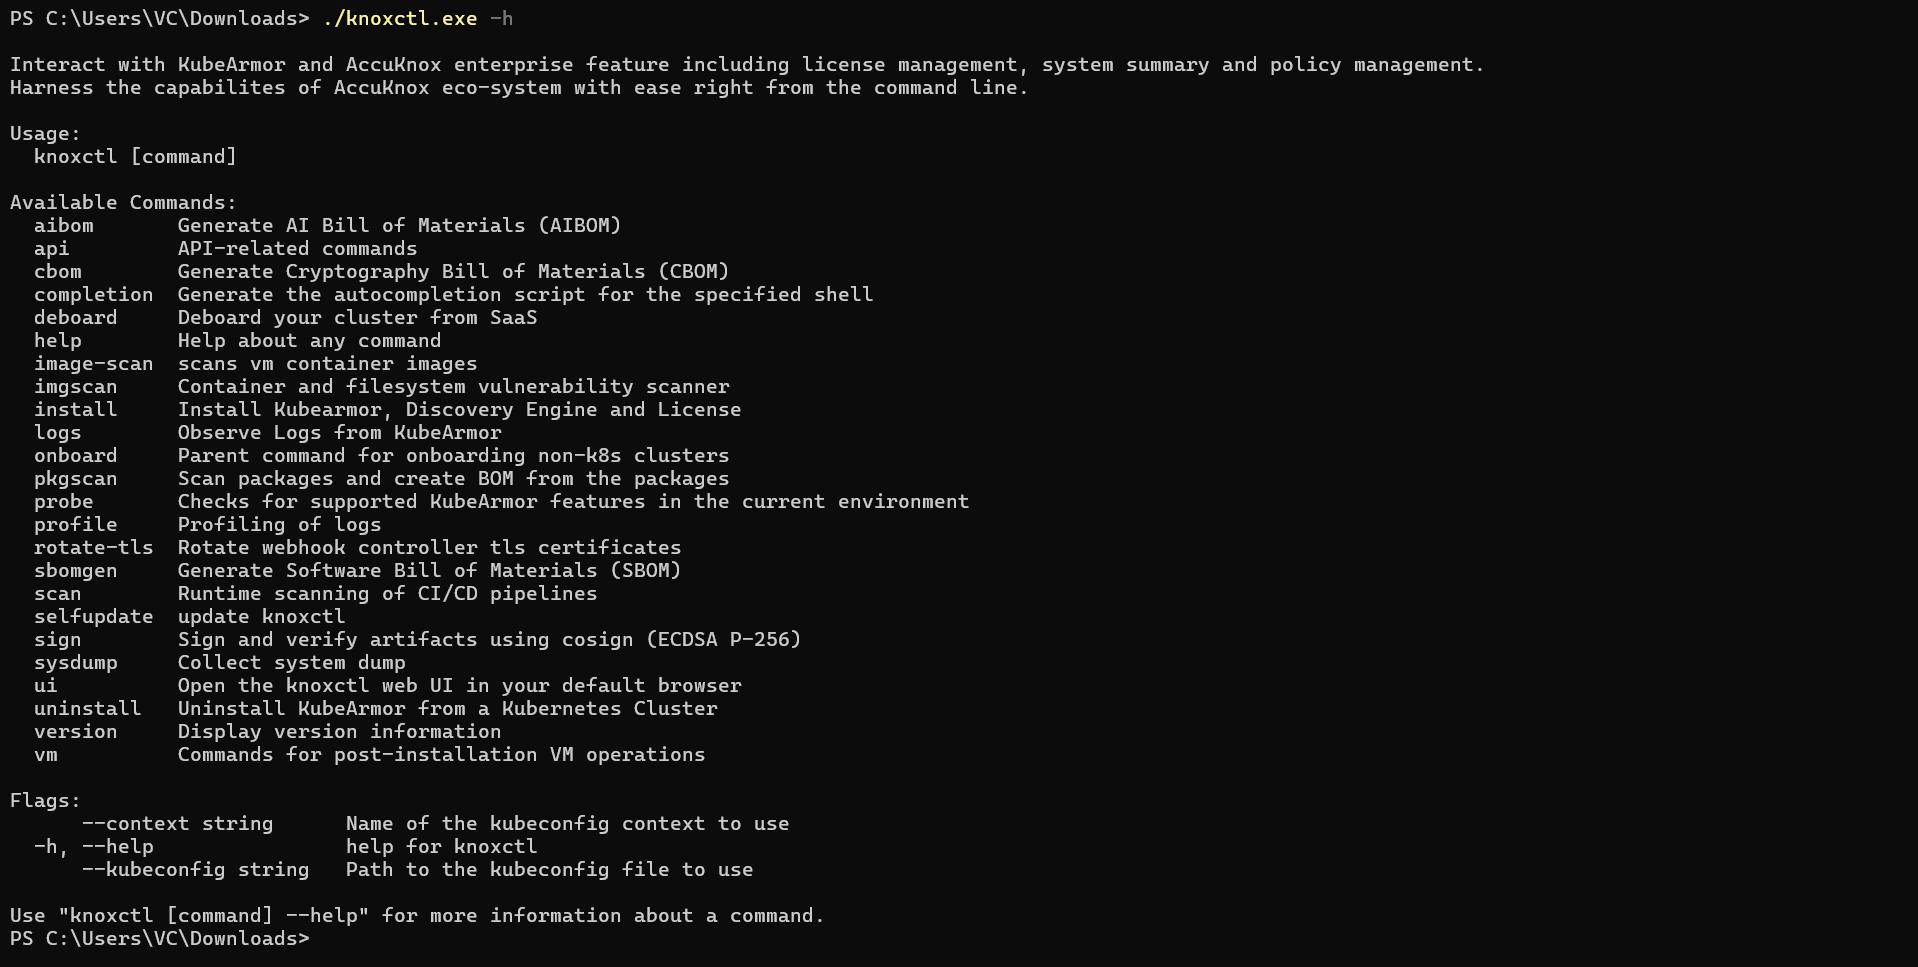
This displays all available commands and options.
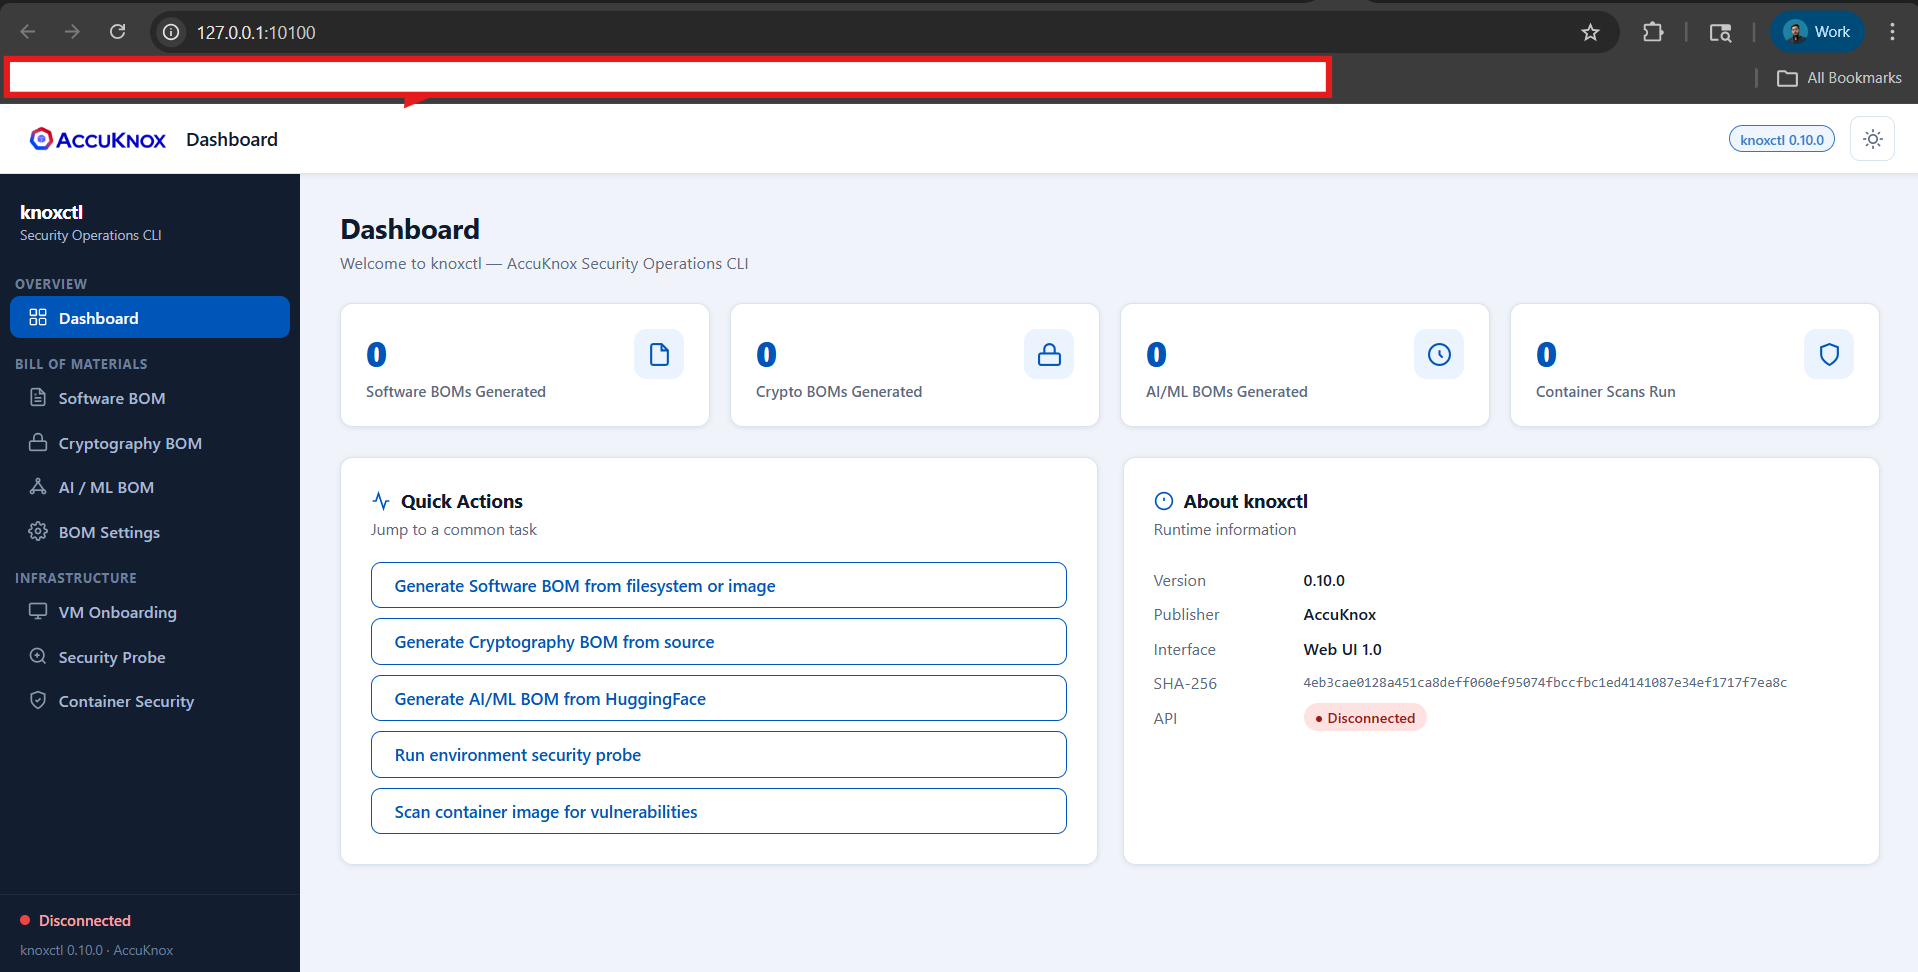
Step 2: Launch the knoxctl UI
Start the local UI server:
./knoxctl.exe ui
The UI will be available at:
Open either URL in your browser.
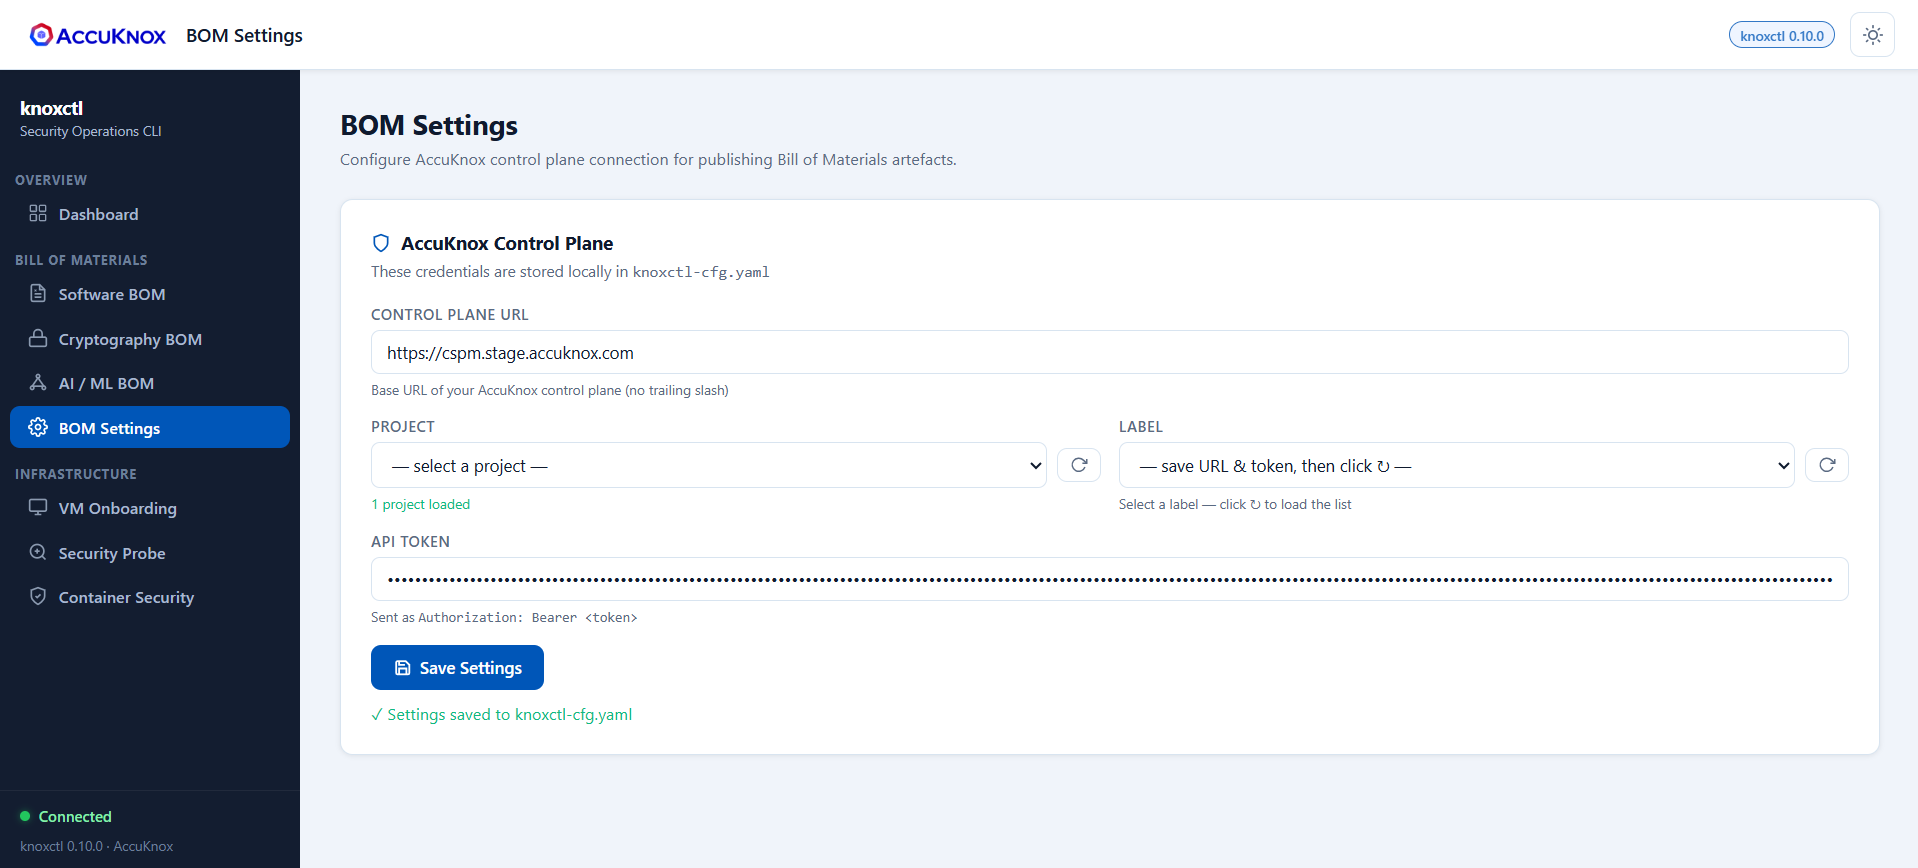
Step 3: Configure BOM Settings
In the knoxctl UI:
- Navigate to BOM Settings.
-
Add the following configuration:
- Control Panel URL:
https://cspm.accuknox.com - API Token: Paste the access key you created in the prerequisites step.
- Control Panel URL:
-
Click Save Settings.
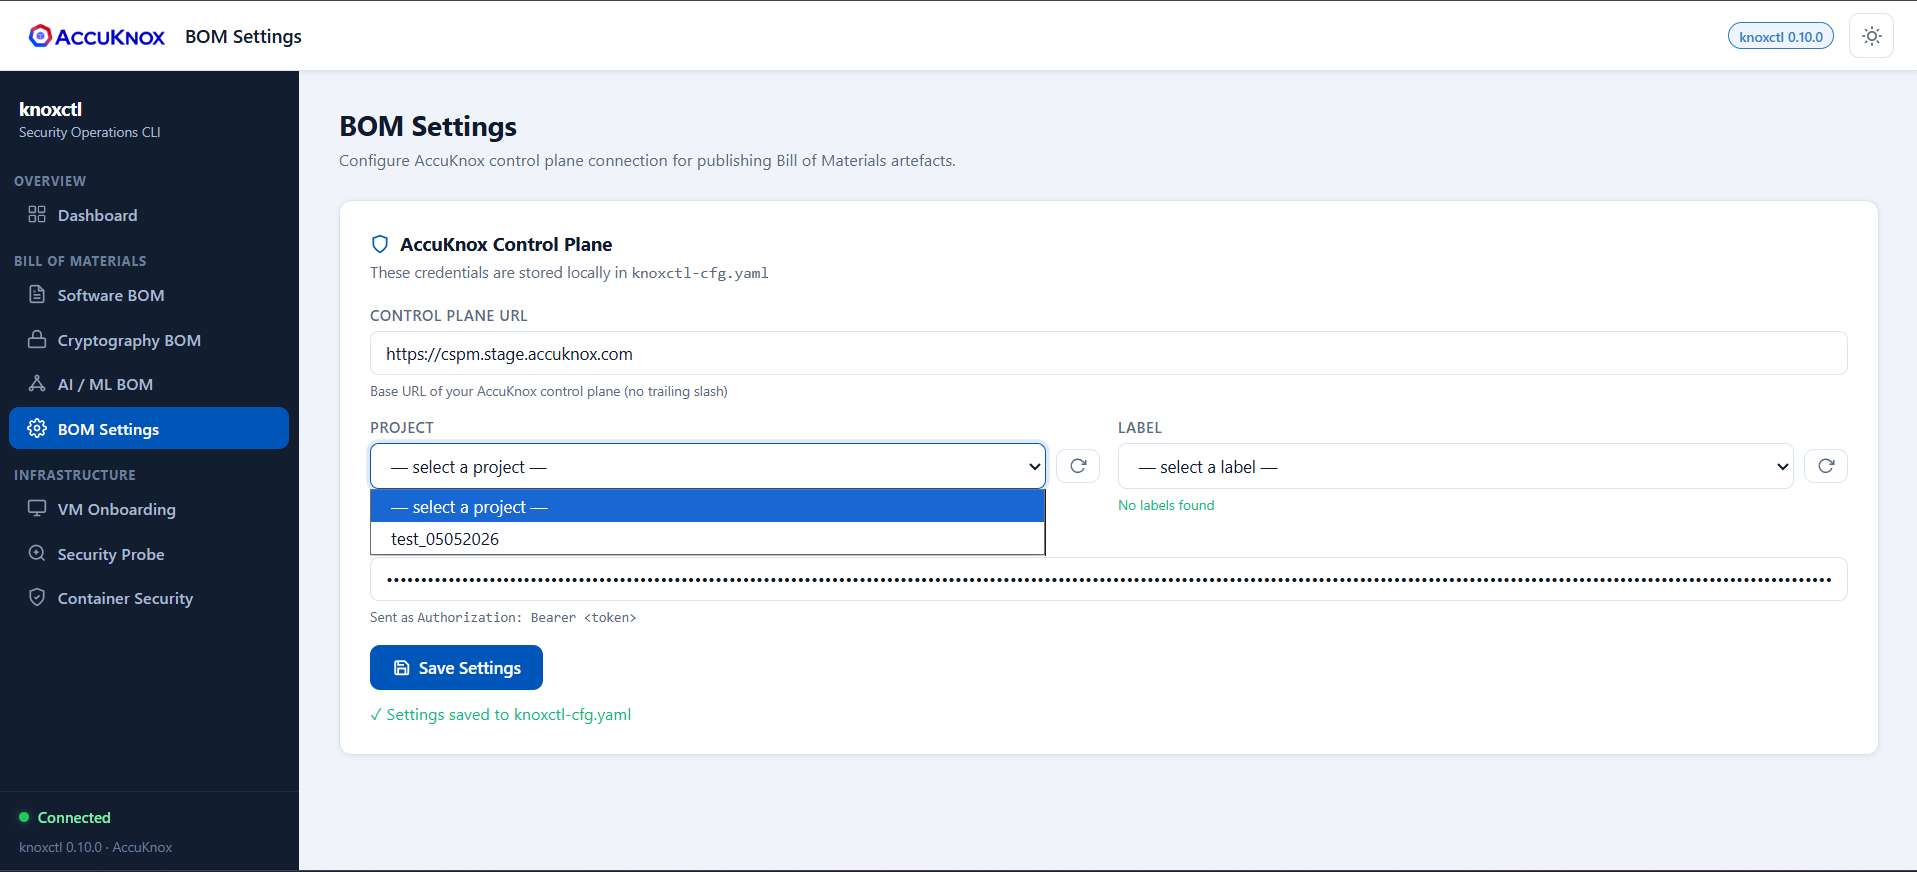
Step 4: Sync Projects and Labels
- Click Refresh for projects and labels.
- The UI will display all projects available on your tenant.
-
All associated labels will be visible.
Generate BOM Files
After completing the setup steps above, you can generate different types of BOM files.
Options available in all BOM types:
- Sign artifact with cosign (ECDSA P-256): Optional checkbox to cryptographically sign the generated BOM.
- CLI Preview: The UI displays the equivalent
knoxctlcommand for your configuration — useful for automation.
SBOM (Software Bill of Materials)
In the knoxctl UI:
- Navigate to Software Bill.
-
Configure the following settings:
- Source: Path to your project folder
- Output Scheme: Select the output schema
- Exclude Pattern: (Optional) Add any patterns to exclude
-
Click Generate SBOM.
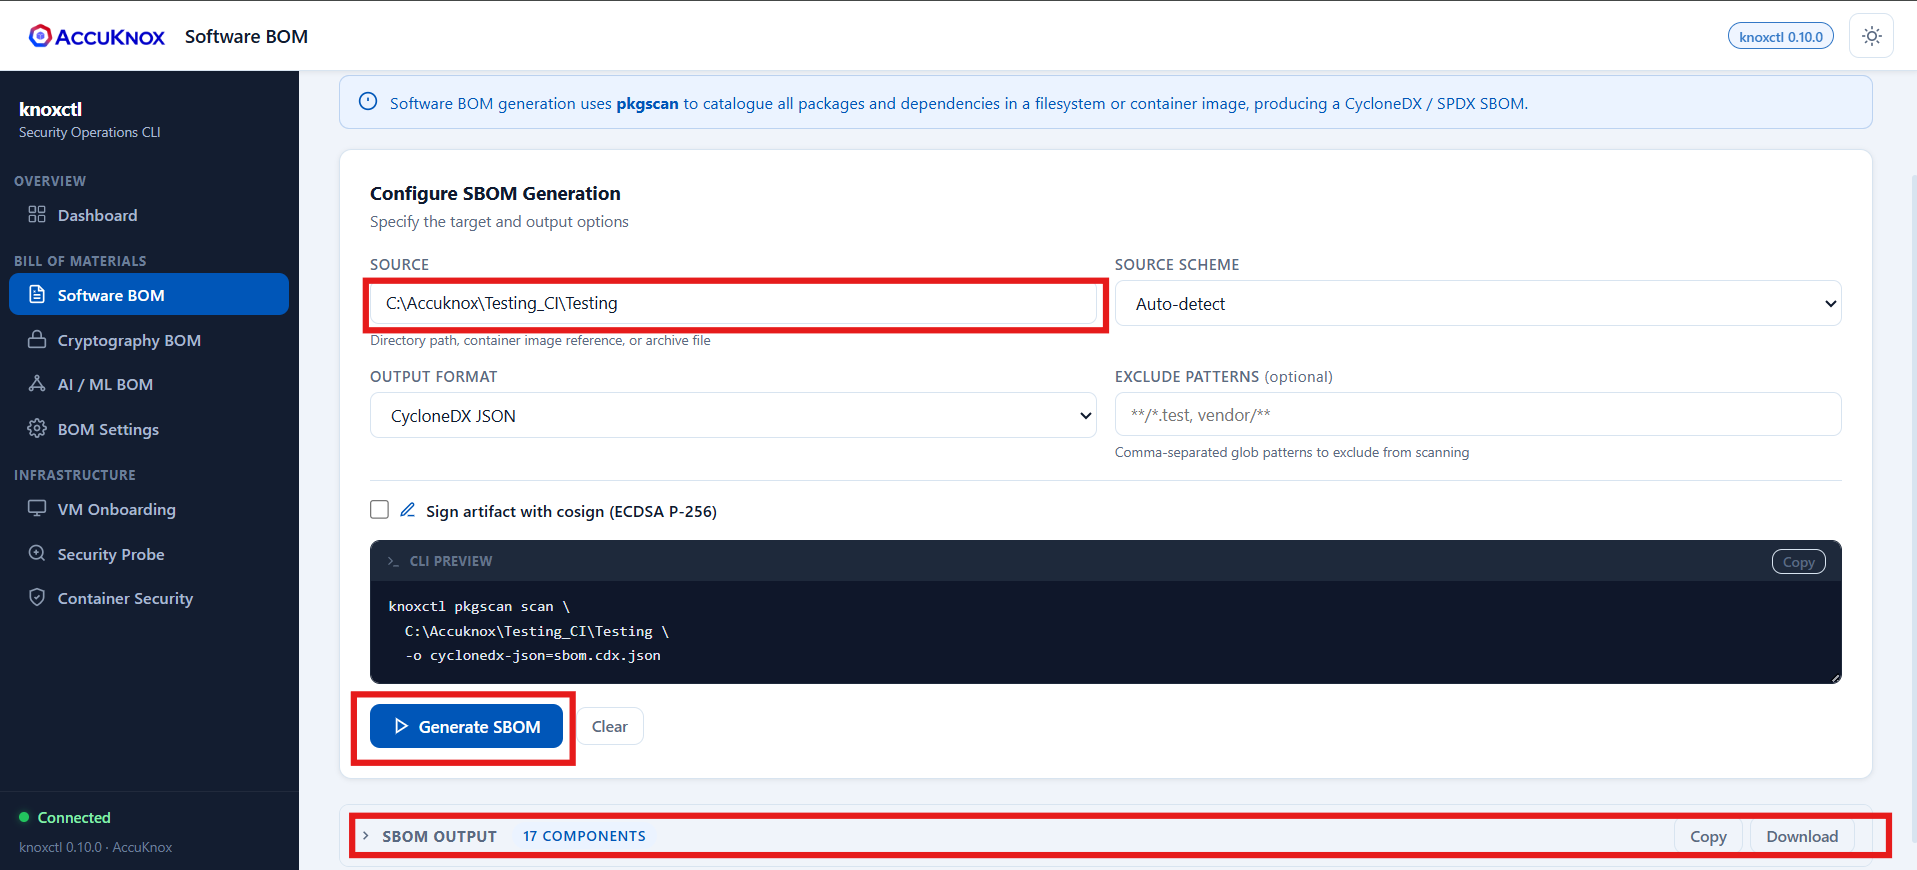
-
Download the generated file from the interface.
-
The generated SBOM will also appear in the UI under SBOM > Projects > [Your Project Name].

CBOM (Cryptographic Bill of Materials)
CBOM can be generated for either filesystem projects or container images.
In the knoxctl UI:
- Navigate to Software Bill.
- Select Source Code as the scan type.
-
Configure the following settings:
- Source Path: Path to your project folder
- Project Name: (Optional) Name of your project
- Group / Module: (Optional) Specify group or module
- Version: (Optional) Project version
-
Click Generate CBOM.

-
Download the generated file from the interface.
- The generated CBOM will also appear in the UI under SBOM > Projects > [Your Project Name].
AIBOM (AI Bill of Materials)
Option 1: Hugging Face Model Scanning
In the knoxctl UI:
- Navigate to Software Bill.
- Select Hugging Face as the source type.
-
Configure the following settings:
- Model Identifier: Format:
owner/model-name(e.g.,meta-llama/Llama-2-7b) - API Token: (Optional) Hugging Face API token
- Override Name: Custom name for the model
- Override Version: Custom version identifier
- Manufacturer: Model manufacturer/creator
- Model Identifier: Format:
-
Click Generate AIBOM.
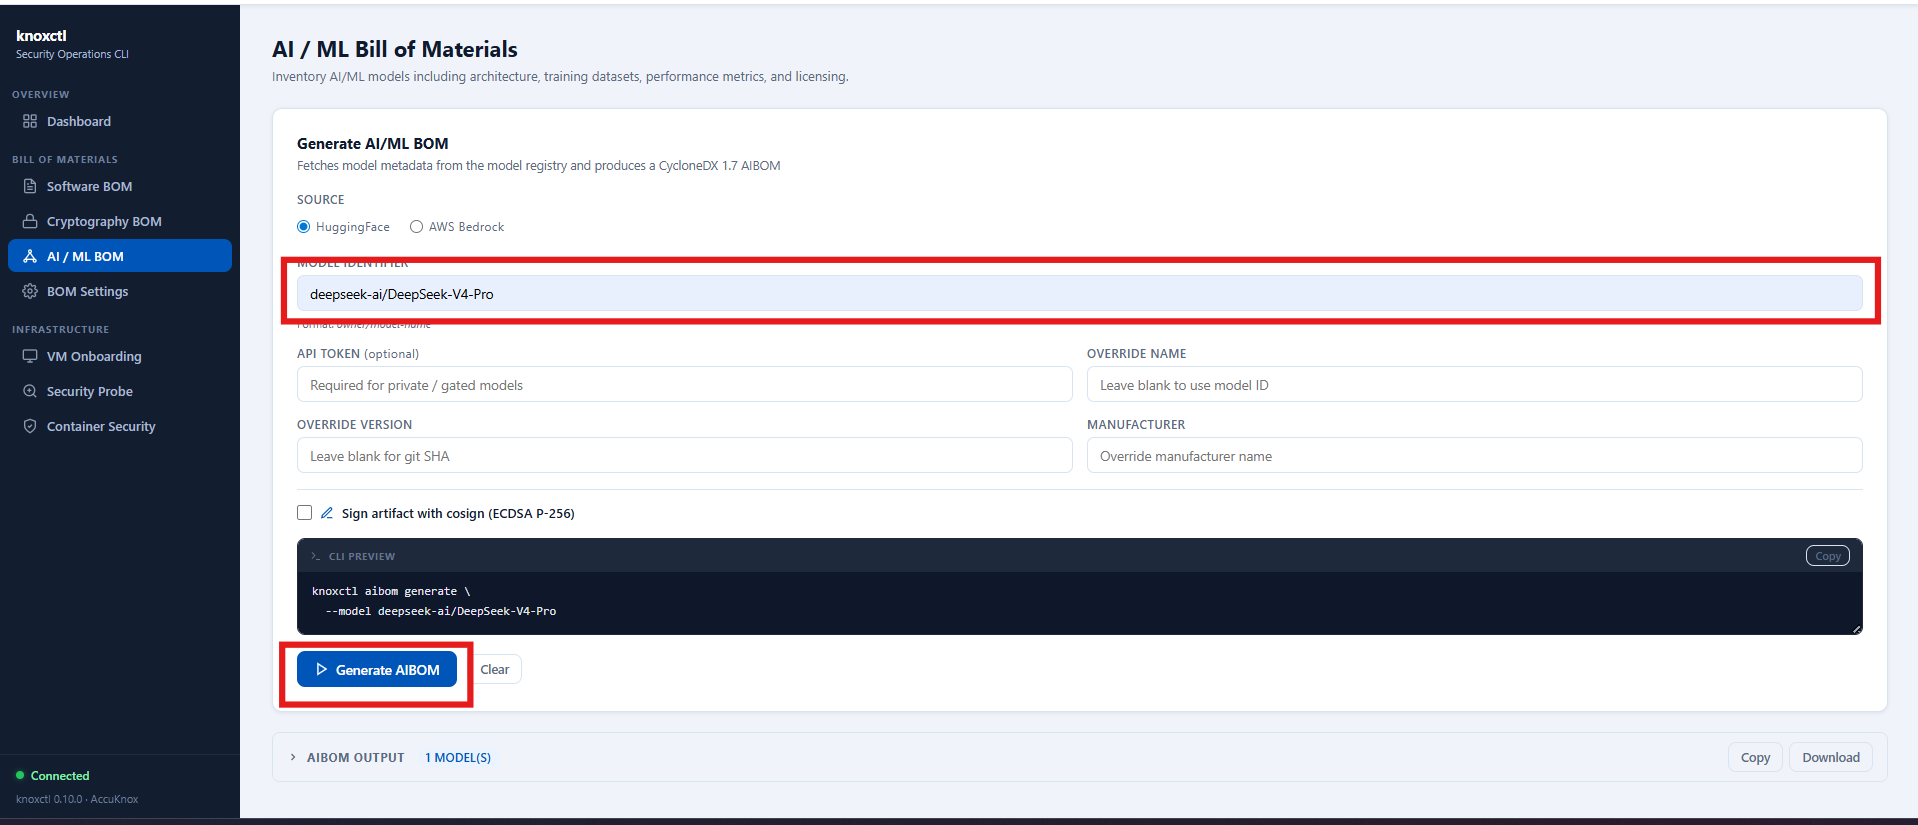
-
Download the generated file from the interface.
- The generated AIBOM will also appear in the UI under SBOM > Projects > [Your Project Name].
Option 2: AWS Bedrock Model Scanning
In the knoxctl UI:
- Navigate to Software Bill.
- Select AWS Bedrock as the source type.
-
Configure the following settings:
- AWS Region:
us-east-1(or your preferred region) - Model ID Filter: (Optional) Leave blank for all models
-
Credentials: Choose one of the following:
- Use Default Credential Chain (if AWS credentials are already configured in your terminal)
- Default chain: env vars →
~/.aws/credentials→ IAM role
- Default chain: env vars →
- Custom Keys:
- Access Key ID
- Secret Access Key
- Session Token: (Optional) Temporary session token
- Use Default Credential Chain (if AWS credentials are already configured in your terminal)
-
Override Name: Leave blank to use model ID
- Override Version: Leave blank for git SHA
- Manufacturer: Override manufacturer name
- AWS Region:
-
Click Generate AIBOM.

-
Download the generated file from the interface.
- The generated AIBOM will also appear in the UI under SBOM > Projects > [Your Project Name].