Sumo Logic Webhook Integration
This guide walks you through configuring AccuKnox to deliver runtime security events to Sumo Logic using the webhook integration. You create a hosted HTTP source in Sumo Logic, then configure the webhook channel in AccuKnox to post events to it.
Prerequisites
Before starting, confirm the following are in place:
- An AccuKnox account with administrative access
- A Sumo Logic account (trial or paid)
Note: All steps assume you have admin-level access to both AccuKnox and Sumo Logic. Read-only access is not sufficient to create collectors, sources, or webhook integrations.
Steps to be followed
Step 1: Log in to your Sumo Logic account. In the left navigation, click Manage Data, then click Collection. The page that loads shows all existing collectors.
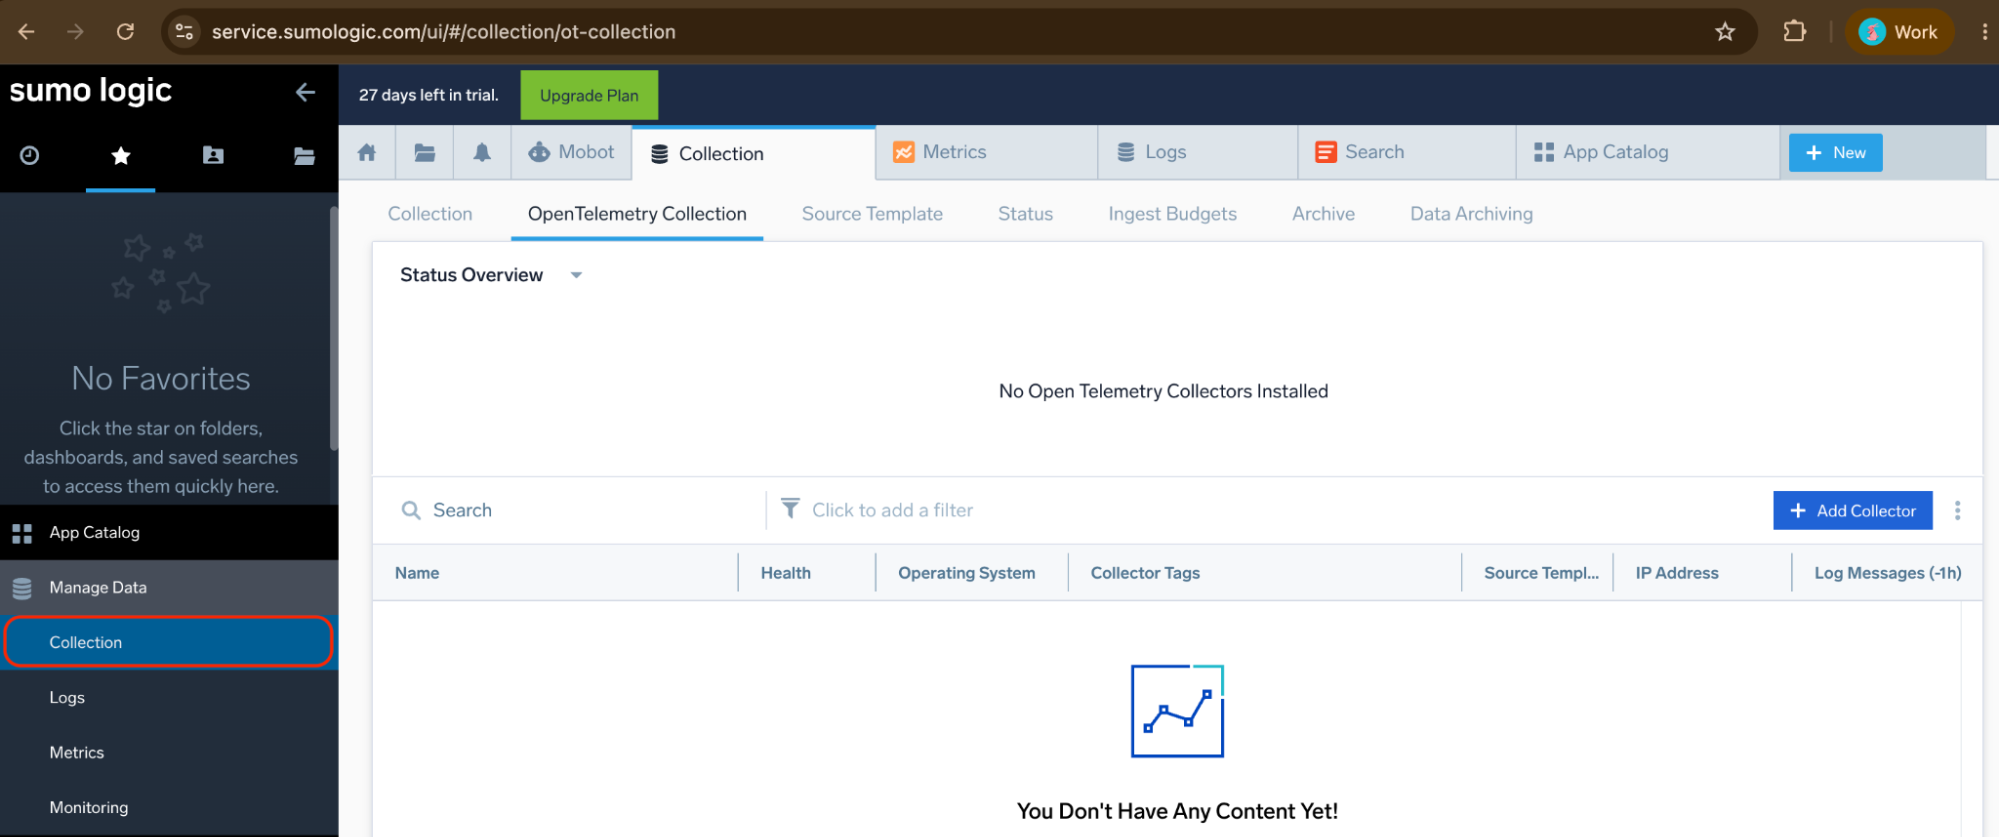
If you land on the OpenTelemetry Collection tab by default, click the Collection tab on the left side of the tab bar to switch to the standard collector view.
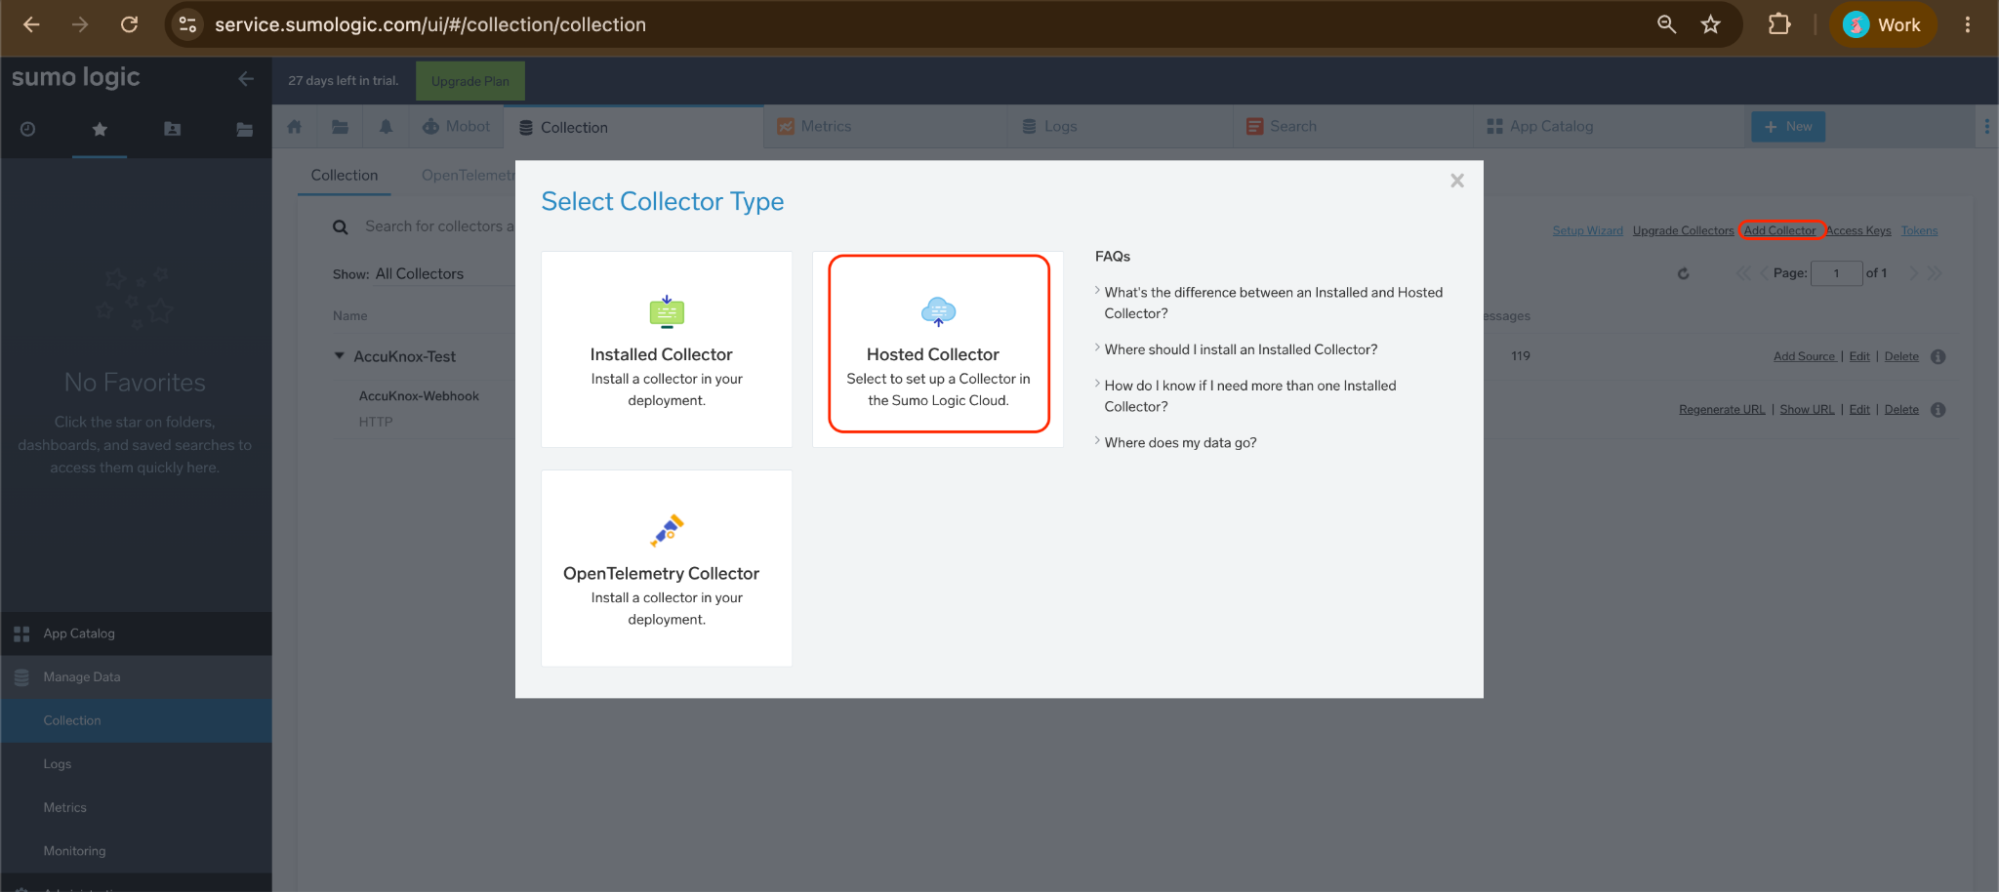
Step 2: Click Add Collector in the top right. Sumo Logic prompts you to select a collector type. Three options appear:
- Installed Collector
- Hosted Collector
- OpenTelemetry Collector
Select Hosted Collector. This creates a cloud-side collector that receives data over HTTP without requiring any agent deployment.
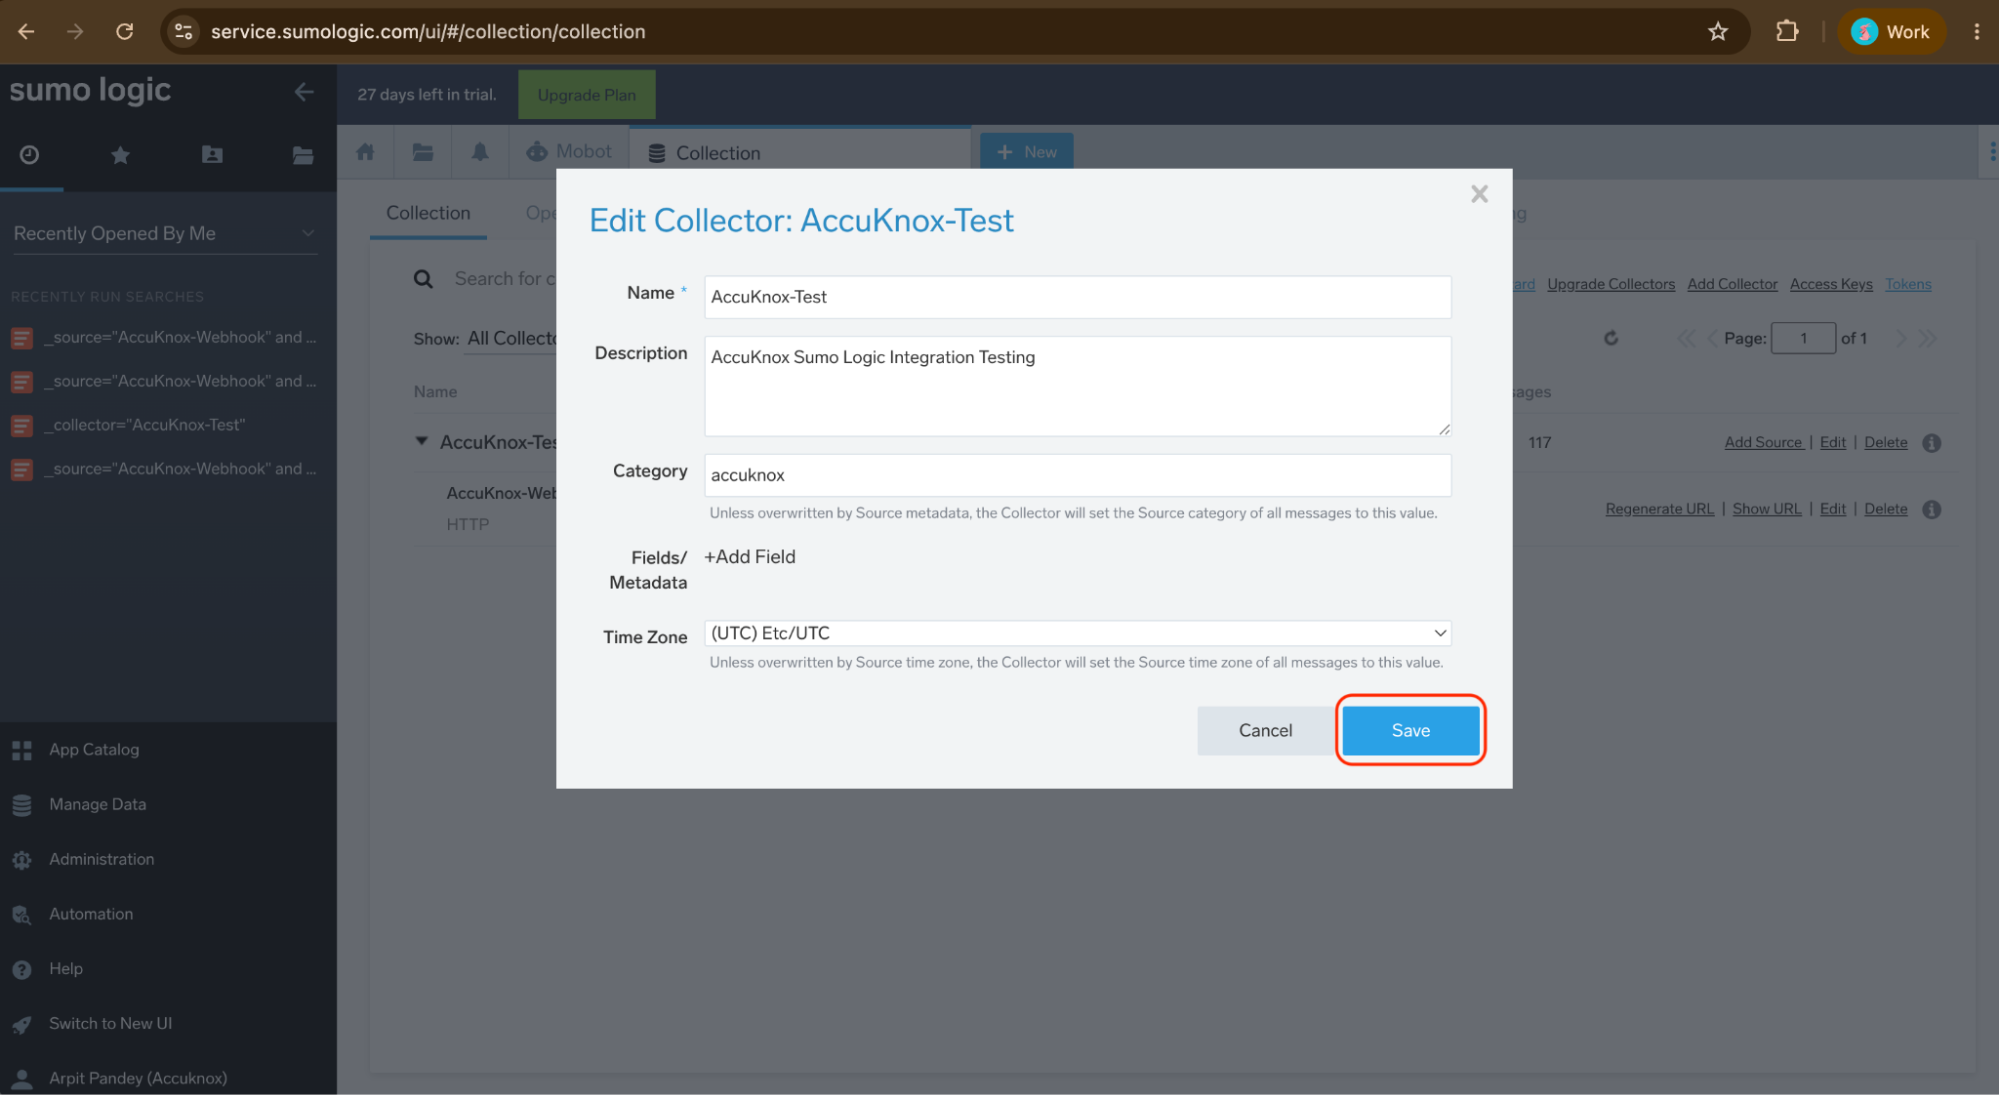
Step 3: Fill in the collector form with the following values:
| Field | Value |
|---|---|
| Name | AccuKnox-Test |
| Description | AccuKnox Sumo Logic Integration Testing |
| Category | accuknox |
| Time Zone | (UTC) Etc/UTC |
Click Save. The collector now appears in the list with a Healthy status and a Hosted type indicator.
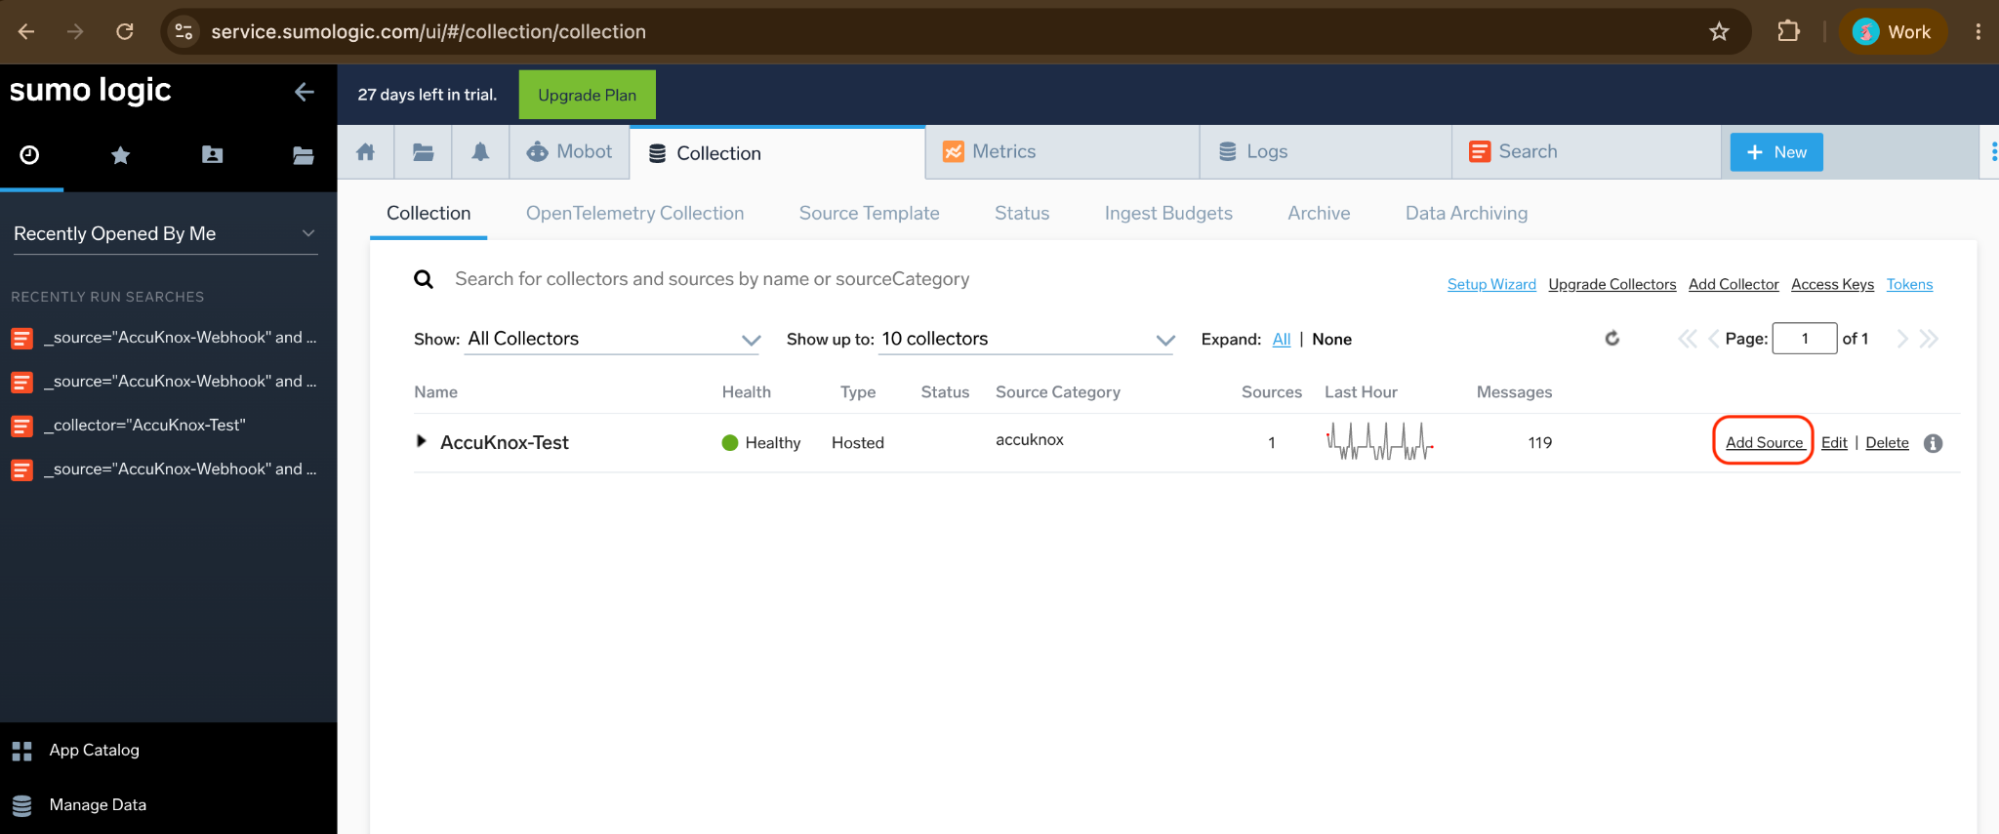
Step 4: Locate the AccuKnox-Test collector in the list and click Add Source on the right side of that row. The source selection page opens.
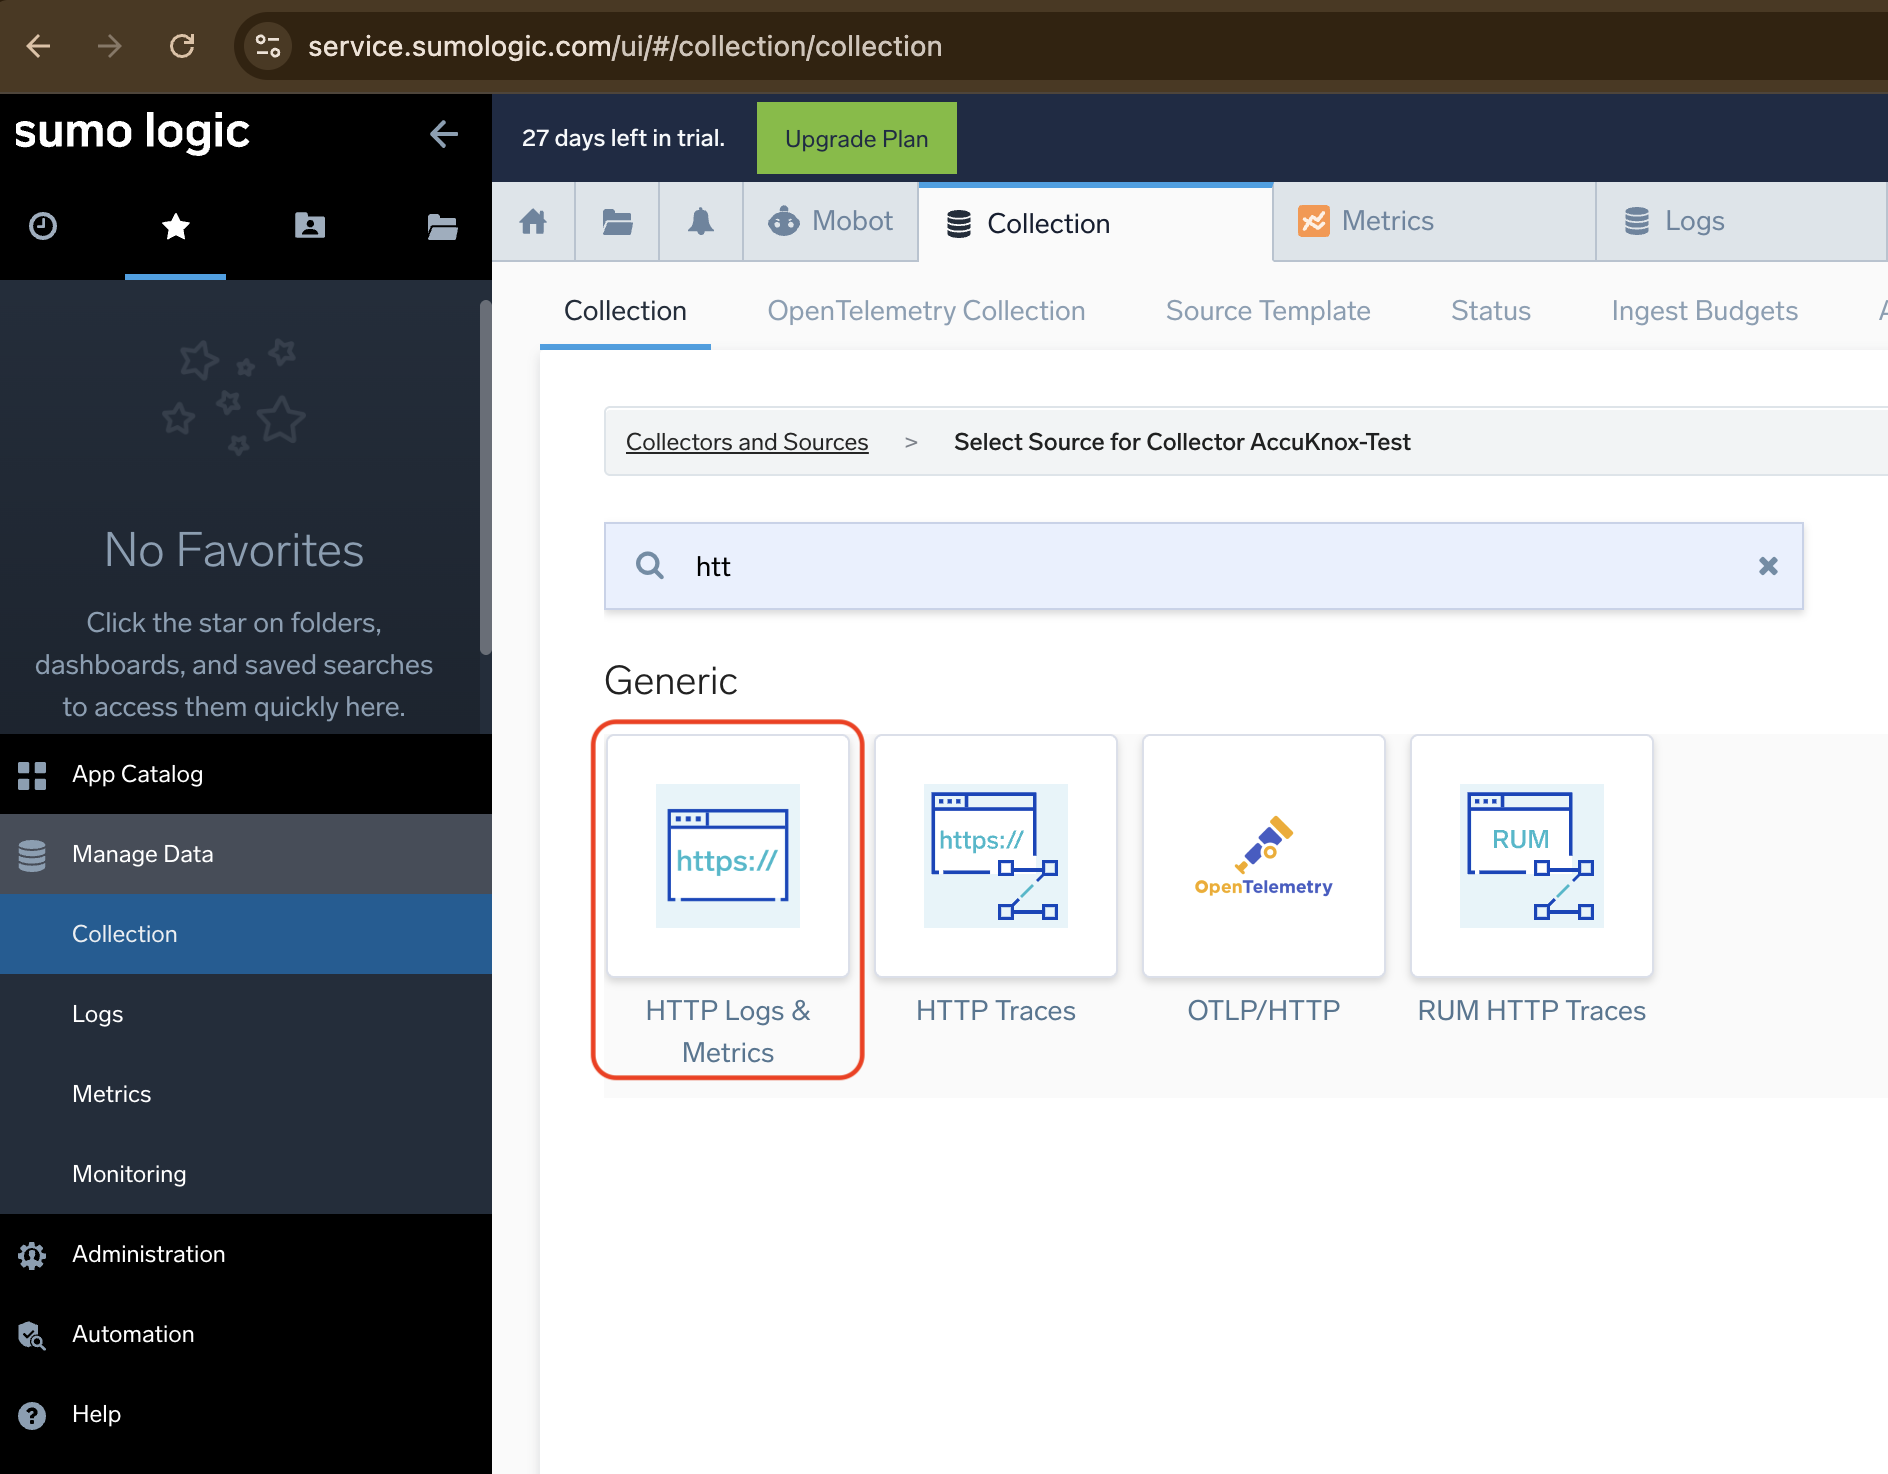
Step 5: In the search box, type HTTP. The results filter to show HTTP source types. Select HTTP Logs and Metrics from the Generic section.
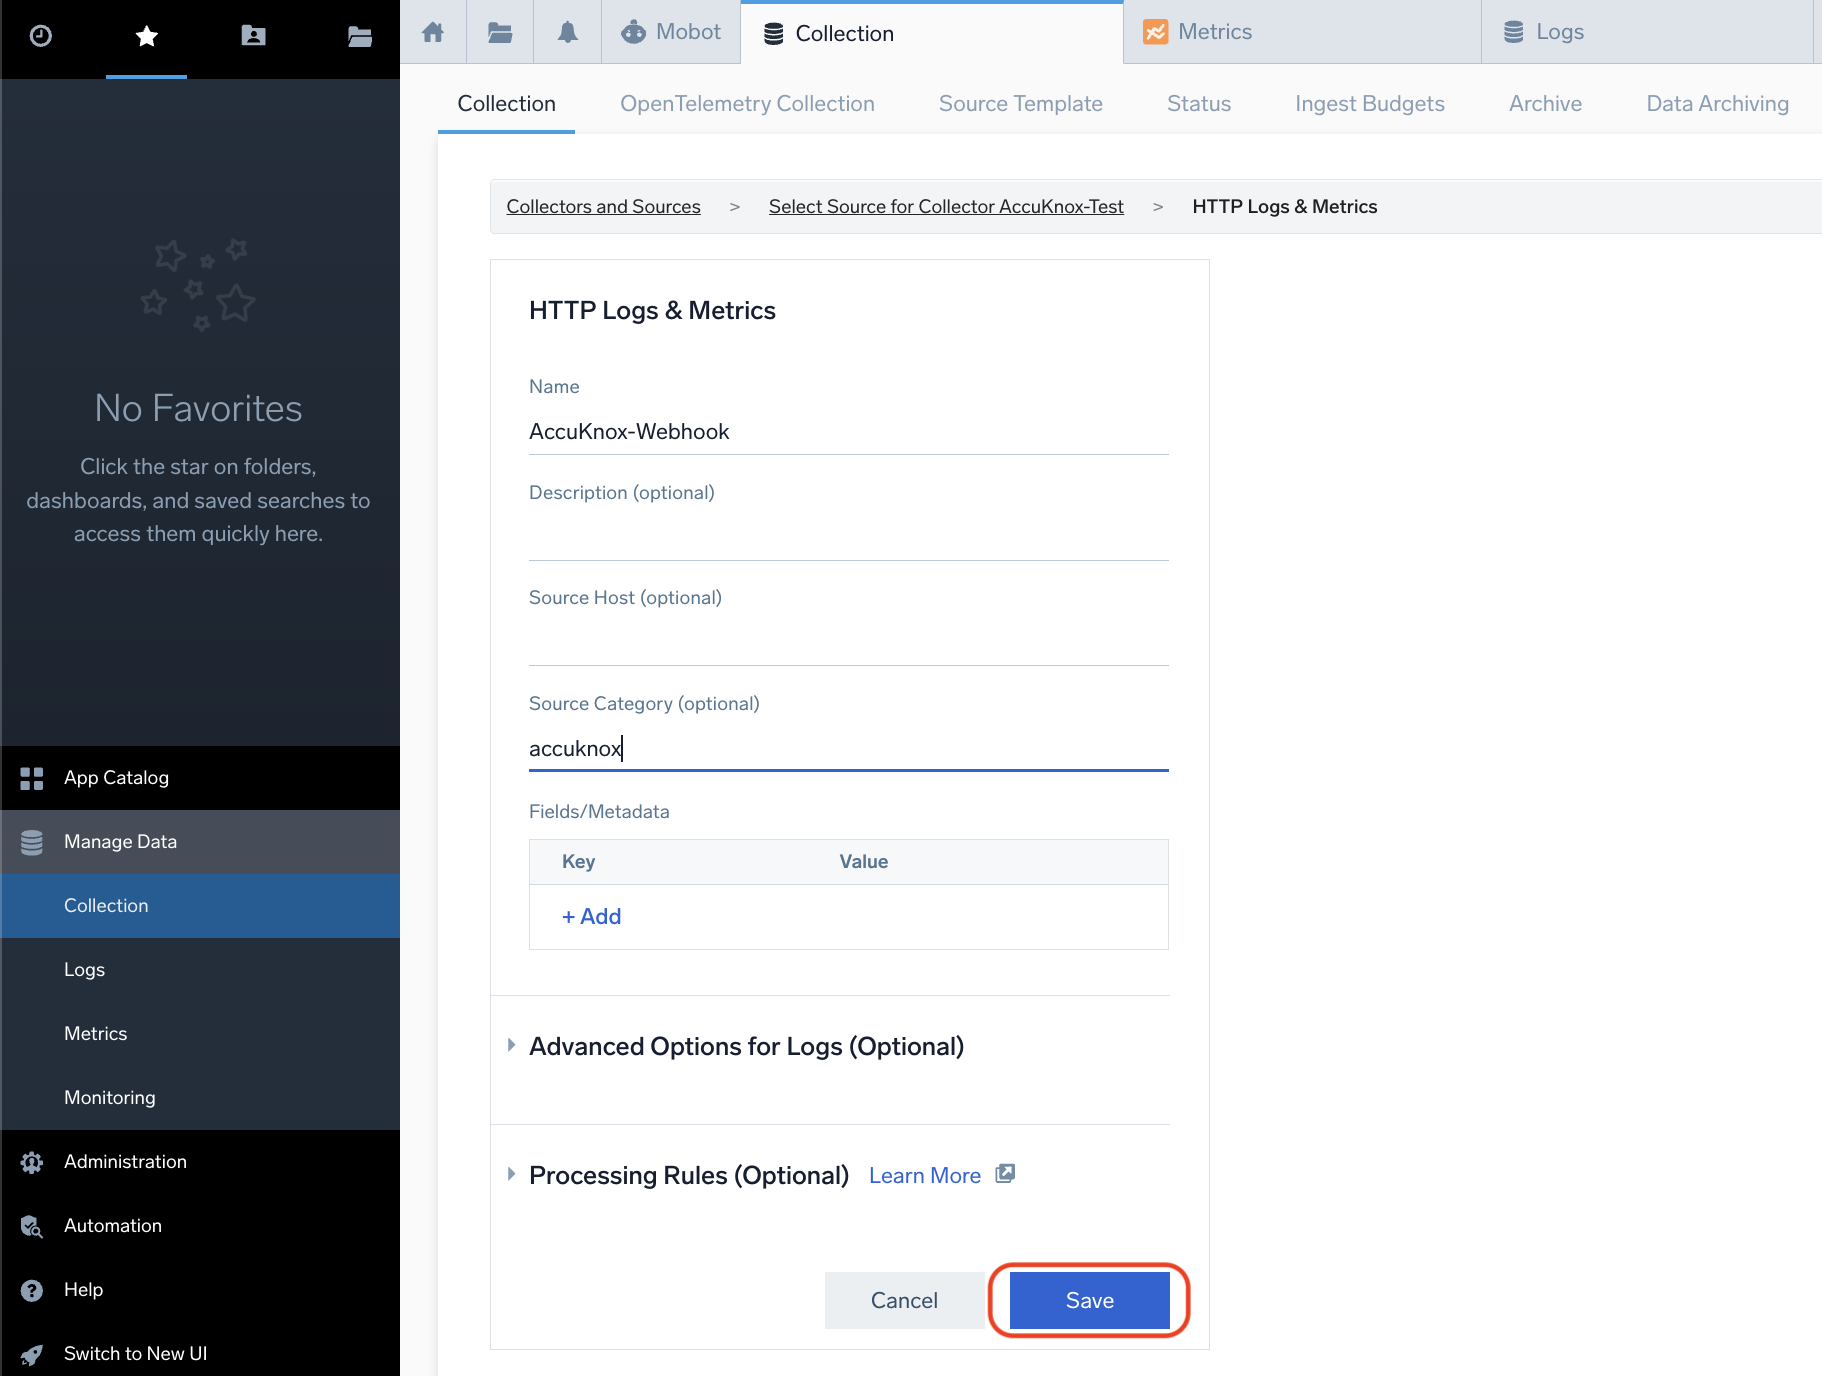
Step 6: Configure the source with the following values:
| Field | Value |
|---|---|
| Source Name | AccuKnox-Webhook |
| Source Category | accuknox |
| Description | (optional) |
| Source Host | (leave blank) |
Click Save. Sumo Logic creates the source and immediately displays the HTTP Source Address screen.
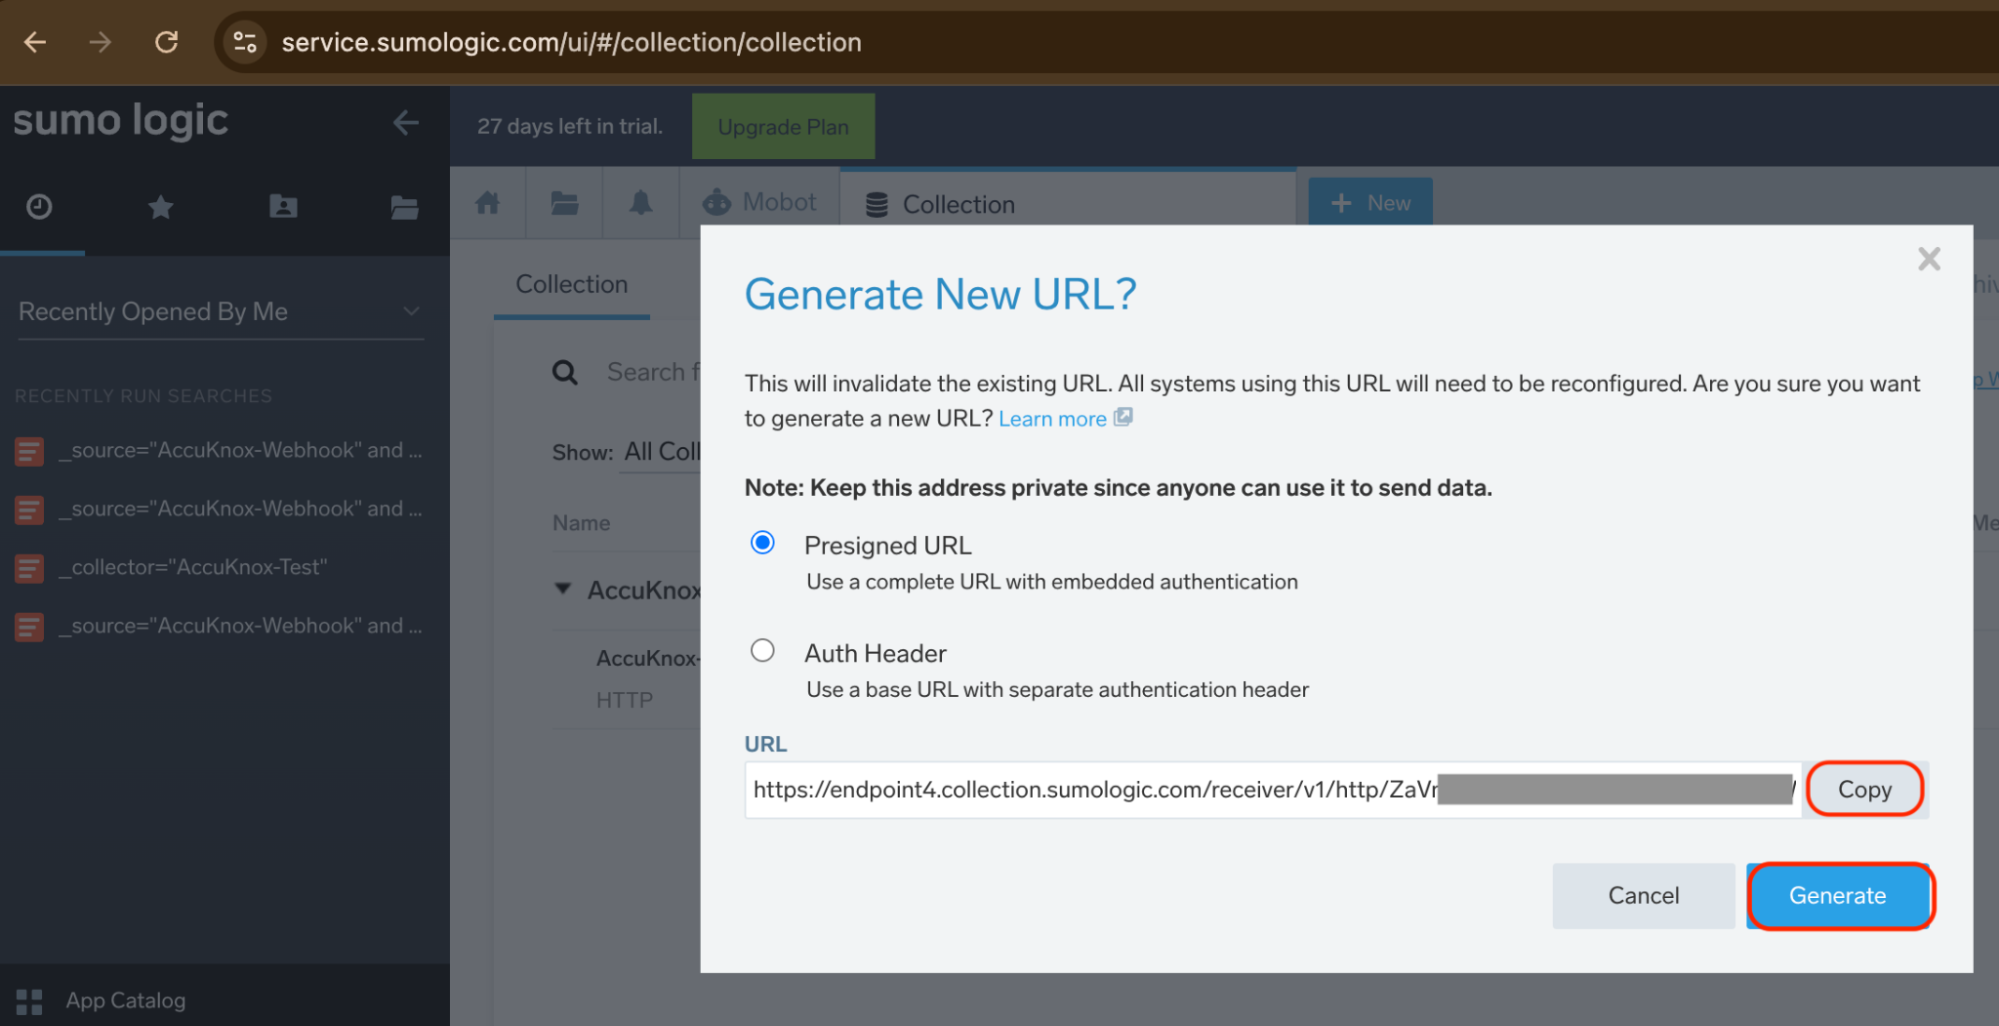
Step 7: After saving, Sumo Logic shows a modal with the endpoint URL. The Presigned URL option is selected by default. This embeds authentication credentials directly in the URL, so no separate header is required.
The URL follows this format:
https://endpoint4.collection.sumologic.com/receiver/v1/http/<token>
Click Copy to copy the URL to your clipboard. Store it securely. You will paste this into AccuKnox in the next section.
Step 8: In the AccuKnox console, click Settings in the left navigation, then click Integrations. The Integrations page shows all available connector types including Webhook, Email, Jira Cloud, PagerDuty, and others.
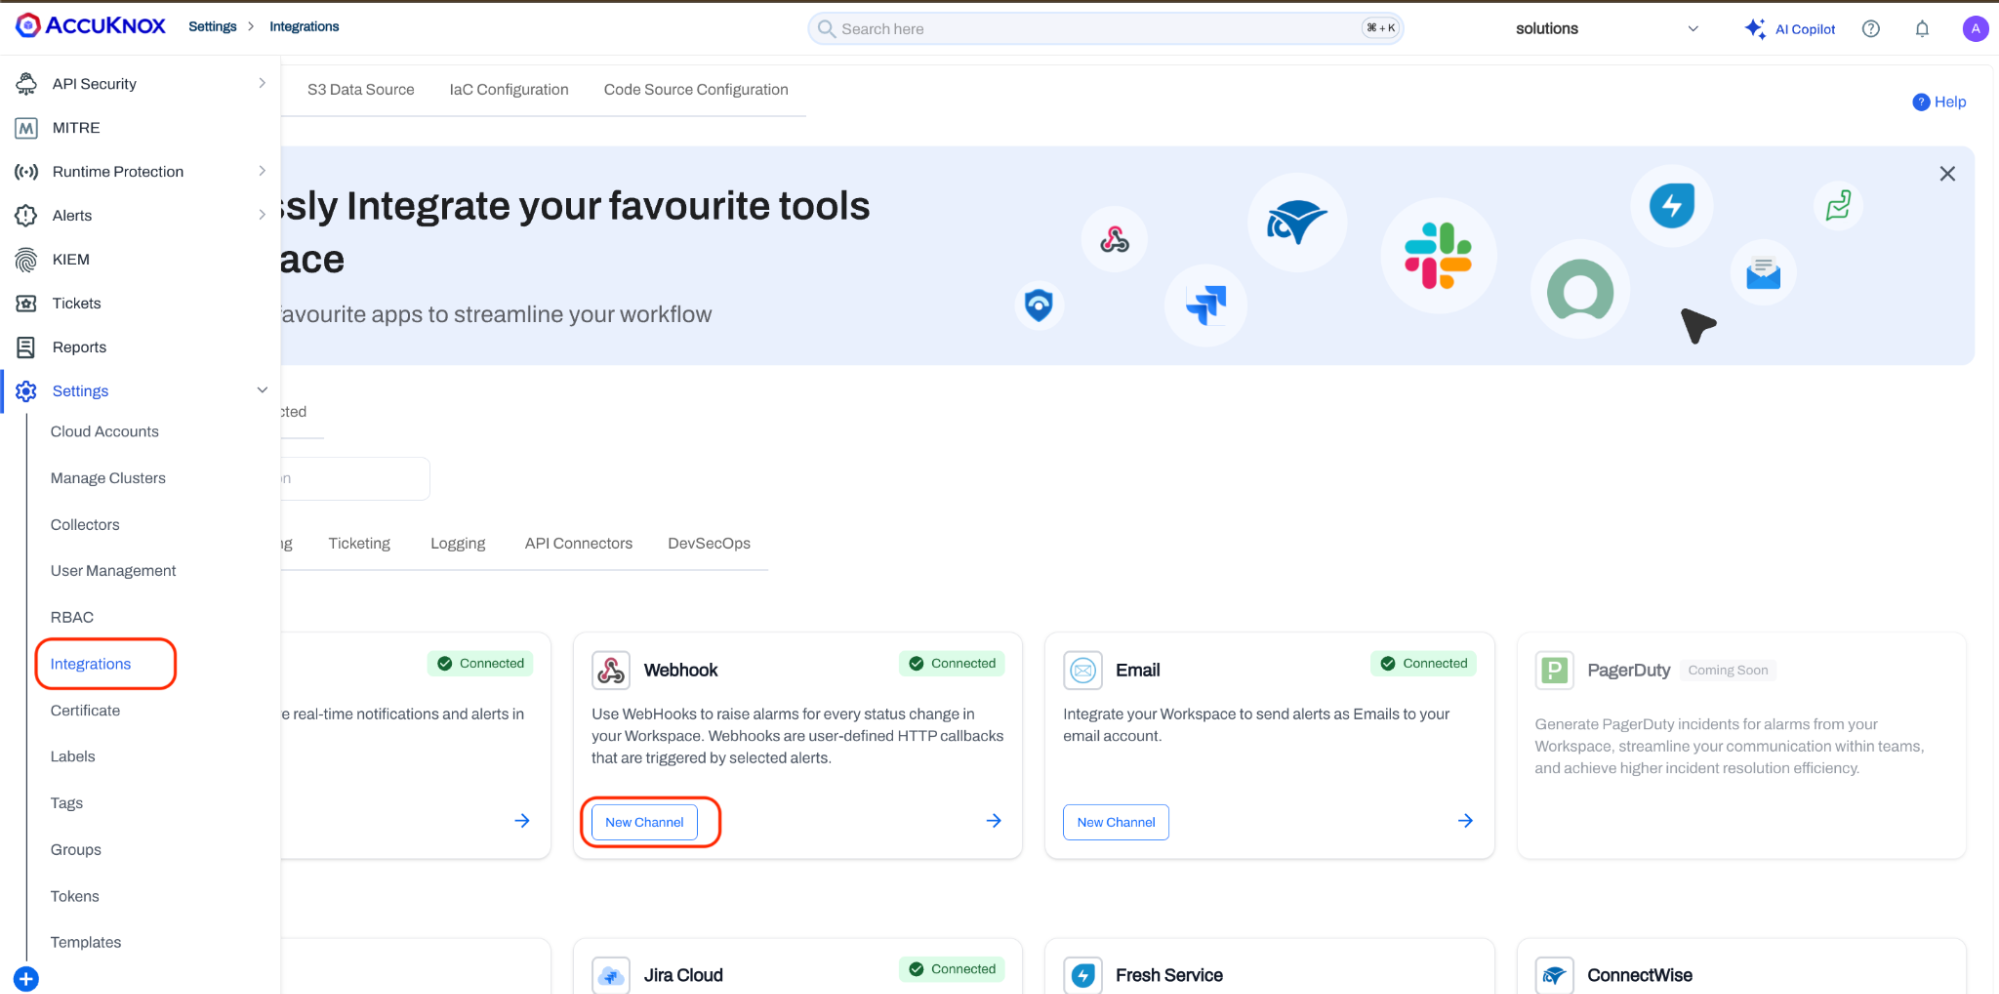
Locate the Webhook card. Click New Channel on the Webhook card to open the integration creation form.
Step 9: The Create Webhook form opens. Fill in the following fields:
| Field | Value |
|---|---|
| Integration Name | SumoLogic-Integration |
| Method | POST |
| WebHook URL | Paste the Sumo Logic HTTP Source URL copied in Step 7 |
| Success Codes | 200 |
| Description | SumoLogic-Integration (optional) |
| Headers | Leave empty (the Presigned URL includes authentication) |
The Method must be set to POST. Sumo Logic does not accept GET requests on the HTTP source endpoint.
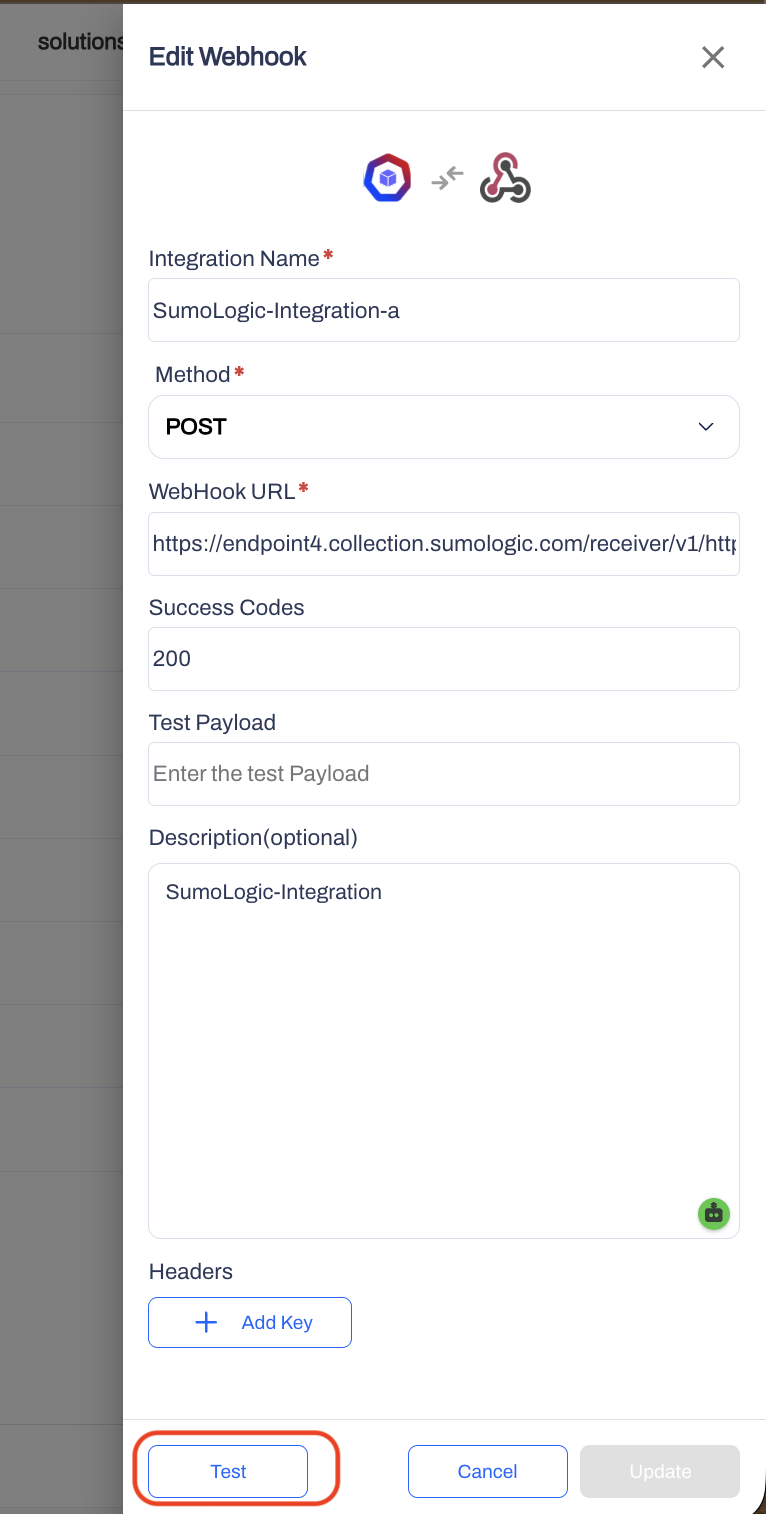
Before saving, click the Test button at the bottom of the form. AccuKnox immediately sends a sample payload to the configured Sumo Logic endpoint. A success response (HTTP 200) confirms that AccuKnox can reach the Sumo Logic endpoint and that the URL is valid. Click Save (or Update if editing an existing webhook) to store the integration.
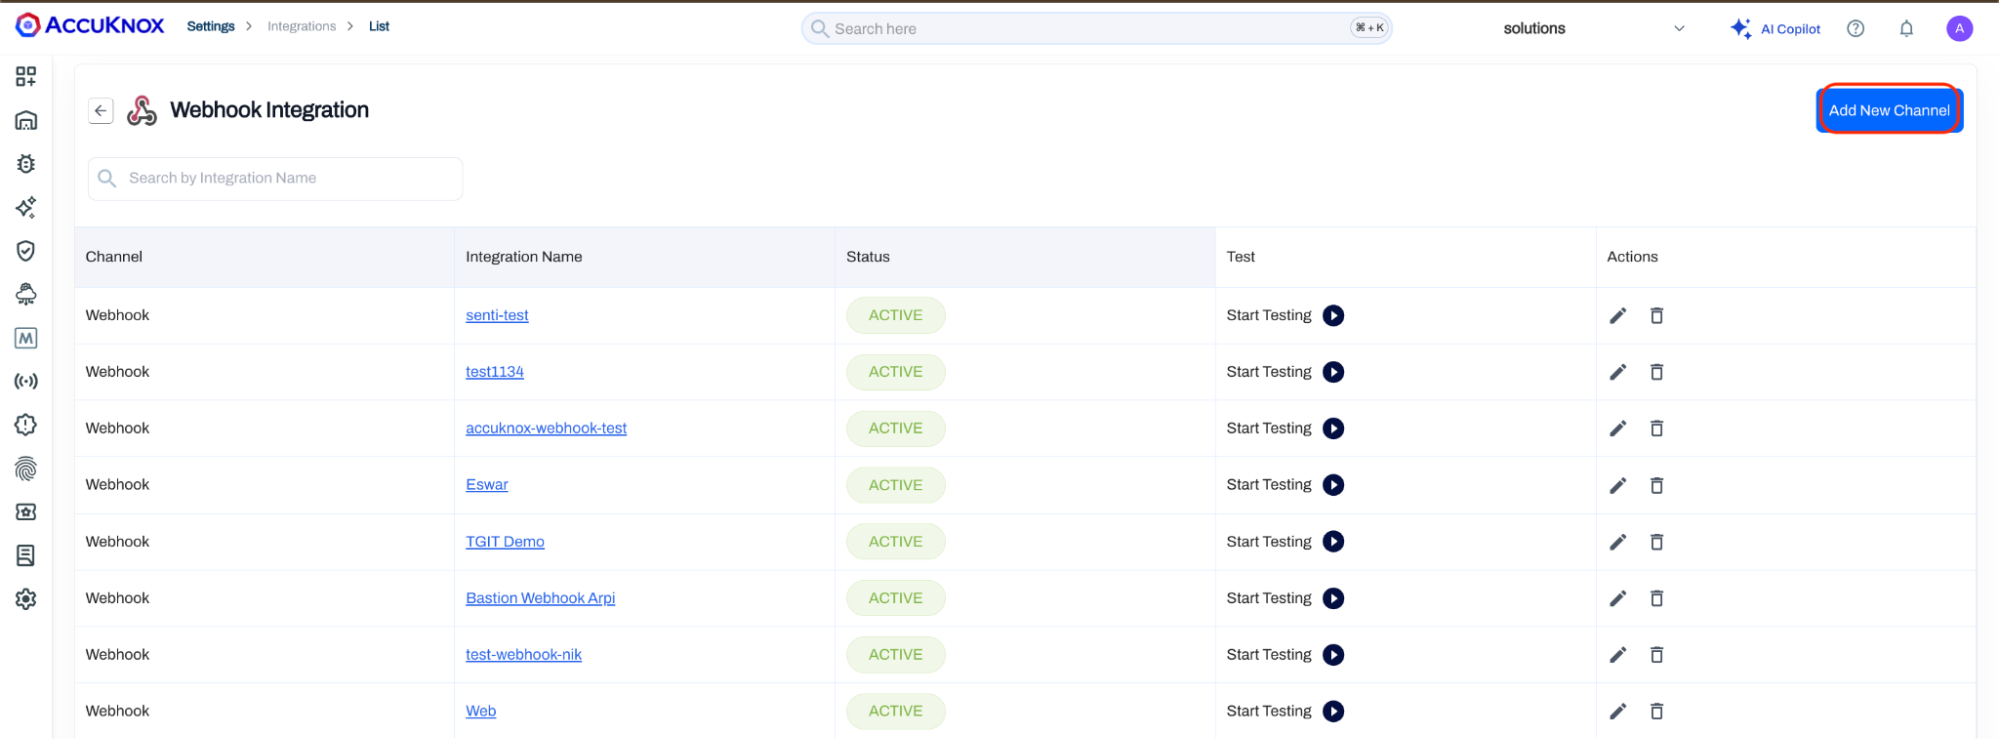
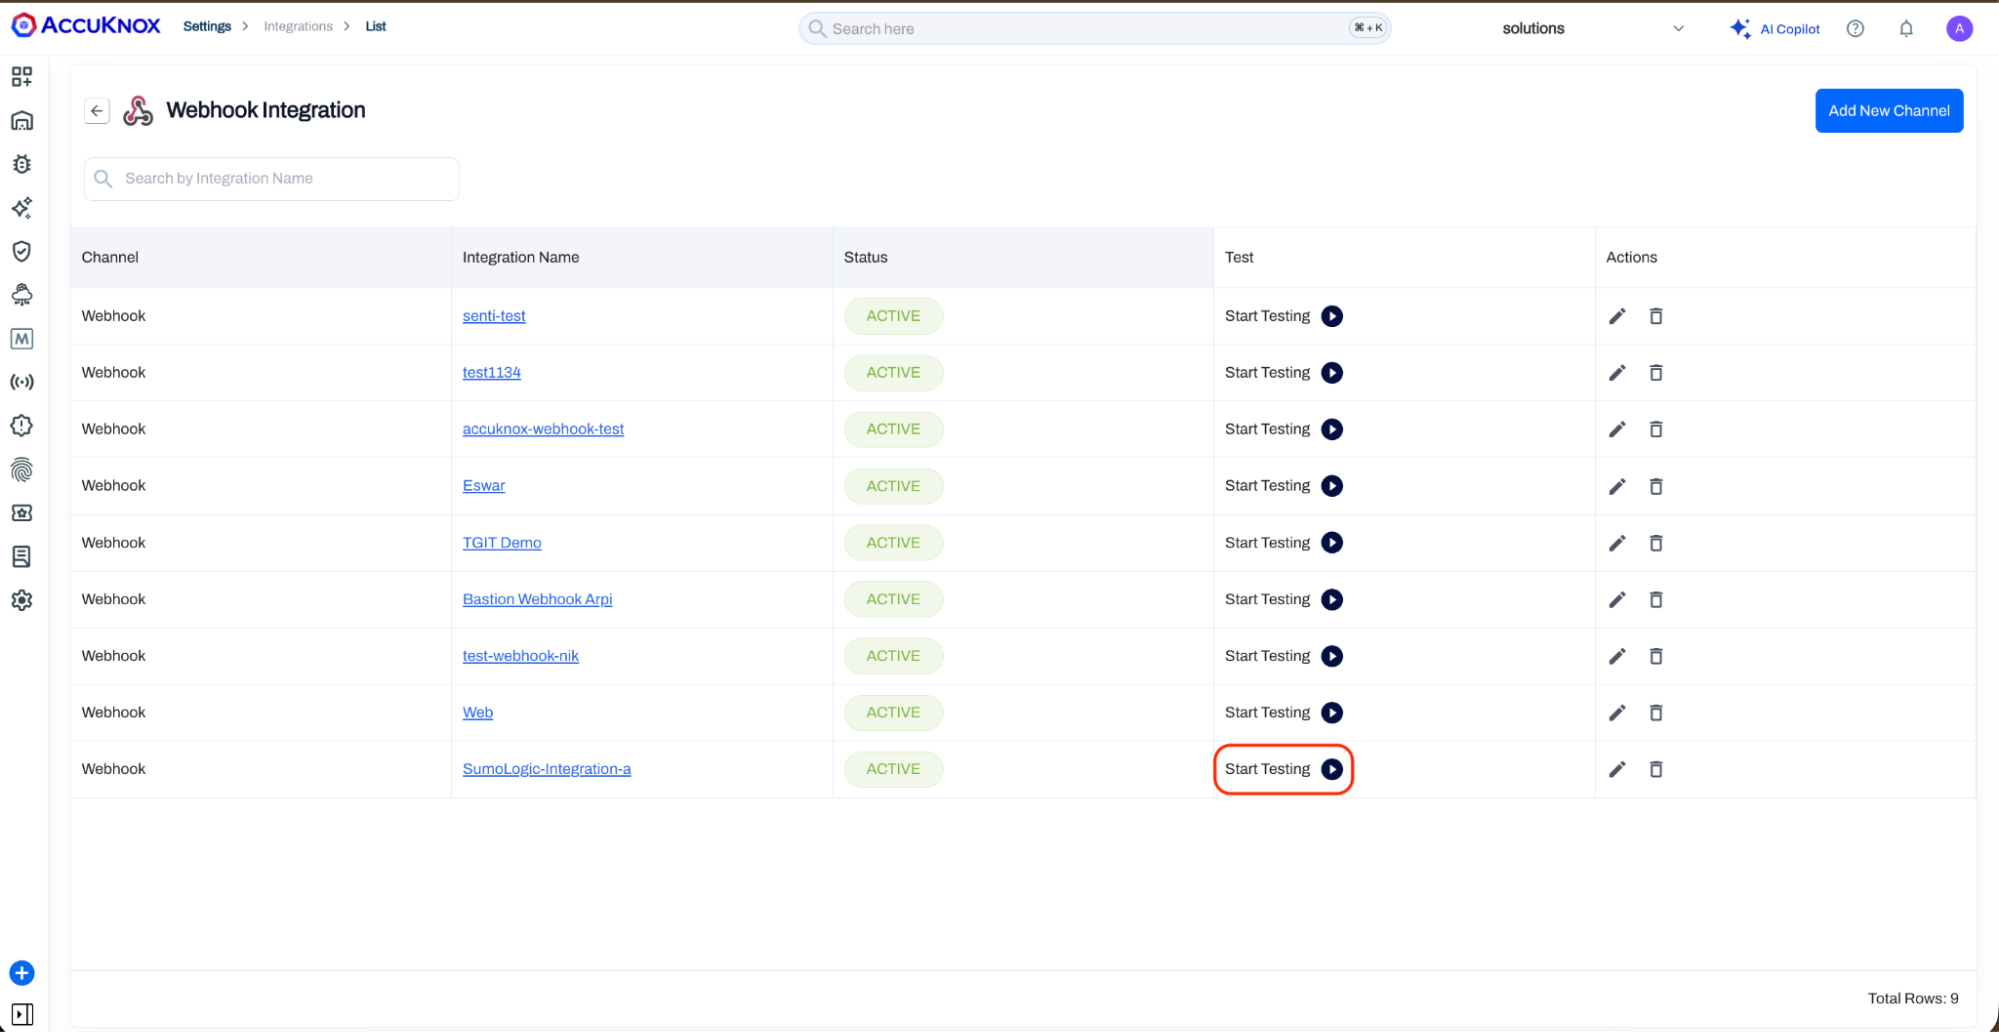
Step 10: The integration now appears in the Webhook Integration list with an ACTIVE status. You can click Start Testing at any time to resend a test payload.
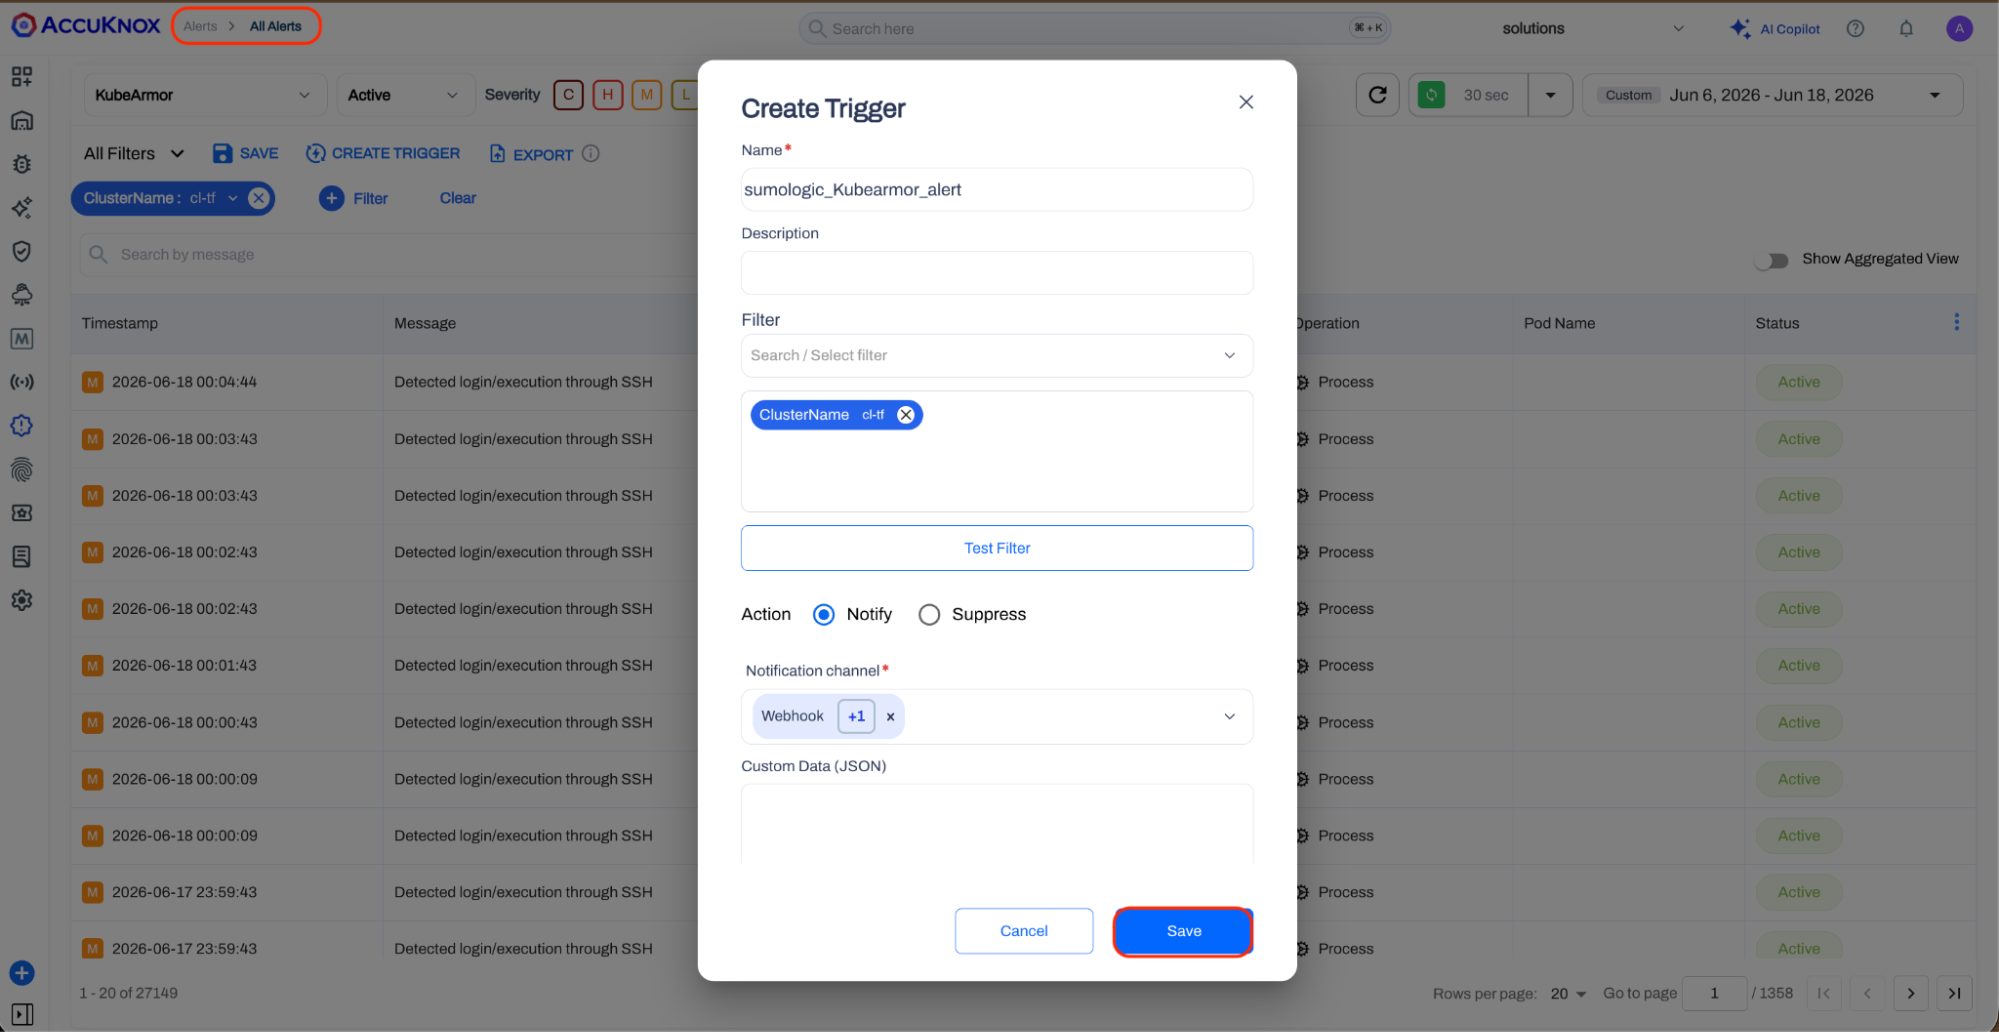
Step 11: In the AccuKnox console, click Alerts in the left navigation. The All Alerts page loads showing the live alert feed for your workspace.
Click the Create Trigger button in the toolbar. The Create Trigger modal opens. Fill in the trigger with the following values:
| Field | Value |
|---|---|
| Name | sumologic_KubeArmor_alert |
| Filter | ClusterName = <your test cluster> |
| Action | Notify |
| Notification Channel | Webhook (select the SumoLogic-Integration channel created in Step 9) |
| Custom Data (JSON) | (leave empty) |
Click Test Filter to confirm that the cluster filter returns results, then click Save. The trigger is now active and forwards matching alerts to Sumo Logic automatically.
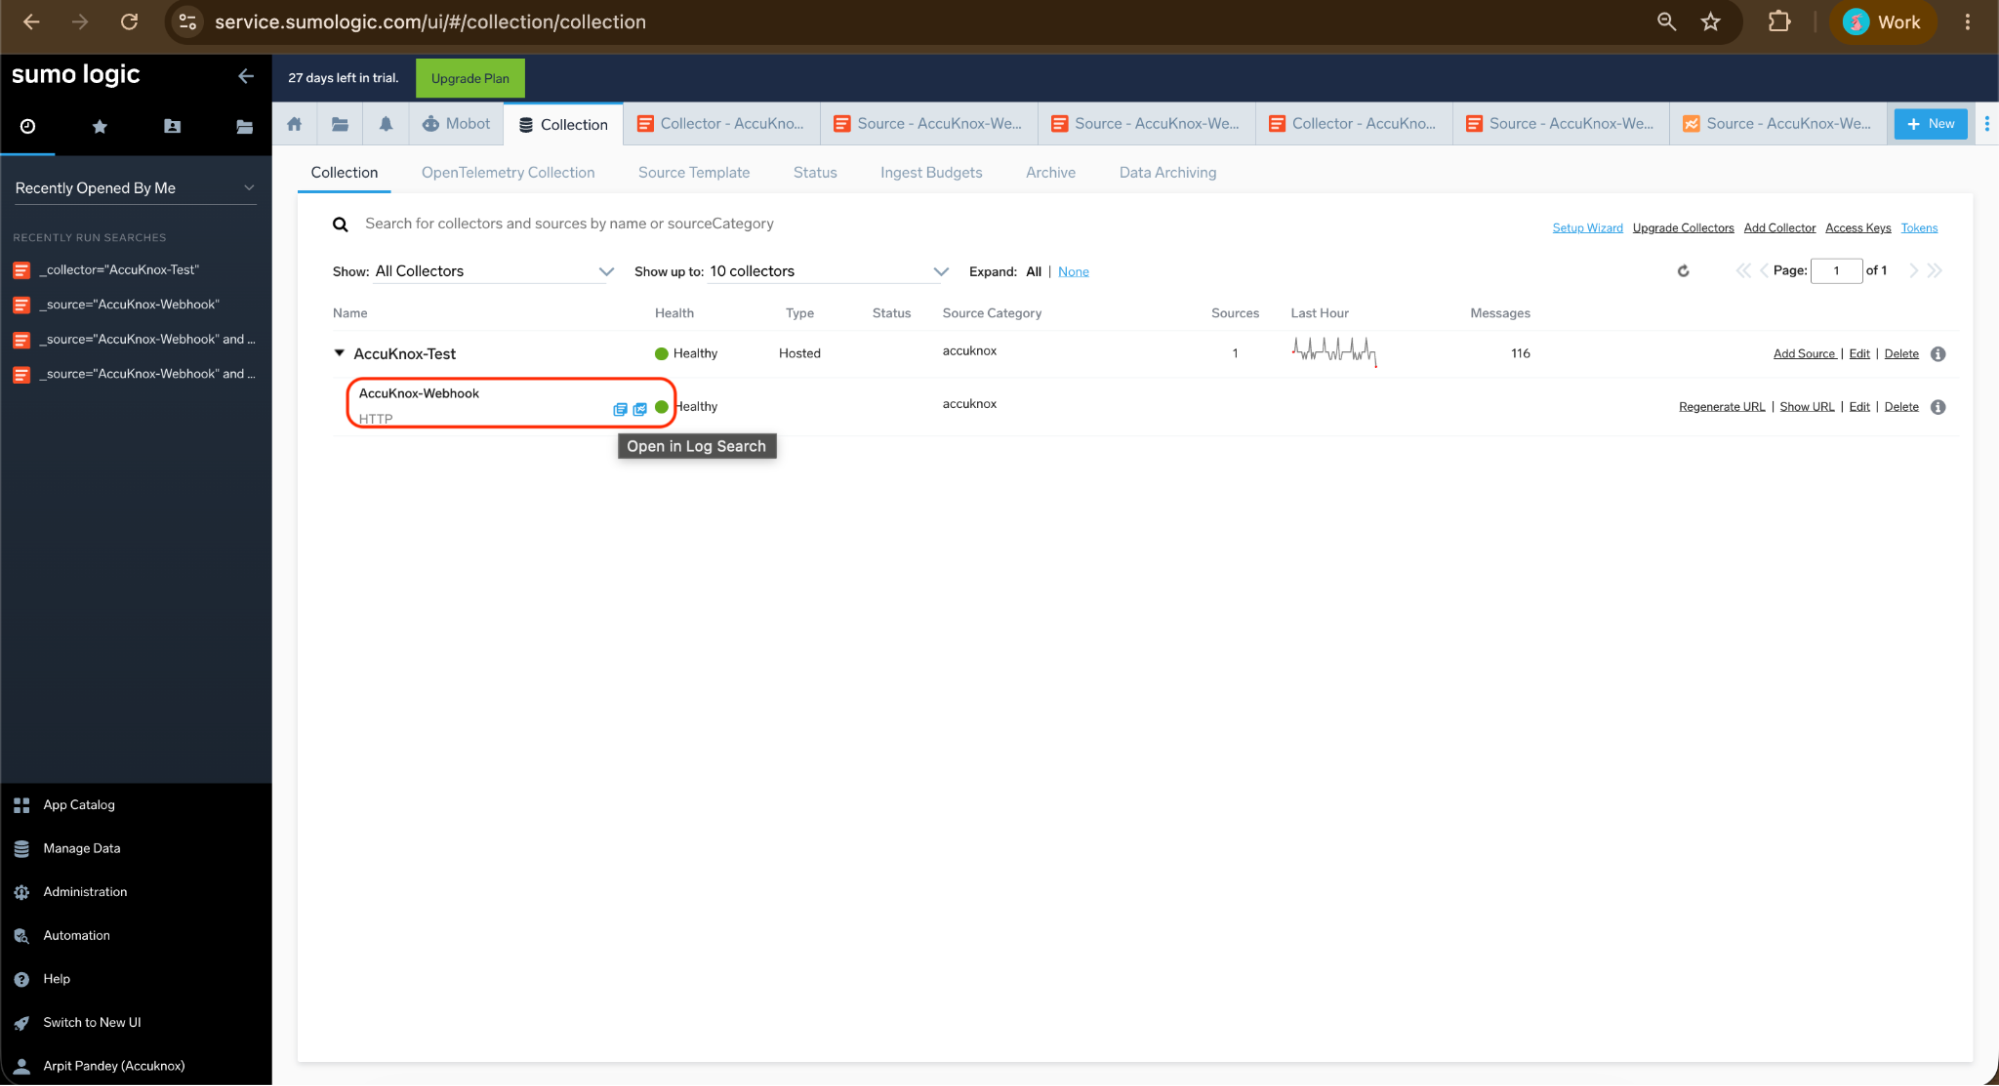
Step 12: Return to Sumo Logic. Navigate to Manage Data, then Collection. Expand the AccuKnox-Test collector and locate the AccuKnox-Webhook source. Hover over the source name and click Open in Log Search.
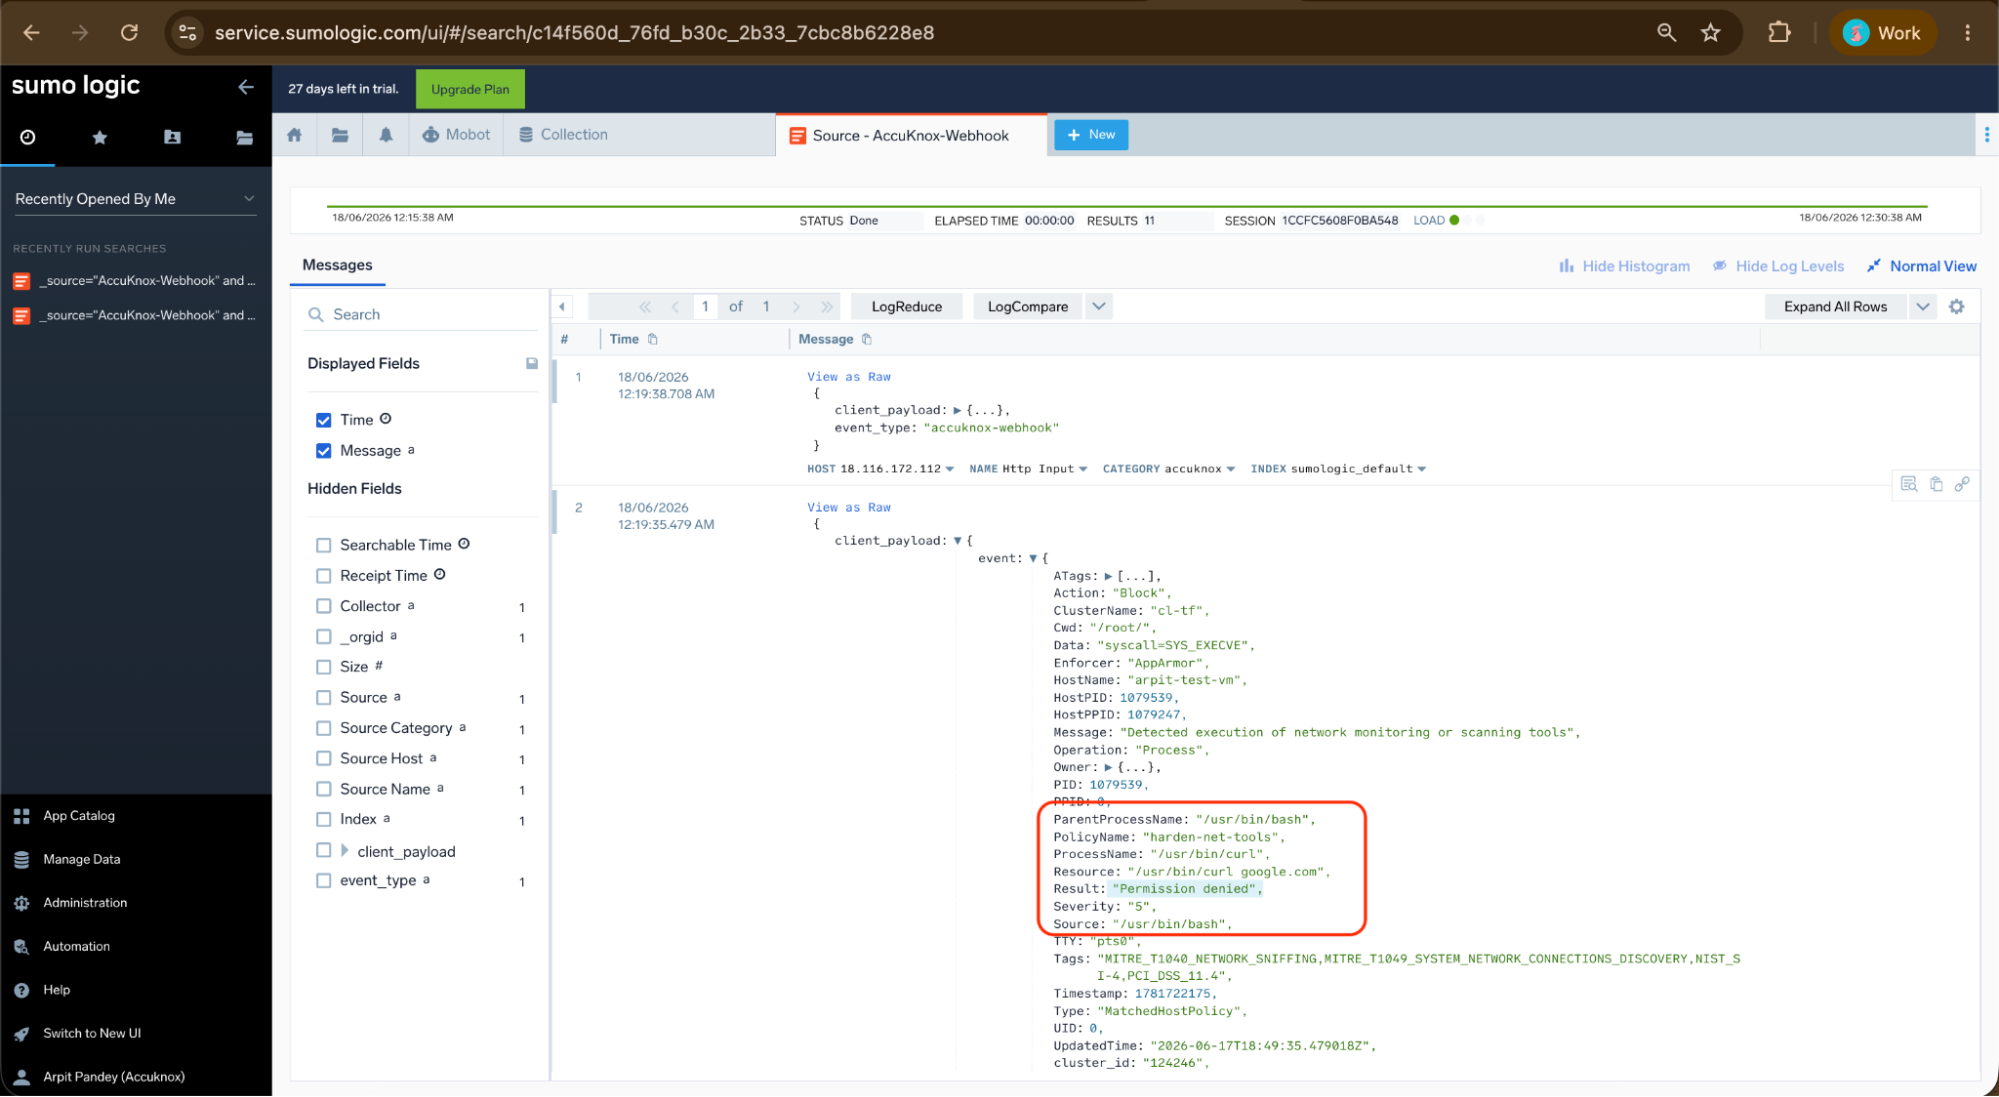
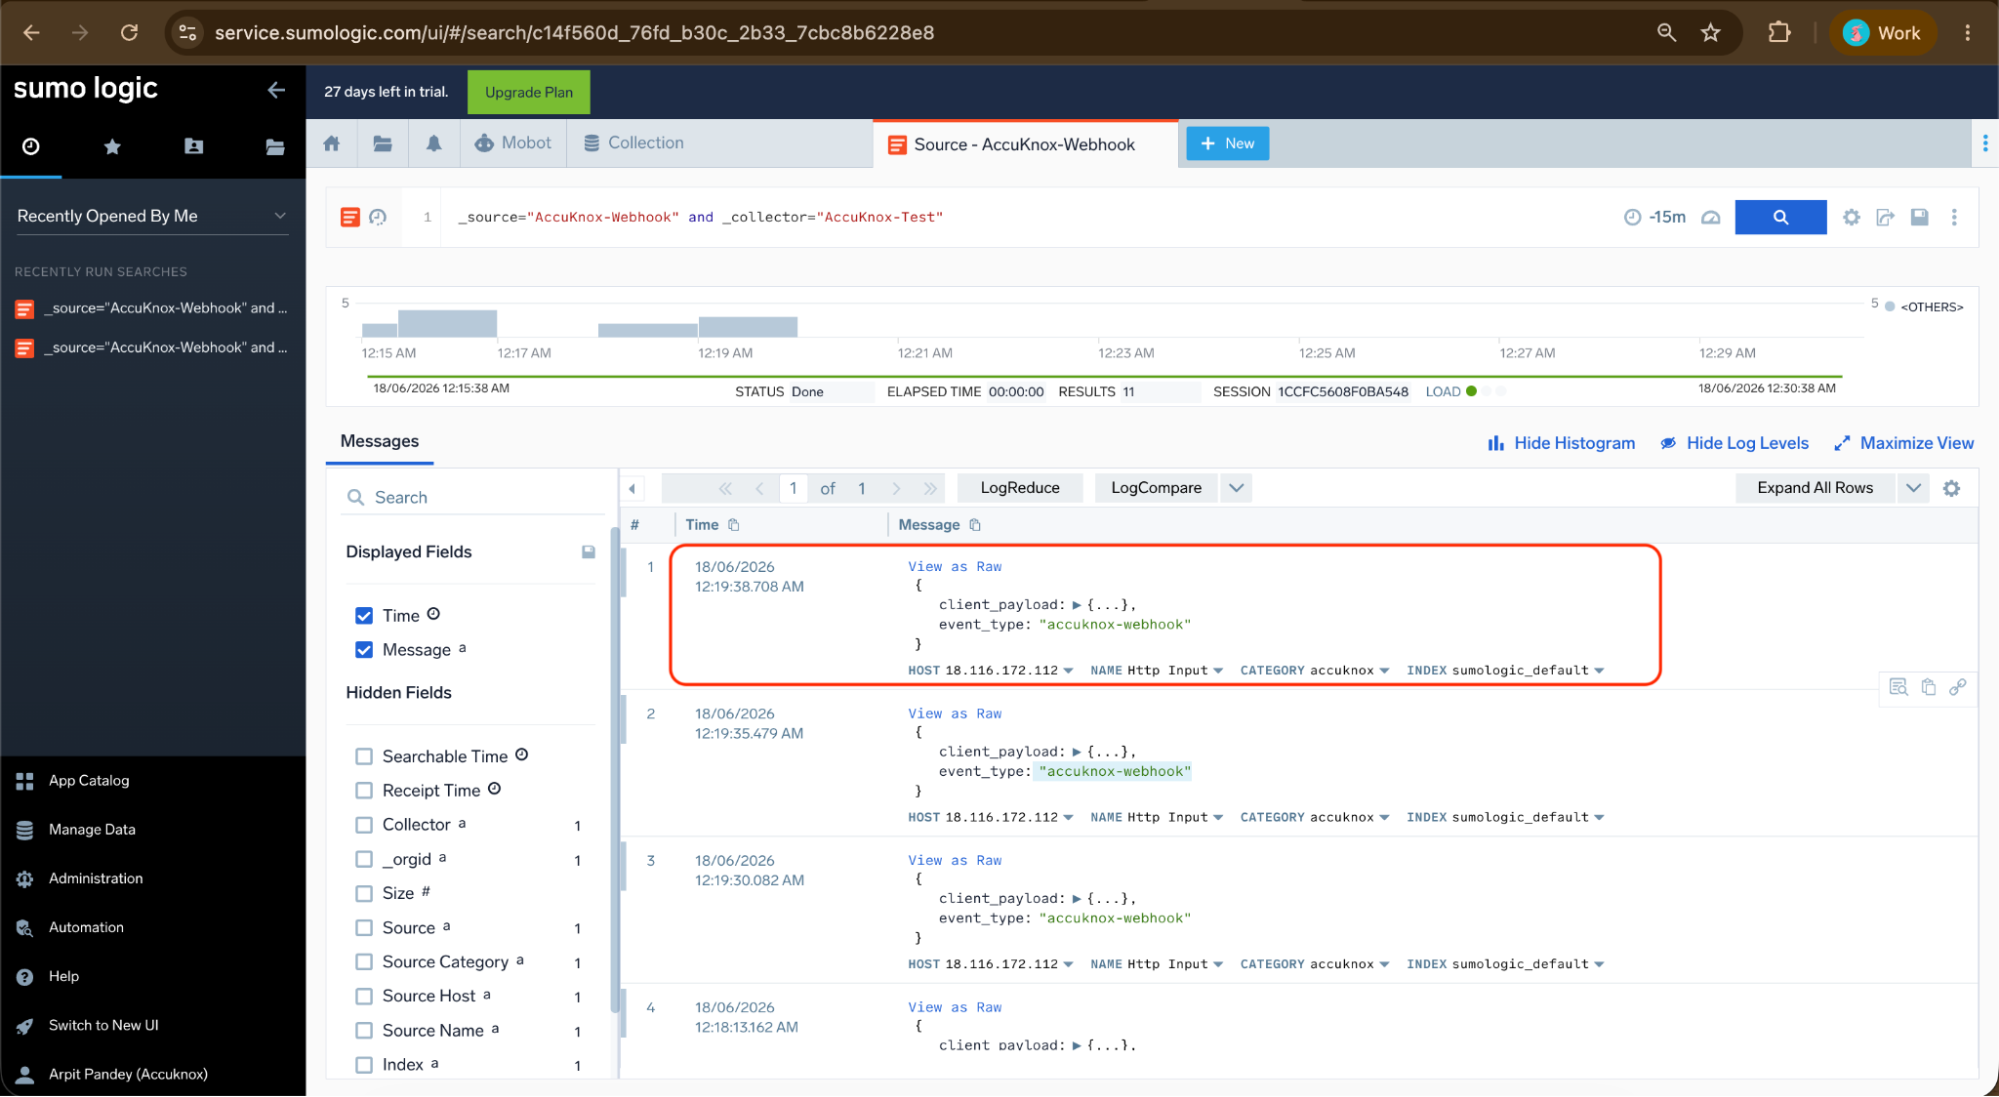
Step 13: In the log search bar, run the following query to filter for AccuKnox webhook events:
_source="AccuKnox-Webhook" and _collector="AccuKnox-Test"
The test payload sent by AccuKnox should appear in the results. Each result row shows a message with an event_type field set to accuknox-webhook. This confirms that network connectivity and webhook delivery are working correctly.
Step 14: In Sumo Logic Log Search, rerun the query and locate the most recent network tool events. Expand the payload and verify:
| Field | Expected Value |
|---|---|
| Action | Block |
| Result | Permission denied |
| PolicyName | harden-net-tools |
| ProcessName | /usr/bin/curl or /usr/bin/wget |
| Resource | /usr/bin/curl or /usr/bin/wget |
| Severity | 5 |
| Source | /usr/bin/bash |
These records confirm that AccuKnox enforcement events are delivered to Sumo Logic with full metadata including policy name, process details, enforcement action, and result.