AccuKnox Code Security for VS Code, Cursor, and IntelliJ
AccuKnox Code Security runs the AccuKnox ASPM Scanner CLI on your machine and shows the findings inside the editor. You fix issues before you commit, without leaving the editor. AccuKnox supports three editors: VS Code, Cursor, and IntelliJ.
Your code stays on your machine
The extension runs the scanner locally. Your Access Key only proves who you are before a scan starts. Neither your source code nor your scan results are uploaded to AccuKnox by this extension.
What you get:
- Multi-engine scans. SAST, SCA, secrets, IaC, ML-static, and container or SBOM engines, over the whole workspace or only your git-changed files.
- Findings sidebar. Group by severity, scan type, or file, and suppress or restore individual findings.
- Inline diagnostics. Issues appear in the Problems panel and inline in the editor.
- AI remediation. Accept or reject AI-suggested fixes, using your own LLM key or the AccuKnox SaaS route.
- AI chat. Ask about one finding, or about code security in general.
Prerequisites
| Requirement | Details |
|---|---|
| Editor | VS Code 1.85 or newer, Cursor, or IntelliJ. Cursor works the same way as VS Code, because it is a VS Code fork |
| Python | Python 3.9 or newer, needed to install the scanner CLI |
| AccuKnox account | An Access Key generated from the AccuKnox console |
Step 1. Install the Extension
Install on VS Code or Cursor
Open the Extensions panel, search for accuknox, select AccuKnox Code Security from AccuKnox, and click Install.
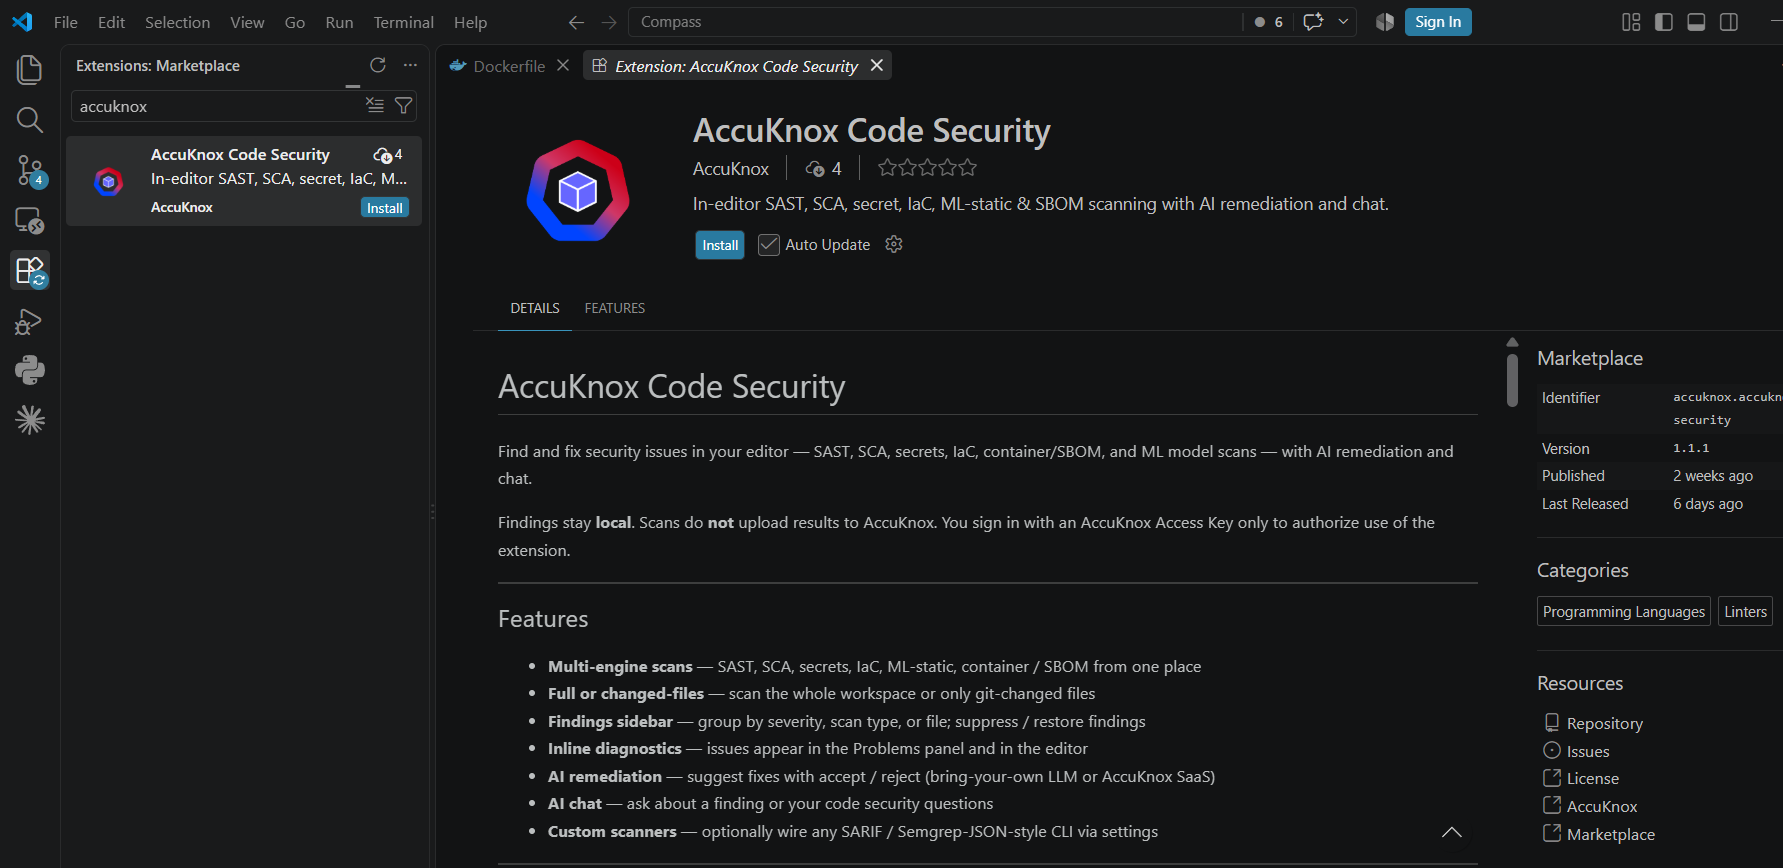
To install from a .vsix file instead, run this in a terminal. It works the same in VS Code and Cursor, and it is more reliable than the GUI path.
code --install-extension accuknox-security.vsix
The GUI install is spinning forever
Use the CLI command above. If the Extensions panel still shows Installing… after that, run Developer: Restart Extension Host from the Command Palette.
Install on IntelliJ
AccuKnox Code Security also runs in IntelliJ, through a separate plugin. Install that plugin from Settings > Plugins.
Steps 2 to 5 use the VS Code names
The scanner CLI, the Access Key, and the sign-in flow work the same way in IntelliJ. Only the menu names differ, because IntelliJ has no Command Palette and reaches the same actions from its own menus.
Step 2. Install the Scanner CLI
The extension prompts you when accuknox-aspm-scanner is missing from your PATH.
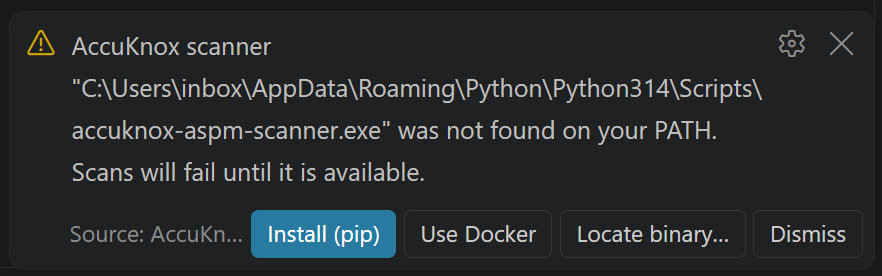
| Option | What it does |
|---|---|
| Install (pip) | Installs the scanner with pip. Recommended |
| Use Docker | Runs the scanner in a Docker container |
| Locate binary | Points the extension at a scanner binary you already have |
The pip install fails
A pydantic version error means pip picked the wrong interpreter. Use python3 -m pip install ... instead of a bare pip install .... An externally-managed-environment error on Debian, Ubuntu, or WSL needs --break-system-packages.
Step 3. Generate an Access Key
Scans stay blocked until a valid Access Key is set. In the AccuKnox console, go to Settings > User Management. Open the three-dot menu next to your user, select Get Access Key, and copy the key.
For the full walkthrough with screenshots, see How to Create Access Keys.
An Access Key carries your permissions
An Access Key inherits the permissions of the user who created it. An administrator's key can perform nearly any operation in the CNAPP from the CLI. Keep it private and never share it.
Step 4. Sign In
- Open the Command Palette and run AccuKnox: Log In / Set Access Token.
- Paste the Access Key from Step 3 and press Enter.

The extension validates the key against accuknox.auth.endpoint and stores it in your operating system's secret store, never in settings.json.
The default auth host is https://cspm.demo.accuknox.com. Change accuknox.auth.endpoint to point at your stage, production, or on-premises console.
Two more commands help here: AccuKnox: Show Authentication Status and AccuKnox: Log Out.
Step 5. Run a Scan
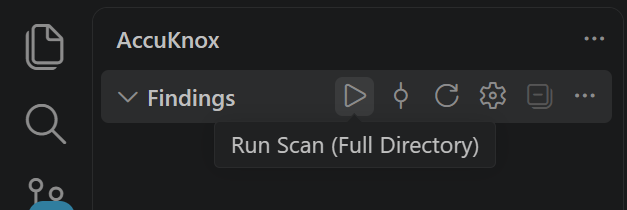
Open a project folder, then run AccuKnox: Run Scan (Full Directory) from the Command Palette. You can also click the play button on the AccuKnox > Findings view.
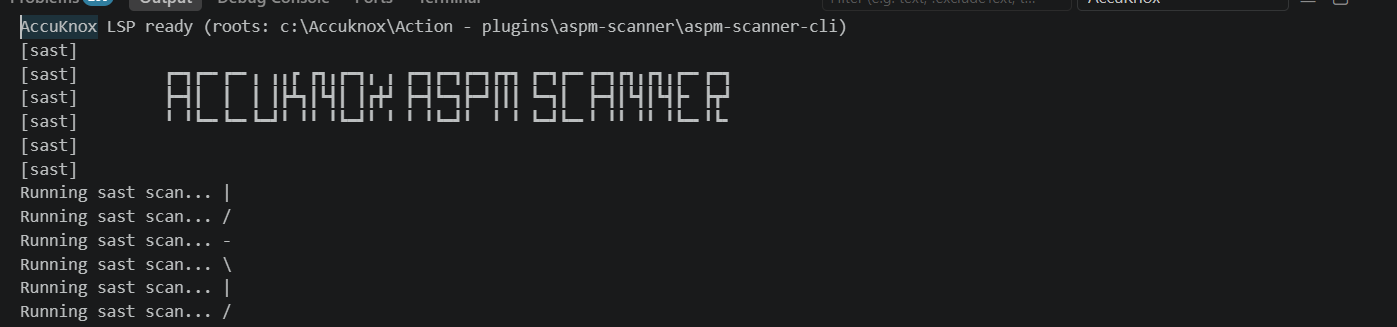
Watch progress in View > Output, then pick AccuKnox from the panel's dropdown.
Findings land in the AccuKnox activity bar under Findings, Suppressed, and AI Chat.
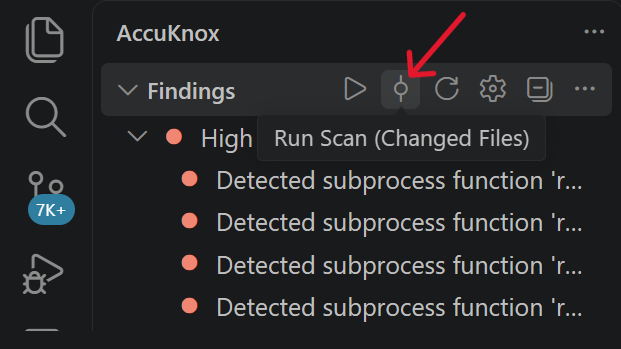
After you edit code, run AccuKnox: Run Scan (Changed Files) to rescan only what git says changed. It is much faster than a full scan.
Commands
| Command | What it does |
|---|---|
| Run Scan (Full Directory) | Scan the whole workspace |
| Run Scan (Changed Files) | Scan git-changed files only |
| Cancel Scan | Stop the current run |
| Log In / Set Access Token | Save and validate your Access Key |
| Log Out | Clear the saved Access Key |
| Show Authentication Status | Check whether a valid key is stored |
| Open AI Chat | Open the chat panel |
| Set LLM API Key | Store your own LLM key for remediation and chat |
| Set AccuKnox SaaS Token | Store the token for the AccuKnox SaaS LLM route |
| Open Settings | Jump to the AccuKnox settings |
Settings
Open Settings and search for accuknox, or edit settings.json directly.
{
  "accuknox.scanner.command": "accuknox-aspm-scanner",
  "accuknox.scanner.executionMode": "local",
  "accuknox.auth.endpoint": "https://cspm.demo.accuknox.com",
  "accuknox.scan.types": {
    "sast": true,
    "sca": true,
    "secret": true,
    "iac": true,
    "ml-scan": false,
    "container": false
  }
}
| Setting | Purpose |
|---|---|
accuknox.scanner.command |
Path or name of the ASPM CLI |
accuknox.scanner.executionMode |
local or docker |
accuknox.auth.endpoint |
AccuKnox console base URL |
accuknox.scan.types |
Which scan types run |
accuknox.scan.secretEngine |
trufflehog or gitleaks |
accuknox.scan.timeoutMs |
Longest a single scanner may run before it is killed. Default 600000, which is 10 minutes |
accuknox.llm.* and accuknox.saas.* |
AI remediation and chat routing |
Secrets never go in a settings file
Your Access Key, LLM key, and SaaS token are stored in the operating system secret store. Set the LLM key through the Command Palette with AccuKnox: Set LLM API Key, never in settings.json.
Configure the AI Model
accuknox.llm.model and accuknox.llm.apiBase are ordinary settings you can edit at any time. The API key is separate, and it goes through AccuKnox: Set LLM API Key.
| Provider | accuknox.llm.model |
accuknox.llm.apiBase |
API key |
|---|---|---|---|
| Anthropic | anthropic/claude-opus-4 |
Leave unset | An Anthropic Console key. A Claude Pro subscription does not work here |
| OpenAI | openai/gpt-4o |
Leave unset | An OpenAI API key |
| Gemini | gemini/gemini-2.0-flash |
Leave unset | A Google AI Studio key |
| Ollama or LM Studio, local | ollama/llama3 or lmstudio/my-model |
Leave unset | Not required |
| OpenRouter or another OpenAI-compatible provider | openai-compatible/<the provider's model id> |
The provider's base URL | The provider's API key |
Troubleshooting
| Problem | What to try |
|---|---|
| A scan asks you to sign in | Log in with a valid Access Key, then check Show Authentication Status |
| Authentication fails or AccuKnox is unreachable | Check the network, then set accuknox.auth.endpoint to your own console |
| Scanner not found | Install the CLI, or set accuknox.scanner.command to an absolute path |
| No findings, and nothing seems to happen | Open View > Output and pick AccuKnox from the dropdown to read the live scanner log |
| A scan on a large repository times out | Raise accuknox.scan.timeoutMs |
pip install fails with a pydantic version error |
Use python3 -m pip install ... rather than a bare pip install ... |
pip install fails with externally-managed-environment |
Add --break-system-packages on Debian, Ubuntu, or WSL |
| Install from VSIX spins forever with no error | Run code --install-extension <path-to-vsix> instead |
| The Extensions panel shows Installing… forever | The UI is stale. Run Developer: Restart Extension Host, or restart the editor |