Runtime Security Deployment for Openshift
Operator Installation
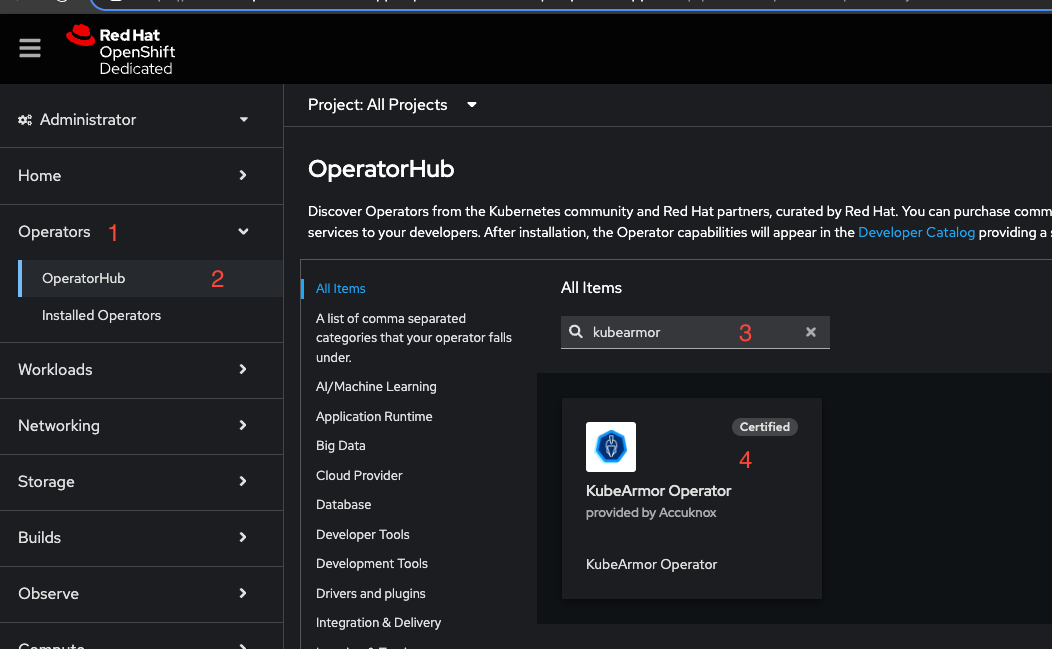
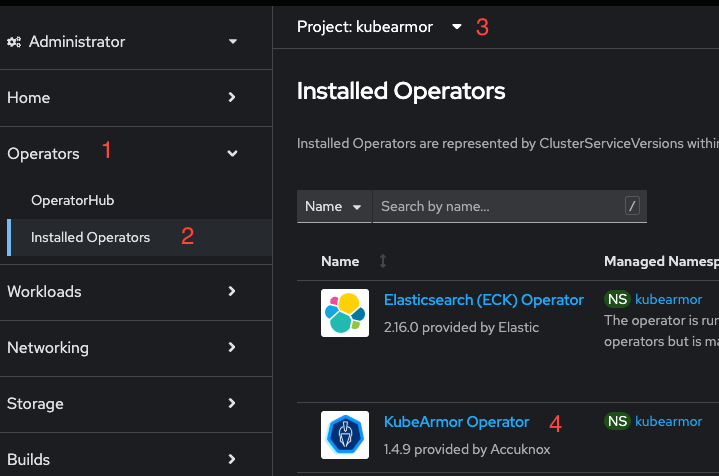
In the OpenShift console, install KubeArmor operator by following the instructions below:
- Under operators (1) select Operator Hub (2).
- Search for the word "kubearmor" (3) and select "KubeArmor Operator" (4).
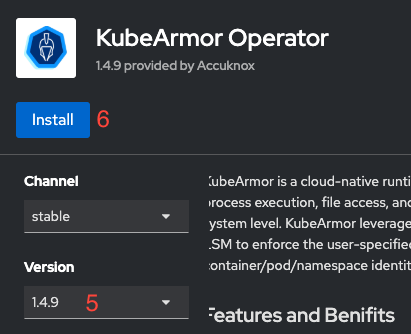
- Install KubeArmor version "1.4.9" with default configurations (5, 6, 7).

ElasticSearch Integration
To integrate KubeArmor with Elasticsearch, the following inputs are required:
- Username/Password: If the Elasticsearch server requires authentication.
- CA Certificate: If Elasticsearch security is enabled.
- URL of Elasticsearch: Including protocol and port.
Steps to Install
Username/Password Installation
If the server does not require authentication, you can skip this step.
To use username/password authentication with Elasticsearch, a Kubernetes secret called elastic-secret needs to be created in the kubearmor namespace.
Run the following command, replacing <elastic-user> and <elastic-password> with appropriate values:
kubectl create secret generic elastic-secret -n kubearmor --from-literal username=<elastic-user> --from-literal password=<elastic-password>
CA Certificate Installation
To use HTTPS communication between the agents and Elasticsearch, a Kubernetes secret called elastic-ca needs to be created in the kubearmor namespace.
- Acquire the CA certificate used by Elasticsearch. If acquiring the certificate is not possible, set the
allowInsecureTLSflag totruein the next steps. - Save the certificate in a file and run the following command:
kubectl create secret generic elastic-ca -n kubearmor --from-file ca.crt=<cacert file name>
KubeArmor Instance Installation
Once the steps in the previous chapter are completed, proceed with the agent installation from the OpenShift console.
Steps to Install
- Install the required SCC using the following command:
oc create -f https://raw.githubusercontent.com/kubearmor/KubeArmor/main/pkg/KubeArmorOperator/config/rbac/kubearmor-scc.yaml
- In the OpenShift console:
- Under Operators (1), go to Installed Operators (2).
- Select
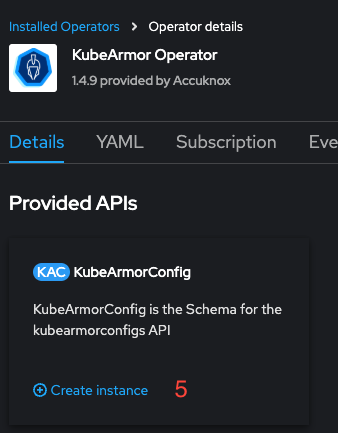
kubearmor(3) as the project. - Click on the KubeArmor Operator (4).
-
Create a
KubeArmorConfigInstance (5). -
In the form view:
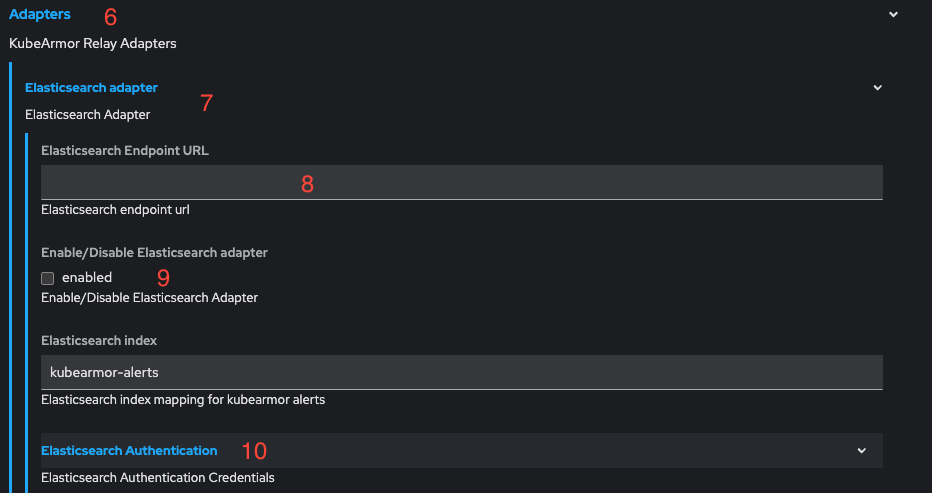
- Select Adapters (6) -> Elasticsearch Adapter (7).
-
Perform the following steps:
- Enter the Elasticsearch URL in the field (8).
- Enable Elasticsearch adapter by checking the checkbox (9).
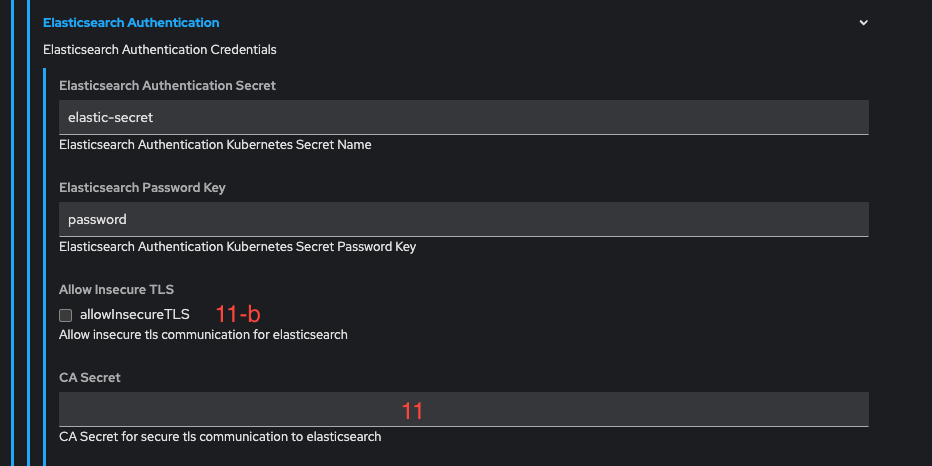
- Click on Elasticsearch Authentication (10) and:
- Set the CA secret field (11) to
elastic-ca. - To enable insecure TLS communication (if no certificate is available), check the
allowInsecureTLScheckbox (11-b) and leave the field (11) empty.
-
Create the instance. The
KubeArmorConfigInstance controls the installation of the agents in the entire cluster, and only one instance should be created per cluster.
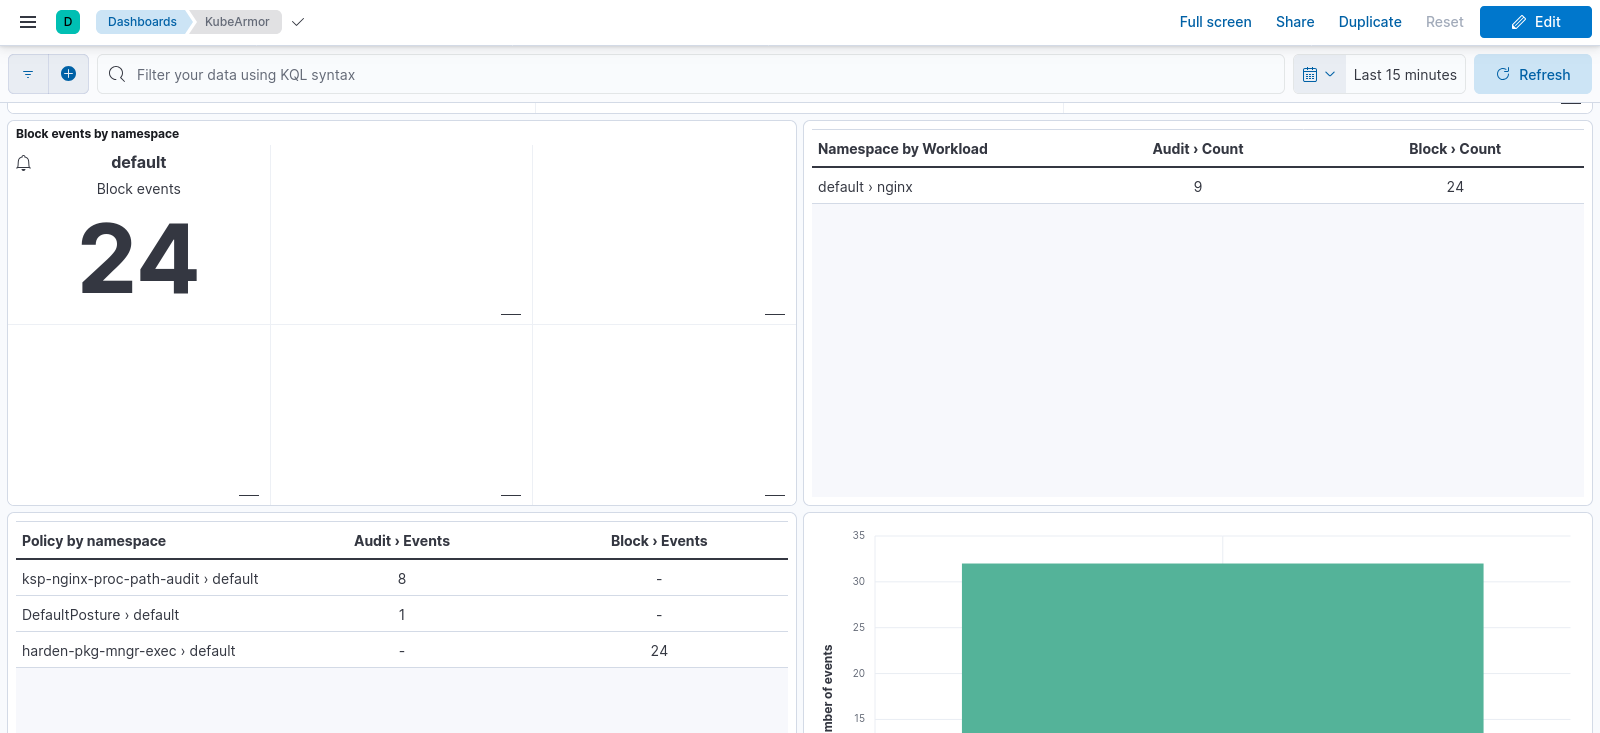
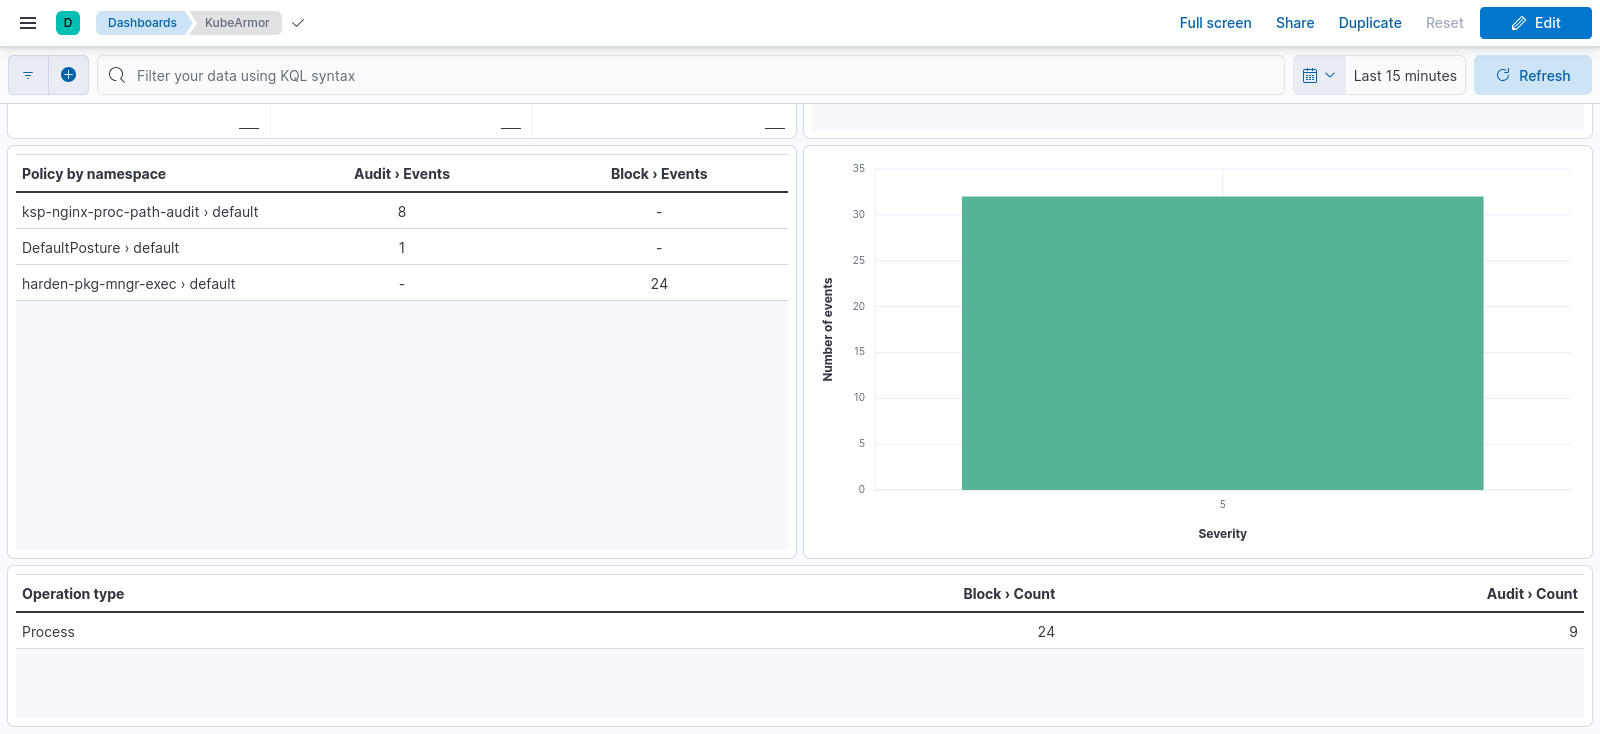
Kibana Dashboard Setup
Steps to Install
Along with this document, a file called kubearmor-dashboard.ndjson has been shared. Follow these steps to import the dashboard:
- Under the Management tab, select Stack Management.
- Navigate to Saved Objects under Kibana.
- Click Import and select
kubearmor-dashboard.ndjson.