Deploy BlueLock on Azure Container Apps
Overview
Build an Azure Container Apps test environment with Terraform, onboard it to AccuKnox as a VM cluster and block a command in a running replica.
Workflow at a Glance
How the Deployment Fits Together
Azure hides the Kubernetes API server of Container Apps, so you cannot onboard it as a Kubernetes cluster. BlueLock uses a VM cluster: the control plane runs on a VM and the replicas act as worker nodes.
| Azure term | What it is |
|---|---|
| Container Apps environment | A resource boundary for CPU, memory and networking |
| Container app | Like a ReplicaSet. A replica is a pod with one or more containers |
Prerequisites
| Requirement | Used for |
|---|---|
| Azure access | Creating the resource group, virtual network, VM and Container Apps environment |
| AWS CLI, configured | The login to public ECR in Step 2 |
| Terraform | Running both scripts |
| Docker | The docker login command in Step 2 |
git |
Cloning the BlueLock repository |
socat |
Connecting to the container app in Step 6 |
| AccuKnox account | Getting a join token and viewing the results |
Step 1. Get a Join Token From AccuKnox
In AccuKnox, open Settings, then Manage Cluster, then Onboard. Select the cluster type VM, enter a name and copy the join token from the knoxctl onboard vm cp-node command. Terraform runs that command on the control plane VM, so you only need the token.
Step 2. Sign in to AWS and Public ECR
Enter your Access Key ID and Secret Access Key.
aws configure
Log in to public ECR.
aws ecr-public get-login-password --region us-east-1 | docker login --username AWS --password-stdin public.ecr.aws/k9v9d5v2
Step 3. Create the Base Infrastructure
Clone the repository and open azure-container-apps.
git clone https://github.com/accuknox/bluelock.git
cd bluelock/terraform/azure-container-apps
Create the base infrastructure. This takes about 5 minutes.
cd 1-infra
terraform init
terraform apply -var="vm_token=YOUR_JOIN_TOKEN"
The script creates the resource group, virtual network, control plane VM and Container Apps environment. It then installs Docker and knoxctl on the VM and onboards it as the control plane with your token.
Variables you can change
Override a default with -var, for example -var="location=<REGION>".
| Variable | Default | Notes |
|---|---|---|
location |
Central India |
Azure region |
resource_group_name |
rg-azure-test |
Resource group that holds everything |
name_prefix |
bluelock-aca |
Prefix for resource names |
vm_username |
testuser |
Login name on the control plane VM |
vm_password |
Has a default | Set your own value with -var |
vm_token |
None | Required. Your AccuKnox join token |
The script prints these outputs: resource_group_name, vnet_name, vm_public_ip, vm_private_ip, container_app_environment_id and container_app_environment_name.
Step 4. Create the Container App
Create the container app. The command reads the VM public IP from Step 3.
cd ../2-app
terraform init
terraform apply \
    -var="vm_public_ip=$(cd ../1-infra && terraform output -raw vm_public_ip)"
Terraform creates a container app with 2 replicas. Each runs the bluelock init container, armored-container and kubearmor-vm-adapter.
Variables you can change
| Variable | Default | Notes |
|---|---|---|
resource_group_name |
rg-azure-test |
Use the same value as in 1-infra |
container_app_environment |
bluelock-aca-container-app-env |
Environment to deploy into |
container_app_name |
bluelock-container-app |
Name of the container app |
vm_public_ip |
None | Required. Public IP of the control plane VM |
Set up manually instead of using Terraform
Replaces Steps 3 and 4. Create these Azure resources in order.
1. Virtual network
- Create a virtual network with 2 subnets. Make one a normal subnet and delegate the other to
Microsoft.App/environments, because the Container Apps environment joins this network. See the Azure networking guide for the subnet size. - For example, create
defaultwith size /24 andaca-subnetwith size /20.
2. Virtual machine
- Create an Ubuntu machine in the normal subnet of the virtual network.
- Open inbound access to all ports from everywhere, for every protocol, in the VM's network security group. Do this for testing only. Do not do this in production. Open only the ports that the agents need.
- Install Docker.
- Onboard the VM as the control plane of a VM cluster in AccuKnox.
3. Container app
- Create a container app.
- When it asks for a Container Apps environment, create a new one. In the Network tab, integrate it with the delegated subnet that you created.
- In Containers, select Docker registry and enter the image
delusionaloptimist/ka-socat:latest. - In Monitoring, select stream logs without storing.
- In Ingress, enable ingress. Allow TCP from everywhere on port 1337 with target port 1337. Leave the other settings unchanged.
- Create the container app.
4. Configure the container app
-
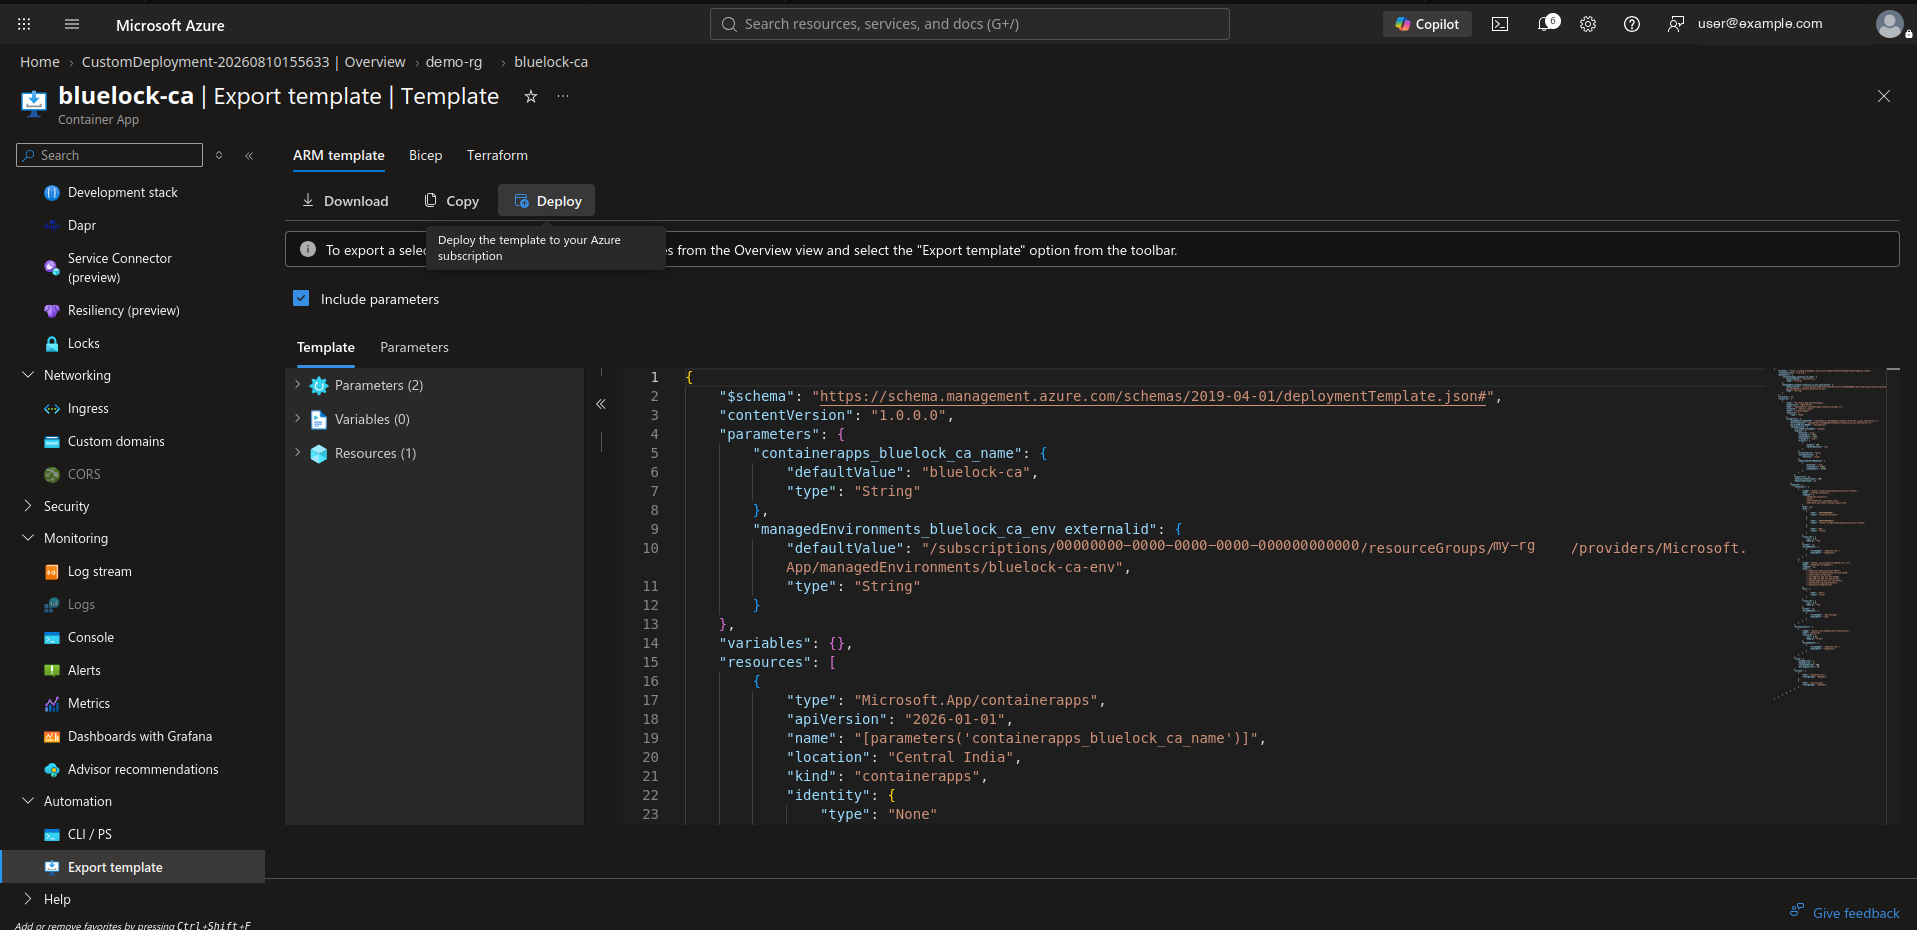
In the left panel, open Export template under Automation and choose Deploy.
-
Choose Edit template. Replace the
templateobject in the JSON with the following. Replace<CONTROL_PLANE_IP>in the VM adapter arguments with the public IP of the VM."template": { "containers": [ { "image": "public.ecr.aws/k9v9d5v2/accuknox-bluelock/ka-socat-demo:latest", "name": "armored-container", "command": [ "/kubearmor/bluelock", "socat", "TCP-LISTEN:1337,reuseaddr,fork", "EXEC:bash,pty,stderr,setsid,sigint,sane" ], "args": [], "env": [ { "name": "CONTAINERNAME", "value": "armored-container" }, { "name": "CONTAINERIMAGE", "value": "public.ecr.aws/k9v9d5v2/accuknox-bluelock/ka-socat-demo:latest" }, { "name": "K8S", "value": "false" } ], "resources": { "cpu": 0.5, "memory": "1Gi" }, "probes": [], "volumeMounts": [ { "volumeName": "kubearmor-dir", "mountPath": "/kubearmor" } ] }, { "image": "docker.io/accuknox/vm-adapter:v0.1.29", "name": "kubearmor-vm-adapter", "command": [], "args": [ "--kubearmor-addr=localhost:32767", "--relay-server-addr=<CONTROL_PLANE_IP>:32768", "--node-state-refresh=4", "--policy-list-enable=true", "--policy-list-relay-frequency=5m0s", "--sia-addr=<CONTROL_PLANE_IP>:32769", "--pea-addr=<CONTROL_PLANE_IP>:32770", "--harden-addr=<CONTROL_PLANE_IP>:32771", "--annotation-topic=annotation", "--annotation-enable=true" ], "env": [ { "name": "test", "value": "true" } ], "resources": { "cpu": 0.5, "memory": "1Gi" }, "probes": [], "volumeMounts": [ { "volumeName": "opt-storage", "mountPath": "/opt" } ] } ], "initContainers": [ { "image": "public.ecr.aws/k9v9d5v2/accuknox-bluelock:v1.0.0", "name": "bluelock", "resources": { "cpu": 0.25, "memory": "0.5Gi" }, "volumeMounts": [ { "volumeName": "kubearmor-dir", "mountPath": "/kubearmor" } ] } ], "scale": { "minReplicas": 2, "maxReplicas": 2, "cooldownPeriod": 300, "pollingInterval": 30 }, "volumes": [ { "name": "kubearmor-dir", "storageType": "EmptyDir" }, { "name": "opt-storage", "storageType": "EmptyDir" } ] } -
Save and deploy this revision.
-
After the deployment finishes, open Log stream in the left panel. It shows the logs of both the
armored-containerand thekubearmor-vm-adapter. Check that neither shows errors.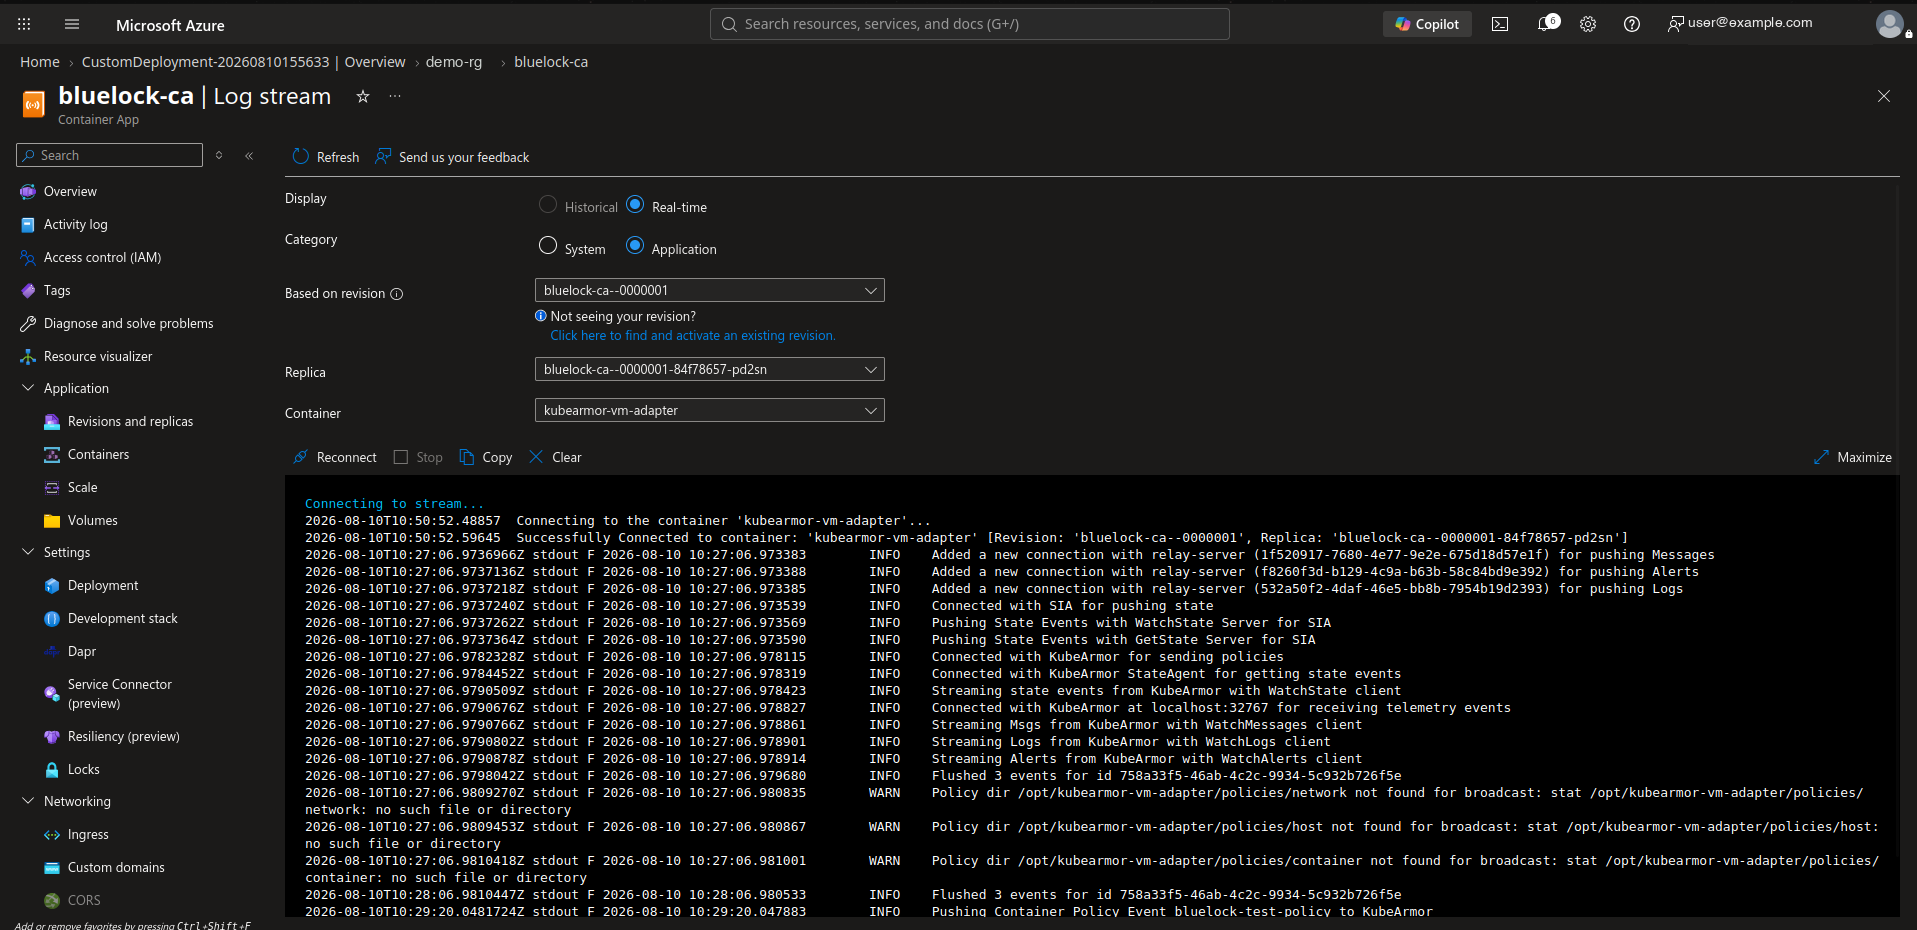
Step 5. Confirm the Nodes Appear in AccuKnox
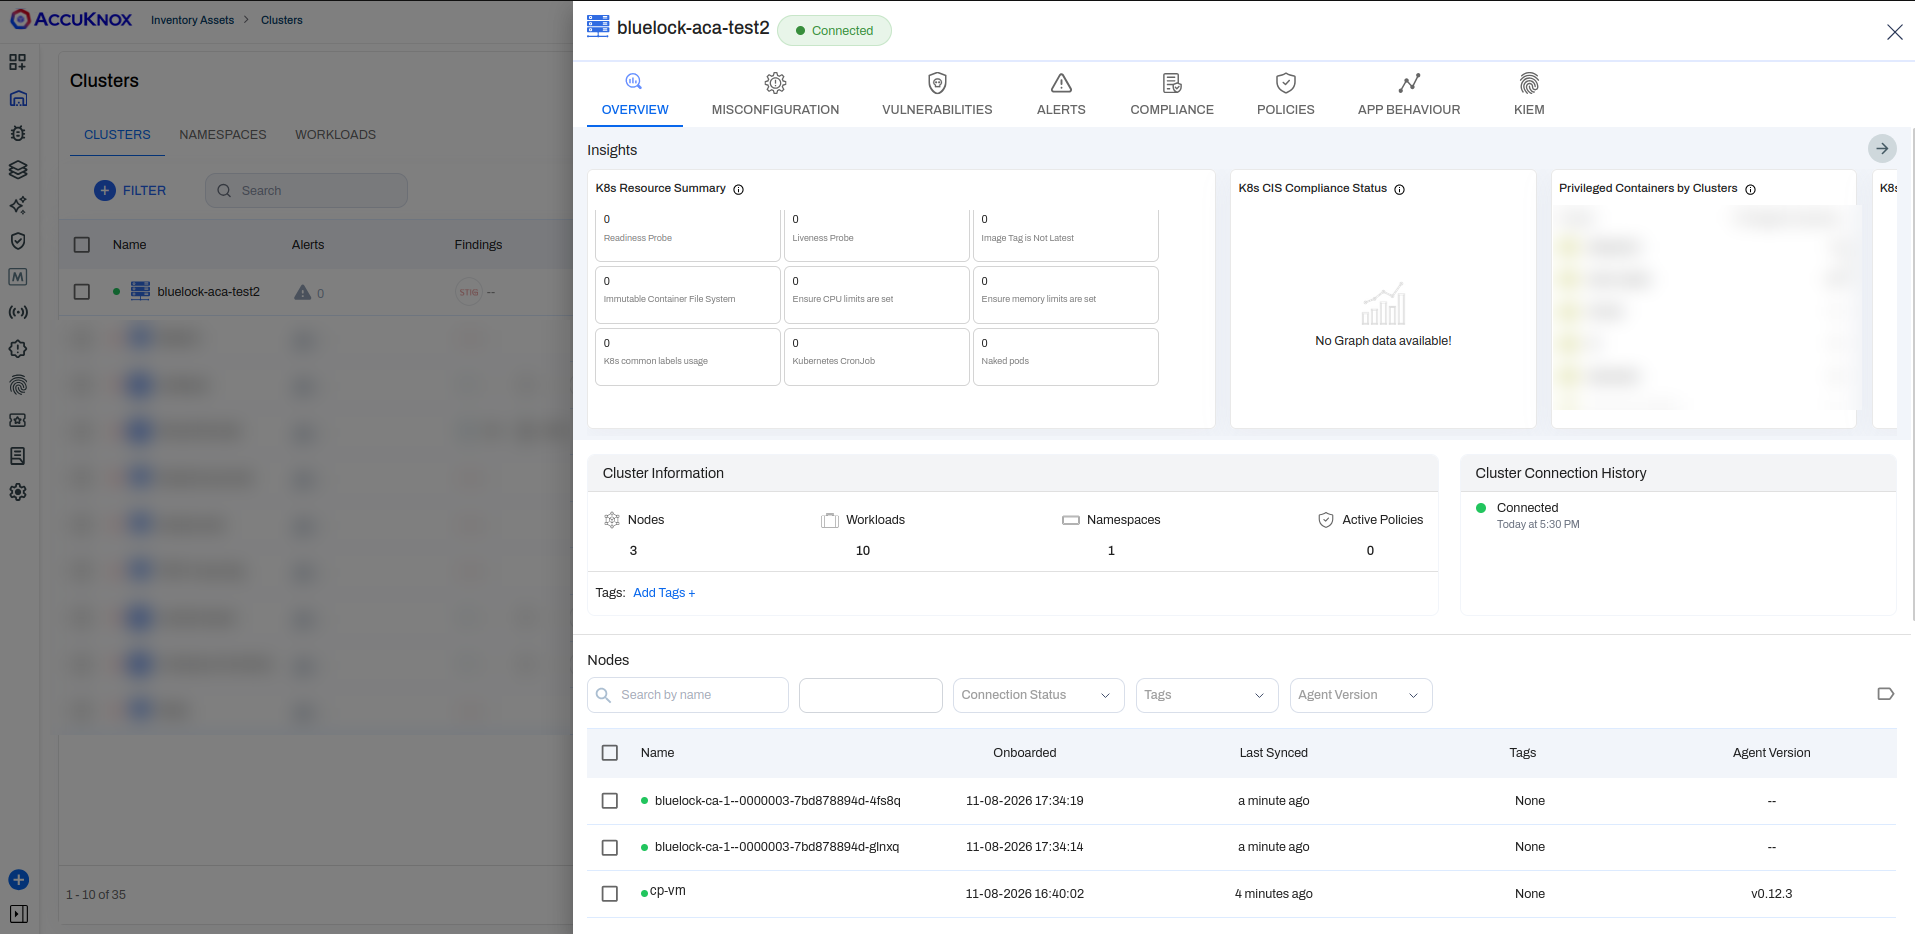
In AccuKnox, the replicas appear as nodes next to the control plane VM.
Step 6. Test Enforcement With a Block Policy
-
In the Azure portal, copy the container app's application URL. It looks like
<container-app-name>.<hostname>.<region>.azurecontainerapps.io. -
Connect to the container app.
socat - TCP:<address>:1337You cannot choose the replica
The app has one URL and Azure's load balancing picks the replica. You cannot choose which replica you reach.
-
Run this. It succeeds because no policy exists yet.
ls /etc/ssl/certs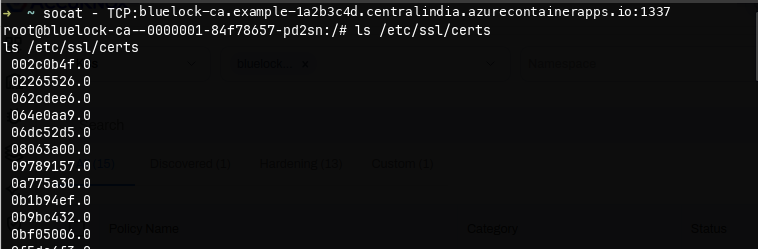
-
In AccuKnox, open Runtime Protection, then Policies, and create this policy.
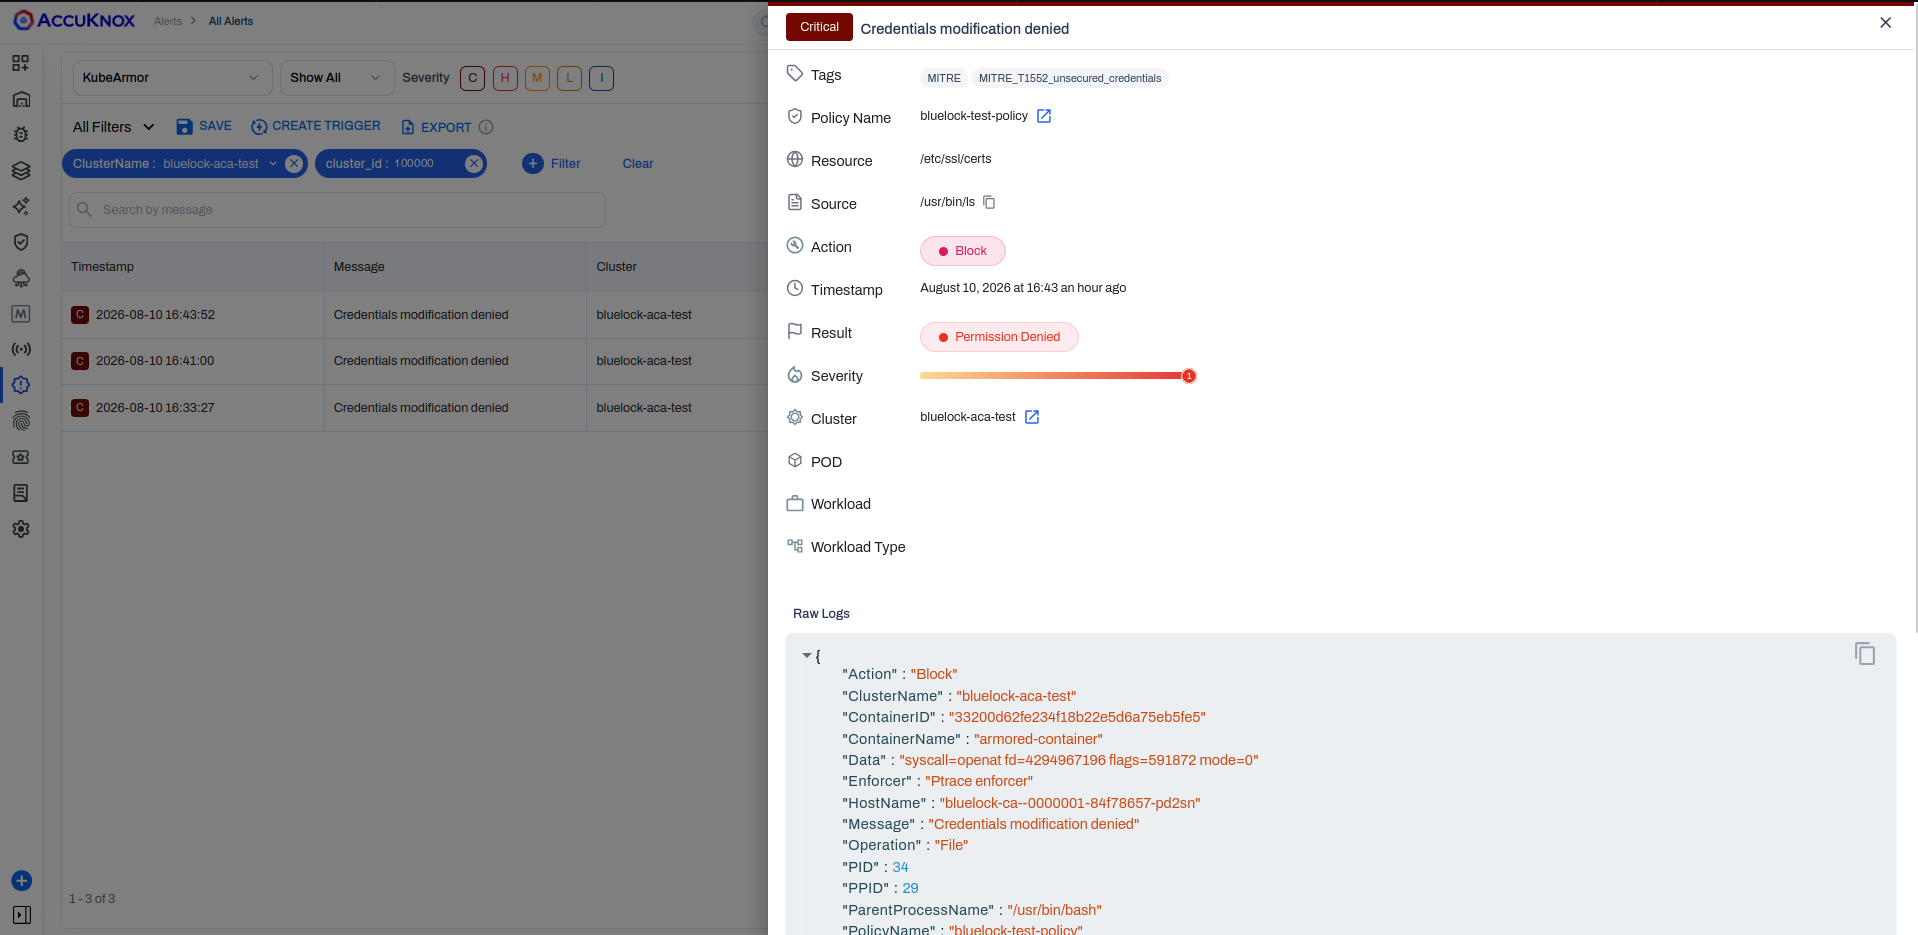
ksp-block-file-dir-recursive.yamlholds the same rules. Activate it after you save.apiVersion: security.kubearmor.com/v1 kind: KubeArmorPolicy metadata: name: bluelock-test-policy namespace: container_namespace spec: action: Block file: matchDirectories: - dir: /etc/ssl/ recursive: true - dir: /etc/pki/ recursive: true - dir: /usr/local/share/ca-certificates/ recursive: true message: Credentials modification denied selector: matchLabels: kubearmor.io/container.name: armored-container severity: 1 tags: - MITRE - MITRE_T1552_unsecured_credentials -
Run the command again. It now fails.
ls /etc/ssl/certs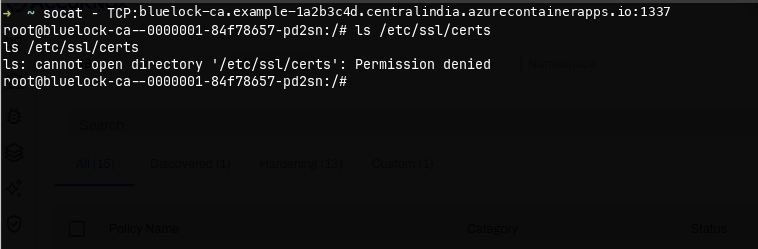
-
Open the alert in AccuKnox.
Step 7. Destroy the Test Environment When You Finish
Destroy the container app first, then the base infrastructure. Both folders need the same variables that you passed to terraform apply.
cd bluelock/terraform/azure-container-apps/2-app
terraform destroy \
    -var="vm_public_ip=$(cd ../1-infra && terraform output -raw vm_public_ip)"
cd ../1-infra
terraform destroy -var="vm_token=YOUR_JOIN_TOKEN"