Onboard with AI Gateway
Onboard an AI application in the AccuKnox console, then point your code at the gateway endpoint. This guide ends with your first monitored request.
Before you start
Have these ready:
- Access to your AccuKnox tenant.
- The provider name and the model that your application uses.
- A provider API key. For a self-hosted model such as Ollama, use the model endpoint instead.
Open AI Gateway
- Select the blue + button at the bottom of the left sidebar.
- Select AI Gateway.
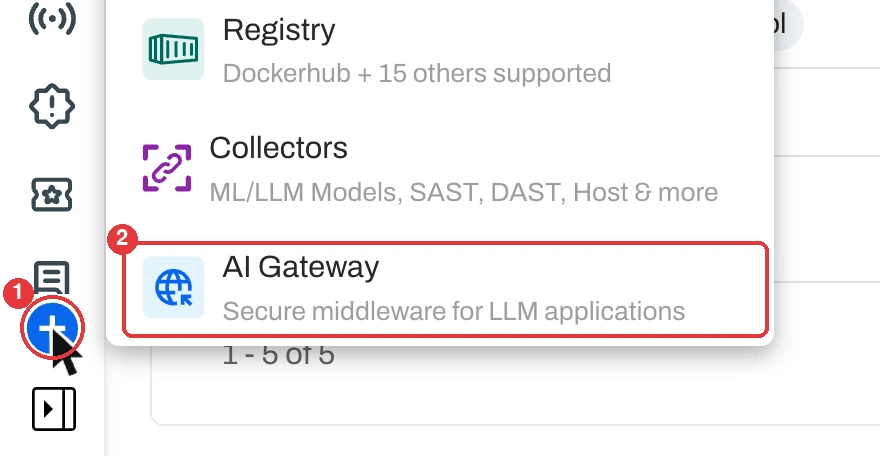
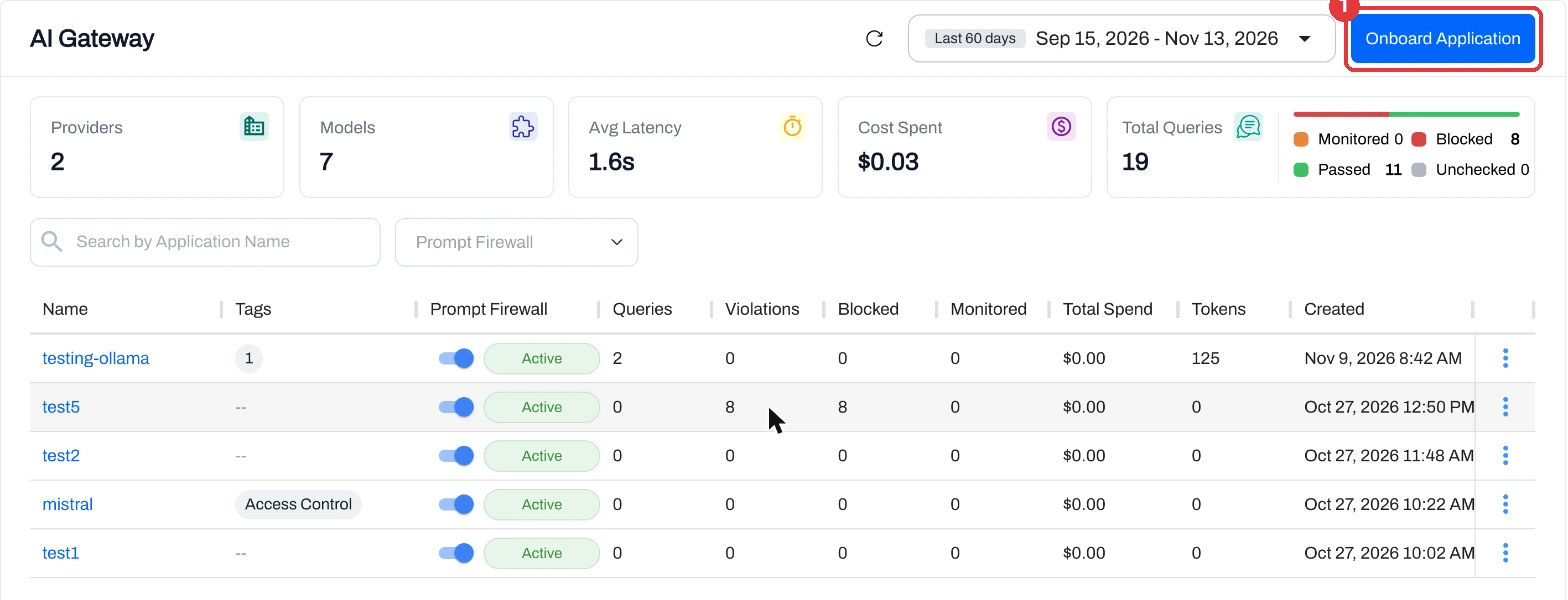
You can also go to Settings > AI Gateway. The page lists every onboarded application and its usage.
Start Onboarding
Select Onboard Application at the top right of the AI Gateway page.
Register the App
Fill in the New Application form.
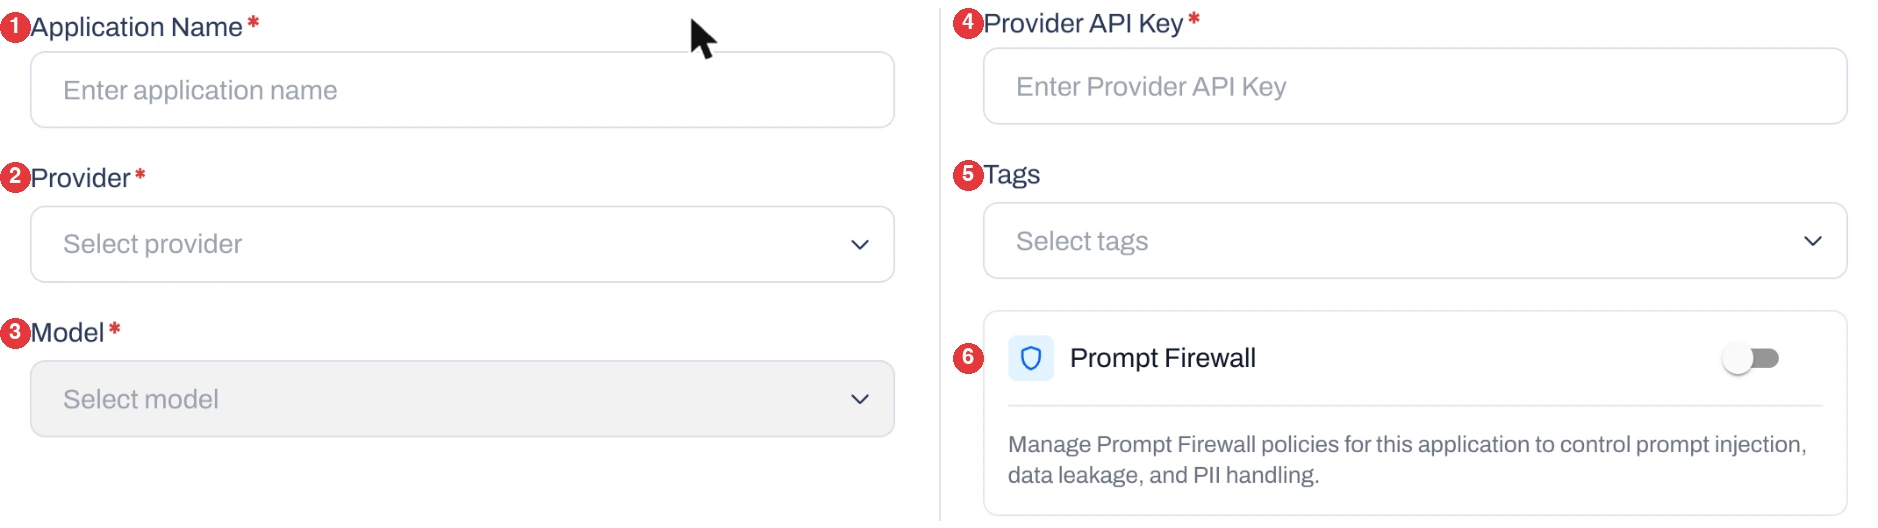
- Application Name. Enter a name that you can recognize in the dashboard. Required.
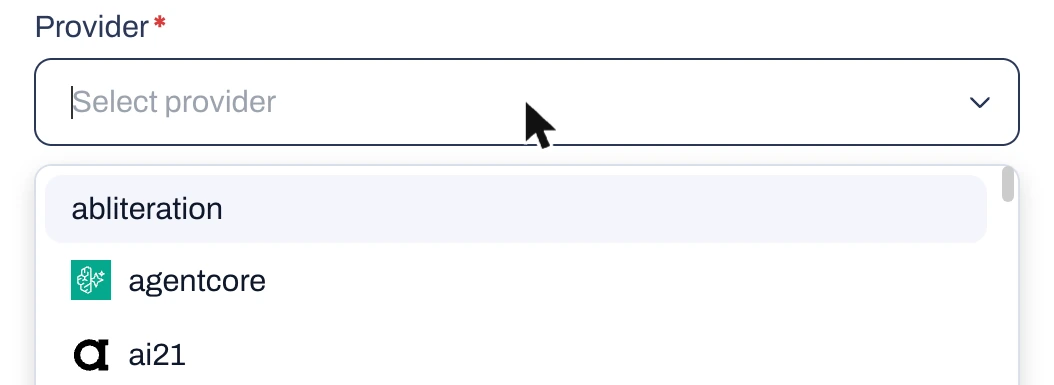
- Provider. Pick your LLM provider from the list. Required.
- Model. Pick the model that your application calls. The list loads after you pick a provider. Required.
- Provider API Key. Enter your key for that provider. Required.
- Tags. Add optional labels to group applications.
- Prompt Firewall. Turn it on to scan prompts and responses for this application.
Self-hosted models
For a provider such as Ollama, the form also asks for a Model Endpoint. Enter the URL where your model runs.
Select Test Connection to check the details, then select Save.
Copy Your Credentials
After you save, the application appears in the list.
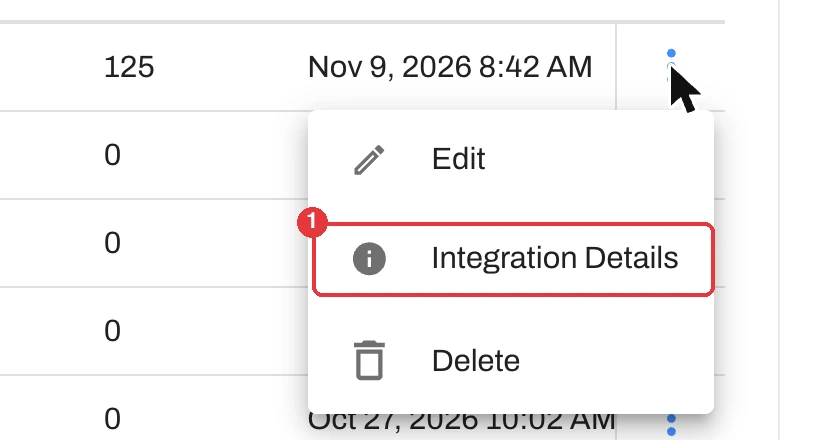
- Select the three-dot menu at the end of the application row.
- Select Integration Details.
The Integration Details panel opens beside the application list. It has everything that your application needs.
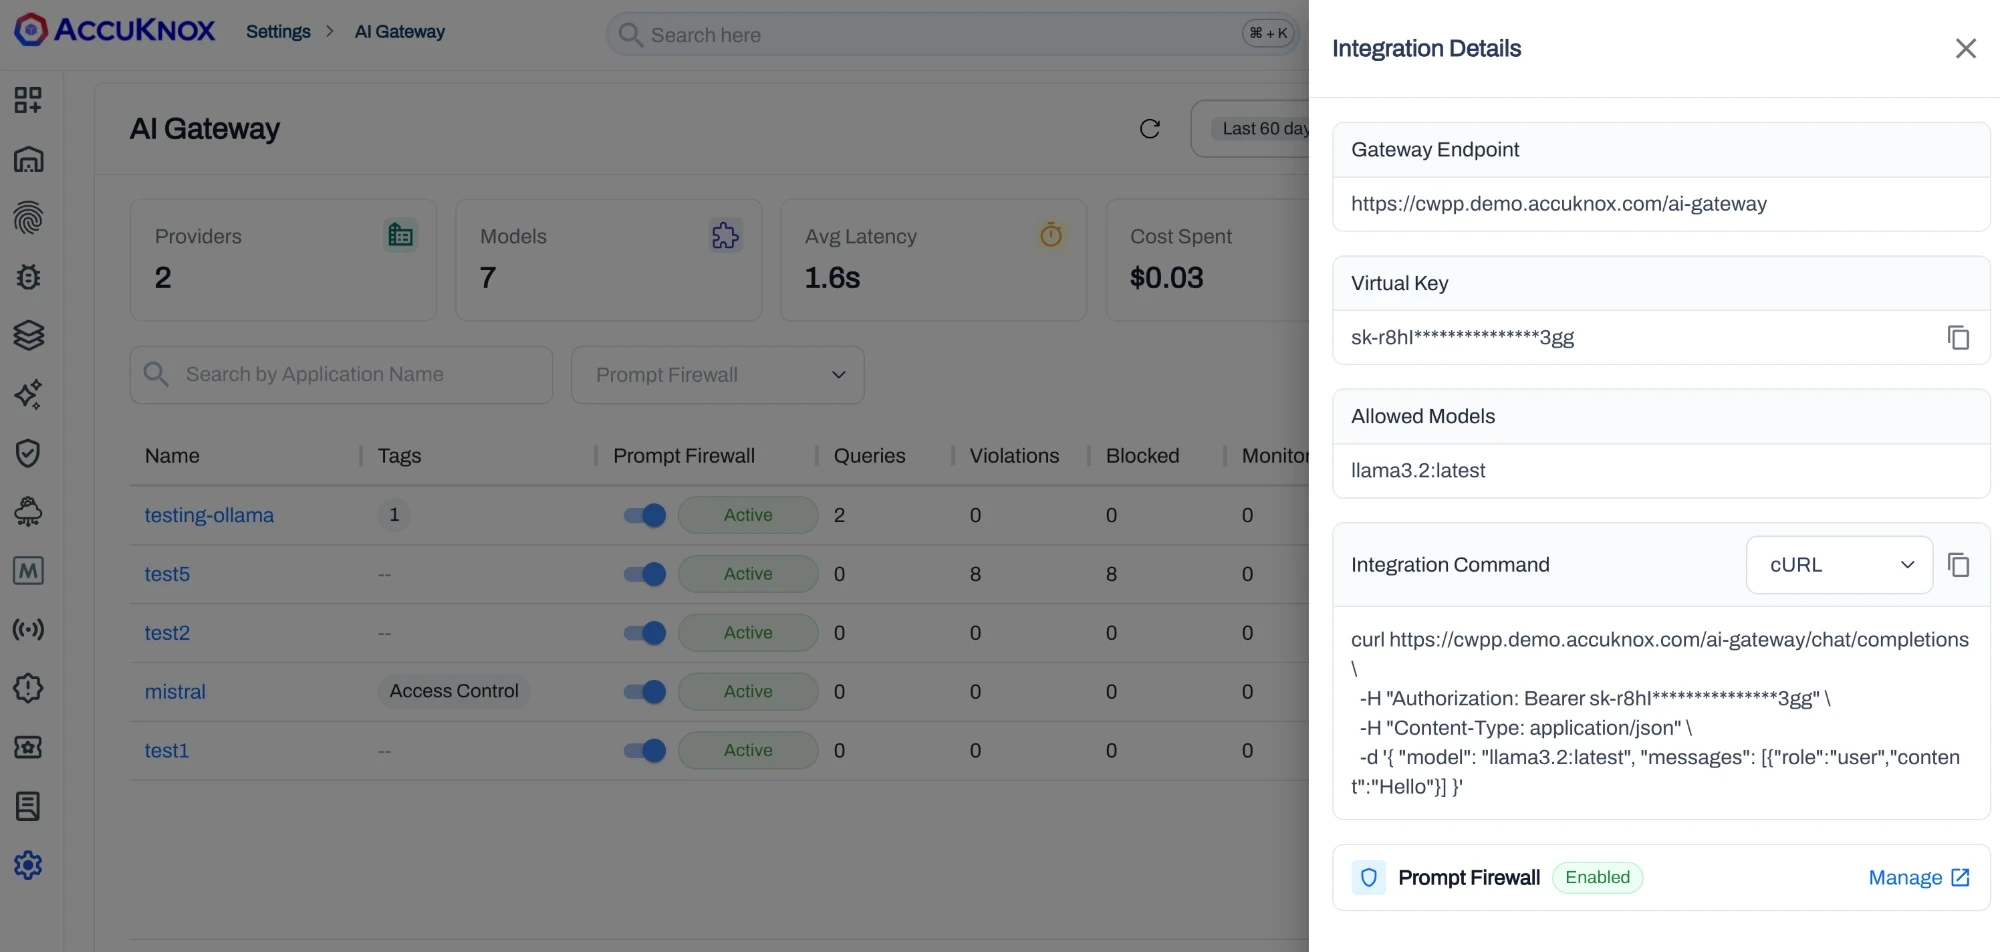
Each section is numbered below.
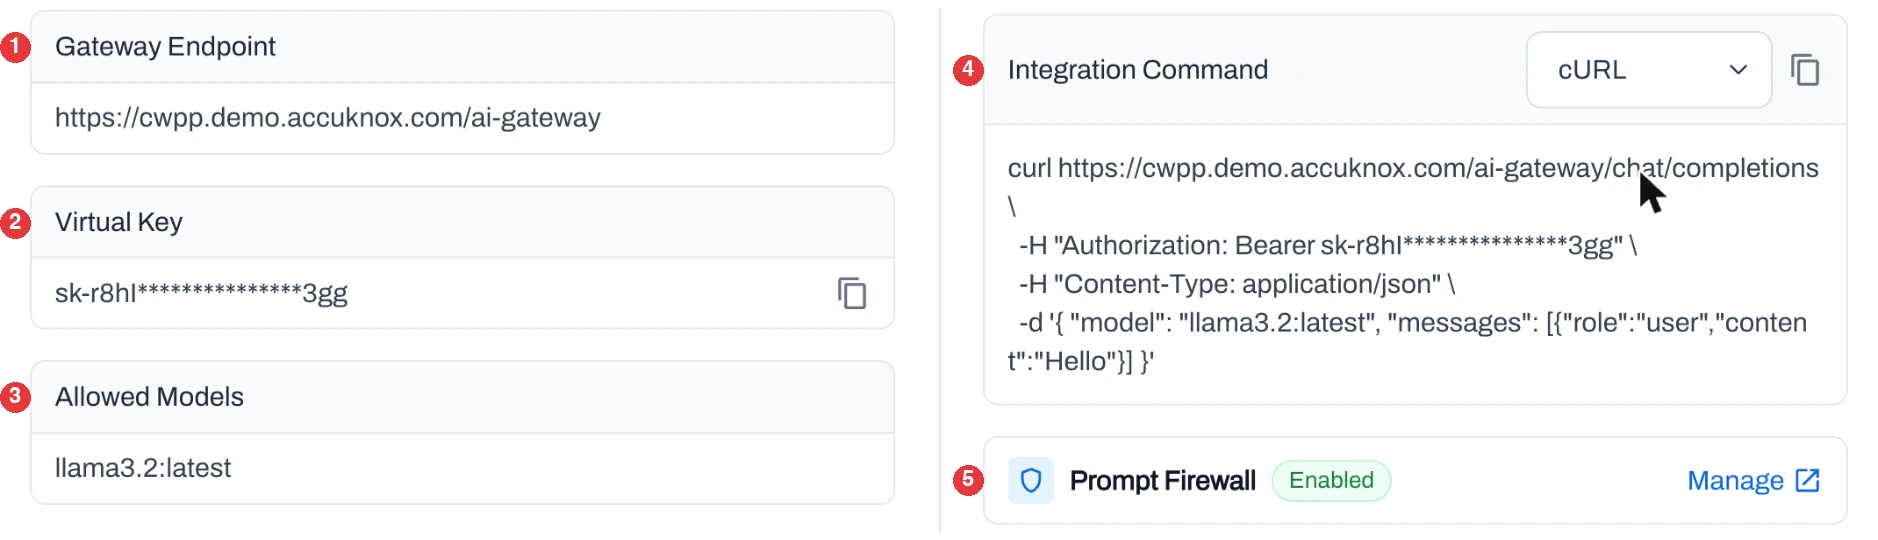
- Gateway Endpoint. Set this as the base URL in your application.
- Virtual Key. Use it in place of the provider API key. Select the copy icon to copy it.
- Allowed Models. Check which models this key can call.
- Integration Command. Copy a ready-made example in cURL, Python, or Node.js.
- Prompt Firewall. Check that the firewall is enabled. Select Manage to open its policies.
You now hold two values.
Gateway Endpoint: <gateway-endpoint>
Virtual Key:      <virtual-key>
Call the Gateway
Replace the provider URL and key with the gateway endpoint and your virtual key. Use a model from Allowed Models. No other change to your application logic is required.
curl <gateway-endpoint>/chat/completions \
  -H "Authorization: Bearer <virtual-key>" \
  -H "Content-Type: application/json" \
  -d '{ "model": "<allowed-model>", "messages": [{"role":"user","content":"Hello"}] }'
from openai import OpenAI

client = OpenAI(
    api_key="<virtual-key>",
    base_url="<gateway-endpoint>"
)

response = client.chat.completions.create(
    model="<allowed-model>",
    messages=[{"role": "user", "content": "Explain Kubernetes"}]
)
print(response.choices[0].message.content)
import OpenAI from "openai";

const client = new OpenAI({
  apiKey: "<virtual-key>",
  baseURL: "<gateway-endpoint>"
});

const response = await client.chat.completions.create({
  model: "<allowed-model>",
  messages: [{ role: "user", content: "Explain Kubernetes" }]
});
console.log(response.choices[0].message.content);
Treat the virtual key like a secret
Store it in an environment variable or a secrets manager. Do not commit it to source control.
Review Policies
When Prompt Firewall is on, the gateway scans each prompt and response against your policies.
- In Integration Details, select Manage next to Prompt Firewall. The application's Prompt Firewall page opens in a new tab.
- Review the Applied Policies table. It shows each policy, its severity, and its action, such as Block.
- Select Add Local Policy to add a policy for this application only.
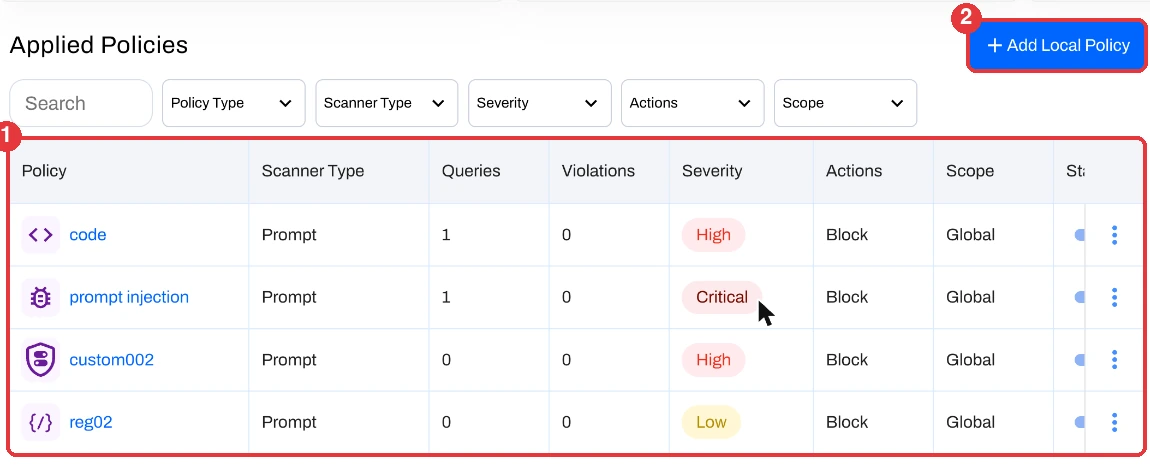
To create or tune policies, see Prompt Firewall Setup.
Monitor Traffic
Send a test request, then return to Settings > AI Gateway and select the refresh icon. The page shows:
- Total Queries with the monitored, blocked, passed, and unchecked counts.
- Providers, Models, Average Latency, and Cost Spent for the date range.
- Queries, Violations, Blocked, Monitored, Total Spend, and Tokens for each application.
To see violations in detail, open AI / ML Security > Prompt Firewall and select the application.
Edit or Remove
Use the three-dot menu on the application row.
- Edit changes the model, the model endpoint, the tags, and the Prompt Firewall toggle. Leave Provider API Key blank to keep the existing key.
- Delete removes the application from the gateway.